
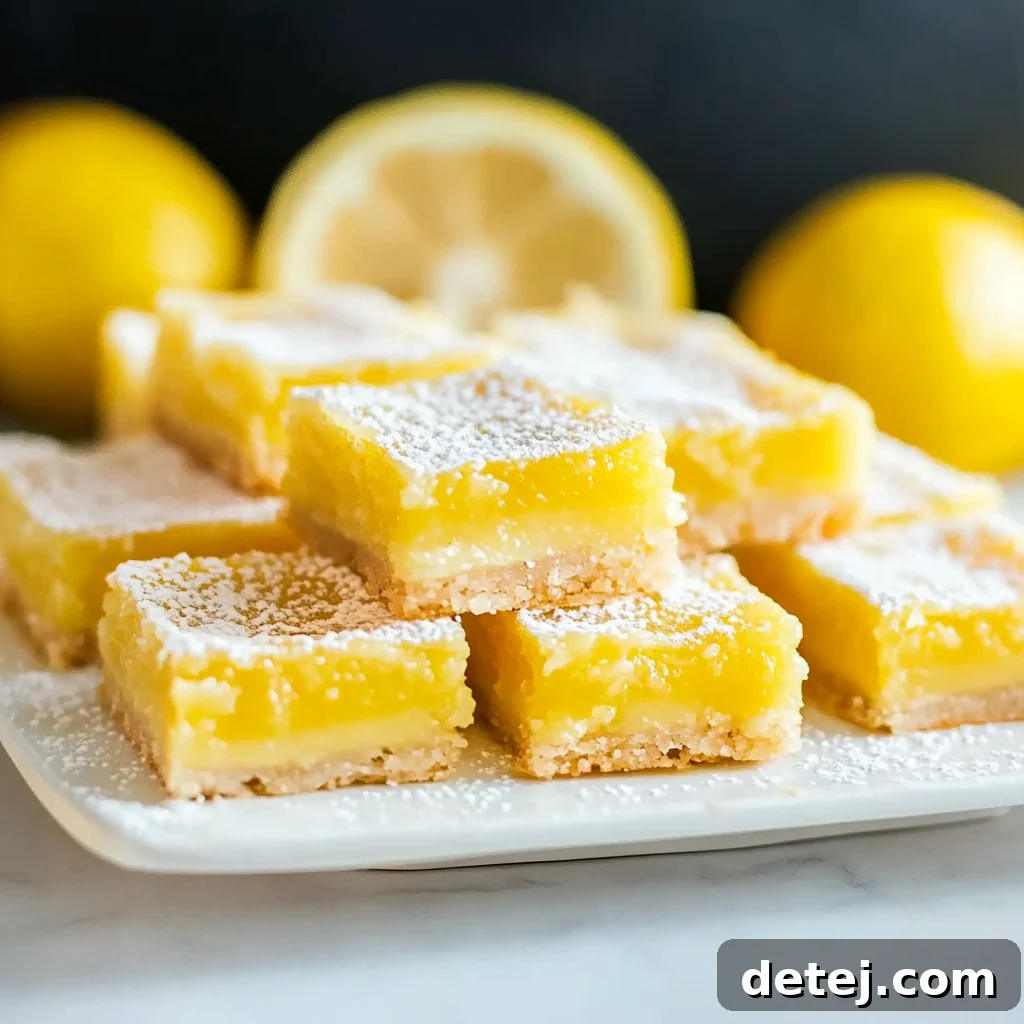
Zesty Perfection: The Ultimate Guide to Crafting Irresistible Lemon Bars
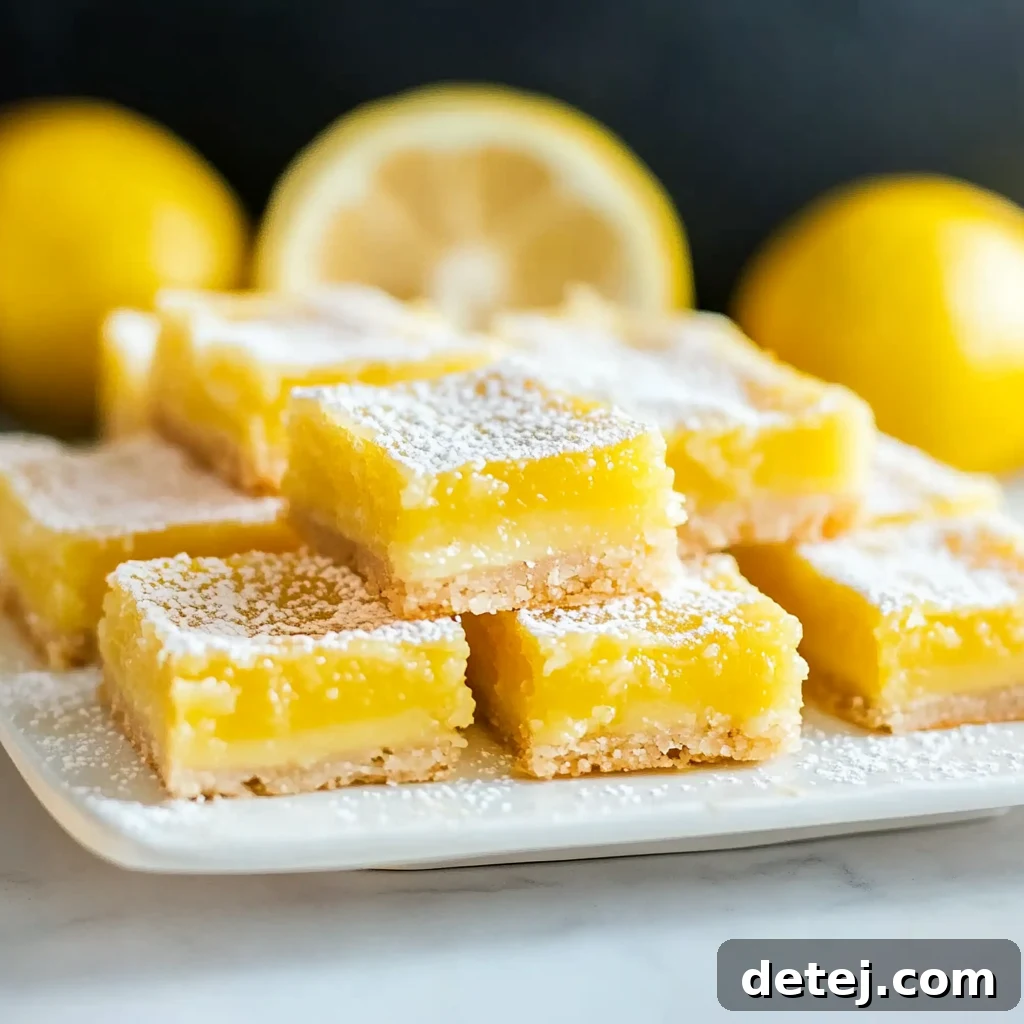
There are few desserts that capture the essence of sunshine and bright flavors quite like a perfectly crafted lemon bar. Imagine a buttery, melt-in-your-mouth shortbread crust, topped with a luscious, tangy lemon filling, all dusted with a delicate veil of powdered sugar. This classic treat offers an exquisite balance of sweet and tart, making it a beloved choice for any occasion, from casual family gatherings to elegant dinner parties and bustling bake sales. Today, we’re embarking on a culinary adventure to uncover the secrets behind creating the absolute best lemon bars – ones that are not just good, but truly unforgettable.
My journey to perfecting this iconic dessert has been filled with joyful experimentation. I’ve discovered that while the recipe seems simple, the magic lies in understanding a few key principles and embracing the quality of your ingredients. We’re talking about freshly squeezed lemon juice that zing, vibrant lemon zest for aromatic depth, and the finest unsalted butter to create that foundational, irresistible crust. Forget everything you thought you knew about store-bought lemon bars; we’re elevating this humble treat to a gourmet experience, right in your own kitchen.
Whether you’re a seasoned baker or just starting your sweet endeavors, this comprehensive guide will walk you through every step, ensuring your lemon bars achieve that coveted golden-brown edge and a perfectly set, vibrant lemon layer. Get ready to awaken your taste buds with a symphony of zesty, sweet, and buttery flavors. Let’s dive in and unlock the ultimate recipe for lemon bars that will have everyone clamoring for more!
Why These Lemon Bars Stand Out: Key Principles for Success
What makes a lemon bar truly exceptional? It’s more than just a recipe; it’s an art form that hinges on several fundamental elements. Our approach focuses on these critical aspects to guarantee superior results every single time:
- The Perfect Flavor Balance: The hallmark of an outstanding lemon bar is its harmonious blend of tartness and sweetness. Our recipe meticulously calibrates the amount of fresh lemon juice and sugar to create a filling that is bright and zesty without being overly sour or cloyingly sweet.
- Uncompromising Ingredient Quality: As with any great recipe, the quality of your ingredients directly impacts the final product. We emphasize the use of fresh, ripe lemons for their vibrant juice and potent zest, high-quality unsalted butter for a rich, pure flavor in the crust, and large, room-temperature eggs for a silky-smooth custard. This attention to detail transforms simple ingredients into an extraordinary dessert.
- Achieving Ideal Texture: From the crumbly yet firm shortbread crust to the silky, smooth lemon filling that holds its shape beautifully, texture is paramount. We’ll share precise techniques for mixing, baking, and cooling that ensure both layers are set perfectly, providing a delightful contrast with every bite.
- Simple, Foolproof Techniques: While the results are gourmet, the process doesn’t have to be complicated. Our instructions are designed to be clear, concise, and easy to follow, making this recipe accessible to bakers of all skill levels. We break down each step, offering insights into why certain methods are used, empowering you to bake with confidence.
Gathering Your Essential Ingredients for Lemon Bar Excellence
The foundation of truly exceptional lemon bars begins with a mindful selection of ingredients. Think of them as the building blocks of flavor and texture. For a dessert where lemon is the star, shortcuts simply won’t do. We’re not just throwing things together; we’re crafting a masterpiece, and every component plays a vital role in achieving that sought-after zesty pop and delightful richness. Here’s a detailed look at what you’ll need and why each element is so crucial for creating the best lemon bars.
The Heart of the Flavor: Fresh Lemons
At the core of our recipe are, naturally, fresh lemons. This is non-negotiable. Bottled lemon juice, while convenient, lacks the vibrant, complex acidity and aromatic oils found in freshly squeezed lemons. You’ll need both fresh lemon juice and lemon zest. The juice provides the essential tartness, while the zest, scraped from the bright yellow rind, infuses the filling with a concentrated burst of citrus perfume that elevates the entire dessert. Aim for bright yellow, firm lemons that feel heavy for their size – these are typically the juiciest.
Building the Buttery Foundation: Crust Ingredients
For the glorious shortbread crust, we rely on a trio of simple yet powerful ingredients:
- Unsalted Butter: Using unsalted butter gives you complete control over the salt content in your recipe. It’s the cornerstone of that rich, pure buttery flavor that makes the shortbread crust so irresistible. Melting the butter ensures easy incorporation and a wonderfully tender crumb.
- All-Purpose Flour: This forms the structure of our crust. Properly measured and lightly combined, it creates a tender yet sturdy base that can perfectly support the lemon filling without becoming tough or overly dense.
- White Granulated Sugar: Just enough sugar to sweeten the crust without overpowering the butter, providing a subtle contrast to the tart filling.
- Salt: A pinch of salt is vital. It doesn’t just make the crust salty; it enhances all the other flavors, particularly the butter, making the shortbread taste richer and more complex.
Crafting the Luscious Filling: Custard Essentials
The velvety lemon filling is a delicate balance, and these ingredients ensure its success:
- Large Eggs (Room Temperature): Eggs are critical for binding the filling, giving it structure, and contributing to its creamy texture. Using room-temperature eggs is paramount as they emulsify more easily with other ingredients, creating a smoother, more uniform custard.
- White Granulated Sugar: This provides the necessary sweetness to balance the intense tartness of the lemon juice, creating that iconic sweet-tart symphony.
- Vanilla Extract: While optional, a touch of vanilla extract (clear vanilla if you want to maintain the bright yellow color of the filling) adds a subtle depth and warmth, rounding out the citrus notes beautifully.
- All-Purpose Flour: A small amount of flour acts as a thickener, helping the lemon filling set into a firm yet jiggly custard, preventing it from being too runny.
- Powdered Sugar (for dusting): This is the final elegant touch, adding a whisper of sweetness and a beautiful visual appeal to the finished bars. Dust just before serving for the best effect.
Each element, from the generous amount of fresh lemon juice to the precise measurements of flour, is chosen with care to ensure we achieve that perfect balance and declare our lemon bars the only recipe you’ll ever need for a truly divine, lemony delight.
The Crucial First Step: Preparing Your Baking Dish
Before you even think about mixing ingredients, let’s talk about the unsung hero of many successful baking endeavors: proper pan preparation. It’s like the secret handshake to creating *those* lemon bars – the kind that slide effortlessly from the pan, slice into perfect, photogenic pieces, and become the undisputed hit at bake sales and dinner parties alike. This step is often overlooked, but it significantly impacts both the texture of your crust and the ease of serving.
First, selecting the right size pan is critical. A standard 9×13-inch metal or glass baking dish is ideal for this recipe, ensuring the perfect thickness for both the shortbread crust and the lemon custard. Using a pan that’s too large might result in thinner, possibly dry bars, while a pan that’s too small could lead to an overly thick crust that doesn’t bake evenly and a filling that takes too long to set. Metal pans generally conduct heat more efficiently, leading to a crisper crust, while glass pans retain heat longer, which can be beneficial for even baking of the custard.
Now, for the magic of parchment paper. Lining your baking dish with parchment paper is non-negotiable. It’s not just there to make clean-up a breeze (though, let’s be honest, that’s a huge plus). More importantly, it creates a truly non-stick surface, acting as a sling that allows you to lift the entire baked slab of lemon bars out of the pan once cooled. This prevents those heart-breaking moments when part of your delicate, tart lemon filling decides to stick to the bottom, marring your beautiful creation. Ensure the parchment paper extends over the edges of the pan, creating “handles” for easy removal. A light spray of cooking oil or a smear of butter on the pan before laying the parchment can help it stick in place.
So, when I stress the importance of using parchment paper and the correct pan size, trust me, it’s to ensure every single slice of your homemade lemon bars is as visually delightful as it is delicious, and that the crust achieves that coveted golden-brown perfection without overcooking or sticking.
Crafting the Irresistible Buttery Shortbread Crust
Every exceptional lemon bar begins with an equally exceptional foundation: the buttery shortbread crust. This isn’t just a base; it’s a critical component that provides a delightful textural contrast and a rich, sweet counterpoint to the vibrant lemon filling. Let me guide you through the simple yet precise steps to create a crust that’s both crisp and tender, perfectly golden, and truly melt-in-your-mouth.
Our journey to this divine crust starts with high-quality unsalted butter, precisely measured and melted to the perfect consistency. The choice of unsalted butter is deliberate; it allows us to control the exact amount of salt in the recipe, ensuring a balanced flavor that enhances the butter’s natural richness without making the crust too salty. Melting the butter is key here, as it helps create a tender, crumbly texture that presses easily into the pan, unlike a flaky pastry crust made with cold butter.
In a medium mixing bowl, combine the melted butter with the granulated white sugar. Mix these two ingredients together until they are just combined and smooth. Overmixing at this stage is unnecessary; we’re simply aiming to integrate the sugar into the butter. Next, gradually add the all-purpose flour and a pinch of salt to the butter-sugar mixture. Stir gently until the flour is fully incorporated and the dough comes together. The mixture will be soft and somewhat crumbly, but it should hold together when pressed.
Once your dough is ready, it’s time to press it into your prepared 9×13-inch baking dish, which should be thoroughly lined with parchment paper. Using the back of a spoon, your fingertips, or a flat-bottomed glass, gently and evenly press the shortbread mixture across the bottom of the pan. Pay special attention to spreading it into a uniform layer from edge to edge. An even thickness is crucial for consistent baking; if some areas are thicker than others, they might not cook through, or they could burn at the edges.
Once pressed, the crust is ready for its initial bake. Pop it into your preheated oven. This first bake, often called par-baking or blind-baking, ensures that the crust sets and becomes slightly golden brown before the wet lemon filling is added. This step prevents a soggy bottom and contributes to that desirable crisp-tender texture. You’ll know it’s ready when the edges begin to turn a light golden hue and it smells wonderfully buttery throughout your kitchen. This foundational step is the promise of a zesty adventure ahead, setting the stage for truly perfect homemade lemon bars.
Crafting the Luscious Lemon Layer: The Heart of the Bar
With our buttery shortbread crust par-baked and ready, it’s time to turn our attention to the star of the show: the luscious lemon filling. This layer is what truly defines a lemon bar, delivering that iconic balance of invigorating tartness and comforting sweetness. Achieving its perfect smooth, vibrant, and set texture is an art, but one that is easily mastered with a few key techniques.
The journey to this perfect filling begins with the freshest ingredients. In a large mixing bowl, you’ll combine the foundational elements of your custard: **large, room-temperature eggs** and **white granulated sugar**. Room temperature eggs are essential here; they create a smoother emulsion with the other ingredients, leading to a silkier, more uniform custard that sets beautifully. Using a hand mixer, beat these two together until they are light, fluffy, and well blended. This aeration helps create a lighter texture in your final filling.
Next, introduce the star flavor: **fresh lemon juice** and a hint of **vanilla extract**. The lemon juice, freshly squeezed for maximum impact, provides that unmistakable zing and bright acidity. The vanilla, especially if using clear vanilla, adds a subtle depth and warmth that complements the citrus without overshadowing it. Mix these into the egg and sugar mixture until everything is smooth and thoroughly combined. This mixture forms the vibrant core of our lemon dessert, promising a tart lemon filling that’s both invigorating and soothing.
Now, for the critical thickening agent: **all-purpose flour**. Gradually whisk in the measured amount of flour into the lemon mixture. The flour plays a vital role in giving the custard its structure and helping it set into a firm yet delicate layer. Ensure it’s fully incorporated with no lumps, creating a uniform, pourable consistency. This step guarantees a filling that’s smooth yet thick enough to hold its own against the buttery shortbread crust below, preventing it from being too runny or liquid after baking.
Finally, with your filling perfectly prepared and your crust still warm from its initial bake, carefully pour the heavenly lemon custard over the hot crust. Make sure it spreads into an even layer across the entire surface. The warmth of the crust actually helps begin the setting process for the custard as soon as it’s poured, contributing to a seamless bond between the two layers. The key is achieving that perfect balance between the tartness of the lemon and the sweetness of the sugar, creating a truly luscious lemon layer that’s bright, bold, and utterly irresistible in your homemade lemon bars.
Essential Tools for Baking Perfect Lemon Bars
Having the right tools can make all the difference in your baking experience, ensuring precision and ease. For these delicious lemon bars, consider these helpful items:
Mixing Bowls
Shop Now →
Hand Mixer
Shop Now →
Baking Dish Set
Shop Now →
These tools are fundamental for preparing both the crust and the filling efficiently, making your baking process smoother and more enjoyable.
Baking to Perfection: How to Know When Your Lemon Bars Are Done
Knowing when your lemon bars have reached that golden state of perfection isn’t as elusive as it might seem. It’s all about combining keen observation of visual cues with the reliable toothpick method. Overbaking can lead to a dry crust and a rubbery filling, while underbaking results in a gooey, unset center. Precision is key!
First, pay close attention to the **buttery shortbread crust**. As the lemon bars bake, the exposed edges of the crust should turn a lovely, light golden brown. This indicates that the shortbread is cooked through and has achieved its desired crisp-tender texture. If it’s too pale, it might be underbaked; if too dark, it’s starting to overbake.
For the **lemon custard filling**, you’re looking for a specific consistency. The edges of the filling should appear set and firm, but the very center should still have a slight, delicate jiggle when you gently shake the pan. Don’t worry, this subtle jiggle is a good sign! It means the custard is cooked through but hasn’t become stiff. As the bars cool, this residual heat will continue to cook the center, and the filling will firm up completely, yielding that perfectly smooth, silky texture.
To confirm doneness, you can also employ the **toothpick test**. Carefully insert a clean toothpick into the center of the lemon filling. If it comes out clean or with only a few moist crumbs attached, your tart lemon filling is ready. If it comes out with wet batter, it needs a few more minutes in the oven. Remember, every oven is a bit different, and actual baking times can vary slightly from the recipe’s guidelines. Trust your senses – sight, smell, and touch – as your best tools. Once baked, remove the pan from the oven and allow it to cool completely on a wire rack before refrigerating. Cooling and chilling are crucial steps for the filling to fully set and for easy, clean slicing.
Expert Tips for Achieving the Best Lemon Bars Every Time
Ah, the journey to perfect lemon bars, it’s almost as zesty as the dessert itself! While the recipe is straightforward, a few expert tips can elevate your homemade lemon bars from good to absolutely phenomenal. When aiming for that melt-in-your-mouth experience and a dessert that becomes the talk of bake sales and dinner parties alike, avoiding common pitfalls is key. Let’s dive into some insider advice to ensure your lemon bars are nothing short of culinary perfection.
- Always Use Fresh Lemons and Zest: This cannot be stressed enough. Bottled lemon juice lacks the vibrant flavor and aroma of fresh lemons. The zest contains essential oils that dramatically enhance the lemon flavor. Always zest your lemons *before* you juice them; it’s much easier!
- Room Temperature Ingredients for the Filling: Ensure your eggs are at room temperature. This allows them to emulsify more effectively with the sugar and lemon juice, creating a smoother, more uniform custard that sets beautifully without a grainy texture.
- Prevent Uncooked Curds: To ensure your lemon custard sets perfectly, embracing the buttery shortbread crust in a tart lemon filling hug, avoid adding the cold filling directly to a hot crust and immediately baking. Our method of pouring over a warm crust and baking immediately minimizes this risk. If you are concerned, you can gently warm the lemon mixture over low heat until it slightly thickens before pouring it, though this recipe is designed to set without that extra step.
- Tackle Pesky Air Bubbles: For a beautifully smooth and uniform lemon layer, tap the baking dish gently on the counter several times before popping it in the oven. This allows any trapped air bubbles to rise to the surface and escape, preventing an uneven or bubbly top.
- Don’t Overmix the Crust: For that signature crisp shortbread crust, mix the flour into the butter and sugar only until just combined. Overmixing develops the gluten in the flour, which can lead to a tough, rather than tender, crust.
- Avoid Overbaking the Custard: The lemon filling should be set but still have a slight jiggle in the center when removed from the oven. It will continue to cook and firm up as it cools. Overbaking can result in a rubbery texture.
- Cool Completely and Chill Thoroughly: Patience is a virtue, especially with lemon bars! Allowing them to cool completely at room temperature, and then chilling them in the refrigerator for at least 2 hours (or even overnight), is crucial. This step ensures the filling fully sets, making for clean, precise slices and enhancing the refreshing taste.
- Dust with Powdered Sugar Just Before Serving: For the most beautiful presentation and a hint of extra sweetness, dust your lemon bars with powdered sugar just before serving. If you dust them too early, the sugar will absorb moisture from the bars and disappear.
Keep these expert tips in mind, and you’re well on your way to creating the best lemon bars that strike the perfect balance between sweet and tart, becoming a cherished recipe in your baking repertoire. Remember, every bit of effort adds a pinch of love and precision to your baking!
Serving and Storing Your Delectable Lemon Bars
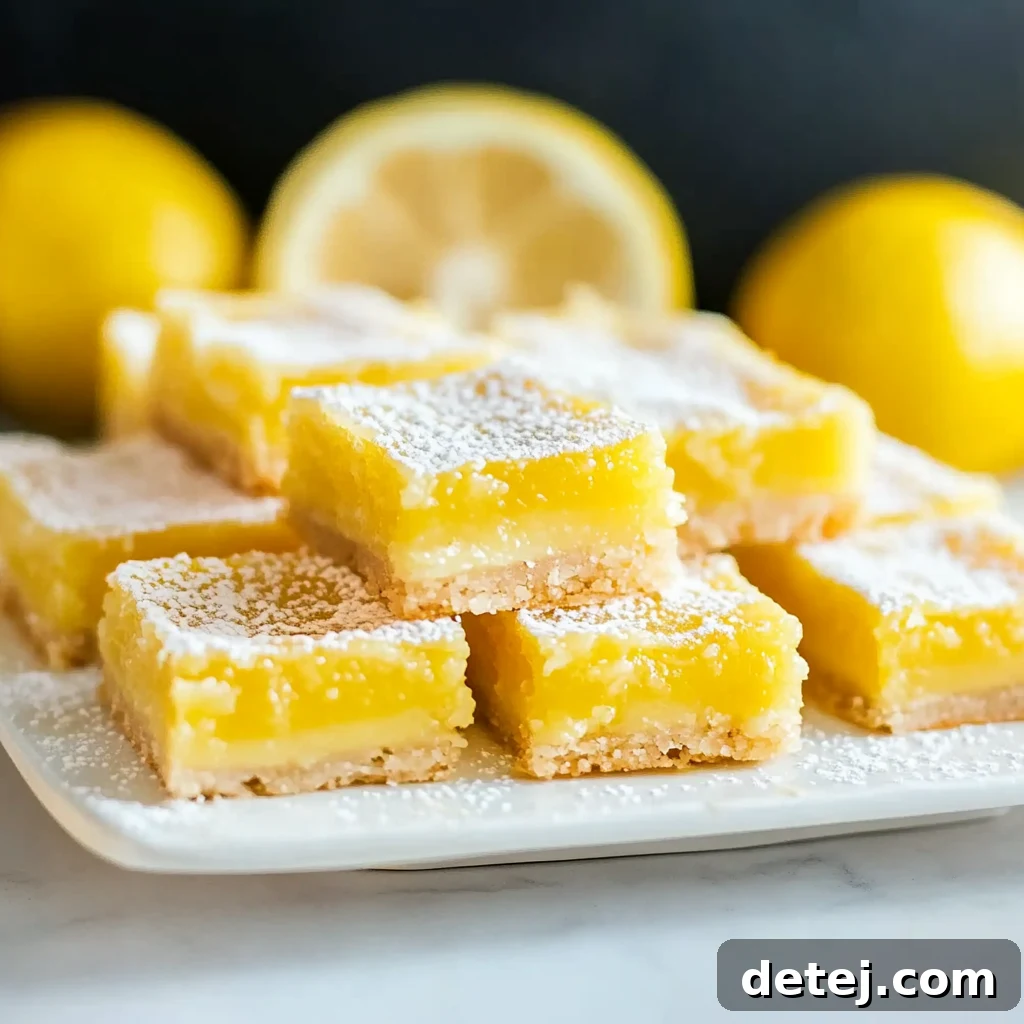
After all your careful baking and patient chilling, it’s finally time for the moment everyone looks forward to – serving and storing these beautiful, zesty bars. The way you slice and present your lemon bars can truly enhance their appeal, and knowing how to properly store them ensures you can enjoy that delightful sweet-tart balance for days to come.
The Art of Slicing
For those clean, picture-perfect slices that impress, a few tricks are indispensable. First and foremost, ensure your lemon bars are **thoroughly chilled**. Warm bars will result in a messy, gooey cut. Once chilled, gently lift the entire slab out of the baking dish using the parchment paper handles. Place it on a sturdy cutting board.
Now, grab a **sharp, non-serrated knife**. This is your best buddy for achieving crisp edges. Before each cut, wipe your knife clean with a damp cloth and, for extra neatness, you can even warm the blade under hot water, drying it thoroughly. This technique helps the knife glide through the cold filling and crust without dragging. Begin by trimming off any uneven edges to create a perfectly rectangular slab. Then, slice the bars into your desired size squares or rectangles. Standard sizes are typically 16 or 24 pieces from a 9×13-inch pan, but feel free to adjust for larger or smaller servings. No one wants squished or crumbly pieces after all!
Elegant Presentation
Before serving, dust the cooled, sliced lemon bars generously with **powdered sugar**. This final flourish adds a delicate touch of sweetness and a beautiful visual contrast against the vibrant yellow filling. Remember to dust just before serving to prevent the sugar from dissolving into the moist surface of the bars. For an extra special touch, consider garnishing with a thin curl of fresh lemon zest or a small berry.
Storing for Lasting Freshness
If, by some miracle, there are leftovers (a rare occurrence with these irresistible treats!), proper storage is key to maintaining their freshness and flavor. Tuck your lemon bars away in **an airtight container**. Layer them with parchment paper between layers if stacking to prevent sticking. Store the container in the refrigerator. They will stay perfectly delicious for 3-4 days, ensuring you get to enjoy that perfect balance between tart lemon filling and buttery shortbread crust over and over. They’re also the perfect excuse for a little midnight snack!
For longer storage, lemon bars freeze remarkably well. Once sliced, arrange them in a single layer on a baking sheet and freeze until solid. Then, transfer the frozen bars to an airtight freezer-safe container or a heavy-duty freezer bag, layering with parchment paper. They can be frozen for up to 2-3 months. Thaw them in the refrigerator overnight or at room temperature for a quick treat. Dust with fresh powdered sugar just before serving after thawing.
A Zesty Farewell: Your Culinary Adventure Continues
And just like that, we’ve journeyed together through the delightful art of making what I confidently consider the best lemon bars ever. This classic dessert, with its perfectly balanced buttery shortbread crust and luscious tart lemon filling, truly strikes an exquisite harmony of sweet and sour, leaving your taste buds dancing with pure delight. We’ve covered everything from selecting the finest ingredients to mastering the subtle techniques that elevate a simple recipe into a show-stopping creation.
But don’t let our culinary adventure end here. The true beauty of baking lies not only in following a recipe to perfection but also in the joy of experimentation and personalizing your creations. Why not consider a vibrant twist on this traditional recipe? Imagine the possibilities if you were to swap in a splash of fresh orange juice or even lime juice for a portion of the lemon, introducing a subtly different citrus nuance. Or perhaps infuse the crust with a hint of almond extract for an extra layer of flavor. Playing with the zest and juice of other citrus fruits can unlock seasonal freshness and create unique variations that reflect your personal palate.
Now, the oven mitts are in your hands. I am genuinely eager to hear how your homemade lemon bars turn out. Did they bring smiles to your family’s faces? Did they disappear instantly at your potluck? Or perhaps you’ll be inspired to invent a unique variation that becomes your new signature family favorite? Share your stories, your triumphs, and even those little “oops” moments – because every baking experience, whether perfect or perfectly imperfect, is a step on the path of our ever-evolving culinary adventures. Here’s to the zesty delights that await us, and to many more sweet moments in the kitchen!
The Best Lemon Bars
16
15
35
50
Krystel
Pin Recipe
Ingredients
Crust:
- 1 cup butter, melted
- 1/2 cup white sugar
- 2 cups all purpose flour
- 1/4 teaspoon salt
Filling:
- 6 eggs, room temperature
- 1 1/2 cups white sugar
- 1 cup lemon juice
- 2 teaspoons vanilla extract, clear preferably
- 1/4 cup all purpose flour
- 1/4 cup powdered sugar (for dusting)
Instructions
-
Preheat your oven to 350°F (175°C) and line a 9×13-inch baking dish with parchment paper, ensuring it overhangs the sides. Set it aside.
-
In a large mixing bowl, combine the melted butter and white sugar. Use a hand mixer or whisk to cream them together until smooth.
-
Stir in the 2 cups of all-purpose flour and salt until fully incorporated and a soft dough forms. Do not overmix.
-
Press the mixture evenly into the bottom of the prepared baking dish. Bake for 15-20 minutes, or until the edges start to turn lightly golden brown.
-
While the crust bakes, prepare the lemon filling:
-
In a large bowl, beat the 6 room temperature eggs and 1 1/2 cups white sugar with a hand mixer until well blended and slightly fluffy.
-
Add the 1 cup lemon juice and 2 teaspoons vanilla extract, mixing until smooth. Gradually incorporate the 1/4 cup all-purpose flour until fully combined and no lumps remain.
-
Carefully pour the lemon filling over the warm, pre-baked crust. Gently tap the pan a few times on the counter to release any air bubbles. Return to the oven. Bake for 20-22 minutes, or until the filling is set around the edges but still has a slight jiggle in the center.
-
Remove from the oven and let cool completely to room temperature on a wire rack. Then, refrigerate for at least 2 hours, or preferably overnight, to allow the filling to fully set.
-
Once chilled, lift the bars out of the pan using the parchment paper. Dust generously with powdered sugar then slice into squares with a sharp, clean knife before serving.
Nutrition Information
Serving:
1 bar
Calories:
298kcal
,
Carbohydrates:
41g
,
Protein:
4g
,
Fat:
13g
,
Saturated Fat:
8g
,
Polyunsaturated Fat:
1g
,
Monounsaturated Fat:
4g
,
Trans Fat:
0.5g
,
Cholesterol:
92mg
,
Sodium:
152mg
,
Potassium:
62mg
,
Fiber:
1g
,
Sugar:
27g
,
Vitamin A:
445IU
,
Vitamin C:
6mg
,
Calcium:
17mg
,
Iron:
1mg
Did you make this recipe? Please share your experience and comments below!