
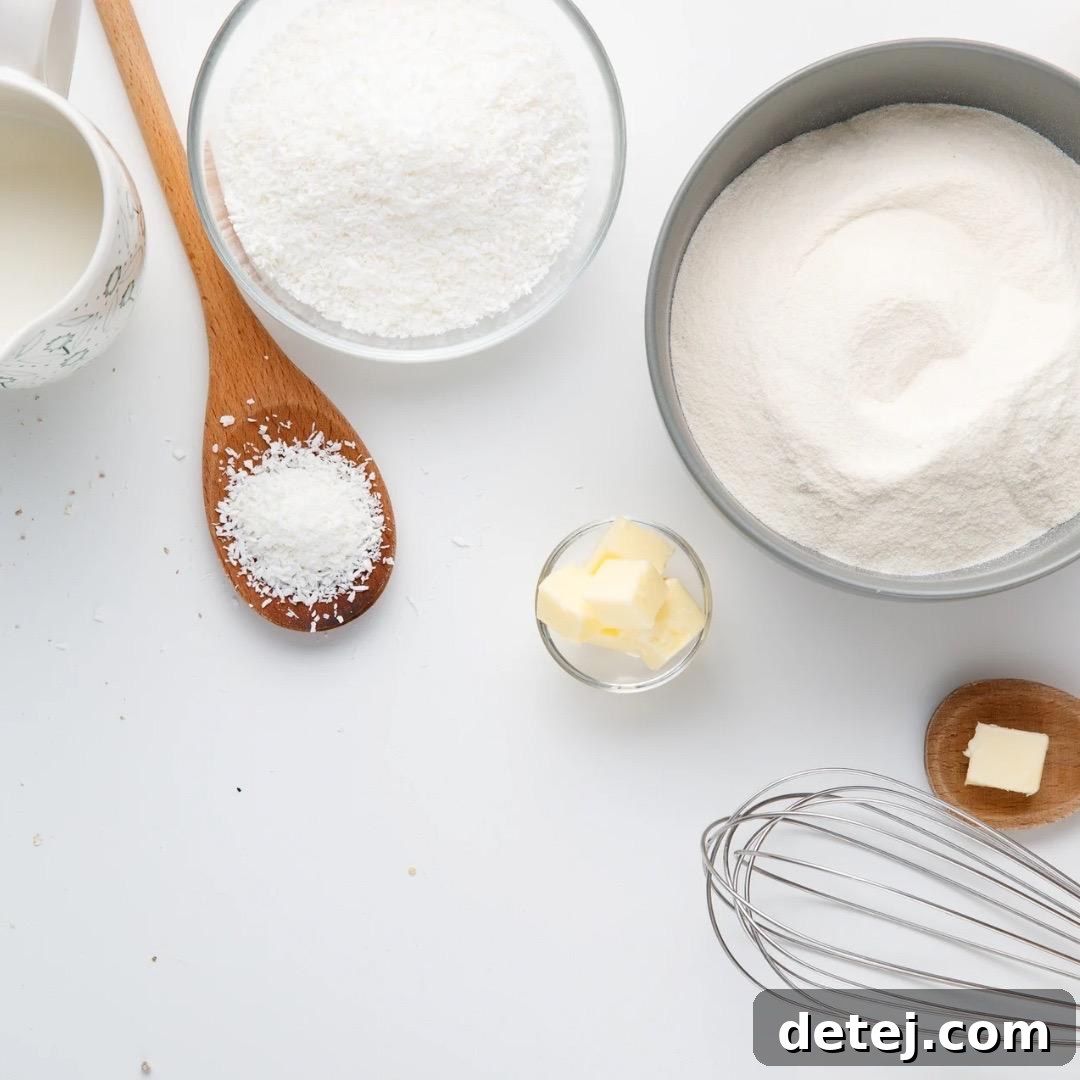
Mastering the Oven: 10 Essential Baking Tips for Beginners
Embarking on your baking journey is an exhilarating adventure, filled with the promise of delightful aromas, creative expression, and the ultimate reward of delicious homemade treats. Yet, for many culinary novices, the world of ovens, precise measurements, and intricate techniques can seem a tad daunting. From achieving perfectly flaky pie crusts to crafting impressive, towering layer cakes, every successful bake hinges on understanding fundamental principles and mastering basic techniques. This comprehensive guide aims to demystify the art and science of baking, offering ten indispensable tips that will empower beginners to confidently navigate their kitchen and achieve consistent, mouth-watering results. Whether you dream of perfecting your first batch of cookies, aspire to bake a rustic loaf of bread, or wish to craft an impressive birthday cake, these foundational insights are your secret ingredients for baking success.
Unlock Your Baking Potential: A Beginner’s Guide to Flawless Bakes
1. Precise Measurements Are Non-Negotiable
Unlike cooking, where a ‘pinch of this’ or a ‘dash of that’ often works wonders, baking is a meticulous science. The exact ratios of ingredients—flours, sugars, fats, and liquids—directly influence the chemical reactions that determine texture, rise, flavor, and overall structure. Even a slight deviation can lead to flat cookies, dense cakes, gummy brownies, or rubbery bread. Think of your recipe as a scientific formula; precision ensures the intended reaction occurs every single time.
The ‘How-To’ for Accuracy:
- Dry Ingredients (Flour, Granulated Sugar, Cocoa Powder): For most dry ingredients, use standard dry measuring cups and spoons. Spoon flour lightly into the measuring cup until it overflows, then level it off with a straight edge (like the back of a knife) without packing it down. Packing can add significantly more flour than intended, leading to a dry product. For granulated sugar, simply scoop and level.
- Liquid Ingredients (Milk, Water, Oil, Vanilla Extract): Use clear liquid measuring cups with pour spouts, placing them on a flat, level surface. Bend down to eye level to read the measurement accurately. This prevents parallax error, which can cause misreading and affect the consistency of your batter.
- Solid Fats (Butter, Shortening): If your butter doesn’t have measurement markings, pack it firmly into a dry measuring cup and level. For melted fats, use a liquid measuring cup.
- Digital Kitchen Scale: For ultimate precision, especially recommended for flours and critical ingredients, invest in a digital kitchen scale. Measuring by weight (grams or ounces) is far more accurate than by volume, as the density of ingredients can vary significantly (e.g., sifted vs. unsifted flour). Many professional recipes and modern home baking recipes now provide measurements by weight for this reason, ensuring consistent results regardless of how an ingredient is packed.
Consequences of Imprecision: Too much flour can make your baked goods dry, crumbly, and tough; too little can make them greasy, spread excessively, or lack proper structure. Incorrect sugar amounts affect not only sweetness but also browning, moisture retention, and texture. Leavening agents (baking soda/powder) are potent; even a small error can result in a collapsed cake, a lack of rise, or an unpleasant soapy taste. Adhering to exact measurements is the cornerstone of successful baking.
2. Embrace Room Temperature Ingredients for Superior Blending
Allowing ingredients like butter, eggs, and dairy to come to room temperature before baking is a small, often overlooked step that yields significant benefits. This isn’t just a suggestion; it’s a foundational principle, particularly for recipes involving the creaming method.
Why It Matters So Much:
- Better Emulsification: Room temperature butter is soft and pliable, allowing it to cream beautifully with sugar. As you beat them together, the sharp edges of the sugar crystals cut into the butter, creating tiny air pockets. These incorporated air pockets are crucial for a light, airy texture and contribute significantly to the leavening of your baked goods. Cold butter, on the other hand, resists incorporating sugar and won’t create those essential air pockets, resulting in a denser, less airy product.
- Smooth, Homogenous Batter: Room temperature eggs and dairy products blend seamlessly and evenly into batters and doughs. Cold ingredients, when added to warmer fats (like creamed butter), can cause the fat to seize up and curdle, leading to a lumpy, uneven batter that can affect the final texture of your bake. A smooth, well-emulsified batter bakes more evenly and has a finer, more tender crumb.
- Improved Volume and Texture: Ingredients at a consistent, moderate temperature integrate more effectively, creating a more stable and cohesive mixture. This leads to better volume, a finer crumb structure, and an overall more tender, moist, and consistent result in your finished baked goods.
How to Achieve Room Temperature:
- Butter: Cut cold butter into smaller, 1-inch pieces and leave it on the counter for 30-60 minutes. It should be soft enough to indent with your finger but not melted, greasy, or shiny.
- Eggs: Place eggs (still in their shells) in a bowl of warm (not hot) tap water for 5-10 minutes, or simply take them out of the refrigerator 30 minutes to an hour before you plan to bake.
- Dairy (Milk, Buttermilk, Cream Cheese): Pour into a microwave-safe bowl and heat briefly (5-10 seconds) until cool to the touch, or let it sit on the counter for 30 minutes alongside your other ingredients.
3. Always Preheat Your Oven Thoroughly
Patience is a virtue in baking, and nowhere is this truer than with preheating your oven. This step is absolutely critical for achieving the proper baking temperature and ensuring consistent, professional-quality results for almost all baked goods.
The Science Behind the Necessity of Preheating:
- Consistent Temperature from the Start: When a recipe calls for a specific oven temperature, it assumes that temperature is reached and stable *before* your food goes in. An oven that hasn’t fully preheated will cycle up and down as it tries to reach the set temperature, leading to inconsistent heat exposure and uneven cooking.
- Proper Rise and Structure: Many baked goods, especially cakes, muffins, soufflés, and quick breads, rely on an initial burst of heat (known as ‘oven spring’) to activate leavening agents (like baking powder and soda) and set their internal structure quickly. Placing dough or batter into a cold or cool oven will significantly slow down this crucial initial rise, often resulting in a dense, flat, heavy, or poorly textured product.
- Desired Browning and Texture: High initial heat helps create a beautiful golden-brown crust and promotes desirable textures, like crisp exteriors on cookies, a perfectly chewy brownie edge, or the crusty exterior of artisan bread. Without adequate preheating, these textural attributes will be compromised.
Best Practice for Preheating: Always preheat your oven to the specified temperature in your recipe, and then wait an additional 10-15 minutes *after* the oven’s preheat indicator light or sound goes off. This crucial extra time allows the oven’s internal temperature to fully stabilize, ensuring that the oven walls, racks, and any baking stones or steels are also thoroughly heated through, providing a truly consistent and radiant baking environment.
4. Strategic Oven Rack Placement
Where you place your baking pans within the oven significantly impacts how your baked goods cook and brown. Recipes often specify rack placement for a reason, as heat distribution varies within the oven cavity.
Understanding Oven Heat Zones:
- Middle Rack: This is the default and generally best position for most baked goods (cakes, cookies, brownies, muffins, most breads). Heat circulates most evenly around the middle rack, ensuring consistent cooking and browning from top to bottom. If a recipe doesn’t specify, always opt for the middle.
- Lower Rack: This position is closer to the primary heat source (usually at the bottom) and is ideal for items that need a crisp bottom or a strong initial rise, such as pizzas, artisan breads (which often start on a baking stone), or pies with a soggy bottom risk. It can also be used for items that need to cook through thoroughly without over-browning the top.
- Upper Rack: Closer to the top heating element, this is best for quick browning on top, like gratins, casseroles that need a golden crust, or when you want to finish off the top of a dish with a quick blast of heat. Be cautious, as items on the upper rack can burn quickly due to intense direct heat.
Multi-Pan Baking Considerations: If you’re baking multiple pans at once, try to place them on separate racks, ensuring there’s enough space for air circulation around each pan. Avoid crowding the oven, which can impede airflow and lead to uneven cooking. If using two racks, position them in the upper-middle and lower-middle positions. Remember that items on different racks might bake at slightly different rates, necessitating rotation (as covered in Tip 6).
Consequence of Poor Placement: Placing a cake too high might result in a burnt top and an underbaked, dense bottom. Cookies on the bottom rack could have excessively dark or burnt bottoms. Always check your recipe for specific instructions; if none are given, the middle rack is usually your safest and most reliable bet.
5. Trust, But Verify: Use an Oven Thermometer
It’s a widespread and costly misconception that the temperature displayed on your oven’s dial or digital screen is perfectly accurate. Unfortunately, oven temperatures can vary wildly, sometimes by as much as 25-50°F (15-28°C) in either direction, and often fluctuate throughout the baking cycle.
Why an Independent Oven Thermometer is Essential for Baking Success:
- True Temperature Reading: An inexpensive, oven-safe thermometer, designed to hang or sit on your oven rack, provides an independent, accurate reading of the actual temperature inside your oven. This simple yet crucial tool becomes your most reliable guide for ensuring your oven is truly at the temperature indicated on the dial.
- Consistent Results: Knowing the true temperature allows you to adjust your oven’s dial accordingly. For instance, if your oven consistently reads 25°F cooler than the setting, you can compensate by setting it 25°F higher. This consistency is paramount for reliable baking outcomes, preventing common frustrations like underbaked centers, overbaked edges, or unevenly cooked items.
- Identifying Hot Spots and Fluctuations: Over time, using an oven thermometer can also help you identify consistent hot or cool spots within your oven cavity, informing your decision to rotate pans strategically or avoid certain problematic areas for delicate bakes. It also helps you understand how long your oven truly takes to stabilize after preheating.
Investing in Accuracy: This small investment (typically under $10-15) is arguably one of the most impactful tools a beginner baker can acquire. It eliminates guesswork and puts you in control of one of the most crucial variables in baking, transforming inconsistent results into predictable perfection.
6. Rotate Pans for Uniform Baking
Even with a well-calibrated oven and precise temperature control, most home ovens have inherent hot spots or uneven heat distribution. Rotating your baking pans halfway through the baking time is a simple yet incredibly effective technique to ensure even browning and thorough, consistent cooking across all your baked goods.
The Purpose and Benefits of Rotation:
- Counteracting Hot Spots: Ovens often have areas that are consistently hotter or cooler than others, especially near the back, sides, or door, or even between heating cycles. Rotating the pan allows different parts of your product to be exposed to these varying temperatures, effectively evening out the cooking process and preventing one side from burning while the other remains pale.
- Ensuring Even Browning: This is particularly noticeable with cookies, cakes, cupcakes, and loaves of bread. Without rotation, one side might be perfectly golden and caramelized, while the other remains pale, or one corner might be scorched. Rotation ensures a beautiful, uniform color across the entire surface.
- Promoting Consistent Doneness: By rotating, you promote uniform heat penetration throughout the entire batter or dough, meaning all parts cook at a similar rate, preventing dreaded raw centers or dry, overbaked edges. This is vital for achieving the desired internal texture.
How and When to Rotate: Halfway through the recipe’s recommended baking time, carefully open the oven door (quickly to minimize temperature loss). Using sturdy oven mitts, rotate the pan 180 degrees (front to back). If you’re using multiple pans on different racks, you might also consider swapping their positions (top rack to bottom rack and vice versa) if the recipe calls for it, or if you notice significant differences in browning between the racks. Always be quick and minimize the time the oven door is open to avoid significant temperature drops that could affect your bake.
When to Skip (or Adjust) Rotation: For highly delicate items like soufflés or custards that are extremely sensitive to movement or temperature fluctuations, it might be best to avoid rotation, or only do it if absolutely necessary and very gently. Always defer to specific recipe instructions regarding rotation.
7. Resist the Urge to Overmix
While precise mixing is crucial for combining ingredients, there’s a fine line between adequately incorporated ingredients and overmixing. For many baked goods, especially those containing wheat flour, overmixing can be detrimental to the final texture, turning what should be tender into something tough.
The Gluten Factor in Overmixing:
- Gluten Development: Wheat flour contains proteins (glutenin and gliadin) that, when hydrated with liquid and agitated (mixed or kneaded), develop into a stretchy, elastic network called gluten. Gluten provides structure and elasticity, which is highly desirable in chewy breads and pizzas.
- Consequences of Overmixing (for tender baked goods):
- Toughness: Excessive gluten development leads to a dense, chewy, and tough texture in products that should be tender and light, such as cakes, muffins, quick breads, and cookies. You want minimal gluten development for these items.
- Tunneling: Overmixing can create undesirable “tunnels” or large, elongated air pockets within muffins and quick breads, indicating a poor and rubbery texture.
- Dryness: Paradoxically, overmixing can also lead to a drier product. The overly developed gluten network can sometimes trap moisture less effectively or cause moisture to evaporate more rapidly during baking.
- Shrinkage: Some batters, when overmixed, can shrink excessively during baking, leading to smaller, less appealing products.
The Golden Rule: Mix Just Until Combined:
- For cakes, muffins, quick breads, and cookies, mix wet and dry ingredients only until no streaks of dry flour remain. A few small lumps in muffin or pancake batter are perfectly acceptable and often preferred, as they indicate minimal gluten development.
- Use a light hand, the lowest speed setting on your electric mixer, or mix gently by hand with a spatula. The moment you see the ingredients come together and the last vestiges of dry flour disappear, stop mixing. Overmixing usually occurs in the last 10-15 seconds of vigorous mixing.
Exceptions: Bread dough, which requires extensive kneading to develop strong gluten for its characteristic chewy texture and elasticity, is a primary exception to this rule.
8. Exercise Patience During Cooling for Optimal Texture
Once your beautifully baked creation emerges from the oven, the hardest part for many new bakers is waiting. However, allowing baked goods to cool properly on a wire rack is a vital and often underestimated step that significantly impacts their final texture, stability, flavor, and overall enjoyment.
Why Proper Cooling is Essential:
- Carryover Cooking and Structure Setting: Baked goods continue to “cook” for a short period after being removed from the oven due to residual heat retained within their mass. This carryover cooking allows the internal structure to fully set and residual moisture to redistribute throughout the product. Removing them too soon can lead to a collapsed center or an unset texture.
- Preventing Sogginess: When hot baked goods are left in their pan for too long or transferred to a solid, non-porous surface, steam gets trapped underneath. This trapped steam condenses, making the bottom soggy, gummy, or even causing the product to stick irrevocably to the pan. A wire rack allows air to circulate freely all around the item, preventing condensation and allowing steam to escape, ensuring a crisp or non-soggy bottom.
- Setting and Stabilizing Structure: Cakes, quick breads, and other delicate items need time to firm up and solidify their structure before being removed from the pan, handled, cut, or frosted. Attempting to cut or frost a warm cake can lead to crumbling, tearing, or melting frosting, ruining hours of effort.
- Enhancing Flavor and Texture Development: Flavors in many baked goods, especially breads, cakes, and certain pastries, actually develop, deepen, and improve in complexity as they cool. The texture also often becomes more pleasant and consistent once completely cooled. This is why many bakers say bread tastes best a few hours after baking, not straight from the oven.
The Ideal Cooling Process:
- Initial Cooling (In Pan): For most cakes, brownies, and quick breads, allow them to cool in their baking pan for 5-15 minutes (as specified by the recipe) before gently inverting them onto a wire rack. This initial cooling allows the structure to stabilize enough to prevent breakage when handled.
- Final Cooling (On Wire Rack): Transfer the baked good to a wire cooling rack to cool completely. Ensure there’s good airflow around the entire product. This can take anywhere from 30 minutes for smaller cookies to several hours for a large cake or loaf of bread.
- Resist the Temptation: As tempting as it is, wait until items are fully cooled before frosting, glazing, slicing (for many items), or storing them in airtight containers. Premature storage traps moisture and can ruin texture.
9. Master the Art of Checking for Doneness
Knowing exactly when your baked goods are perfectly done is a crucial skill that develops with practice and observation. However, there are several reliable methods even for beginners to ensure success and avoid the common pitfalls of under- or overbaking.
Reliable Doneness Tests for Various Bakes:
- The Toothpick/Skewer Test (for Cakes, Muffins, Brownies): This is perhaps the most widely used test. Insert a wooden toothpick, thin skewer, or dedicated cake tester into the very center of the baked good (the thickest part). If it comes out completely clean, it’s done. If it comes out with a few moist crumbs clinging to it (especially for fudgy items like brownies), it’s also done. If it comes out with wet batter, continue baking and check again in 2-5 minute intervals.
- Golden Brown & Springy to the Touch (for Cakes, Quick Breads): The top surface should be uniformly golden brown, indicating proper caramelization and heat penetration. Gently press the center of the cake or bread with a clean finger; if it springs back immediately, it’s likely done. If your finger leaves a lingering indent, it needs more time in the oven.
- Edges Pulling Away from the Pan: For many cakes, quick breads, and some casseroles, the edges will start to slightly pull away or shrink from the sides of the baking pan when they are fully baked and set.
- Internal Temperature (for Breads, Custards, Cheesecakes): For certain items, particularly yeasted breads, custards, or cheesecakes, an instant-read thermometer is the most accurate way to check doneness. Refer to your recipe for specific internal temperature targets (e.g., most yeasted breads are done around 200-210°F / 93-99°C, custards around 175°F / 79°C).
- Visual Cues (for Cookies): For cookies, look for golden edges and a slightly set, but often still soft or slightly shiny, center. Remember that cookies will continue to set and firm up significantly as they cool on the baking sheet and then on the wire rack. It’s often better to slightly underbake than overbake cookies.
Common Mistakes to Avoid:
- Opening the Oven Door Too Early or Too Frequently: Resist the urge to check on your bake constantly, especially in the first two-thirds of the baking time. Frequent opening can cause significant temperature fluctuations, leading to sinking, uneven baking, or hindering proper rise.
- Overbaking: When in doubt, it’s often better to slightly underbake than overbake, especially for items meant to be moist and tender. Remove items from the oven just as they reach doneness, as carryover cooking will often finish the job and prevent dryness.
10. Embrace Practice and the Joy of Experimentation
Baking, like any fine art or specialized skill, improves significantly with consistent practice, patience, and a willingness to learn from every experience. Don’t be discouraged by initial mishaps or recipes that don’t turn out perfectly the first time. Every “fail” is not a failure but a valuable learning opportunity, providing crucial insight into what works and what doesn’t in your specific kitchen environment.
The Path to Baking Mastery and Culinary Confidence:
- Learn from Mistakes Actively: Did your cake sink in the middle? Was it too dry or crumbly? Instead of giving up, try to understand *why*. Review your measurements, oven temperature (did you use a thermometer?), mixing technique, and ingredient temperatures. There are countless troubleshooting guides online and in cookbooks to help diagnose common baking problems.
- Experiment with Confidence (Once Basics are Solid): Once you’ve mastered the foundational tips and feel comfortable with basic techniques, feel empowered to experiment. Try substituting ingredients (always with caution and prior research), adding new flavorings like citrus zest or spices, or adapting recipes to suit your personal taste preferences or dietary needs. This is where the true creativity, innovation, and joy of baking come alive.
- Keep a Baking Journal: A simple notebook can become an invaluable tool. Note down recipe changes, specific oven temperatures and actual baking times, results, and what you would do differently next time. This will help you track what works best in your specific oven and kitchen environment, allowing you to replicate successful outcomes and refine future attempts.
- Start Simple, Then Build Up: Begin your baking adventure with straightforward recipes like basic cookies, quick breads, muffins, or simple brownies. As your confidence and understanding grow, gradually challenge yourself with more complex creations like layered cakes, delicate pastries, or yeasted breads. Each new challenge builds upon the skills you’ve already acquired.
- Enjoy the Process and Share the Love: Remember that baking is not just about the end product; it’s about the therapeutic and mindful process of creating something wonderful with your own hands, the delightful aromas that fill your home, and the immense satisfaction of sharing your delicious culinary creations with loved ones. Embrace the entire journey, savor every moment, and let your passion for baking flourish. The best bakers are those who bake with heart and learn with every batch.
Whether you’re attempting to bake a batch of cookies or preparing your first homemade cake, mastering the basics can make all the difference in your baking journey.
Krystel’s Cooking
With these 10 fundamental tips, you are now equipped to venture into the delightful and rewarding world of baking and oven handling with renewed confidence and a clearer understanding of the science and art involved. Remember, baking is as much about patience and precision as it is about creativity, sensory pleasure, and the sheer enjoyment of the process. Embrace each step, learn from every experience, and savor the incredible joy of creating delicious, heartwarming treats right in your own kitchen. May your future bakes be always perfect and your kitchen always filled with wonderful aromas. Happy baking!