
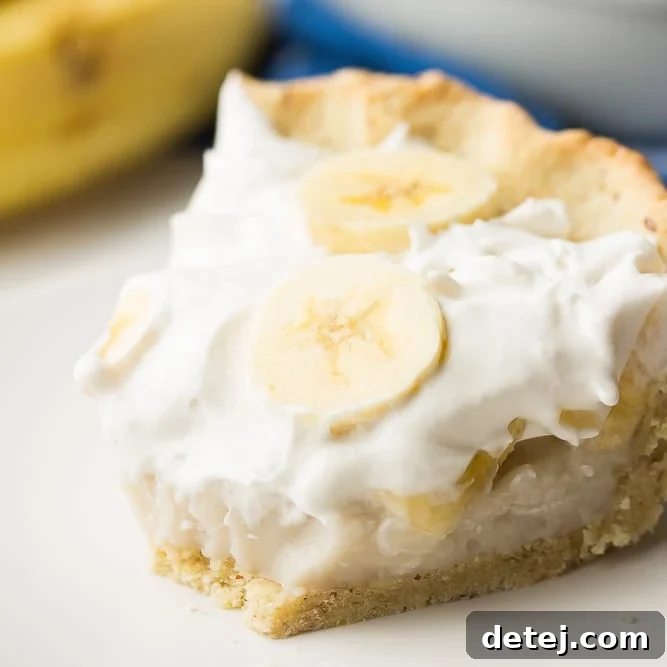
Indulge in the ultimate plant-based dessert with our Vegan Banana Cream Pie – a heavenly fusion of creamy custard, fresh banana slices, and a luscious whipped topping. This delightful treat is not just vegan and often gluten-free; it’s a testament to how simple ingredients can create an unbelievably rich and satisfying dessert that everyone will adore.
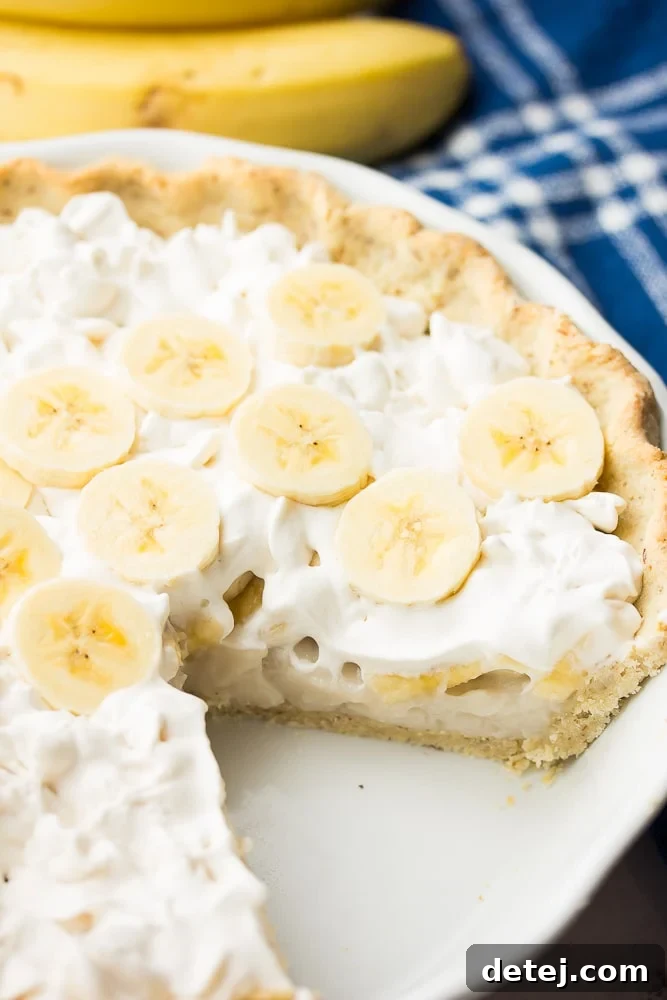
Delicious Vegan Banana Cream Pie: A Plant-Based Dream Dessert
Step into a world where creamy indulgence meets wholesome plant-based ingredients with our incredible Vegan Banana Cream Pie. Far from being a niche dessert, this pie is a universal crowd-pleaser, designed to win over even the most discerning palates. Whether you’re a long-time vegan, exploring plant-based options, or simply seeking a spectacularly delicious dessert, this recipe promises to deliver a truly unforgettable experience. It’s a remarkable creation that challenges the notion that vegan desserts compromise on flavor or texture. In fact, many find this version even more delightful than its traditional dairy-laden counterpart.
The beauty of this Vegan Banana Cream Pie lies in its straightforward construction, comprising four essential components that come together harmoniously: a perfectly baked crust, a rich and velvety vanilla custard, abundant layers of fresh, ripe bananas, and a generous cloud of fluffy vegan whipped topping. Each element plays a crucial role in creating the symphony of textures and flavors that define this classic dessert, all reimagined through a compassionate, plant-based lens.
One of the most surprising aspects for many home bakers is just how easy it is to create a truly decadent vegan custard. Forget complicated egg-tempering or dairy concerns. Our recipe harnesses the natural richness of full-fat coconut milk, expertly thickened with cornstarch, sweetened with granulated sugar, and infused with pure vanilla extract. A touch of coconut oil ensures a perfect set and contributes to the custard’s silky smooth mouthfeel. This simple combination yields a custard that is indistinguishable in its luxuriousness from traditional versions, making it accessible for cooks of all skill levels.
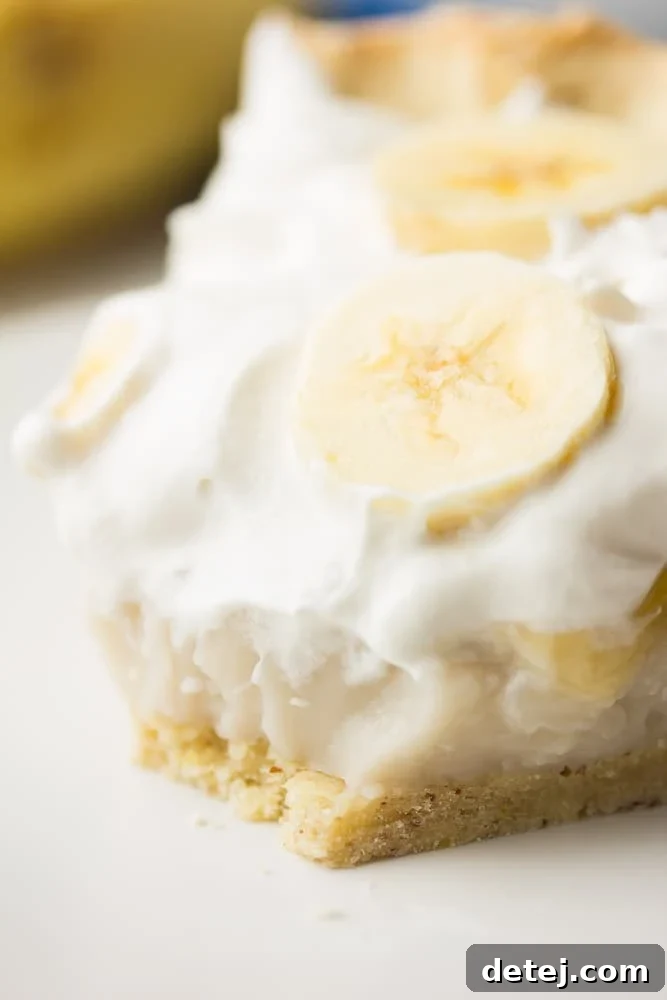
Crafting Your Vegan Banana Cream Pie: A Step-by-Step Guide
Creating this magnificent pie is a rewarding process. Let’s break down each step to ensure your Vegan Banana Cream Pie turns out perfect every time.
1. The Foundation: Perfecting Your Pie Crust
The crust is more than just a holder; it’s an integral part of the pie’s flavor and texture profile. You have several fantastic options to choose from, depending on your preferences and time constraints:
- Homemade Healthy Vegan Pie Crust (Gluten-Free): For those who love to bake from scratch and prefer a lighter, gluten-free option, my Healthy Vegan Pie Crust is an excellent choice. It’s incredibly easy to work with and bakes beautifully without shrinking, providing a wonderfully crisp and flavorful base. This option gives you full control over the ingredients, ensuring a wholesome and delicious foundation for your pie.
- Homemade Easy Vegan Pie Crust: If gluten is not a concern, my classic Easy Vegan Pie Crust offers a rich, flaky texture that complements the creamy filling perfectly. Remember to pre-bake this crust using pie weights (ceramic weights, dried beans, or even sugar work great) to prevent bubbling and ensure a flat, even base. You’ll typically need two packages of pie weights for a single crust to provide adequate coverage.
- Store-Bought Convenience: For ultimate ease, a pre-made vegan cookie crust or a graham cracker crust can be a lifesaver. Ensure you check the ingredients to confirm it’s dairy-free and vegan-friendly. These ready-to-use crusts save valuable time without compromising on flavor, making this recipe accessible even on busy days.
Regardless of your choice, ensure your crust is fully baked and completely cooled before pouring in the custard. A warm crust can affect the custard’s setting process.
2. The Heart of the Pie: Silky Vanilla Custard
This vegan vanilla custard is surprisingly simple to make, yet yields a wonderfully rich and thick texture:
- Prepare the Cornstarch Slurry: In a small bowl, whisk together 3 tablespoons of cornstarch with about ½ cup of the full-fat coconut milk (from the can). This creates a slurry that will smoothly integrate into the hot liquid without clumping. Set this mixture aside.
- Heat the Coconut Milk Base: Pour the remaining full-fat coconut milk from the can into a small saucepan. Add the granulated sugar and a pinch of salt. Place the pot over medium heat and whisk gently until the sugar dissolves and the mixture reaches a gentle simmer. Do not let it boil vigorously at this stage.
- Thicken the Custard: Give the cornstarch slurry a quick re-whisk, then gradually pour it into the simmering coconut milk mixture in the pot, whisking continuously. Continue to whisk for 5-10 minutes. The mixture will begin to thicken, though it may not appear as thick as a fully set custard just yet. This is perfectly normal; it will firm up considerably as it cools. The key is consistent whisking to prevent scorching and ensure an even consistency.
- Add Flavor and Richness: Remove the pot from the heat. Stir in the coconut oil and pure vanilla extract. The coconut oil adds an extra layer of richness and helps achieve that characteristic smooth, glossy finish, while the vanilla provides essential flavor.
Non-Coconut Milk Alternative: If you or your guests have a coconut aversion or allergy, you can substitute the full-fat coconut milk with 1 ½ cups of another non-dairy milk such as soy, almond, or oat milk. Be aware that the custard might not achieve the same intense richness or thickness as with full-fat coconut milk, but it will still be delicious. You can also omit the coconut oil if preferred; the custard will still set, though it might be slightly less firm.
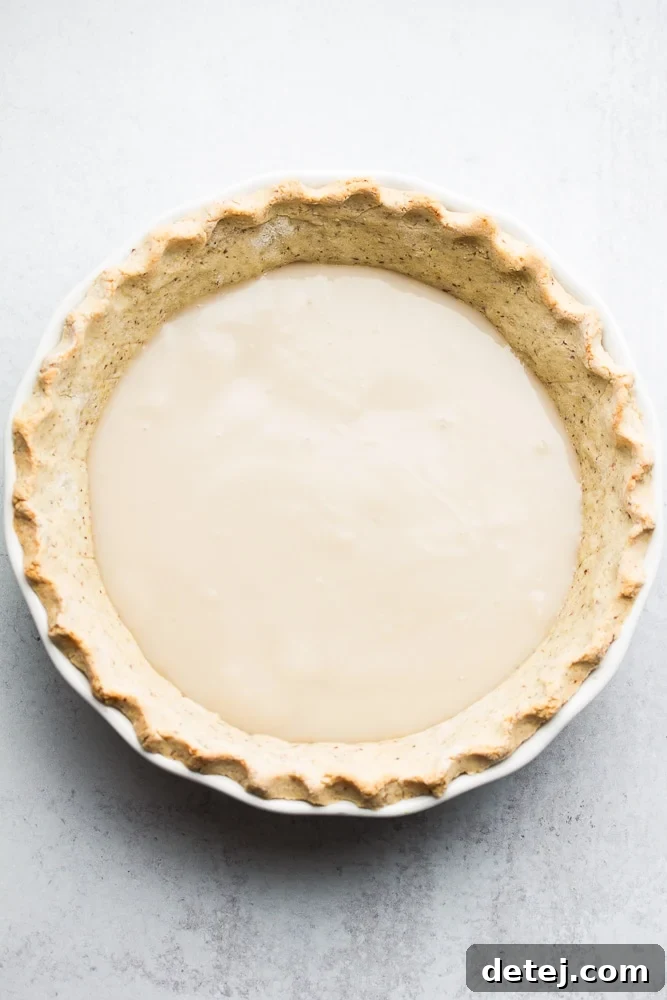
3. Chilling and Layering: The Art of Patience
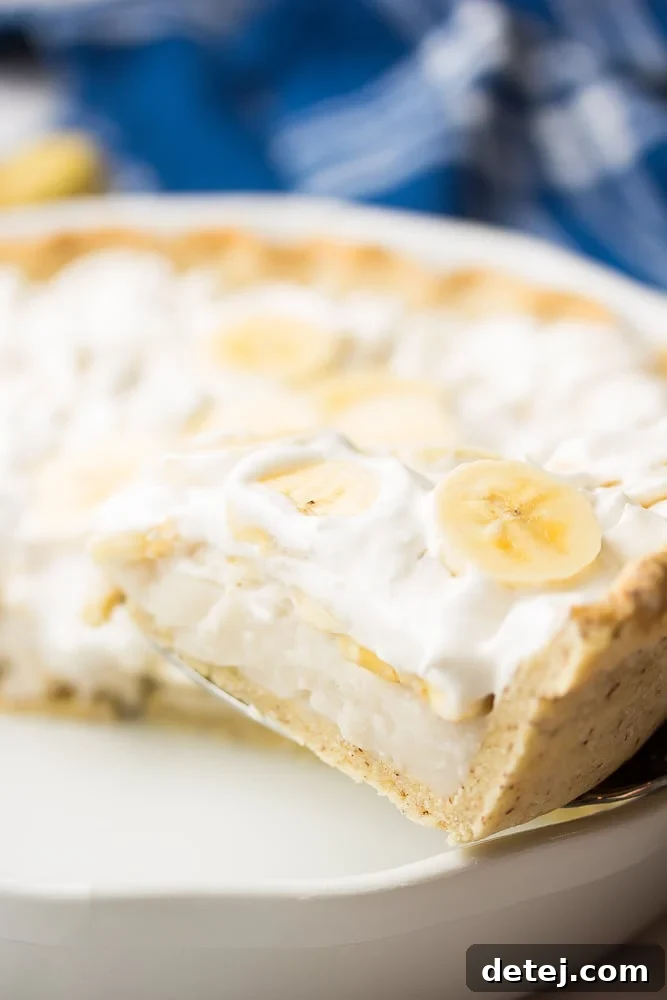
Once your custard is ready, carefully pour it into your pre-baked and cooled pie crust. The custard will still be somewhat runny, but don’t worry—it’s designed to thicken as it cools. For best results, cover the pie loosely with plastic wrap, pressing the wrap directly onto the surface of the custard to prevent a “skin” from forming. This also helps keep the custard moist. Refrigerate the pie for a minimum of 2-4 hours, or ideally overnight, to allow the custard to fully set and chill properly. This chilling time is crucial for achieving that sliceable, creamy texture.
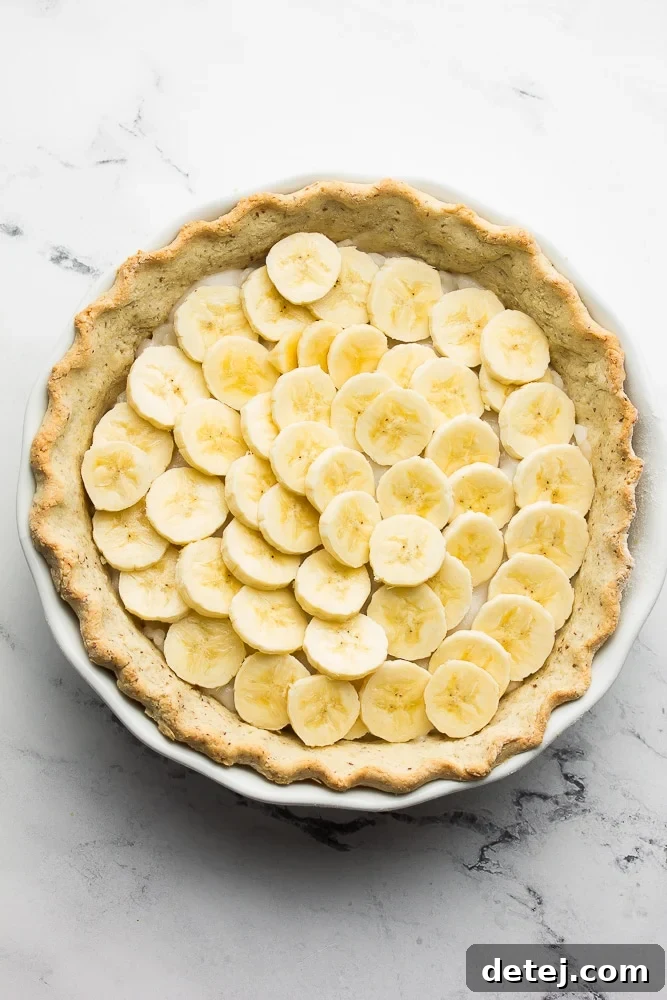
Once thoroughly chilled and firm, it’s time to add the star fruit: bananas! Slice three large, ripe (but not overly ripe) bananas. Arrange most of the slices in an even layer over the set custard. Reserve a few slices for the final decorative touch on top of the whipped cream.
4. The Grand Finale: Fluffy Whipped Topping
The final touch that elevates this pie to dessert perfection is a generous layer of fluffy vegan whipped topping. This adds a delightful contrast in texture and a subtle sweetness that balances the rich custard and fresh bananas.
You have several excellent options for your whipped topping:
- Store-Bought Vegan Whipped Cream: For ultimate convenience, brands like So Delicious CocoWhip are fantastic and widely available. They provide a light, airy, and delicious topping with minimal effort. Simply spread it over the banana layer.
- Homemade Vegan Whipped Cream (Aquafaba-Based): For a homemade touch, my Vegan Whipped Cream recipe, made with aquafaba (the liquid from a can of chickpeas), yields an incredibly light and stable topping that pipes beautifully. This option is great for those who prefer to avoid coconut or want a truly unique homemade topping.
- Homemade Coconut Whipped Cream: Another popular homemade option is Coconut Whipped Cream. This involves chilling a can of full-fat coconut milk and whipping the solid cream portion until fluffy. It offers a slightly richer, more coconut-forward flavor that perfectly complements the pie.
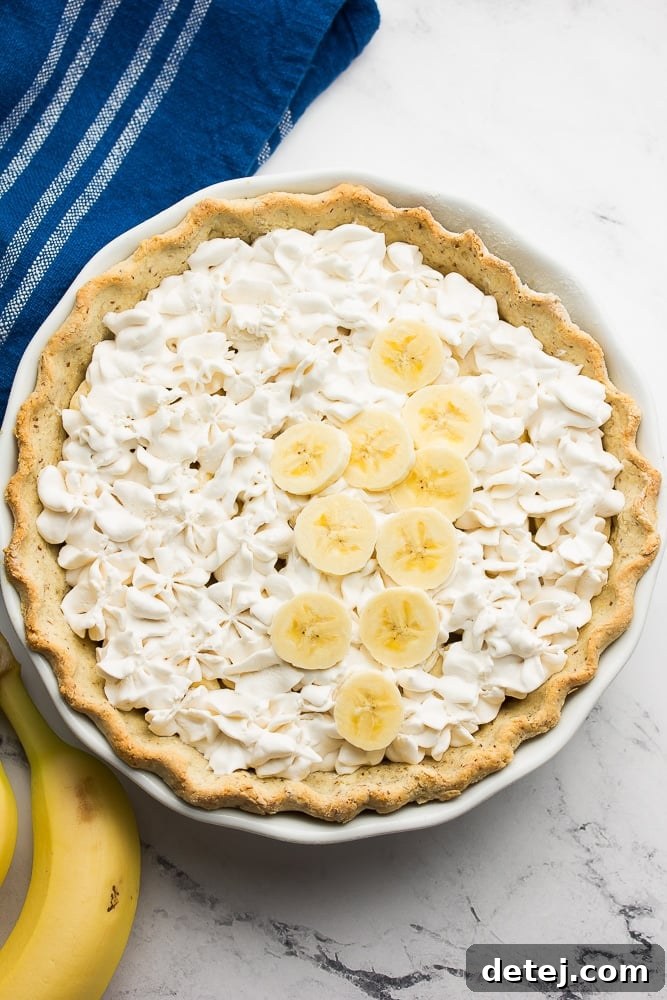
Once the whipped topping is spread evenly, decorate the top with your reserved banana slices just before serving. For an extra flourish, you might consider a sprinkle of cinnamon, a drizzle of vegan caramel sauce, or a few chocolate shavings.
Tips for a Flawless Vegan Banana Cream Pie
- Bananas are Key: Use firm, ripe bananas – not overly green, and not too brown. Overly ripe bananas can become mushy and too sweet. Slice them just before layering to minimize browning. If you’re concerned about browning, you can lightly brush them with a tiny amount of lemon juice, but use sparingly as it can alter the flavor.
- Chilling is Crucial: Do not rush the chilling process for the custard. It needs ample time (at least 2-4 hours, preferably overnight) to fully set and achieve its creamy, sliceable texture.
- Preventing Custard Skin: Covering the custard with plastic wrap, pressed directly onto the surface, is the best way to prevent a film from forming as it cools and chills.
- Serving Fresh: While the pie is delicious chilled, it’s best served within 1-2 days. Bananas tend to brown and soften over time, even when covered.
- Storage: Keep any leftover pie refrigerated, covered loosely to prevent condensation from making the crust soggy.
Creative Variations & Customizations
While the classic Vegan Banana Cream Pie is perfect as is, feel free to get creative with these variations:
- Crust Adventures: Experiment with different crusts! A chocolate cookie crust adds a rich cocoa dimension, while a gingersnap crust can introduce a spicy warmth.
- Spiced Custard: Infuse your custard with a touch of cinnamon, nutmeg, or even a hint of cardamom for an exotic twist.
- Chocolate Lover’s Dream: Drizzle vegan chocolate ganache or shavings over the whipped topping, or even incorporate a thin layer of chocolate between the crust and custard.
- Nutty Crunch: Add a sprinkle of toasted pecans, walnuts, or almonds on top for an extra layer of texture.
- Caramel Swirl: A homemade or store-bought vegan caramel sauce swirled into the whipped topping or drizzled over slices adds a luxurious sweetness.
More Irresistible Vegan Pie Recipes
If you’ve fallen in love with this Vegan Banana Cream Pie, there’s a whole world of plant-based pies waiting to be explored. Check out these other delightful recipes:
- Vegan Chocolate Pie
- Vegan Strawberry Pie
- Vegan Pumpkin Pie
Vegan Banana Cream Pie Recipe
Vegan Banana Cream Pie
Vegan Banana Cream Pie features a creamy custard filling, plenty of fresh sliced bananas and fluffy vegan whipped topping! Indulgent and delicious.
Average Rating: 4.95 stars (20 ratings)
Prep Time: 30 mins
Cook Time: 10 mins
Chilling time: 4 hrs
Total Time: 4 hrs 40 mins
Servings: 8 servings
Pin Recipe
Ingredients
Pie Crust
- 1 Healthy Vegan Pie Crust (see notes below for options)
Vanilla Custard
- (1) 13.5 oz can full fat coconut milk, divided
- 3 tablespoons cornstarch
- 1/2 cup granulated sugar
- 1/4 teaspoon salt
- 2 tablespoons coconut oil
- 1 1/2 teaspoons pure vanilla extract
The Rest
- 3 large bananas, sliced
- 1 container non-dairy whipped cream (I used SoDelicious Coco Whip – see notes below for options)
Instructions
- Pre-bake your chosen pie crust. Let it cool completely while you prepare the custard filling. You can use my Healthy Vegan Pie Crust (which is also gluten-free), my Easy Vegan Pie Crust, or a store-bought crust like a cookie crust.
- In a small bowl, combine 1/2 cup of the full-fat coconut milk with the cornstarch. Whisk until smooth to create a slurry, then set aside.
- In a small pot over medium heat, whisk together the remaining coconut milk from the can, granulated sugar, and salt. Bring the mixture to a gentle simmer, whisking occasionally.
- Quickly stir the cornstarch/milk slurry once more to ensure it’s well combined. Add the slurry to the simmering pot. Bring the mixture to a boil, whisking frequently for 5-10 minutes, until it visibly starts to thicken. It will become even thicker as it cools.
- Remove the pot from the heat. Stir in the coconut oil and pure vanilla extract until fully incorporated.
- Pour the hot custard mixture into the pre-baked and cooled pie crust. Allow it to cool at room temperature for about 10 minutes. Then, move the pie to the refrigerator and chill for 2-4 hours, or ideally overnight, until the custard is completely set. Cover the pie with plastic wrap, pressing it directly onto the custard’s surface, to prevent a film from forming.
- Once the pie is thoroughly chilled, slice the bananas. Layer most of the banana slices evenly on top of the set custard filling. You may reserve a few slices for decorating the top if desired.
- Cover the entire pie with your chosen vegan whipped topping. I recommend SoDelicious Coco Whip for convenience. If you prefer to make your own, consider my Vegan Whipped Cream (made with aquafaba) or Coconut Whipped Cream.
- Decorate the pie with any reserved banana slices right before serving.
- Serve immediately. Any leftovers should be stored in the refrigerator, covered. The pie is best enjoyed within 1-2 days as the bananas may start to brown and soften over time.
Notes
- Blind Baking Easy Vegan Pie Crust: If using the Easy Vegan Pie Crust, prepare it as instructed and line your pie plate. Chill the crust in the refrigerator. Preheat your oven to 375℉ (190℃). Line the chilled crust with parchment paper and fill it with pie weights (ceramic weights, dried beans, or sugar). Bake for 15 minutes. Carefully remove the weights. Poke holes in the bottom of the crust with a fork, then return it to the oven and bake for another 15 minutes until lightly golden. Let it cool completely before filling.
- Nutritional information is an estimate only and may vary significantly based on the specific brand of whipped topping and type of pie crust used.
- While full-fat coconut milk from a can provides the best thickness and richness for the custard, you can substitute 1 ½ cups of another non-dairy milk (such as soy, almond, or oat milk) if needed. Note that the custard may not be as thick. You can also omit the coconut oil if you prefer, though it helps with texture.
- This pie recipe is naturally gluten-free if you use my Healthy Vegan Pie Crust or a certified gluten-free store-bought crust.
Nutrition
Serving: 1 serving | Calories: 305kcal | Carbohydrates: 41g | Protein: 7g | Fat: 15g | Saturated Fat: 4g | Sodium: 147mg | Potassium: 183mg | Fiber: 5g | Sugar: 22g | Vitamin A: 33IU | Vitamin C: 4mg | Calcium: 3mg | Iron: 1mg
Course: Dessert
Cuisine: American
Author: Nora Taylor
Did you make this recipe?
Mention @nora_cooks_vegan_ or tag #noracooks!