
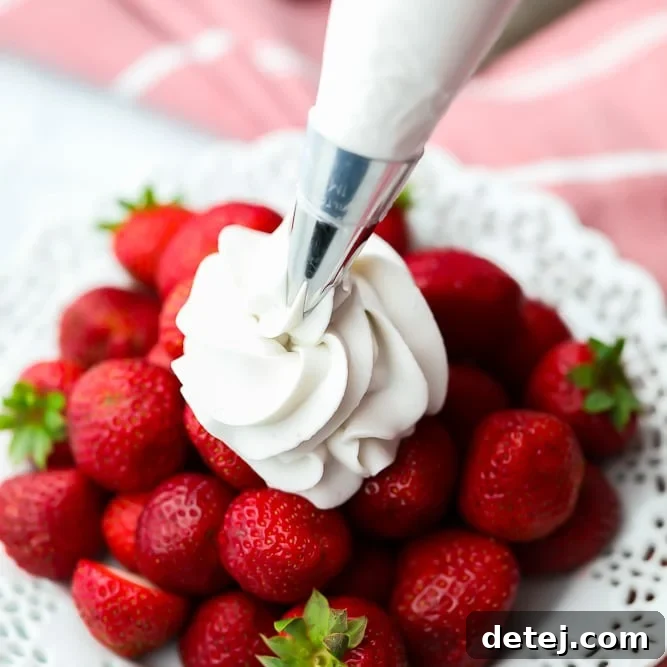
Transform your desserts with truly decadent, homemade coconut whipped cream! This comprehensive guide reveals all the secrets to achieving a light, airy, yet rich and stable dairy-free topping, complete with expert tips and tricks.
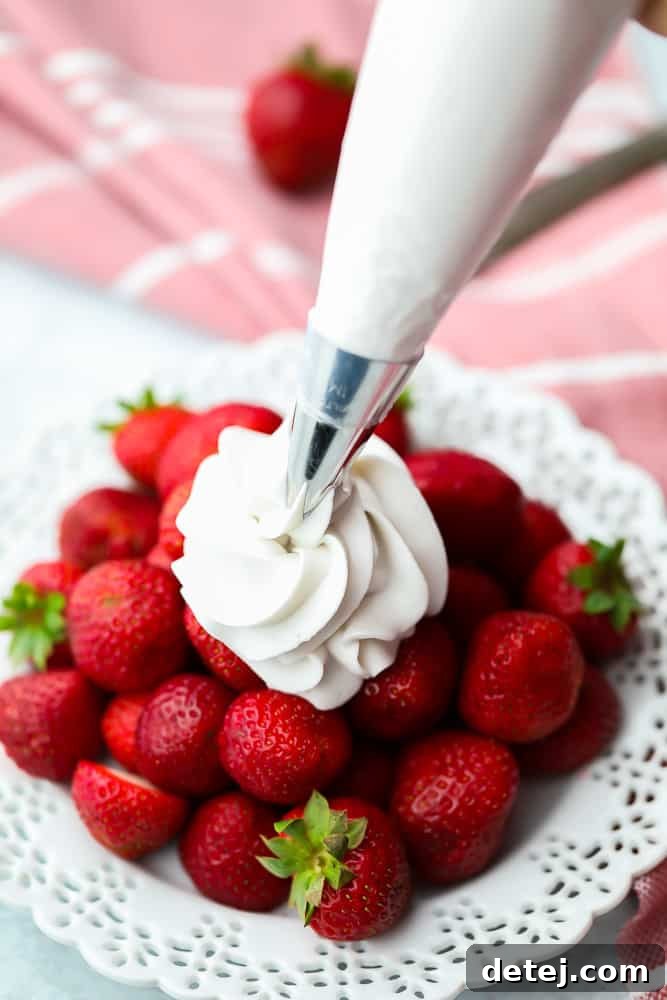
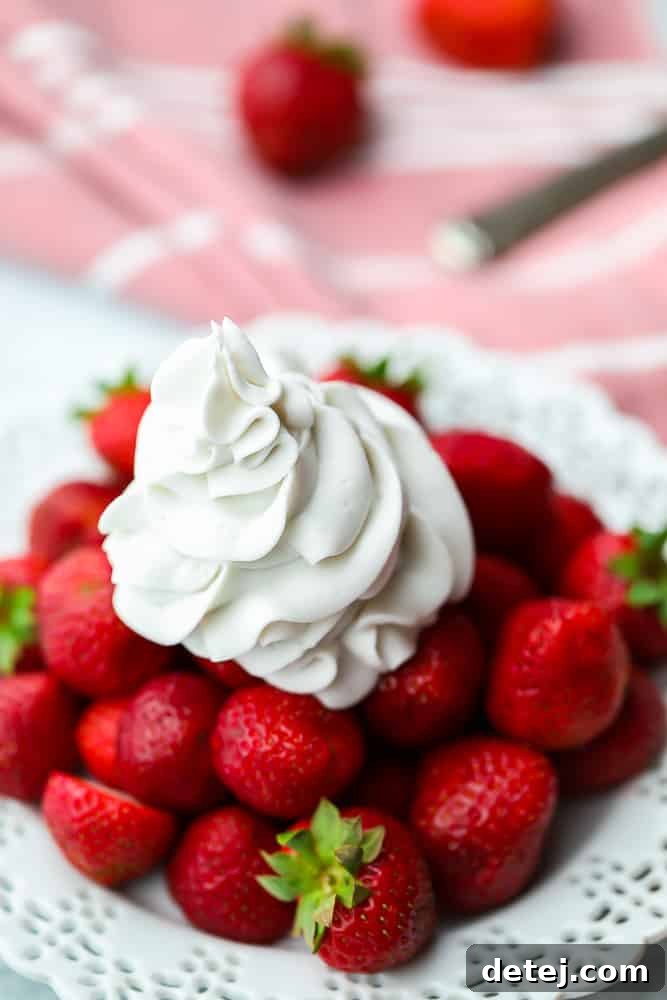
For many, giving up dairy means longing for the creamy indulgence of cheese. But for me, the true yearning has always been for whipped cream. Imagine those ethereal clouds of perfectly sweetened, fluffy cream crowning a slice of pie, swirling atop a rich coffee drink, or generously dolloped over a mountain of ripe strawberries. Is there any pleasure quite as simple yet profoundly satisfying? I sincerely think not.
Over a decade of embracing a vegan lifestyle, I’ve embarked on a quest to find the ultimate dairy-free whipped topping. I’ve experimented with various alternatives, including my popular aquafaba vegan whipped cream. While undeniably delicious and impressive in its own right, that version often leaned more towards a marshmallow fluff consistency than the dense, creamy richness of traditional whipped cream. It’s fantastic for specific applications, but I always sought something that truly mirrored the luxurious mouthfeel of classic whipped cream.
That’s where **coconut whipped cream** enters the scene, and it absolutely hits every single spot. This incredible creation delivers unparalleled richness, a wonderfully fluffy texture, and a creamy consistency that’s simply divine. It carries just a subtle hint of coconut flavor, which I find enhances its appeal. However, if coconut is a flavor you truly dislike, I want to be upfront: this may not be the ideal whipped cream for your palate. But for everyone else, prepare for a revelation!
My journey to perfecting coconut whipped cream has spanned years of trials and adjustments. I’ve finally uncovered the most effective tips and tricks for consistent success, and I’m thrilled to share every single insight with you. With just a handful of simple ingredients and about 15 minutes of active preparation time, you too can effortlessly create this spectacular whipped cream at home!
Unveiling the Flavor Profile: What Does Coconut Whipped Cream Taste Like?
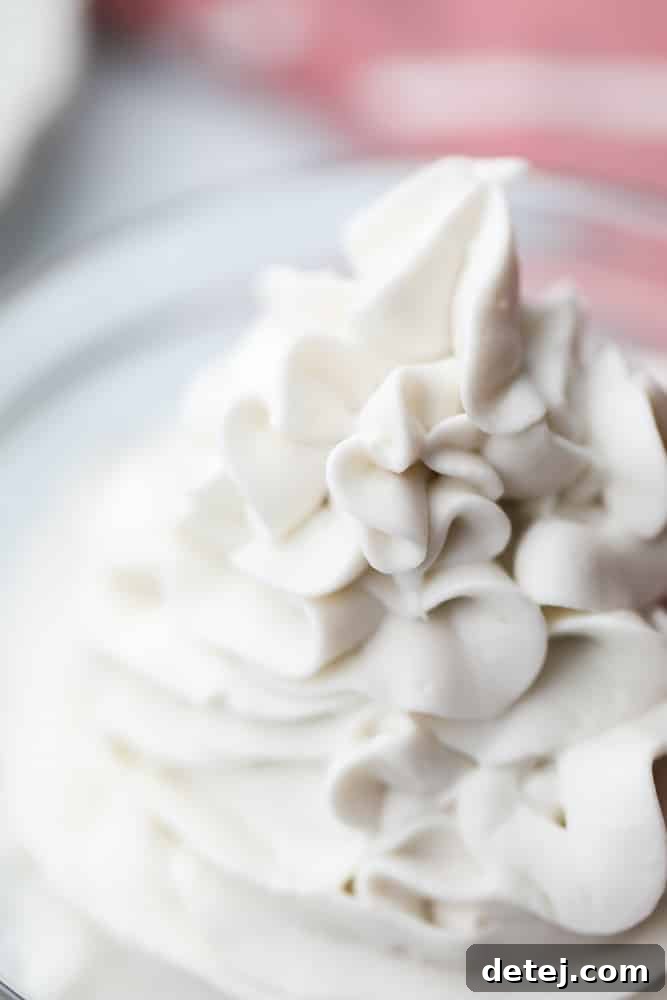
This exquisite dairy-free topping offers a distinct, yet subtle, coconut essence that beautifully complements its other characteristics. Beyond that gentle tropical note, my perfected recipe yields a whipped cream that is flawlessly sweetened, intensely rich, and incredibly creamy – remarkably similar to its traditional dairy counterpart. It’s a taste experience that delights the senses without being overwhelmingly coconut-flavored, striking a perfect balance for a versatile dessert topping.
The Art of Crafting Coconut Whipped Cream: A Step-by-Step Guide
Creating this magnificent coconut whipped cream is a straightforward process, but it hinges on one critical preparatory step: chilling. You absolutely must refrigerate your cans of full-fat coconut cream or coconut milk at least 24 hours in advance. For optimal results and a higher yield of solid cream, 48 hours or even longer is highly recommended. Make it a habit to place those cans deep in the back of your refrigerator as soon as you bring them home from the grocery store. This ensures you’ll always have readily available coconut cream whenever a spontaneous craving for this delightful topping strikes!
- **Pre-Chill Your Equipment:** Begin by placing a medium-sized mixing bowl in the freezer for a minimum of 10 minutes. For even better results, chill your hand mixer whisks alongside the bowl. This crucial step helps maintain a cold environment, preventing the coconut cream from softening prematurely and ensuring maximum fluffiness.
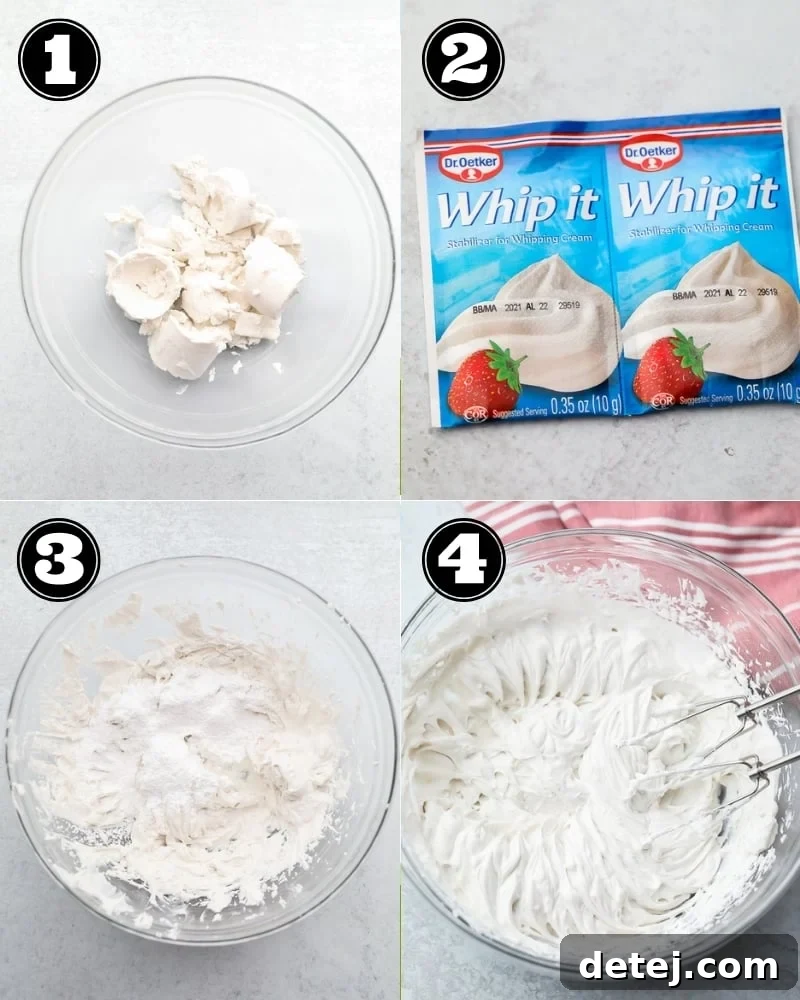
- **Extract the Coconut Cream:** Once your equipment is thoroughly chilled, retrieve the mixing bowl and whisks. Carefully open your pre-chilled cans of coconut cream. Using a sturdy spoon, gently scoop out only the hardened, thick coconut cream that has risen to the top. It should have a consistency similar to solid butter or thick cream, as depicted in the images. **Crucially, avoid incorporating any of the clear liquid (coconut water) found at the bottom of the can.** This liquid will prevent your cream from whipping properly. You can save the leftover coconut water for smoothies or other recipes.
- **Optional Stabilization Boost (Whip It):** For an extra layer of stability and to achieve slightly firmer peaks, you have the option to add a package of “Whip It” stabilizer. This product, which is typically vegan-friendly, can often be found in the baking aisle of most grocery stores. While not strictly essential for delicious whipped cream, it certainly helps, particularly if you plan to pipe the cream or use it in warmer environments.
- **Initial Whipping:** With the hardened coconut cream in your chilled bowl, begin beating it on medium-high speed with your hand mixer. Continue for approximately 1 minute, allowing the cream to start breaking down and become somewhat smooth.
- **Add Sweetener & Flavor:** Now, it’s time to incorporate the flavor. Add the sifted powdered sugar (sifting prevents lumps and ensures a smooth texture), the pure vanilla extract, and the optional “Whip It” stabilizer (if using).
- **Final Whipping to Perfection:** Continue beating the mixture for another minute or so on medium-high speed. Observe as the cream transforms, becoming smooth, light, and wonderfully creamy. While coconut whipped cream may not achieve the super-stiff peaks often seen with traditional dairy whipped cream, it will become beautifully fluffy and hold its shape well. Taste and adjust sweetness if desired.
Once prepared, your freshly made coconut whipped cream is ready to be used immediately. If you have leftovers, store them in an airtight container in the refrigerator for up to a week. It can also be frozen, though its texture might become slightly softer upon thawing.
Expert Tips for Unwavering Success
Achieving consistently perfect coconut whipped cream requires attention to a few key details. These tips are designed to help you avoid common pitfalls and ensure a smooth, stable, and utterly delicious outcome every time:
- Choose the Right Product: Coconut Cream vs. Full-Fat Coconut Milk: For the absolute best results, I highly recommend using dedicated coconut cream. Brands like Native Forest often come in smaller cans and yield a higher percentage of solid cream. If coconut cream isn’t available, opt for high-quality, full-fat coconut milk. Brands such as Whole Foods 365 have worked well for me. The key is “full-fat” – light coconut milk will simply not work. Remember that you might need 2 to 3 cans of full-fat coconut milk to get the same amount of solid cream as one can of coconut cream, as the cream content can vary significantly between brands.
- The Non-Negotiable Chill: This is arguably the most crucial step. You *must* chill your coconut cream or full-fat coconut milk for a minimum of 24 hours. There are no exceptions if you want firm, scoopable cream. Chilling allows the thick, fatty cream to separate from the thinner coconut water and solidify at the top of the can. Without proper chilling, you’ll end up with a runny mixture that won’t whip.
- Keep Everything Cold: Beyond chilling the coconut product itself, extend this chill to your equipment. Place your mixing bowl, hand mixer whisks, and even your spatula in the freezer for 10-15 minutes before you begin. Heat is the ultimate enemy of coconut whipped cream, causing it to melt and lose its structure. Starting with cold tools helps maintain the cream’s ideal temperature throughout the whipping process.
- Sift Your Powdered Sugar: Powdered sugar (also known as confectioners’ sugar) can often be clumpy, especially if it’s been stored for a while. To prevent undesirable lumps in your smooth whipped topping, always sift the powdered sugar before adding it to the coconut cream. This ensures a silky-smooth, uniform texture.
Mastering Stability: How to Stabilize Coconut Whipped Cream
One of the most common questions about dairy-free whipped cream revolves around its stability. While coconut whipped cream is naturally quite sturdy when prepared correctly, a few extra steps can ensure it holds its beautiful form for longer:
- **The Power of Cold:** As mentioned, chilling is paramount. Ensure all your ingredients and equipment are impeccably cold before you start. Furthermore, always store your finished coconut whipped cream in the refrigerator when not in use. A cold environment is its best friend.
- **Powdered Sugar is Your Ally:** Powdered sugar not only sweetens but also plays a vital role in stabilizing the whipped cream. Its fine texture and cornstarch content (found in most commercial powdered sugars) help absorb moisture and provide structure. For this reason, I strongly recommend against using liquid sweeteners. If you absolutely prefer a liquid sweetener like pure maple syrup or agave, use it very sparingly – no more than a tablespoon for the amount specified in this recipe. Exceeding this will almost certainly make your whipped cream too runny to hold its shape.
- **”Whip It” for an Extra Boost:** For an even firmer, more stable whipped cream, I often incorporate a packet of “Whip It” stabilizer. This readily available baking aid (typically found near baking powder and soda) works wonders in firming up the coconut whip without altering its taste. It’s a fantastic optional addition, but don’t fret if you can’t find it; the other tips will still yield a wonderfully stable result.

Troubleshooting: My Coconut Cream Has Chunks! Help!
It’s not uncommon to encounter frustrating hard lumps or chunks in some brands of coconut milk or cream, which can be stubborn to smooth out with a standard hand mixer. If you find yourself in this situation, don’t despair! There’s an alternative method that works quite effectively:
Instead of a hand mixer, try using a high-powered blender. Begin by chilling your blender jar in the freezer for about 10 minutes. Then, add all your ingredients directly into the chilled blender. Blend until everything is perfectly smooth, using the tamper (if your blender has one) to push down the ingredients and ensure even blending. **However, exercise caution: do NOT over-blend!** Over-blending generates heat, which can quickly warm the coconut cream and turn it runny. While the blender version might be slightly less fluffy and a touch more runny than the hand-mixer method, it’s an excellent solution for achieving a smooth consistency when chunks are an issue.
Delicious Variations: Indulge in Chocolate Coconut Whip
Elevate your coconut whipped cream experience with a delightful chocolate twist! To create a rich and creamy chocolate coconut whip, simply add 1/4 cup of natural unsweetened cocoa powder (sifted to prevent lumps) at the same time you add the powdered sugar to your whipping cream. The result is an incredibly decadent and irresistible topping. This chocolate version also makes for a fantastic frosting, particularly on single-layer cakes, where its slightly softer stability is not an issue. Note that it’s generally not stable enough to use as a filling for multi-layered cakes.
Perfect Pairings: What to Serve with Coconut Whipped Cream
The versatility of homemade coconut whipped cream knows no bounds! Its rich, creamy texture and subtle sweetness make it the ideal companion for a vast array of desserts and beverages. Here are just a few ideas to get you started, but feel free to let your imagination run wild:
- Vegan Pumpkin Pie: A classic pairing, especially during the holidays.
- Vegan Chocolate Pie: Enhance the decadence of any chocolate dessert.
- Vegan Banana Cream Pie: A match made in heaven for tropical and creamy pies.
- Vegan Waffles & Pancakes: A delightful alternative to syrup or dairy cream for breakfast or brunch.
- Vegan Strawberry Shortcake: The perfect light and fresh topping for berries and cake.
- Vegan Hot Chocolate or Coffee: Transform your warm beverages into an indulgent treat.
- Fresh Berries: A simple yet elegant dessert on its own, especially with strawberries, blueberries, or raspberries.
- Fruit Salads: Add a creamy dimension to any fruit medley.
- Muffins or Scones: A dollop adds moisture and sweetness.
- As a frosting for cupcakes or single-layer cakes.
And so much more! Explore my extensive Vegan Desserts section for countless other delicious inspirations and recipes that would be beautifully complemented by this incredible coconut whipped cream.

Perfectly Fluffy Coconut Whipped Cream
Pin
Comment
SaveSaved
Ingredients
- 13.5 ounce can full-fat coconut cream (thoroughly chilled in the refrigerator for 1-2 days; refer to notes for alternative options)
- 1/4-1/2 cup powdered sugar (sifted, adjust to desired sweetness)
- 1 teaspoon pure vanilla extract
- Optional: 1 packet Whip It stabilizer
Instructions
-
**Chill Coconut Cream:** Place cans of full-fat coconut cream or coconut milk in the refrigerator for 1-2 days. For optimal consistency, 48 hours is ideal. Storing several cans in the back of your fridge ensures you’re always prepared.
-
**Prepare Equipment:** Once the coconut cream is thoroughly chilled, place a medium to large mixing bowl and your hand mixer whisks in the freezer for about 10 minutes. Keeping everything very cold is key to preventing the coconut cream from melting and achieving maximum fluffiness.
-
**Scoop Hardened Cream:** Retrieve your chilled bowl. Open the cans of coconut cream carefully. Using a spoon, scoop out only the hardened, thick coconut cream from the top, discarding or saving the clear liquid at the bottom. The cream should be very firm; if it’s still soft, the brand might not be suitable or it needs more chilling time. Place the hardened cream into your chilled mixing bowl.
-
**Whip & Sweeten:** Using a hand mixer, beat the coconut cream on high speed for approximately 1 minute until it starts to smooth out. Then, sift in the powdered sugar (to prevent clumps), add the vanilla extract, and the optional Whip It stabilizer (if using). Continue beating for another minute or so until the mixture is smooth, creamy, and light. While it won’t achieve the ultra-stiff peaks of dairy whipped cream, it will be beautifully fluffy. Taste and adjust powdered sugar to your preference.
-
**Serve or Store:** Use your coconut whipped cream immediately for best results. Leftovers can be stored in an airtight container in the refrigerator for about a week. It can also be frozen, though the texture might soften slightly upon thawing. Enjoy this versatile topping with fresh fruit, on pies, waffles, hot cocoa, coffee, or any other treat you desire!
Notes
- **Coconut Cream vs. Full-Fat Coconut Milk:** For optimal results, use canned full-fat coconut cream as it yields more solid cream per can. If using full-fat coconut milk, you may need 2-3 cans to achieve the same amount of thick cream, as the cream content can vary. Ensure it’s always full-fat, not light.
- **Natural Sweetening Option:** While powdered sugar aids in stability and texture, you can opt for a natural liquid sweetener. However, be cautious: use no more than 1 tablespoon of pure maple syrup or agave, as adding more will likely make the whipped cream too runny and less fluffy.
- **Luscious Chocolate Whipped Cream!** For a delightful variation, add 1/4 cup of sifted natural unsweetened cocoa powder when you incorporate the powdered sugar. This creates a rich chocolate topping that’s fantastic as a frosting for single-layer cakes, though it may be too soft for layered cake fillings.
- **Batch Size & Storage:** This recipe is easily doubled or tripled to suit your needs. Any leftover coconut whipped cream freezes exceptionally well for future indulgence.