
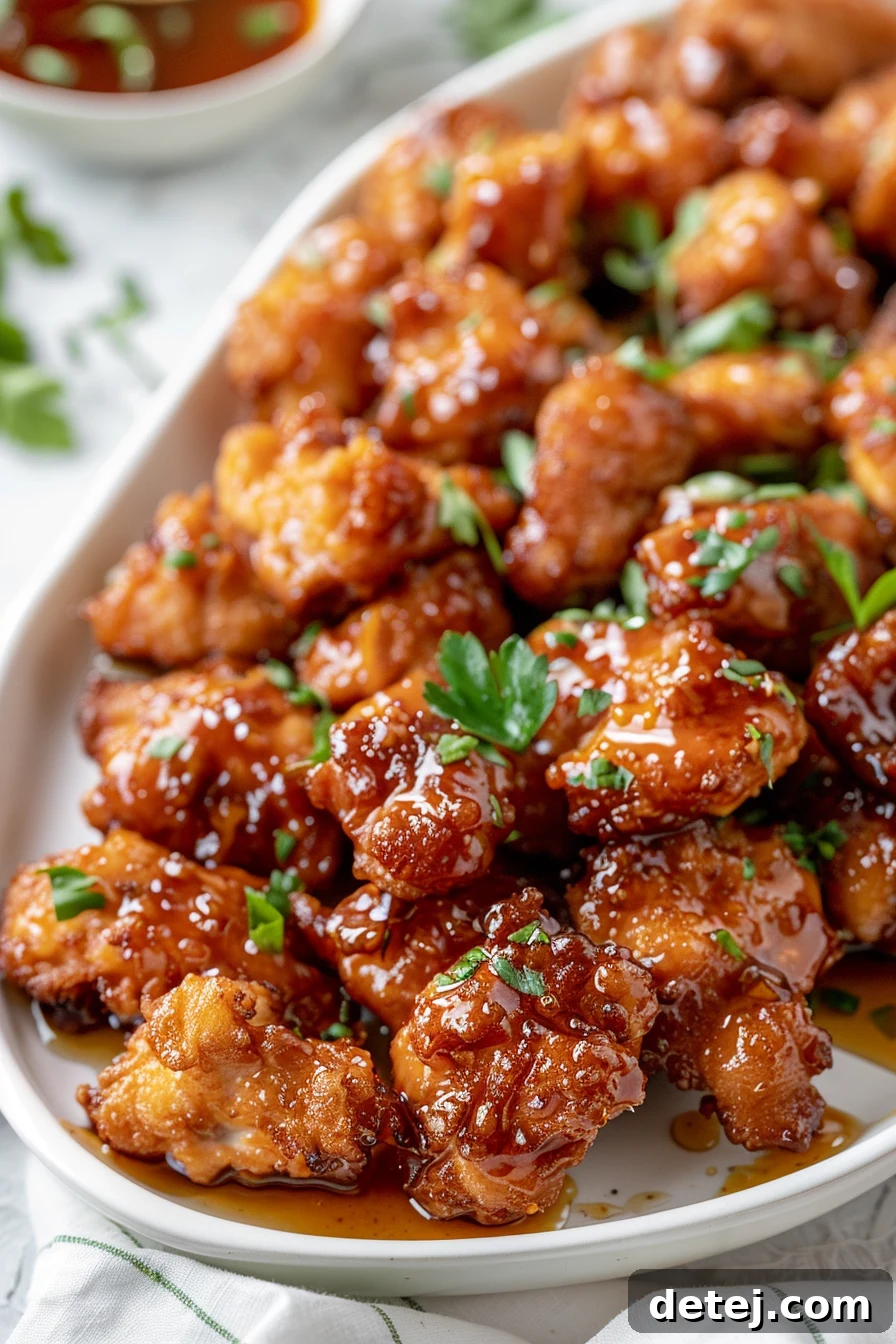
Golden Bites of Heaven: Mastering Honey Garlic Crispy Chicken at Home
Welcome to a culinary adventure that promises to transform your weeknight dinners into a sensational feast! Today, we’re diving deep into the secrets behind the internet’s most coveted dish: Honey Garlic Crispy Chicken. You’ve likely scrolled past countless videos showcasing its irresistible golden-brown crust, succulently juicy interior, and a glistening coat of sticky, savory-sweet sauce. Prepare yourself, because this isn’t just another recipe; it’s your definitive guide to recreating this viral sensation right in your own kitchen.
This dish is a true masterpiece of flavors and textures, marrying the tender perfection of expertly fried chicken with a luscious sauce that balances the aromatic kick of garlic and the comforting sweetness of honey. Every single bite is a symphony for your taste buds – a golden bite of heaven that will have everyone reaching for more. It’s more than just a meal; it’s an experience, guaranteed to impress friends and family alike and become a beloved staple in your recipe repertoire.
What Makes This Dish So Irresistible?
- Unmatched Flavor Profile: The harmonious blend of sweet honey and savory garlic creates a dynamic taste that’s deeply satisfying and highly addictive.
- Perfect Texture Contrast: Enjoy the satisfying crunch of a perfectly crispy exterior giving way to incredibly juicy, tender chicken inside.
- Social Media Sensation: This recipe has captivated home cooks worldwide, proving its universal appeal and deliciousness.
- Versatile Main Dish: Ideal for a quick family dinner or an impressive gathering, this chicken is incredibly adaptable and always a crowd-pleaser.
Gathering Your Golden Ingredients: The Foundation of Flavor
Embarking on the journey to create our renowned Honey Garlic Crispy Chicken begins with selecting the finest ingredients. Think of this as laying the groundwork for an architectural marvel of flavor. The quality and freshness of your components will significantly impact the final taste and texture of this truly delicious meal. Here’s a detailed look at what you’ll need to create this celebrated dish:
For the Crispy Chicken:
- Chicken: Opt for either boneless, skinless chicken breasts or thighs. Thighs offer a richer, juicier flavor and tend to stay moist even after frying, while breasts provide a leaner option. Cut your chosen chicken into uniform bite-sized pieces, roughly 1-inch cubes. Uniformity is crucial for even cooking, ensuring every piece achieves that coveted golden-brown, crispy finish without drying out.
- Egg: A single egg acts as a binder, helping the batter adhere perfectly to the chicken pieces. It also contributes to the golden color and a slight richness.
- Cornstarch: This is your secret weapon for an unbelievably crispy coating. When combined with flour, cornstarch reduces gluten development, resulting in a lighter, crispier texture.
- All-Purpose Flour: The primary component of our coating, providing structure and contributing to the golden crust. For those with gluten sensitivities or allergies, a 1:1 gluten-free flour blend or a combination of rice flour and potato starch makes an excellent substitute without compromising on crispiness.
- Seasonings: A dash of black pepper and garlic powder will infuse your chicken with a foundational layer of savory flavor, perfectly complementing the honey garlic sauce.
- Vegetable Oil: For frying. Choose an oil with a high smoke point, such as canola, peanut, or vegetable oil, to ensure a clean fry and prevent burning. You’ll need enough to allow the chicken pieces to submerge properly during frying.
For the Sticky Honey Garlic Sauce:
- Honey: The star of the show, providing natural sweetness and that signature sticky glaze. Use good quality honey for the best flavor.
- Soy Sauce: The backbone of the savory element, offering umami depth and saltiness. A low-sodium soy sauce is an excellent choice for those mindful of their salt intake.
- Brown Sugar: Adds a deeper, more complex sweetness with hints of caramel, enhancing the honey’s flavor.
- Sesame Oil: A small amount goes a long way in adding a nutty, aromatic depth that is characteristic of many Asian-inspired dishes.
- Minced Garlic & Fresh Ginger: These aromatics are essential. Freshly minced garlic and finely chopped ginger provide a vibrant, pungent base that elevates the entire sauce. Don’t skimp on fresh!
- Lemon Juice: A squeeze of fresh lemon juice brightens the sauce, cutting through the sweetness and richness, adding a delightful zing.
- Cornstarch & Water (for slurry): This combination is vital for achieving the perfect thick, glossy consistency for your sauce, ensuring it beautifully clings to every piece of crispy chicken.
- Optional Heat: For those who enjoy a little warmth, a pinch of cayenne pepper or a dash of sriracha can be added to the sauce, allowing you to tailor the spice level to your preference.
With these carefully selected ingredients at your fingertips, you’re now perfectly positioned to create a dish that’s not only delicious but also a joy to prepare. Let’s get cooking!
Preparing the Chicken: The First Step to Perfection
The journey to truly crave-worthy Honey Garlic Crispy Chicken begins with meticulous preparation of the chicken itself. This foundational step is crucial for ensuring uniform cooking, optimal tenderness, and the perfect canvas for our crispy batter and flavorful sauce. Follow these guidelines to set your chicken up for success:
Sizing Your Chicken for Success:
Start by cutting your boneless, skinless chicken breasts or thighs into uniform, bite-sized pieces, typically around 1 to 1.5 inches. This isn’t merely for aesthetic appeal; it’s a critical step for even cooking. Pieces of similar size will cook at the same rate, preventing some from becoming overcooked and dry while others remain undercooked. This uniformity guarantees that every golden bite is as succulent and tender as the last, ensuring a consistently delicious experience.
The Magic of the Marinade:
Once your chicken is perfectly portioned, it’s time for its brief yet impactful bath in our simple yet highly effective marinade. In a medium bowl, combine the chicken pieces with a single egg, a tablespoon of soy sauce, and a third of a cup of cornstarch. Mix everything thoroughly, ensuring each piece of chicken is fully coated. This isn’t just any marinade; it’s a strategic blend designed to achieve that golden-brown perfection and luscious texture:
- Egg: Acts as a gentle binder, helping the subsequent batter adhere evenly and promoting a richer, golden hue during frying.
- Soy Sauce: Infuses the chicken with a foundational layer of umami and seasoning, enhancing its natural flavors from the inside out.
- Cornstarch: This is a game-changer. It tenderizes the chicken, helps to retain moisture during cooking, and creates a subtle, almost velvety texture that primes the chicken for an incredibly crispy exterior once fried.
Allow the chicken to marinate for at least 15-30 minutes at room temperature, or for up to an hour in the refrigerator for deeper flavor penetration. This step is your ticket to achieving juicy, tender chicken that’s destined to be the best part of your meal.
Crafting the Perfect Batter: The Secret to Supreme Crispiness
With your chicken prepped and tenderized by the marinade, our focus shifts to the glorious batter – the golden armor that defines the “crispy” in our Honey Garlic Crispy Chicken. Achieving that unmistakable crunch requires more than just flour; it demands a thoughtful blend and a precise consistency. In my kitchen, the secret lies in a dynamic duo: all-purpose flour and cornstarch.
The Science Behind the Crisp:
The combination of flour and cornstarch is a culinary marvel. While flour provides the bulk and structure, cornstarch plays a crucial role in creating an exceptionally light and crispy coating. Cornstarch contains no gluten, which means when heated, it doesn’t develop a chewy texture. Instead, it forms a brittle, shattering crust that locks in the chicken’s moisture, preventing it from becoming tough or dry. This is my go-to blend for ensuring each piece emerges from the fryer with a golden-brown crispness that’s not only visually appealing but also a delight to your ears and taste buds with every crunch.
Seasoning and Consistency:
To further enhance the flavor of our crispy coating, I whisk together the all-purpose flour and the remaining cornstarch (about half a cup of flour and a third of a cup of cornstarch total, including the marinade’s cornstarch). To this blend, I add just the right amount of garlic powder, black pepper, and for those who appreciate a subtle kick, a pinch of cayenne pepper. These spices don’t just add flavor; they become part of the crispy matrix, ensuring the chicken is delicious even before it meets the honey garlic sauce.
The true magic, however, is in achieving the perfect consistency. After incorporating the seasoned flour mixture into your marinated chicken, you’re looking for a batter that evenly coats each piece without being excessively thick or too runny. Think of a consistency similar to thin pancake batter – it should cling gracefully to the chicken, creating a uniform, thin layer. A batter that’s too thick will result in a heavy, doughy crust, while one that’s too thin won’t offer enough protection or crispness. Achieving this ideal viscosity means your chicken cutlets are perfectly prepared, poised to fry to a gloriously crispy finish that is the very definition of a heavenly, golden bite. This careful attention to batter consistency is what elevates this dish from good to unforgettable.
Frying to Perfection: The Art of Golden Crispiness
You’ve meticulously prepped your chicken, and crafted the ultimate crispy batter – now comes the exhilarating stage of turning those tender pieces into golden bites of heaven. Frying might seem daunting, but with a few key techniques, you’ll achieve restaurant-quality crispiness every time. The secret to perfectly fried chicken lies in two critical factors: precise oil temperature and strategic frying methods.
Temperature is Key:
The most crucial element is maintaining your frying oil at a steady 375°F (190°C). Investing in a reliable kitchen thermometer is invaluable here. If the oil is too cool, the chicken will absorb excessive oil, resulting in a greasy, soggy crust. If it’s too hot, the exterior will brown too quickly, potentially burning before the chicken inside is fully cooked. A consistent 375°F ensures each piece of chicken cooks evenly, developing that desired golden-brown perfection without becoming overly oily. Use enough oil to generously submerge the chicken pieces, typically about 2-3 inches deep in a heavy-bottomed pot or Dutch oven.
Batch Frying for Optimal Results:
Carefully lower the battered chicken pieces into the hot oil. It’s imperative not to overcrowd the pan. Frying in small batches is essential because adding too much chicken at once drastically lowers the oil’s temperature, leading to the dreaded soggy chicken. Give each piece enough space to fry freely, allowing the heat to circulate evenly around it.
After about 3 minutes of sizzling, golden transformation, use a slotted spoon or tongs to gently turn the chicken pieces. This ensures an even golden crust forms on all sides. This brief period is where the magic happens – watch as the batter solidifies into that beautiful crispy coat. Once golden brown and firm, carefully remove the chicken from the oil.
The Double Fry Method:
For an unparalleled level of crispiness, I highly recommend a double-fry method. After the initial fry, place the chicken on a wire rack set over a baking sheet (or on paper towels) to drain any excess oil. Let it rest for about 5 minutes. This resting period allows the internal temperature to equalize and the surface to slightly cool, preparing it for the second fry. Then, return the chicken to the hot oil for another 1-2 minutes, or until it reaches a deep golden brown and is audibly crisp. This second fry is what truly locks in that incredible crunch, creating a shell that perfectly withstands the sticky sauce. Once achieved, remove the chicken and let it drain again.
This attention to detail in the frying process ensures you achieve crispy chicken pieces that are just waiting to be coated in that delicious sticky honey garlic sauce. There you have it, my friends – the secret to achieving truly golden, crispy perfection.
Creating the Honey Garlic Sauce: A Symphony of Sweet and Savory
The heart and soul of our Golden Bites of Heaven is undoubtedly the sticky, luscious honey garlic sauce. This is where sweet meets savory in a dazzling display of flavor, transforming humble fried chicken into an extraordinary culinary delight. Achieving the perfect balance and consistency for this sauce is simpler than you might think with the right approach.
Aromatic Foundations:
First things first, grab a small saucepan and place it over medium heat. Add just enough olive oil (or canola oil) to lightly coat the bottom of the pan. Once the oil begins to shimmer, indicating it’s hot enough, toss in your finely chopped fresh garlic and fresh ginger. These aromatics are the cornerstone of the sauce’s robust flavor profile. Sauté them gently, stirring continuously, until they become fragrant and just begin to turn golden brown – typically about 1-2 minutes. Be careful not to burn them, as burnt garlic or ginger can impart a bitter taste to your sauce.
Building the Flavor Base:
Next, it’s time to introduce the core liquid ingredients. Pour in your silky honey, rich brown sugar, and a generous splash of both soy sauce and lemon juice. Add the sesame oil at this stage as well, allowing its nutty aroma to meld with the other ingredients. Stir everything together until the brown sugar has fully dissolved and all the ingredients are well combined. Bring the mixture to a gentle simmer over medium heat, stirring occasionally. This simmering allows the flavors to deepen and marry, creating a cohesive and complex taste. The honey and brown sugar will begin to caramelize slightly, adding to the sauce’s depth and beautiful sheen.
Achieving Perfect Consistency with a Slurry:
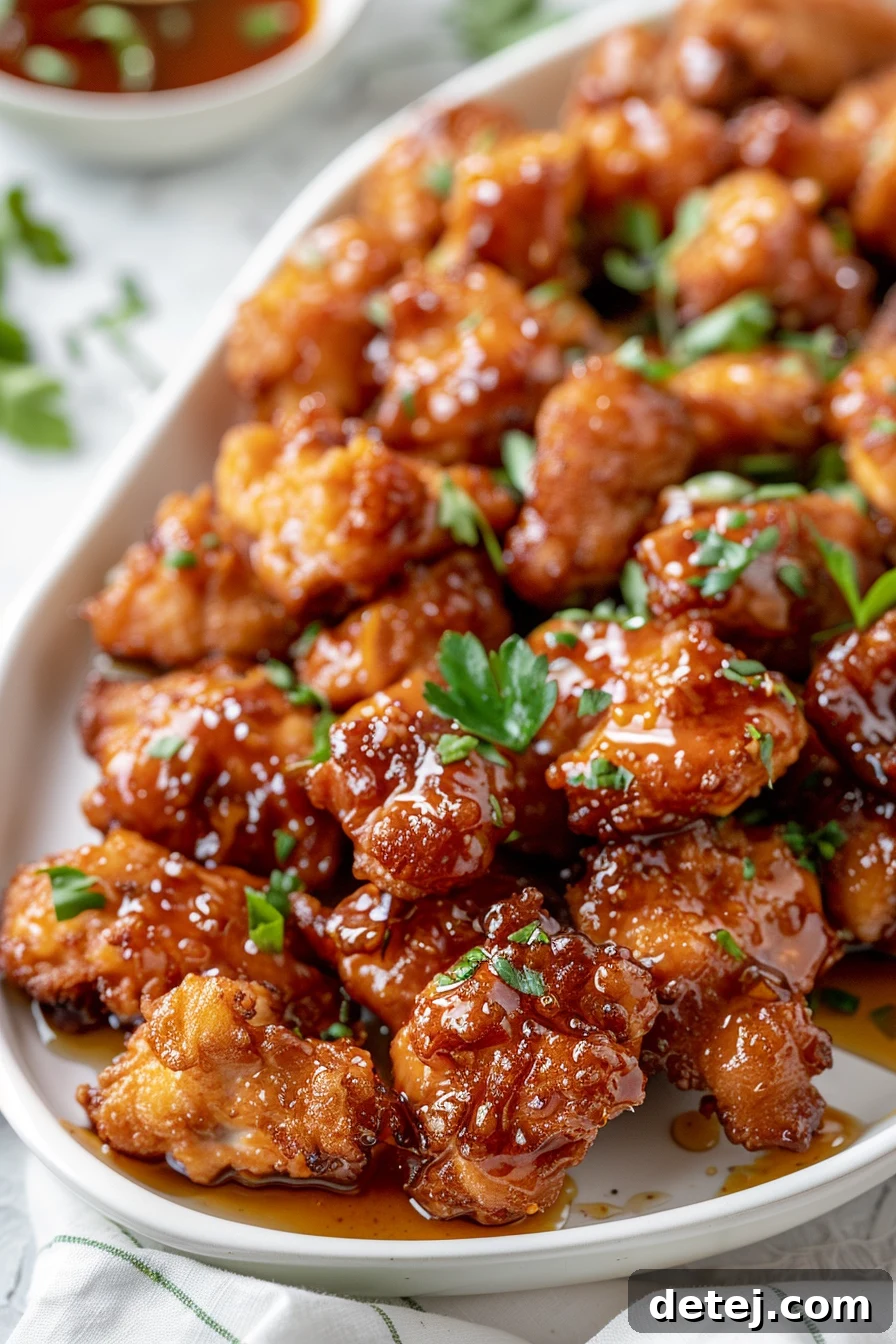
Now, for the secret to that perfectly sticky, glossy sauce consistency: the cornstarch slurry. In a separate small bowl, whisk together two tablespoons of cornstarch with a quarter cup of cold water until completely smooth and lump-free. This slurry is your thickening agent. While your sauce continues to simmer gently in the saucepan, slowly pour in the cornstarch slurry in a thin stream, stirring constantly. You’ll notice an almost immediate transformation as the sauce thickens and takes on a beautiful glossy sheen. Continue to cook on low heat, stirring, until the sauce reaches your desired consistency – it should be thick enough to cling to the back of a spoon, but still pourable. This balance between runny honey sweetness, the savory depth of soy, and the aromatic notes of ginger and garlic is what makes this sauce truly unforgettable.
There you have it – a perfectly crafted honey garlic sauce, ready to embrace your crispy chicken and elevate it to new heights. You’ve done it!
Combining Chicken and Sauce: The Grand Finale
This is where all your hard work culminates into the truly magical dish you’ve been dreaming of. After achieving that irresistible golden-brown crispiness with your chicken and perfecting the velvety, aromatic honey garlic sauce, the final step is to bring these two stars together. Trust me, the way you combine them can make or break the dish, ensuring every bite is a symphony of flavor and texture.
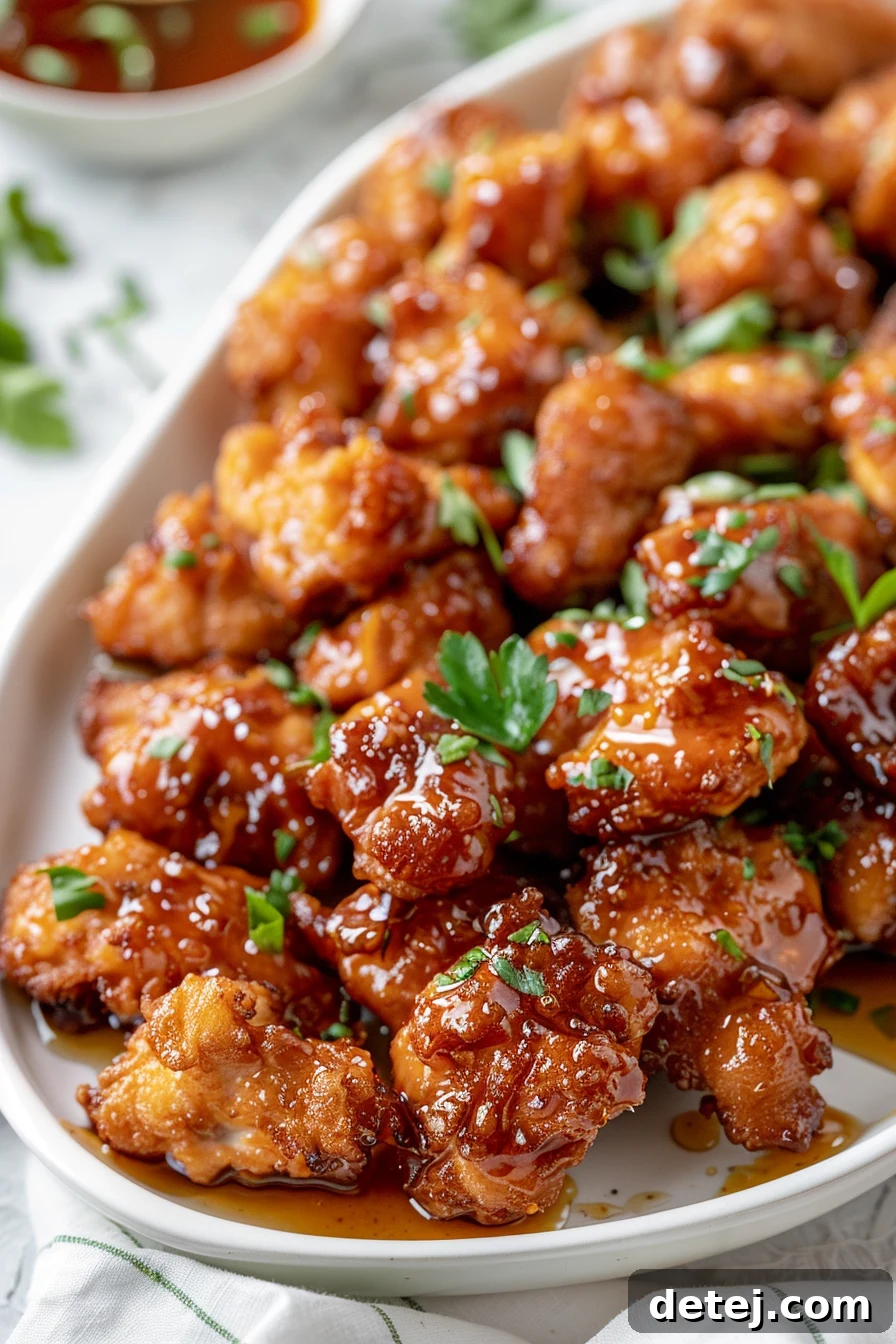
The key here is gentle efficiency. You want to generously coat each piece of crispy chicken in that glorious, sticky honey garlic sauce without losing the precious crunch you worked so hard to achieve. The goal is a loving embrace, not a drowning. Transfer your freshly fried, drained chicken pieces into the saucepan with your warm sauce. Using tongs or a spatula, gently toss the chicken until every piece is evenly covered. The sauce should cling beautifully to the chicken, creating a glistening, irresistible glaze that highlights both the sweet and savory notes, along with any optional heat you’ve added. It should enhance, not soften, the chicken’s exterior.
And here’s a crucial tip straight from my kitchen to yours: serve it up hot and fast. The moment the chicken is perfectly coated, it’s ready to be devoured. Transferring it directly from the stove to your plates ensures that each bite remains as crispy and delicious as intended, maximizing the contrast between the crunchy exterior and the tender, juicy interior, all enveloped in that amazing sauce. The longer it sits, the more the sauce will penetrate the crust, inevitably reducing its crispness. So, the next time you’re craving something truly delightful, remember this golden duo works best when fresh and served immediately!
Essential Tips and Tools for Success
Achieving culinary excellence often comes down to having the right tools and knowing a few clever tricks. This Honey Garlic Crispy Chicken recipe is no exception. Here are my top tips and indispensable kitchen essentials to help you perfect this dish:
Helpful Tips for an Amazing Dish:
- Mise en Place: Before you begin cooking, get all your ingredients prepped and laid out. This French culinary term means “everything in its place” and will make the cooking process smooth, efficient, and enjoyable, preventing any last-minute scrambles.
- Don’t Rush the Fry: As mentioned, maintaining oil temperature and frying in batches are critical. Rushing this step will compromise the crispiness and overall quality of your chicken. Patience is a virtue in frying!
- Taste and Adjust the Sauce: Before combining the chicken, taste your honey garlic sauce. Is it sweet enough? Does it need more tang from lemon juice or more umami from soy sauce? Adjust to your personal preference.
- Garnish for Impact: A sprinkle of toasted sesame seeds or fresh chopped green onions not only adds a burst of color but also a delightful textural contrast and fresh flavor to the finished dish.
- Consider a Slotted Spoon: When adding the chicken to the batter, a slotted spoon can help lift the chicken from the marinade, allowing excess liquid to drain before coating, ensuring a crispier result.
My Favorite Kitchen Tools:
Having the right equipment can make a significant difference in both the ease of preparation and the quality of your final dish. Check out my kitchen essentials, where you’ll find my favorite tools, spices, and more!
- I typically use my dutch oven for frying chicken on the stovetop. Its heavy bottom ensures even heat distribution, which is perfect for maintaining oil temperature.
- After frying, I rely on these cooling racks to drain excess oil from the chicken, keeping it beautifully crispy while it rests.
- Using my garlic press makes mincing fresh garlic and ginger a breeze, saving time and effort while ensuring maximum flavor.
- For coating chicken and tossing it in the sauce, these large mixing bowls are incredibly versatile and essential.
- A good kitchen thermometer (not linked but highly recommended) is indispensable for monitoring oil temperature during frying.
By keeping these tips in mind and utilizing the right tools, you’re well on your way to mastering this delightful Honey Garlic Crispy Chicken and impressing everyone at your table.
A Perfect Pair: Thoughtful Serving Suggestions
Once you’ve successfully crafted this mouthwatering masterpiece of crispy honey garlic chicken, the final flourish lies in how you present and pair it. Just like adding the finishing brushstrokes to a masterpiece painting, the right sides and garnishes can elevate a delicious meal into an unforgettable dining experience. The versatility of this dish allows for a range of accompaniments, each contributing to a perfectly balanced and visually appealing meal.
Classic Pairings:
- Fluffy White Rice: A timeless companion, a bowl of perfectly cooked fluffy white rice acts as an ideal canvas to absorb every drop of that irresistible honey garlic sauce. Its mild flavor beautifully complements the richness of the chicken.
- Steamed Green Vegetables: For a refreshing contrast and added nutrition, serve with tender-crisp green beans, broccoli florets, or asparagus. A light steaming ensures they retain their vibrant color and slight crunch, providing a fresh counterpoint to the savory chicken.
Beyond the Basics:
- Noodle Dishes: Consider pairing with a simple stir-fried noodle dish or even a light cold noodle salad to expand on the Asian-inspired flavors.
- Quinoa or Brown Rice: For a healthier, heartier option, quinoa or brown rice can offer a nutty flavor and more fiber, making the meal even more substantial.
- Crisp Salad: A light, crisp salad with a ginger-sesame vinaigrette can provide a wonderful textural and flavor contrast, especially on warmer days.
Garnishes for Elevated Presentation:
Don’t underestimate the power of a simple garnish to add that extra pop of flavor and visual appeal:
- Toasted Sesame Seeds: A sprinkle of lightly toasted sesame seeds not only adds a beautiful visual texture but also a subtle nutty crunch that complements the sauce perfectly.
- Finely Chopped Spring Onions (Scallions): Their mild, fresh onion flavor and vibrant green color provide a wonderful contrast and freshness.
- Fresh Cilantro or Parsley: A few sprigs of fresh herbs can add an aromatic touch and a pop of green, brightening the dish.
It’s these thoughtful little details that can transform a simply delicious meal into an extraordinary culinary moment, leaving a lasting impression on your guests.
And That’s a Wrap! Your Honey Garlic Crispy Chicken Journey
And there you have it, fellow food enthusiasts! Crafting this Golden Bites of Heaven: Honey Garlic Crispy Chicken has been a thrilling culinary journey that I’m absolutely delighted we’ve embarked on together. From understanding the nuances of ingredient selection to mastering the art of the perfect crispy batter and concocting that luscious, sticky sauce, every step is a testament to the joy and satisfaction that cooking brings.
The excitement of diving into new recipes, the mesmerizing sizzle of chicken hitting the hot oil, and that glorious moment when every component perfectly combines into a mouthful of sweet, savory bliss – these are the pure pleasures we chase in our kitchens. This dish isn’t just about feeding your body; it’s about nourishing your soul, igniting your passion for cooking, and creating memorable moments around the dinner table.
So, why wait for a special occasion? Make any night of the week unforgettable with this sensational dish. It’s more than just a meal; it’s an invitation to explore, to create, and to share. Believe me, the smiles, nods of approval, and requests for seconds around your dinner table will be the most rewarding applause. Here’s to many more delicious discoveries, to the courage to experiment, and to the profound satisfaction of serving up a dish that is bound to impress and delight every single time. Cheers to cooking, to exploring, and to the simple, golden pleasures of a meal exquisitely made!
★
★
★
★
Honey Garlic Crispy Chicken
Pin
Rate
Ingredients
- 1 lb boneless skinless chicken thighs, cut into bite sized pieces
- 1 egg
- 1 tbsp vegetable oil
- 1/3 cup cornstarch
- 1/2 cup all-purpose flour
- 1 tbsp soy sauce
- 1/2 tsp black pepper
- Honey garlic sauce:
- 1/2 cup soy sauce
- 1/4 cup water, for slurry
- 5 tablespoons honey
- 1/2 teaspoon sesame oil
- 2 tablespoons brown sugar
- 2 tablespoons cornstarch, for slurry
- 1 1/2 teaspoons minced garlic
- 1 tablespoon fresh ginger , finely chopped
- 1 tablespoon green onions , optional
- 1 tablespoon parsley , optional
Instructions
- In a mixing bowl, combine the cubed chicken thighs with egg, 1/3 cup of cornstarch, and 1 tbsp soy sauce. Mix thoroughly and set aside to marinate.
- To prepare the sauce, mix 1/2 cup soy sauce, 1/4 cup water, honey, and brown sugar in a bowl. In a separate pan, heat 1 tbsp vegetable oil over medium-high heat and cook ginger and garlic until they become fragrant and soft (about 1-2 minutes).
- Pour in the soy sauce mixture, stirring occasionally, and bring to a gentle simmer.
- While the sauce cooks, make a slurry by mixing 2 tablespoons of cornstarch and 1/4 cup of water in a small bowl until smooth.
- Gradually add the slurry to the simmering sauce while stirring constantly. Cook over medium-low heat until the sauce thickens to a glossy consistency. Stir in the sesame oil.
- For the fried chicken, whisk together the remaining 1/2 cup all-purpose flour and any remaining cornstarch (if not used in marinade) in a separate bowl. Add this dry mixture to the bowl of marinated chicken, ensuring each piece is fully coated.
- Heat about 2 inches of frying oil in a Dutch oven or deep pan to 375°F (190°C). Fry the chicken in batches for about 3 minutes until lightly golden. Remove from the oil and place on a wire rack to drain for about 5 minutes.
- Fry the chicken again for another 1-2 minutes or until deeply golden brown and extra crispy. Remove from the oil and drain excess oil on the wire rack.
- Combine the freshly fried chicken with the cooked honey garlic sauce in the pan. Gently toss until every piece of chicken is evenly coated.
- Serve immediately, garnished with green onions or parsley if desired, for the best crispy texture and flavor.
Did you make this recipe?
Please leave a star rating and review below!