
The Secret to Perfect Flaky Buttermilk Biscuits: A Recipe with Real Ingredients
Imagine the irresistible aroma of freshly baked buttermilk biscuits filling your kitchen, promising warmth, comfort, and pure indulgence. Envision biting into a light, tender, and incredibly flaky biscuit, made from scratch with simple, wholesome ingredients. This isn’t a dream – it’s an achievable reality with our unbelievably simple technique. Forget complicated steps or exotic components; this comprehensive guide will transform you into a seasoned biscuit baker, crafting mouthwatering homemade biscuits that will have everyone begging for more. So, tie on your apron, preheat your oven, and prepare to embark on a delightful journey to biscuit bliss, discovering the joy of baking the best buttermilk biscuits you’ve ever tasted.
Why These Buttermilk Biscuits Stand Out
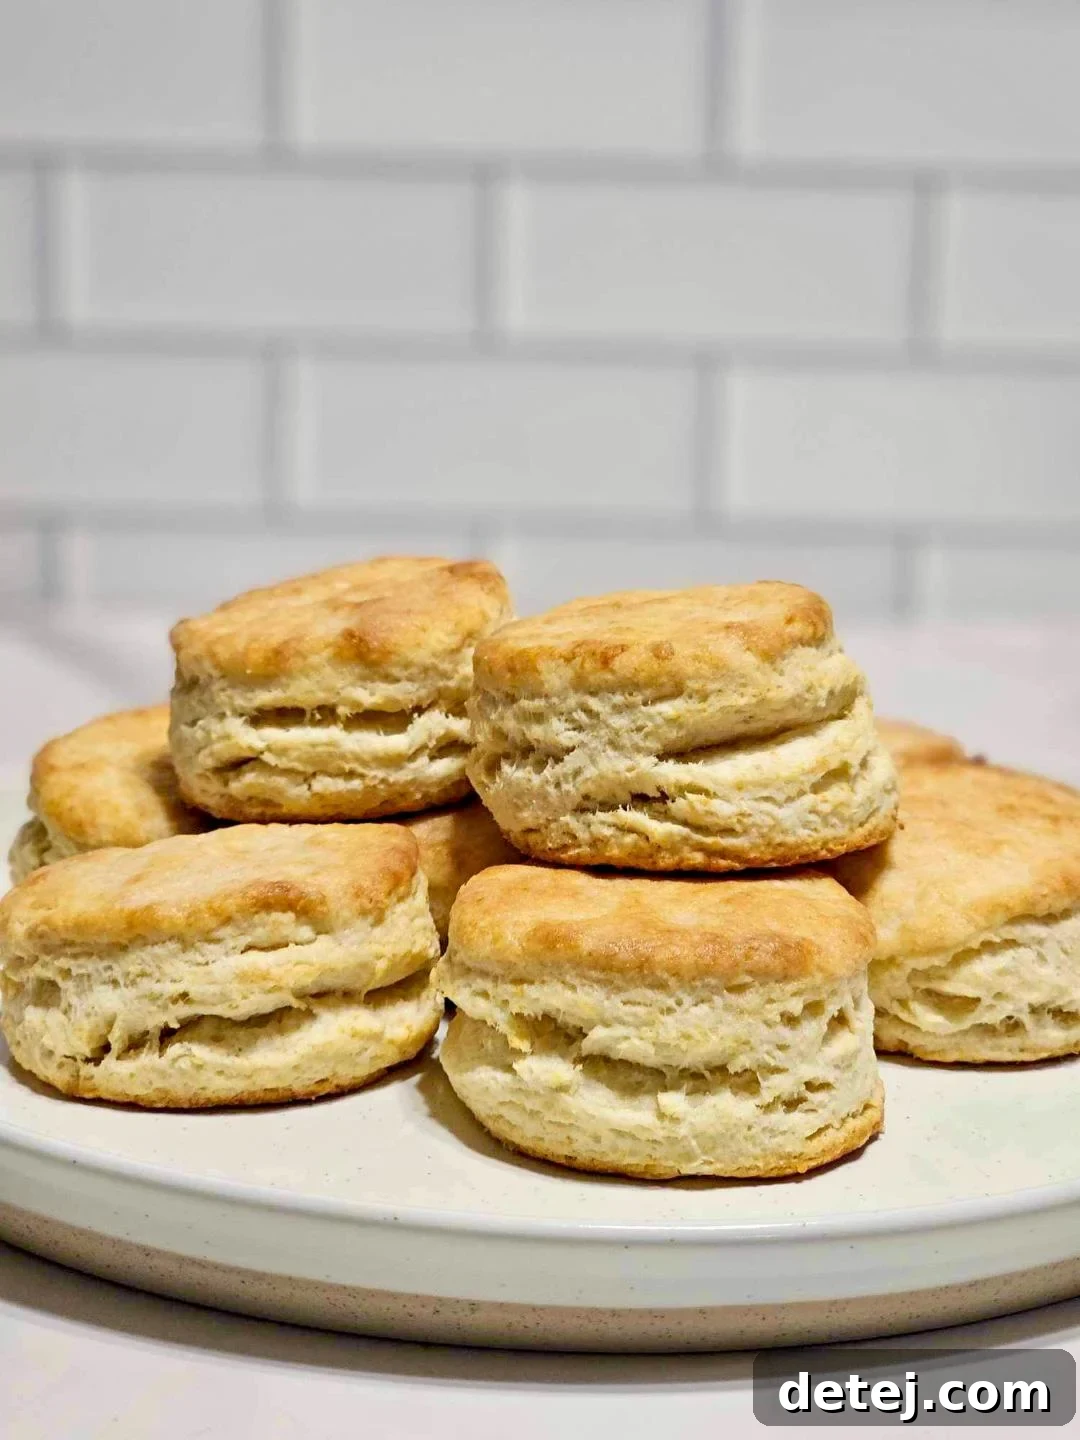
What truly sets these buttermilk biscuits apart? It’s the thoughtful combination of time-honored techniques and an unwavering commitment to using only the finest real ingredients. Many recipes promise ease, but often fall short on delivering genuine flavor or the quintessential flaky texture. Here, we strike the perfect balance between simplicity and gourmet quality. Each step, from the careful selection of components to the precise method of mixing and baking, is designed to maximize the flakiness and tenderness, resulting in biscuits that are crispy on the outside, remarkably soft and layered on the inside, and bursting with a rich, buttery tang. Whether served with sweet jam and honey for a cozy breakfast, as a comforting side for a savory dinner, or simply enjoyed on their own as a delightful snack, these biscuits are destined to become a beloved staple in your kitchen and a testament to the power of homemade goodness.
Beyond their exquisite taste and texture, there’s a unique satisfaction that comes from baking something so delicious from scratch. The process itself is therapeutic, and the reward—a plate of warm, golden-brown biscuits—is truly priceless. This recipe isn’t just about making food; it’s about creating memories, sharing joy, and bringing a touch of authentic, wholesome comfort to your home.
Gathering Your Essential Real Ingredients for Flaky Buttermilk Biscuits
The foundation of any truly exceptional recipe lies in the quality of its ingredients. For these incredible buttermilk biscuits, quality and freshness are not just recommended, they are paramount, yet the list remains wonderfully straightforward and accessible. Using real, readily available items ensures a superior flavor profile and an unparalleled texture that processed or inferior alternatives simply cannot replicate. Here’s your essential checklist for crafting the most tender and flaky buttermilk biscuits imaginable:
- All-Purpose Flour: This forms the structural backbone of your biscuits, providing the necessary body, elasticity, and volume. For the best rise, purest flavor, and an ultimately tender crumb, always opt for unbleached all-purpose flour. Bleached flour, having undergone chemical treatment, can sometimes lead to a tougher texture due to altered protein structures, making unbleached the superior choice for delicate baked goods like biscuits.
- Baking Powder: A crucial chemical leavening agent, baking powder is solely responsible for those magnificent, airy layers and the characteristic lofty rise of a perfect biscuit. Its effectiveness hinges on its freshness; ensure your baking powder is active by checking its expiration date. Old or inactive baking powder will result in flat, dense, and disappointing biscuits, so never overlook this vital detail. For consistent results, a double-acting baking powder is recommended as it provides lift both when mixed with liquid and when exposed to oven heat.
- Baking Soda: Working in perfect harmony with the buttermilk, baking soda reacts with the buttermilk’s natural acidity to produce carbon dioxide gas. This reaction significantly contributes to a wonderfully tender, moist, and well-risen texture. Like baking powder, baking soda’s potency diminishes over time, so always verify its freshness to guarantee its efficacy in your recipe.
- Salt: While seemingly minor, a small pinch of salt is a mighty ingredient. It doesn’t just add seasoning; it acts as a flavor enhancer, intensifying the subtle sweetness and balancing the richness of the butter and the tangy notes of the buttermilk. For even distribution throughout the dough and consistent flavor in every bite, use a fine-grain salt.
- Unsalted Butter: The undeniable hero for achieving that irresistible richness and, most importantly, creating those coveted flaky layers that define an outstanding biscuit. It is absolutely imperative that your butter is very cold and cut into small cubes or, as our recipe suggests, grated before being incorporated into the dry ingredients. When cold butter encounters the heat of the oven, it creates pockets of steam that push the dough upwards, forming distinct, delicate, and delicious layers. Using unsalted butter also grants you precise control over the overall salt content of your recipe.
- Buttermilk: The true star ingredient that imparts a unique tangy flavor, a subtle moisture, and contributes significantly to the tender crumb of these biscuits. Its inherent acidity reacts powerfully with the baking soda, aiding efficiently in the leavening process. For the richest taste, most luxurious texture, and optimal chemical reaction, always choose full-fat buttermilk. If genuine buttermilk is unavailable, you can create a suitable substitute by adding one tablespoon of lemon juice or white vinegar to a liquid measuring cup, then filling the rest with regular milk (preferably whole milk) and letting it sit for 5-10 minutes until it slightly curdles.
With these high-quality, real ingredients meticulously gathered and ready, you’re not just preparing to bake; you’re well on your way to crafting the ultimate southern buttermilk biscuits. The next step involves a technique that truly makes all the difference in the world: mastering the art of mixing with a light and knowing hand.
Master the Art of Mixing for Tender and Flaky Biscuits
The mixing process is arguably the most critical stage in achieving the desired light, tender, and famously flaky texture of your buttermilk biscuits. It’s a delicate dance between combining ingredients sufficiently and avoiding the common pitfalls of overworking the dough. The paramount principle here is maintaining a “light hand.” Overmixing vigorously develops the gluten in the flour, transforming it into long, elastic strands that lead to tough, chewy biscuits instead of the delicate, melt-in-your-mouth kind we’re aiming for. Let’s delve into the nuances of this crucial step to ensure biscuit perfection.
Initial Dry Ingredient Combination
Begin by meticulously whisking together all your dry ingredients – the all-purpose flour, baking powder, baking soda, and salt – in a large mixing bowl. If you’re utilizing a stand mixer, ensure it’s fitted with the paddle attachment. Thoroughly whisking for about 30 seconds ensures that these crucial leavening agents and salt are evenly distributed throughout the flour. This step is often underestimated but is absolutely vital for guaranteeing a consistent rise, uniform texture, and balanced flavor in every single biscuit. An uneven distribution can result in some biscuits rising beautifully while others remain flat and dense.
Incorporating Cold Butter for Flakiness
Next comes the very cold butter. The colder the butter, the more distinct and pronounced your flaky layers will be. You have two primary methods: cutting it into small, pea-sized cubes using a pastry blender or your fingertips, or as our recipe specifically suggests, grating it directly into the dry ingredients using a cheese grater. Grating butter creates very small, fine shreds that disperse more evenly through the flour without requiring extensive handling. Once the butter is in, gently work it into the flour mixture using your fingertips, a pastry blender, or the paddle attachment on the lowest speed. Work quickly and efficiently to prevent the butter from warming up and melting prematurely. The goal is a mixture that resembles coarse crumbs, with some pieces of butter still visible – these visible bits of cold butter are your secret weapon, as they will create the pockets of steam that lead to those desirable flaky layers during baking.
The Gentle Addition of Buttermilk
Once the butter is incorporated, create a shallow well in the center of your butter-flour mixture. Pour in the cold buttermilk. Now, with a silicone spatula or a sturdy fork, gently stir the buttermilk into the dry mixture. The key instruction here is to combine the ingredients just until no dry spots remain and the mixture barely comes together. The dough will look notably shaggy, rough, and slightly crumbly, not perfectly smooth or cohesive. This minimal mixing is absolutely critical to prevent extensive gluten development, thereby preserving the tender, melt-in-your-mouth structure of your future biscuits. Stop as soon as the ingredients are barely cohesive; it’s always far better to slightly undermix than to risk overmixing. A few quick, gentle strokes are often all it takes to bring the dough to the correct consistency.
By respecting the integrity of the dough and employing these mindful mixing techniques, you are laying a robust and essential foundation for perfectly tender and flaky buttermilk biscuits. With your dough expertly mixed, the next delightful step awaits: shaping and cutting these promising morsels into their iconic forms.
Shape and Cut Your Buttermilk Biscuits with Precision and Care
Having perfected the delicate art of mixing, ensuring your dough is just right, it is now ready for its transformation into beautiful, individual biscuits. This stage is where your patience and light touch continue to be rewarded, as precise shaping and cutting are absolutely essential for optimal rise, uniform baking, and that signature flaky texture. Remember, every action at this point directly contributes to the final outcome of your magnificent homemade buttermilk biscuits.
Preparing Your Work Surface and Handling the Dough
First, lightly flour a clean work surface or a large cutting board. This crucial step prevents the dough from sticking without the need to incorporate too much additional flour, which can inadvertently dry out your biscuits. Gently turn the shaggy, slightly crumbly dough out onto this floured surface. The guiding principle here remains minimal handling: work the dough as little as possible to maintain its cold temperature and, more importantly, to preserve the delicate air pockets that have formed during the mixing process. These nascent air pockets are paramount for the light, airy texture you desire in the finished product, so handle the dough with a genuinely light and respectful touch.
The Folding Technique: Building Layers for Ultimate Flakiness
Instead of simply rolling out the dough once, we will employ a classic technique known as “folding” or “lamination.” This method is a secret weapon for creating multiple, distinct layers within each biscuit, significantly enhancing their flakiness. Gently pat or press the dough into a rough rectangle, aiming for a thickness of about 1/2 to 3/4 inch. Once formed, fold one side of the rectangle into the middle, followed by the other side, much like folding a letter for an envelope. After this first fold, rotate the dough horizontally a quarter turn, gently flatten it into a rectangle again, and then repeat this exact folding process two more times. This sequential layering technique is what truly gives these biscuits their exceptionally high rise and magnificent flaky texture. After the final fold, gently pat or roll the dough into a cohesive rectangle approximately 10 x 7 inches and about 1 inch thick, ready for cutting.
The Art of Cutting Biscuits: The “No Twist” Rule
Now, for the exciting part: cutting the biscuits! Dip your chosen biscuit cutter (a 3-inch round cutter is typically ideal for standard-sized biscuits) into flour before each cut to prevent the dough from sticking to the cutter. Press the cutter firmly straight down into the dough. **Crucially, do not twist the cutter.** Twisting can inadvertently seal the delicate edges of the biscuit, preventing it from rising properly in the oven and severely hindering the formation of those beautiful, airy layers. Lift the cutter straight up, and you’ll be left with a perfectly shaped biscuit round. As you cut, try to place the cuts as closely together as possible to minimize the amount of dough scraps.
Arranging for Baking and Handling Scraps Efficiently
Carefully transfer each precisely cut biscuit round to a baking sheet that has been lined with parchment paper. Ensure you leave a small amount of space between each biscuit (about an inch) to allow for adequate expansion during baking without them merging into one another. For the remaining dough scraps, gather them gently – again, with absolutely minimal handling – and lightly press them together to form another rectangle. Avoid the temptation to knead the scraps excessively, as this will develop gluten and result in tougher biscuits. Repeat the cutting process until all the dough has been used. Biscuits from the second or third re-roll might be slightly less flaky due to the extra handling, but they will still be utterly delicious.
With your precisely shaped and cut biscuits artfully arrayed on the baking sheet, you’ve meticulously prepared them for their grand finale. The stage is perfectly set for these little doughy morsels to transform into golden perfection in the oven. Next, we will cover the final, satisfying step: baking to achieve that irresistible golden hue, ultimate tenderness, and unmistakable aroma that only fresh homemade biscuits can provide.
Bake to Golden Perfection: The Grand Finale of Your Buttermilk Biscuits
The journey from simple, real ingredients to delightful homemade biscuits culminates gloriously in the oven, where heat works its transformative magic to turn your carefully prepared dough into golden, flaky masterpieces. This final stage is incredibly crucial, and a watchful eye combined with precise timing will ensure your buttermilk biscuits reach their absolute peak of perfection, both in appearance and texture.
Preheating the Oven and Strategic Placement
Before your meticulously shaped biscuits even touch the baking sheet, it is imperative that your oven is fully preheated to the specified temperature (typically 400°F or 200°C). A hot oven is not just a suggestion; it’s essential for providing an initial burst of steam and facilitating a rapid, robust rise, which contributes significantly to the biscuit’s coveted flakiness. Once all your biscuit rounds are artfully arranged on the parchment-lined baking sheet, make sure they have enough space to expand gracefully. Placing them too close together can inhibit proper air circulation, leading to uneven browning and potentially hindering their magnificent rise.
The Science of the Bake: Unveiling Flakiness
As the baking sheet slides into the intense heat of the oven, the magical transformation truly begins. The tiny pockets of cold butter, strategically incorporated within the dough, rapidly melt and release steam. This steam becomes trapped by the layers of flour, creating internal pressure that effectively forces the layers of dough apart and upwards, resulting in those characteristic, distinct, and highly desirable flaky strata. Simultaneously, the chemical reaction between the baking powder, baking soda, and the buttermilk’s acidity produces carbon dioxide gas, which further expands the dough, contributing to its airy lightness. The exterior of the biscuits will gradually transition from a pale, unassuming hue to a magnificent golden brown, while the interior blossoms into a light, tender, and beautifully layered crumb.
Monitoring for Doneness and Achieving the Perfect Hue
Baking times can vary slightly from oven to oven due to calibration differences, but typically, these exceptional buttermilk biscuits bake for approximately 12 to 18 minutes. It is vital to keep a close and vigilant eye on them, especially during the final few minutes of baking. You are looking for a gorgeous, even golden-brown color on the tops and slightly more browned, crispy edges. The biscuits should appear wonderfully puffed up and feel remarkably light when gently lifted. To confidently check for doneness, you can carefully remove one biscuit from the center of the tray (where they tend to bake slowest) and gently break it open; the inside should be cooked through, no longer doughy, and beautifully layered. Avoid the temptation to overbake, as this can lead to dry, crumbly, and less flavorful biscuits.
Cooling and Irresistible Serving Suggestions
Once your homemade buttermilk biscuits have achieved their golden perfection, carefully remove the baking sheet from the oven. For the absolute best texture, immediately transfer the hot biscuits to a wire rack to cool slightly. While they are undeniably delicious eaten warm directly from the oven, a brief cooling period allows the internal steam to redistribute, setting the crumb and preventing them from becoming soggy. Serve your warm, fragrant buttermilk biscuits immediately with a generous pat of softened butter, your favorite homemade fruit jam, a drizzle of local honey, or as the perfect accompaniment to a hearty savory meal like classic southern fried chicken, rich sausage gravy, or a comforting stew. The culinary possibilities are truly endless, and the immense joy of sharing these freshly baked treats with family and friends is immeasurable.
You’ve now successfully mastered the art and science of creating tender, flaky, and utterly delicious buttermilk biscuits from scratch. Each meticulous step, from the initial selection of real, high-quality ingredients to the final precise bake, contributes directly to a culinary triumph that will impress and delight everyone at your table. Embrace your newfound baking prowess and generously share the warmth, authenticity, and unparalleled comfort that only homemade goodness can truly provide.
Crafting delectable buttermilk biscuits from scratch has become effortlessly achievable, fueling your kitchen with the warmth of authenticity and homemade joy.
Krystel’s Cooking
In conclusion, the journey to baking the best buttermilk biscuits is an incredibly rewarding one, bringing an abundance of incredible flavor, comforting aromas, and profound satisfaction into your home. By thoughtfully selecting pure, high-quality ingredients, mastering the gentle art of mixing with precision, shaping with a mindful and delicate touch, and finally baking to a perfect golden hue, you unlock a timeless recipe that is both remarkably budget-friendly and profoundly gratifying. This simple yet sophisticated technique effortlessly transforms ordinary pantry staples into an extraordinary delicacy that will captivate your loved ones, elevate any meal, and become a cherished culinary tradition. Why wait another moment? Unleash your inner baker today and embark on this mouthwatering biscuit-baking adventure. As you savor the delicious fruits of your labor, remember Julia Child’s timeless and inspiring wisdom: “Cooking is like love, it should be entered into with abandon or not at all.” Happy baking, and may your kitchen always be filled with the sweet scent of success!
Classic Flaky Buttermilk Biscuits
12
10 mins
15 mins
25 mins
Krystel
Ingredients
- 2 ½ cups all-purpose flour
- 2 tablespoons baking powder
- 1 teaspoon salt
- 1/2 cup very cold unsalted butter, grated
- 1 cup + 3 Tablespoons cold full-fat buttermilk
Instructions
-
Begin by preheating your oven to 400°F (200°C).
-
In a large mixing bowl, combine the flour, baking powder, and salt. Whisk until they are thoroughly mixed and evenly distributed.
-
Take the very cold butter and grate it directly into the dry ingredients using a cheese grater. Gently mix the butter into the flour mixture with your fingertips or a pastry blender until it resembles coarse crumbs, with some pea-sized butter pieces still visible. Work quickly to keep the butter cold.
-
Create a well in the center of the butter-flour mixture, then pour in the cold buttermilk. Use a silicone spatula or a sturdy fork to stir it in until just combined. Be careful not to overmix; the dough will have a shaggy, slightly crumbly texture.
-
Transfer the dough to a lightly floured surface. Gently pat or press the dough into a rectangle about 1/2 to 3/4 inch thick.
-
Fold the left side of the rectangle into the middle, followed by the right side (like folding a letter).
-
Rotate the dough horizontally, gently flatten it into a rectangle again, and repeat the folding process two more times. This layering technique helps create beautifully flaky biscuits.
-
After the final fold, gently pat or roll the dough into a 10 x 7 inch rectangle that’s approximately 1-inch thick.
-
With a 3-inch round biscuit cutter, cut out biscuits. Dip the cutter in flour before each cut. Press it firmly straight down without twisting, as twisting can seal the edges and inhibit rising. Flour the cutter as needed between cuts. To keep the dough cool, you can store the cutouts or remaining dough in the fridge briefly.
-
Place the cut biscuits onto a baking sheet lined with parchment paper, leaving about an inch of space between each. Gather the remaining dough scraps, gently press them together (without kneading), roll to 1-inch thickness, and cut out any additional biscuits. In total, you should have around 8-10 biscuits ready to bake depending on how many times you re-roll.
-
Bake for 12-18 minutes, or until the tops are golden brown and the biscuits are puffed and cooked through. Serve warm immediately with butter, jam, or your favorite toppings.