

These exquisite heart-shaped Chocolate Sugar Cookies are the ultimate vegan indulgence, tailor-made for chocolate enthusiasts! Luxuriously soft, delightfully chewy, and elegantly adorned with a simple, dreamy icing, they are an essential treat for Valentine’s Day, Christmas, or any festive occasion that calls for a touch of sweetness.
Are you searching for more delightful and festive cookie recipes? Be sure to explore our popular Lofthouse Cookies and our wonderfully crumbly Vegan Shortbread Cookies. For an effortlessly delicious twist on classic sugar cookies, you’ll absolutely adore our Vegan Sugar Cookie Bars, perfect for sharing or enjoying all to yourself.

While a classic vegan sugar cookie always hits the spot with its soft texture and endless decorating possibilities, true chocolate aficionados crave something richer. That’s where these incredibly easy-to-make Vegan Chocolate Sugar Cookies come in! They offer all the fun of decorating traditional sugar cookies, but with an irresistible depth of chocolate flavor that will captivate your taste buds.
Crafting these vegan chocolate sugar cookies is a breeze, requiring just one bowl for the dough. This simplicity makes them not only enjoyable to prepare but also a joy to devour. They are absolutely perfect as vegan Valentine’s Day cookies, easily cut into charming heart shapes and finished with our simple, four-ingredient vegan icing. But don’t let Valentine’s Day be your only excuse! Their versatility means you can effortlessly customize them for any holiday or special event, whether it’s Christmas, St. Patrick’s Day, Halloween, or even a birthday celebration. Imagine them shaped as snowflakes, shamrocks, or spooky ghosts, each with a rich chocolate base.
These cookies aren’t just a dessert; they’re an experience. They bring people together, spark creativity in the kitchen, and deliver a delightful chocolatey treat that caters to everyone, regardless of dietary preferences. Forget about complicated recipes or animal products – these cookies prove that decadent, homemade treats can be entirely plant-based and incredibly simple to achieve. Get ready to bake a batch that will impress and satisfy every chocolate lover in your life!
Why These Vegan Chocolate Sugar Cookies Are a Must-Try
These delightful vegan chocolate sugar cookies are quickly becoming a favorite for many reasons. From their irresistible taste to their straightforward preparation, they offer a perfect blend of convenience and indulgence. Here’s why you’ll undoubtedly fall in love with them:
- The Ultimate Valentine’s Day Dessert (and Beyond!): Nothing says “I love you” quite like homemade chocolate cookies. These heart-shaped wonders are infused with care and a deep chocolate flavor that will melt hearts. Guests and loved ones alike won’t be able to resist their charming heart shapes and festive pink sprinkles (or any sprinkles you choose!). Beyond Valentine’s Day, their rich chocolate base makes them ideal for Christmas, birthdays, or just a sweet pick-me-up.
- A Truly Beginner-Friendly Recipe: If you’re new to baking or simply prefer hassle-free recipes, these cookies are your new best friend. The sugar cookie dough comes together effortlessly in just one bowl, utilizing common, readily available pantry staples. This streamlined process means less cleanup and more enjoyment, making it a fantastic recipe for both novice and experienced bakers alike to achieve perfect results every time.
- Universally Appealing – Adult and Kid-Friendly: These chocolate cookies are designed to be loved by everyone! Their soft, chewy texture and rich cocoa flavor appeal across all age groups. Whether you’re baking for your significant other, your children, or a crowd of friends and family, these delightful treats are guaranteed to be a hit. The fun of decorating adds an extra layer of enjoyment, making them a fantastic activity for kids and adults to do together.
- Dairy-Free and Delicious: As a fully vegan recipe, these cookies are completely dairy-free, egg-free, and animal-product-free, making them suitable for those with dietary restrictions or ethical preferences. You don’t have to sacrifice flavor or texture for a plant-based treat; these cookies are every bit as indulgent and satisfying as their traditional counterparts.
- Customizable for Any Celebration: While perfect for Valentine’s Day, the versatility of this recipe is outstanding. Change your cookie cutters to stars for Christmas, pumpkins for Halloween, or even simple circles for an everyday treat. Adjust the icing colors and sprinkles to match any theme, ensuring these cookies fit seamlessly into all your celebratory plans throughout the year.

Essential Ingredients for Perfect Vegan Chocolate Sugar Cookies (with Smart Substitutions)
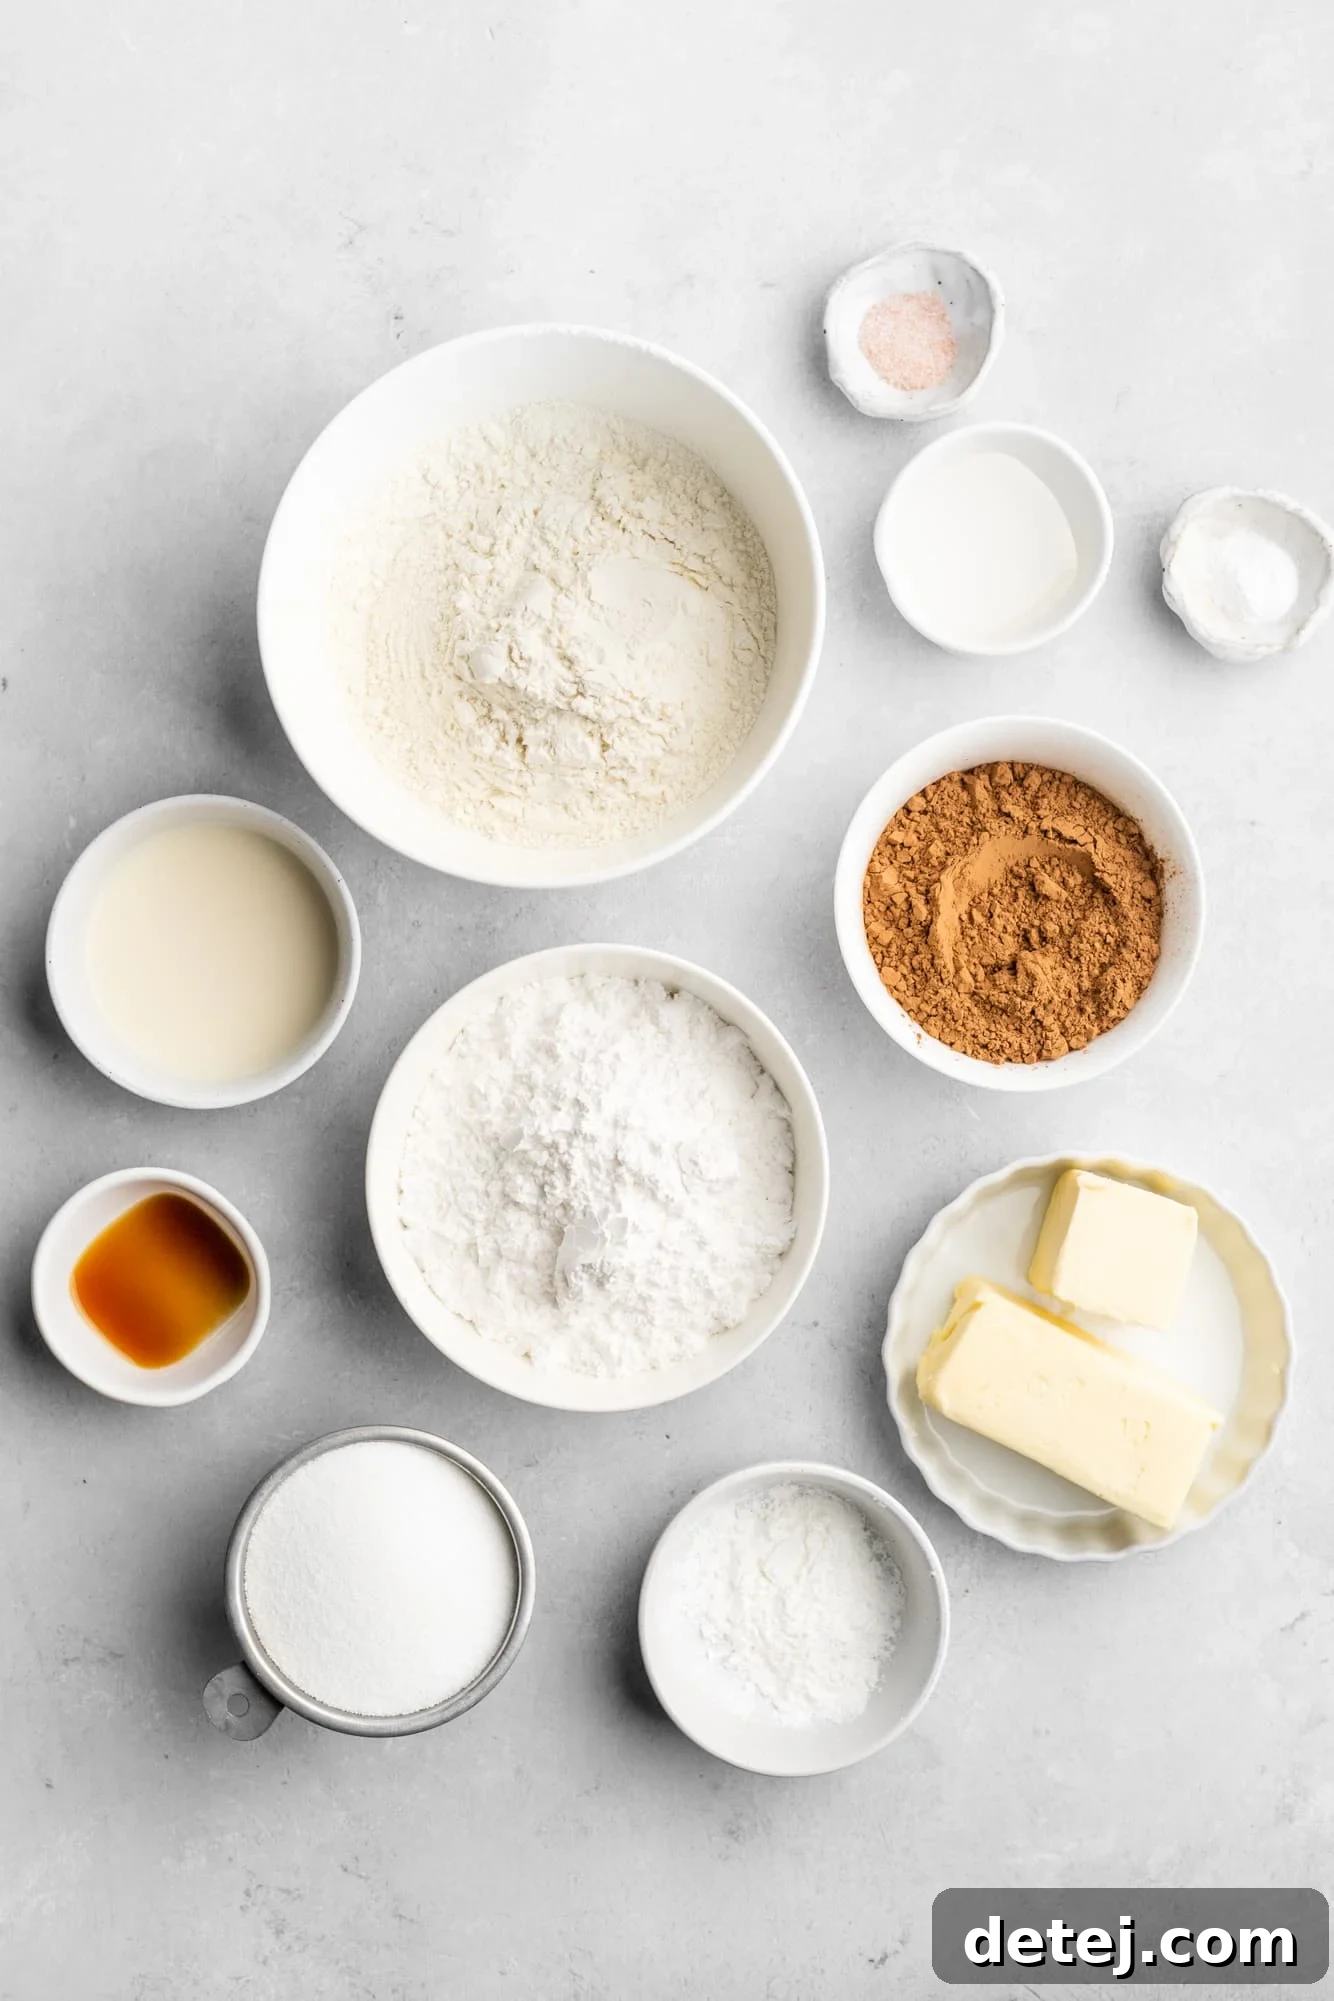
Creating these delectable vegan chocolate sugar cookies requires a handful of simple, accessible ingredients. Here’s a detailed look at what you’ll need and how you can make easy substitutions:
- Vegan Butter – The foundation of any good cookie! We recommend Miyoko’s Kitchen Cultured Vegan Butter for its exceptional flavor and texture in baking vegan cookies. Earth Balance is another widely available and excellent option. For those who love a homemade touch, our homemade vegan butter recipe works beautifully and adds a unique depth of flavor. Ensure your vegan butter is softened to room temperature for optimal creaming with sugar.
- Granulated Sugar – This provides the classic sweetness and helps achieve that desirable soft, chewy cookie texture. While granulated sugar is ideal, coconut sugar can also be used as a slightly less refined alternative, though it may impart a subtle caramel note and a slightly darker dough color.
- Soy Milk – Our preferred dairy-free milk for its richness and neutral flavor profile. However, you can easily substitute it with any unsweetened dairy-free milk of your choice. Excellent alternatives include creamy oat milk, rich cashew milk, or light almond milk. Just be sure it’s unsweetened to control the overall sweetness of the cookies.
- Cornstarch – This might seem like an unusual ingredient for cookies, but it’s crucial here! Cornstarch is the secret to achieving that wonderfully soft and perfectly chewy texture that’s ideal for rolling out and cutting into intricate shapes without the dough becoming tough. It also helps prevent excessive spreading during baking, maintaining those beautiful cookie forms.
- Pure Vanilla Extract – A staple in baking, vanilla extract enhances the chocolate flavor and adds a warm, inviting aroma to your cookies. Don’t skip this!
- All-Purpose Flour – We consistently achieve the best results with standard all-purpose flour, which yields a tender and pliable dough. If you need your cookies to be gluten-free, a high-quality 1:1 gluten-free flour blend, such as those from King Arthur or Better Batter, should work well. Be aware that gluten-free flours can sometimes absorb liquids differently, so you might need slight adjustments in milk quantity.
- Unsweetened Natural Cocoa Powder – Essential for that rich chocolate flavor and deep color. Make sure to use unsweetened natural cocoa powder, not Dutch-processed, as the natural cocoa powder reacts with the baking powder to create the perfect lift. You’ll also use a little extra for dusting your work surface, which prevents sticking without adding more flour that could toughen the dough.
- Baking Powder – This leavening agent is key to giving the cookies a slight lift, contributing to their soft and tender crumb.
- Salt – A pinch of salt is vital for balancing the sweetness and intensifying the chocolate flavor, making every bite more complex and delicious.
For the Icing:
- Powdered Sugar (Confectioners’ Sugar) – This is the base for our simple and smooth icing. Its fine texture dissolves easily, creating a silky glaze.
- Light Corn Syrup – The secret to an irresistibly shiny and professional-looking sugar cookie icing. It also helps the icing set more smoothly and prevents it from becoming too brittle. If you don’t have it on hand, you can omit it, but the shine will be slightly less pronounced.
- Dairy-Free Milk (Soy Milk recommended) – Just a touch is needed to achieve the perfect icing consistency.
- Vanilla Extract – For a hint of warmth and aroma in the icing.
Step-by-Step Guide: How to Make Irresistible Vegan Chocolate Sugar Cookies
Making these delightful vegan chocolate sugar cookies is a rewarding and surprisingly simple process. Follow these detailed steps to create perfectly soft, chewy, and beautifully shaped treats. Remember, precise measurements and gentle handling are key to cookie success! (For complete measurements, please refer to the comprehensive recipe card below.)
Preparing the Dough
Step 1: Cream the Vegan Butter and Sugar. In a large mixing bowl, using an electric mixer (either handheld or a stand mixer fitted with a paddle attachment), begin by beating the softened vegan butter for about 1 minute until it becomes wonderfully creamy and smooth. This aeration is crucial for a light cookie. Next, add the granulated sugar and continue beating on high speed for 2-3 minutes. You’re looking for a mixture that is light in color and fluffy in texture, indicating that air has been incorporated.
Step 2: Incorporate Wet Ingredients. Reduce the mixer speed to low. Carefully add the soy milk, cornstarch, and vanilla extract to the creamed butter and sugar mixture. Beat on high speed for about 1 minute until all these wet ingredients are fully combined and seamlessly integrated. Don’t forget to pause and scrape down the sides of the bowl with a spatula as needed to ensure everything is thoroughly mixed.
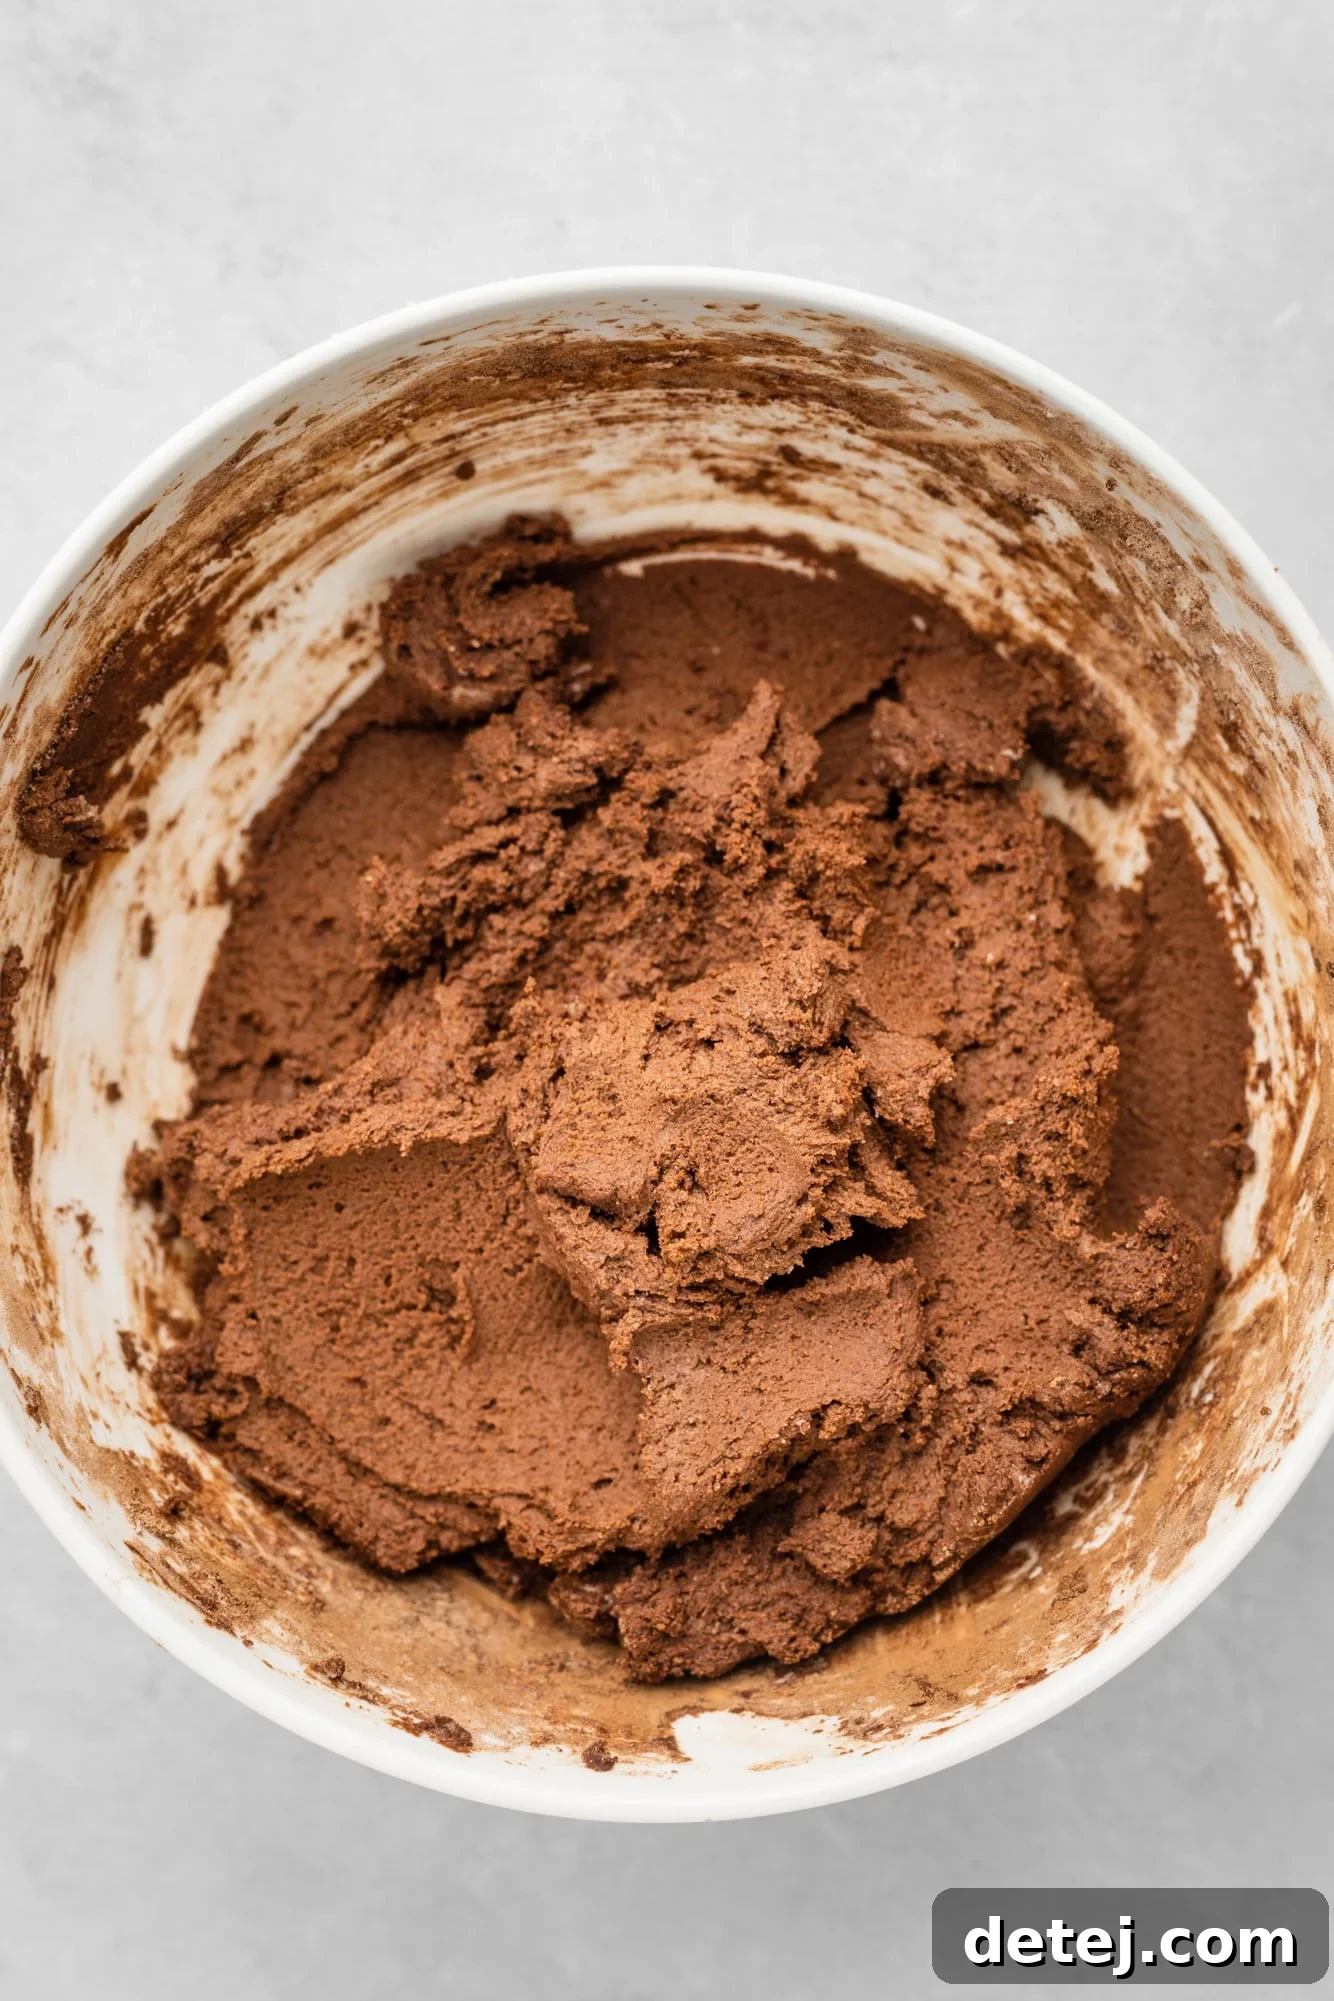
Step 3: Add Dry Ingredients. Now, it’s time for the dry components. Gradually add the all-purpose flour to the wet mixture. On top of the flour, sprinkle in the unsweetened cocoa powder, baking powder, and salt. Mix on low speed until the ingredients are just combined. Overmixing can lead to tough cookies, so stop as soon as you no longer see streaks of dry flour. The dough might appear a little crumbly in the bowl, but once you gently work it with your hands, it should come together and feel soft and pliable, much like play dough. If it feels excessively dry, incorporate an additional tablespoon or two of soy milk, one at a time, until the desired consistency is reached.
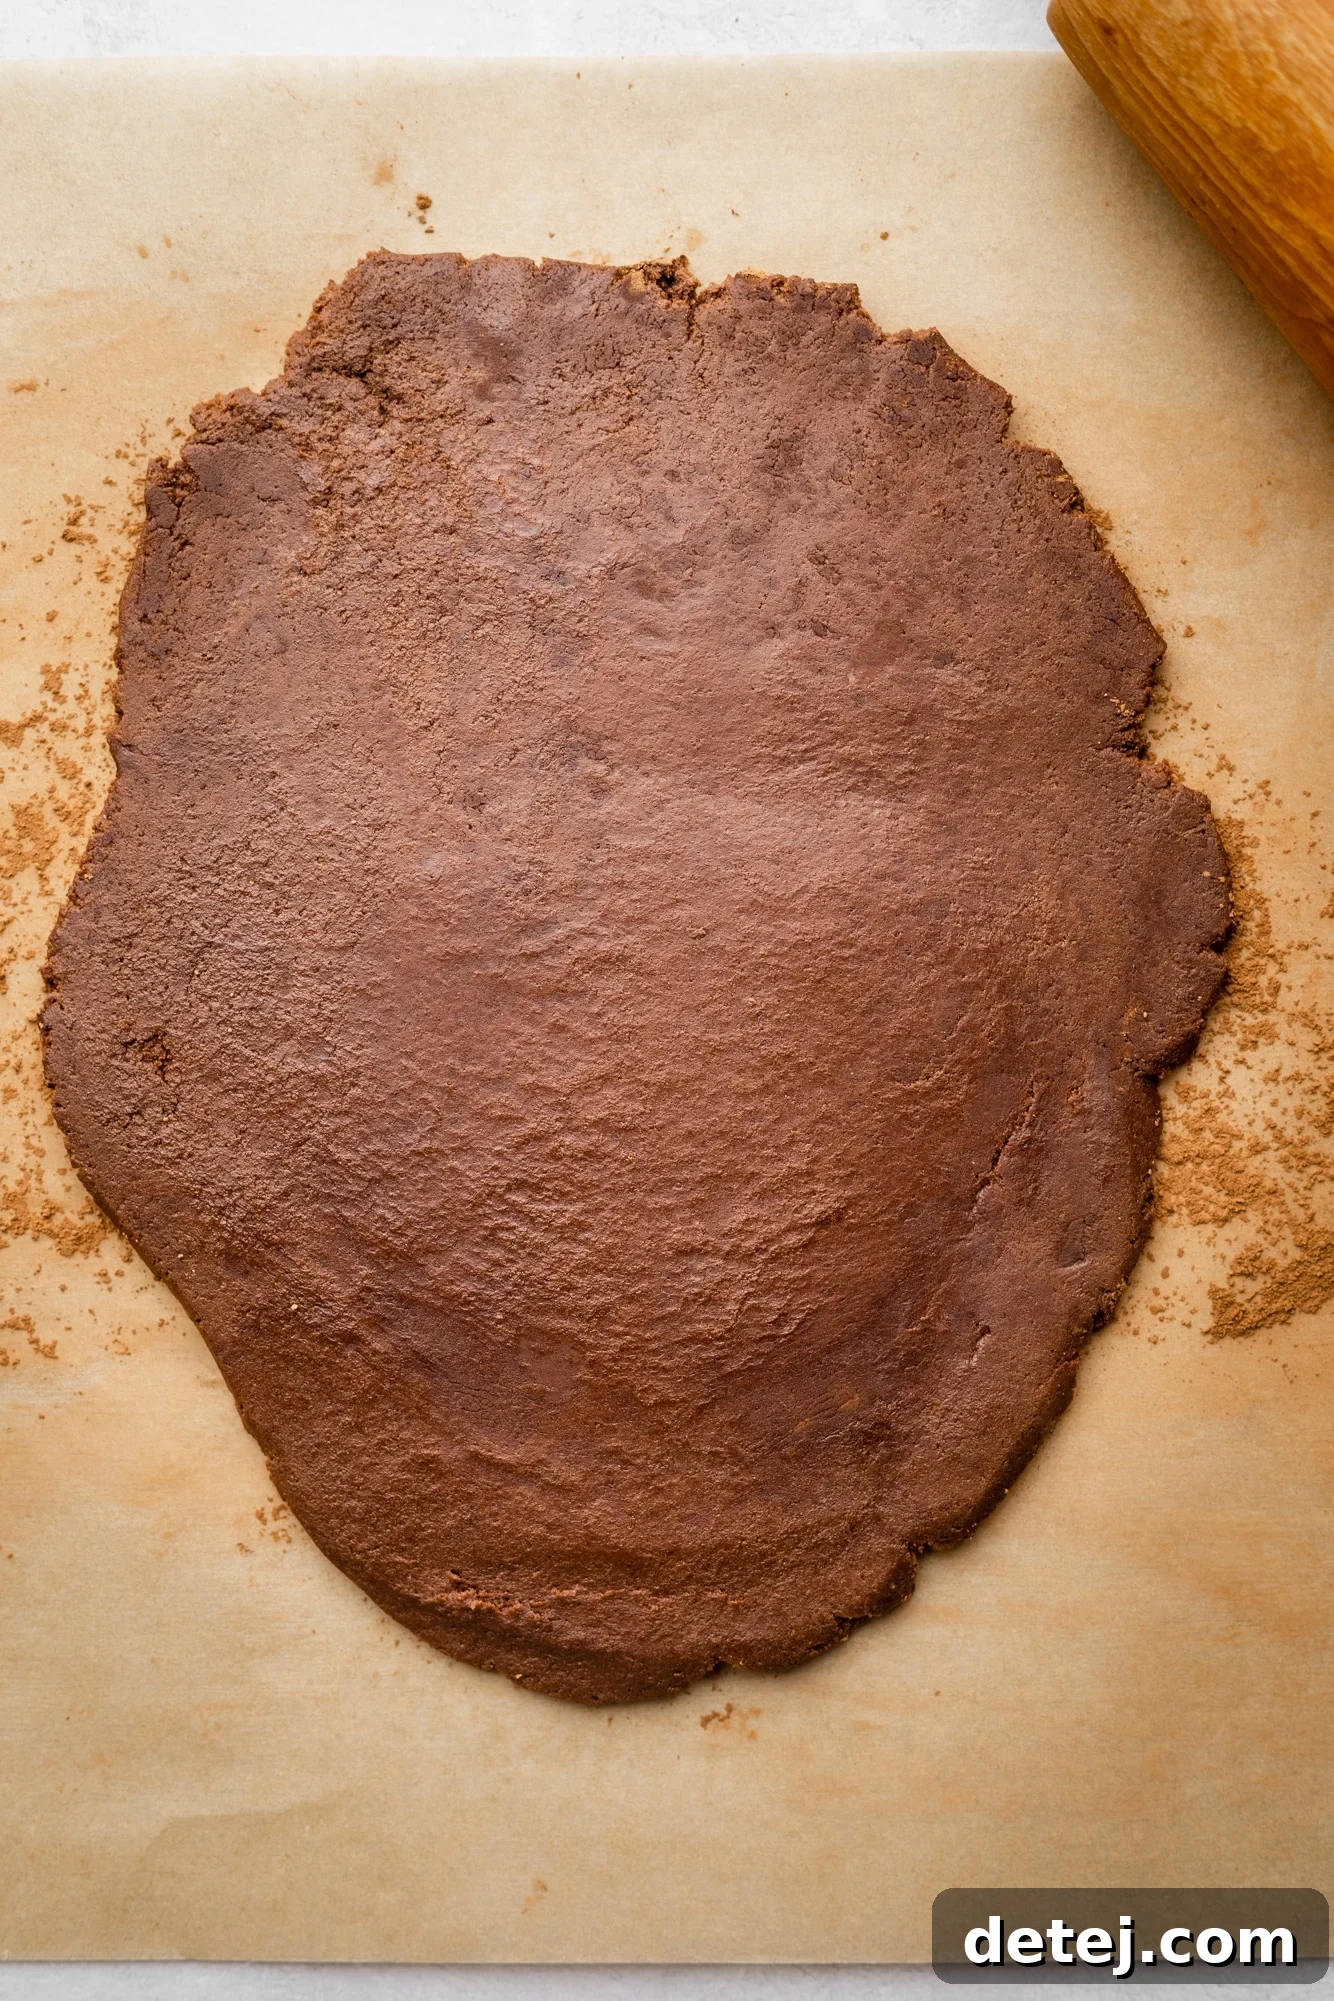
Step 4: Prepare and Chill the Dough. Using a spatula, scoop all the dough out of the bowl. If necessary, use your hands to gently push it all together into a cohesive ball. Divide this dough in half, forming two equal balls. This makes it easier to roll out. Lay a large sheet of parchment paper on a clean, flat work surface. Lightly sprinkle a little cocoa powder over the parchment paper to prevent sticking. Place one of the dough balls on top, sprinkle it with a bit more cocoa powder, and then carefully place a second piece of parchment paper on top. Using a rolling pin, roll the dough out evenly to about ¼-inch thickness. This uniform thickness is important for consistent baking. Repeat this process with the second dough half. Stack both parchment-lined cookie dough sheets and transfer them to the refrigerator to chill for at least 1 hour, or ideally overnight. Chilling is a critical step that helps firm up the butter, prevents the cookies from spreading too much, and allows for clean, precise cuts.
Baking the Cookies
Step 5: Cut and Bake. Once the dough has thoroughly chilled, remove it from the refrigerator and let it sit on the counter for 10-20 minutes while your oven preheats to 350°F (175°C). Prepare two baking sheets by lining them with parchment paper. Peel back the top layer of parchment from your chilled dough. Using your desired cookie cutters (heart shapes are perfect for Valentine’s Day!), cut out your cookie shapes and carefully place them on the prepared baking sheets, leaving a little space between each cookie. Gather any dough scraps, gently re-roll them, and cut out more shapes until all the dough is used.
Step 6: Bake to Perfection. Bake the chocolate sugar cookies for 8-10 minutes on the middle rack of your oven. It’s important not to overbake them. They will appear slightly soft and perhaps a little underdone when you remove them from the oven, but they will continue to firm up considerably as they cool. Overbaked cookies will be dry and crumbly, so trust the process. Let them cool on the baking sheets for 5 minutes before carefully transferring them to a wire rack to cool completely. They must be entirely cool before you proceed to the icing step.

While your delightful chocolate sugar cookies are cooling, you can begin preparing the rich and glossy vegan icing. This ensures that by the time your cookies are ready, your icing will be too, allowing for immediate decoration!
Crafting the Perfect Vegan Sugar Cookie Icing
This simple, four-ingredient vegan icing is the ideal complement to your chocolate sugar cookies, offering a smooth finish and a beautiful sheen. It’s incredibly versatile and easy to customize! (Explore more customization and decorating ideas further below.)
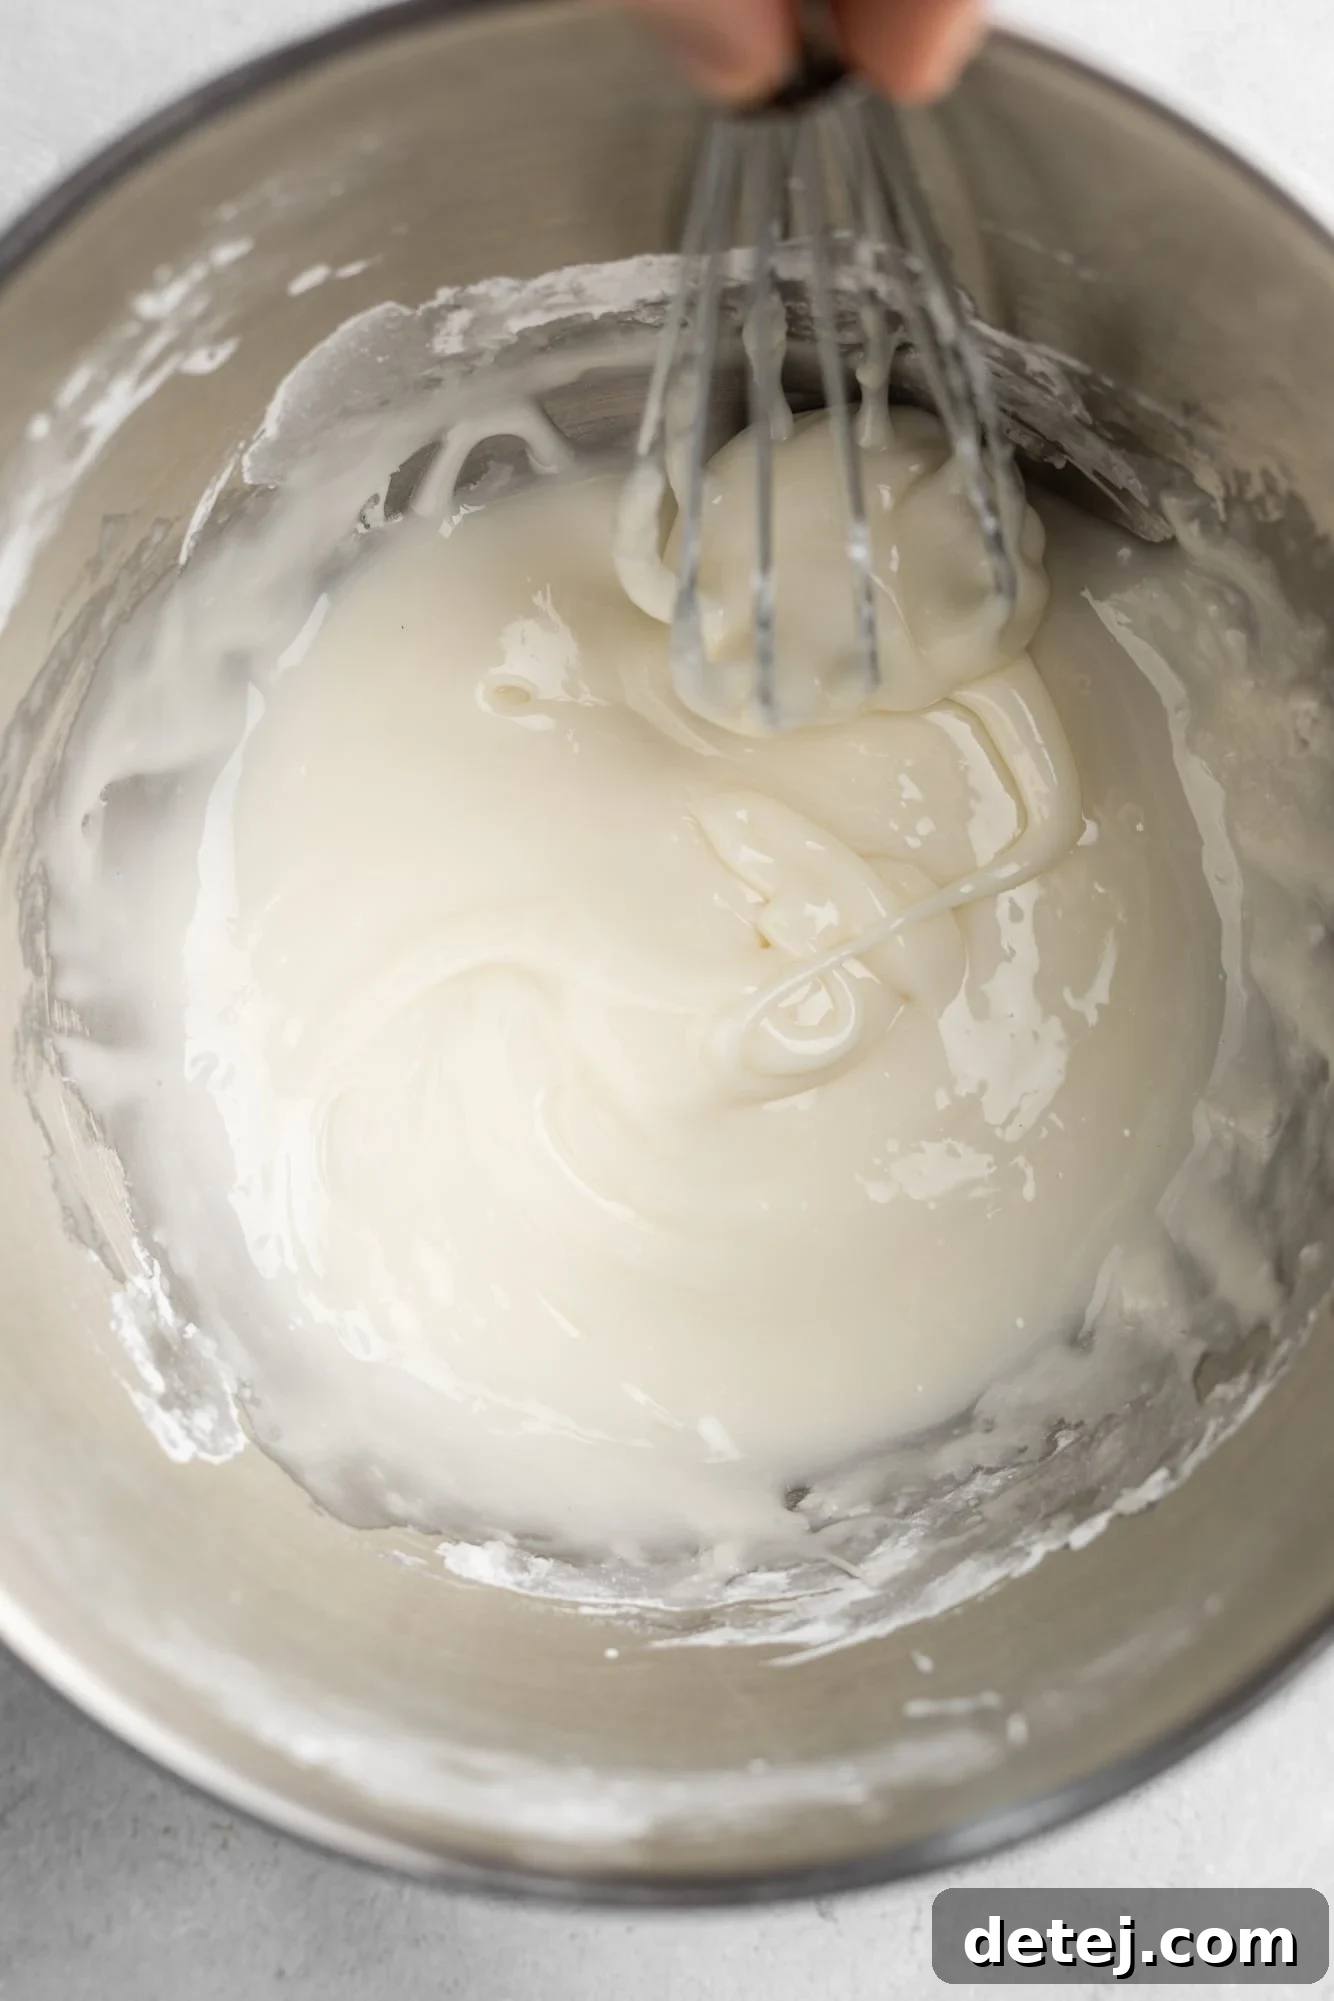
To make the icing, combine the powdered sugar, vanilla extract, and light corn syrup in a medium-sized bowl. Gradually whisk in 1-2 tablespoons of soy milk (or your chosen dairy-free milk), starting with 1 tablespoon. Continue whisking until the mixture is completely smooth, glossy, and free of lumps. The key is to achieve a consistency that is thick enough to coat the back of a spoon but still flows smoothly without being too runny. If your icing appears too thick, add another splash of soy milk, a teaspoon at a time, until it reaches the desired flow. Conversely, if it seems too runny, mix in a little more powdered sugar, a tablespoon at a time, until it thickens appropriately. The goal is a perfect balance that allows for easy spreading and setting.
Once your cookies are completely cool, gently spread the prepared icing over each cookie using a small offset spatula or the back of a spoon. While the icing is still wet, add any desired decorations or sprinkles. This is where your creativity can truly shine! After decorating, set the sugar cookies aside on a wire rack to allow the icing to harden completely. This process can take several hours, so plan accordingly. Once set, your beautifully decorated vegan chocolate sugar cookies are ready to be enjoyed!
Unleash Your Creativity: Decorating Tips and Ideas
Decorating these vegan chocolate sugar cookies is arguably the most fun part of the entire process! It’s your chance to personalize them for any occasion or simply express your artistic side. Remember, the golden rule of decorating is to ensure your cookies are completely cool before you even think about applying icing. Warm cookies will cause the icing to melt, slide off, and create a messy situation. Once they’ve cooled down to room temperature, you’re free to unleash your creativity:
- Precision Piping for Intricate Designs: For more detailed and intricate designs, consider transferring your vegan royal icing to a piping bag fitted with a very fine tip (such as a Wilton #2 or #3). This allows you to outline shapes, create delicate patterns, write messages, or flood areas with a smooth, even layer of icing. Practice on a piece of parchment paper first to get a feel for the consistency and pressure.
- Customize with Sprinkles for Every Season: Sprinkles are a fantastic way to add color, texture, and festive flair! Tailor your sprinkle choices to the specific time of year or holiday. Think classic pink and white for Valentine’s Day, vibrant red and green for Christmas, playful orange and black for Halloween, or cheerful pastels for Easter. Always ensure your sprinkles are vegan-friendly – many brands now offer plant-based options. Apply them immediately after icing a cookie, before the icing starts to set, so they adhere properly.
- Infuse Color into Your Icing: Easily transform your plain white icing into a spectrum of colors! Simply fold in 2 to 3 drops of your preferred vegan food coloring. Gel-based food colorings tend to yield more vibrant hues without thinning the icing too much. Popular vegan-friendly brands include Watkins (which offers a great range of assorted colors) and some of the Wilton gel-based colors (always double-check ingredients, as formulations can change). Start with a small amount and add more gradually until you achieve your desired shade. You can divide your icing into different bowls to create multiple colors.
- Patience is Key: Let Them Harden Completely: After decorating, it’s crucial to allow the icing to harden completely. This process can take several hours, sometimes even overnight, depending on the thickness of your icing and the humidity in your environment. Placing them in a cool, dry place can help. Avoid stacking the cookies in a storage container until the icing is firm to the touch, otherwise, your beautiful designs might smudge and stick together.
- Layered Icing Techniques: For a professional look, try a two-step icing process. First, pipe a stiff outline around the edge of your cookie and let it set for about 10-15 minutes. Then, thin down some of your icing (by adding a tiny bit more milk) to a “flood” consistency and fill in the outlined area. Use a toothpick to gently spread the flood icing to the edges and pop any air bubbles. This creates a beautifully smooth and flat surface for further decoration once dry.
Pro Tips for Vegan Chocolate Sugar Cookie Success
Baking delicious vegan chocolate sugar cookies is an enjoyable process, and with a few insider tips, you can elevate your results from good to absolutely amazing. Pay attention to these details for perfectly shaped, tender, and flavorful cookies every time:
- Accurate Flour Measurement is Paramount: One of the most common baking errors is incorrect flour measurement, which can drastically alter your dough’s consistency. Always measure your flour by spooning it lightly into the measuring cup until it overflows, then level off the top with the flat side of a knife or a straight edge. Never scoop the flour directly with the measuring cup, as this can compact it, resulting in too much flour and a dry, crumbly, or tough dough that is difficult to roll and cut.
- Avoid Overmixing the Dough: After adding the dry ingredients, mix the dough only until the ingredients are just starting to come together and no dry streaks of flour are visible. Overmixing develops the gluten in the flour, leading to tough and less tender cookies. The dough should look a bit crumbly in the bowl but should feel like soft play dough when you work it with your hands. If it’s truly too dry and stiff, add an extra splash of soy milk, one teaspoon at a time, until it reaches the right pliable consistency.
- Chilling the Dough is Non-Negotiable: This step is absolutely crucial for perfect cut-out cookies. Chilling the dough in the refrigerator for at least 1 hour (or even overnight) allows the vegan butter to firm up significantly. This prevents the cookies from spreading excessively in the oven, ensuring they maintain their beautiful, clean-cut shapes. It also makes the dough much easier to handle and roll without sticking.
- Achieve Consistent Thickness for Even Baking: When rolling out each dough half, aim for an even ¼-inch thickness. This consistent thickness is key to ensuring that all your cookies bake evenly and have that desirable soft, slightly pudgy interior with delicately crisp edges. If you prefer your sugar cookies to be crispier throughout, you can roll the dough a bit thinner, closer to ⅛-inch, but be mindful of baking time as thinner cookies will cook faster.
- Parchment Paper for Rolling: Using parchment paper both above and below the dough when rolling helps tremendously. It prevents sticking to your rolling pin and work surface, eliminates the need for excess flour (which can dry out the dough), and makes transferring the rolled dough to the fridge much easier.
- Watch Your Baking Time Closely: Cookie ovens can vary. Begin checking your cookies at the 8-minute mark. They are done when the edges appear slightly firm, even if the centers still look a bit soft. They will continue to bake and firm up on the hot baking sheet once removed from the oven. Undercooked cookies can be gummy, while overcooked ones will be dry and hard.
Frequently Asked Questions About Vegan Chocolate Sugar Cookies
Here are some common questions about making, decorating, and storing these delightful vegan chocolate sugar cookies:
Absolutely! While the simple sugar cookie icing provides a lovely shine and sets firm, these chocolate sugar cookies are incredibly versatile and delicious with other types of frosting. A classic vegan vanilla buttercream would be a fantastic choice, adding a rich, creamy contrast to the chocolate. For an extra dose of chocolate decadence, you could double the chocolate flavor with our luscious chocolate buttercream. Explore even more flavor ideas and variations in our comprehensive Vegan Buttercream Frosting recipe.
When stored properly in an airtight container at room temperature, your decorated vegan chocolate sugar cookies will maintain their freshness, soft texture, and delicious flavor for up to 5 days. For optimal freshness, ensure the icing has completely hardened before layering them in a container, separating layers with parchment paper if needed.
These vegan chocolate sugar cookies freeze beautifully, whether they are iced or uniced. To freeze, arrange the cooled cookies in a single layer on a baking sheet and flash freeze for about 30 minutes until solid. Then, transfer the frozen cookies to a freezer-safe container or a heavy-duty freezer bag, layering them with parchment paper to prevent sticking. They can be frozen for up to 3 months. When you’re ready to enjoy them, simply thaw them at room temperature. If they were iced, allow the icing to fully come to room temperature before handling too much.
Yes, absolutely! Making the dough ahead of time is a great way to streamline your baking process. After preparing the dough and rolling it out between parchment paper sheets, you can keep it chilled in the refrigerator for up to 2-3 days. This makes it perfect for prepping in advance for holiday baking or a special occasion. When you’re ready to bake, simply remove the dough from the fridge, let it sit on the counter for 10-20 minutes to slightly soften, and then proceed with cutting and baking.

Craving More Vegan Valentine’s Day Desserts?
If you’ve enjoyed these delightful vegan chocolate sugar cookies, you’re in for a treat! Valentine’s Day, or any day that calls for a sweet gesture, is the perfect excuse to dive into more delicious plant-based desserts. Here are some of our top picks that are sure to impress and satisfy:
- Vegan Chocolate Cake: A rich, moist, and utterly decadent chocolate cake that’s perfect for any celebration.
- Vegan Strawberry Cupcakes: Light, fluffy, and bursting with fresh strawberry flavor, topped with a luscious pink frosting.
- Classic Vegan Chocolate Cookies: For those who love a chewy, intensely chocolatey cookie without the need for cutters or elaborate decorating.
- Fudgy Raspberry Brownies: Deeply chocolatey brownies studded with tart raspberries for a perfect flavor combination.
- Elegant Vegan Strawberry Cake: A show-stopping cake with layers of tender crumb and fresh strawberry cream, ideal for a romantic dinner or festive gathering.

Chocolate Sugar Cookies
Pin Recipe
Leave a Comment
Save RecipeRecipe Saved!
Ingredients
- 3/4 cup vegan butter, softened to room temperature
- 1 cup granulated sugar
- 3 tablespoons soy milk
- 1 tablespoon cornstarch
- 1 teaspoon pure vanilla extract
- 1 1/2 cups all-purpose flour
- 3/4 cup natural cocoa powder (sifted if clumpy)
- 1/2 teaspoon baking powder
- 1/2 teaspoon salt
Icing and Toppings
- 1 1/2 cups powdered sugar
- 1/2 teaspoon pure vanilla extract
- 1 tablespoon light corn syrup
- 1-2 tablespoons soy milk
- sprinkles of choice
Instructions
Make the Cookies
-
In a large bowl, using either a handheld or stand mixer fitted with the paddle attachment, beat the softened vegan butter for about 1 minute until it is smooth and creamy. Add the granulated sugar and continue beating on high speed for 2-3 minutes, until the mixture is light and fluffy.
-
Now, add the soy milk, cornstarch, and pure vanilla extract. Beat on high speed for approximately 1 minute, until all ingredients are fully combined. Scrape down the sides of the bowl with a spatula as needed to ensure thorough mixing.
-
Gradually add the all-purpose flour to the wet mixture. Sprinkle the cocoa powder, baking powder, and salt on top of the flour. Mix on low speed until the ingredients are just combined. The dough should have a consistency similar to play dough when worked with your hands, even if it looks a bit crumbly in the bowl. If it feels excessively dry, add another tablespoon or two of soy milk, one at a time, until the desired pliability is achieved.
-
Using a spatula, scoop all the dough out of the bowl, pressing it together with your hands if necessary to form a cohesive ball. Divide the dough into two equal halves and roll each half into a ball.
-
On a flat surface, lay a sheet of parchment paper. Lightly sprinkle a little cocoa powder onto the parchment. Place one of the dough balls on top, sprinkle with more cocoa, and then cover with a second sheet of parchment paper. Using a rolling pin, roll the dough out evenly to about ¼-inch thickness. Repeat this process for the second dough ball. Stack the parchment-lined dough sheets and chill in the refrigerator for at least 1 hour, or preferably overnight.
-
Once the dough has chilled, remove it from the refrigerator and let it sit on the counter for 10-20 minutes while your oven preheats to 350°F (175°C). Line two baking sheets with fresh parchment paper. Using your chosen cookie cutters, cut out shapes from the dough and carefully transfer them to the prepared baking sheets, ensuring a small space between each. Gather any dough scraps, gently re-roll, and cut out additional shapes until all the dough is used.
-
Bake the cookies for 8-10 minutes on the middle rack of the oven. They may still appear slightly underdone in the center, but they will firm up significantly as they cool. Remove from the oven and let them cool on the baking sheets for 5 minutes before carefully transferring them to a wire rack to cool completely. Ensure cookies are entirely cool before icing.
Make the Icing and Decorate
-
In a bowl, whisk together all the icing ingredients until smooth. If the icing appears too thick, add a little more soy milk (or your chosen dairy-free milk), a teaspoon at a time, until the desired consistency is reached – it should be smooth and glossy, not watery. If it becomes too runny, mix in additional powdered sugar until thickened. Spread the icing evenly onto the completely cooled cookies.
-
Decorate your cookies with sprinkles or other toppings as desired while the icing is still wet. Allow the icing several hours to harden completely before stacking or storing. The cookies themselves will remain soft for approximately 5 days when stored at room temperature in an airtight container.
Notes
- Any unsweetened dairy-free milk can be used in place of soy milk for both the cookies and the icing.
- While these cookies haven’t been specifically tested as gluten-free, a quality 1:1 gluten-free flour blend (such as King Arthur or Better Batter) may work. Results might vary slightly in texture.
- To accurately measure flour, always use the spoon and level method: scoop the flour into the measuring cup with a spoon and level it off with the back of a knife. Improperly measuring flour (e.g., scooping directly from the bag) can lead to too much flour, resulting in a dry or tough dough.
- The baked cookies, once iced, will keep well in an airtight container at room temperature for 4-5 days. Un-iced or iced cookies can also be frozen for longer storage (refer to FAQ for details).