
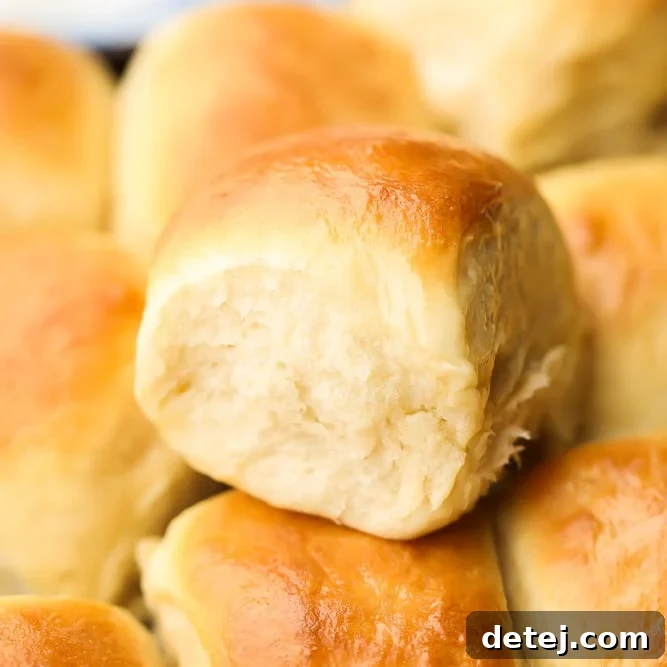
The Ultimate Guide to Incredibly Fluffy Vegan Dinner Rolls
Learn how to make the best vegan dinner rolls! These soft, fluffy, buttery rolls are easy to make and completely irresistible.
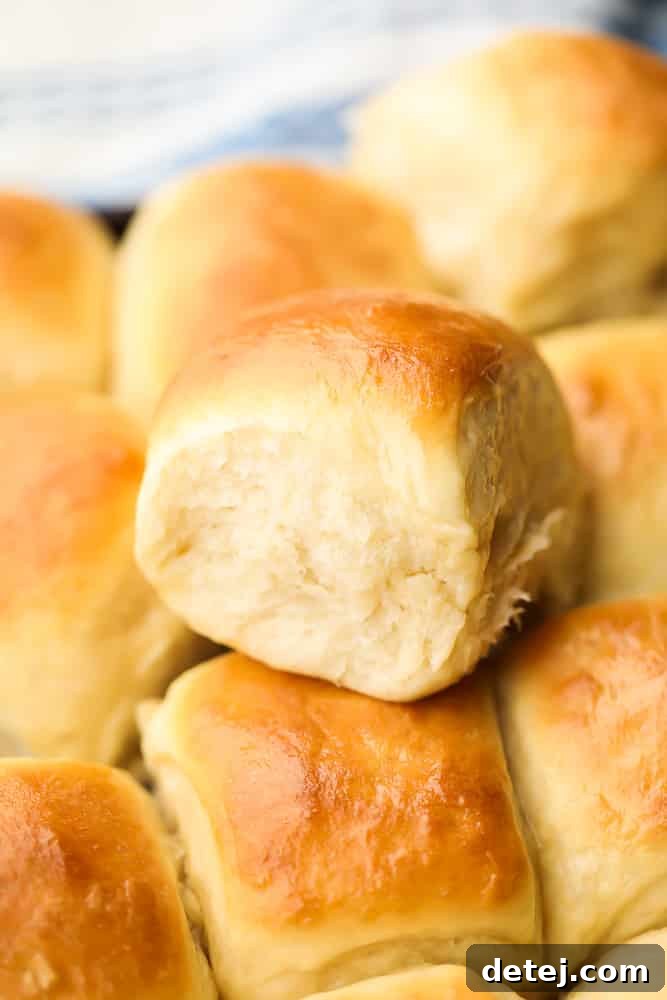
Why You Need These Vegan Dinner Rolls in Your Life
Imagine a basket of warm, tender, golden-brown rolls, fresh from the oven, filling your home with an aroma that signals comfort and celebration. That’s precisely what these incredible vegan dinner rolls deliver. They are the perfect accompaniment to virtually any meal, elevating a simple dinner into a memorable experience. While they shine brightest during festive occasions like holiday gatherings, they are equally delightful with everyday favorites.
Pair these versatile plant-based rolls with hearty dishes such as Crispy Tofu Nuggets, a savory Vegan Turkey Roast complemented by a rich Easy Vegan Gravy, a comforting Vegan Chicken dish, or the acclaimed Best Vegan Meatloaf. The soft texture and buttery flavor of these rolls make them ideal for soaking up every last drop of delicious sauces and gravies on your plate.
The Magic of Vegan Baking: Dispelling Myths
Many traditional dinner roll recipes rely heavily on eggs for structure and richness, and dairy butter for flavor and tenderness. However, I am thrilled to share that eggs are absolutely unnecessary to achieve an airy, delightful dinner roll. This recipe proves that you can create incredibly soft, fluffy, and delicious rolls without any animal products. The secret lies in simple, readily available plant-based ingredients that perfectly replicate the texture and taste of their conventional counterparts. Your friends and family will be amazed that these decadent rolls are entirely vegan!
The absence of dairy is easily addressed by using your favorite vegan butter, which provides all the rich, buttery flavor without compromise. This recipe is not only simple to follow but also includes a clever trick to ensure every single roll is perfectly smooth and beautifully rounded, adding a professional touch to your homemade creations. Get ready to impress everyone with these irresistible, buttery soft rolls that are sure to become a staple in your kitchen.
If you’re in the mood for something different, be sure to explore my recipe for flaky Southern Style Vegan Buttermilk Biscuits!
Essential Ingredients for Perfect Vegan Dinner Rolls (and Smart Substitutions)
Crafting the perfect vegan dinner roll starts with a careful selection of ingredients. Here’s what you’ll need, along with helpful notes and substitution tips to ensure your baking success:
- Unsweetened Plant Milk: The Creamy Foundation
I typically use unsweetened soy milk due to its excellent protein and fat content, which contributes to a rich, tender dough. However, other creamy plant milks work just as wonderfully. Options like almond milk, cashew milk, coconut milk (from a carton, not canned), or even oat milk are fantastic choices. The goal is to select a creamy variety that will add richness to your dough. It’s crucial to ensure your chosen plant milk is unsweetened and unflavored to avoid any unwanted sweetness or conflicting tastes in your savory rolls. I would recommend avoiding rice milk as it tends to be too thin and watery, which can negatively impact the dough’s consistency.
- Instant Rapid Rise Yeast: Speeding Up the Process
This type of yeast is a game-changer for speeding up your baking process, as it activates quickly and requires less rise time compared to traditional active dry yeast. I find it incredibly convenient for most of my bread and cinnamon roll recipes. If you only have regular active dry yeast on hand, don’t worry—it will work perfectly fine. Just be prepared for slightly longer rising times, as detailed in the recipe notes below. Always check the expiration date on your yeast to ensure it’s fresh and active; a successful rise depends on it!
- Granulated Sugar: Just a Touch of Sweetness
A small amount of granulated sugar is essential in this recipe, not just for a hint of sweetness, but primarily to feed the yeast, helping it activate and ensuring a vigorous rise. For vegan-friendly baking, I always opt for organic granulated sugar, as it is processed without bone char. If you prefer, coconut sugar can also be used, but be aware that it will give your rolls a slightly darker color and a subtle caramel note, which can be quite delicious in its own right.
- Vegan Butter, Softened: For That Irresistible Richness
Vegan butter is key to achieving that classic buttery flavor and incredibly soft texture. The butter should be softened, not melted, to properly incorporate into the dough. I’ve had great success with Country Crock Plant Butter Sticks lately, but feel free to use your favorite brand. Miyoko’s Kitchen Cultured Vegan Butter, Earth Balance, and Melt Organic Vegan Butter are all excellent choices that will deliver that desired richness and tenderness to your rolls. Ensure your butter is at room temperature to blend smoothly with the other ingredients.
- All-Purpose Flour: The Heart of the Roll
This recipe has been developed and tested with all-purpose white flour, which yields light, tender, and airy rolls. While you might be tempted to experiment with other flours, I haven’t tested this recipe with anything else. Using whole wheat flour, for example, would likely result in a much denser roll due to its higher fiber content. If you’re looking for a gluten-free option, a high-quality gluten-free all-purpose baking mix might work, but I cannot guarantee the same results without specific testing. If you do try a gluten-free blend, please share your experience in the comments!
- Salt: Enhancing Every Bite
Salt is more than just a seasoning here; it plays a vital role in balancing the flavors of the rolls and regulating yeast activity. It also strengthens the gluten structure in the dough, contributing to a better texture. Don’t skip it!
Step-by-Step: Crafting Your Fluffy Vegan Dinner Rolls
Creating these delightful vegan dinner rolls is a straightforward process, even for novice bakers. Follow these detailed steps to ensure perfectly soft and buttery results every time. (This is an overview with helpful tips; for a complete printable recipe card, see the section below.)
- Activate the Yeast: The Foundation of Fluffiness
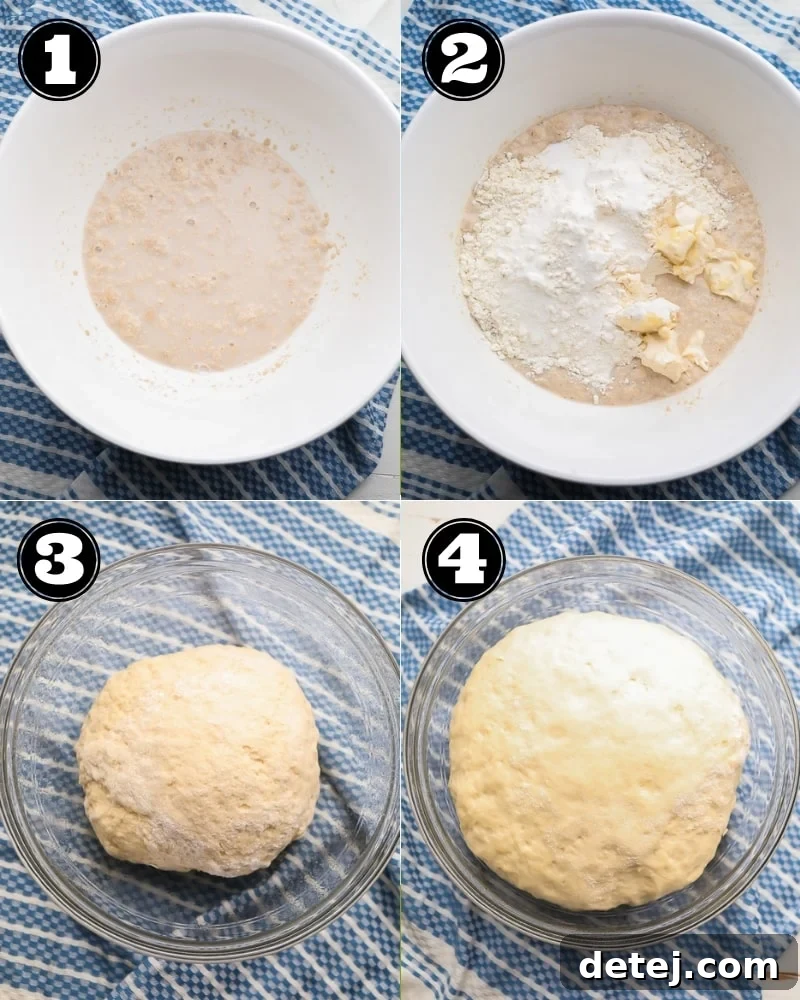
Begin by gently warming your unsweetened plant milk. You can do this in the microwave for 1-2 minutes or in a saucepan over low heat until it reaches a lukewarm temperature, similar to bathwater (around 105-115°F or 40-46°C). It’s crucial that the milk isn’t too hot, as excessive heat will kill the yeast, preventing your rolls from rising. Pour the warm milk into the bowl of a stand mixer (or a large mixing bowl). Add the instant rapid rise yeast and granulated sugar. Give it a gentle stir and let it sit undisturbed for about 3 to 5 minutes. During this time, the mixture should become visibly foamy and bubbly, indicating that the yeast is active and ready to work its magic. If you don’t see any foam, your yeast might be old or the milk too hot/cold; you’ll need to start again with fresh yeast.
- Mix the Dough: Achieving the Perfect Consistency
Once your yeast is active, add the softened vegan butter, 4 cups of all-purpose flour, and the salt to the bowl. If using a stand mixer, attach the dough hook and mix on low speed until all the flour is fully incorporated and the ingredients form a shaggy dough. If mixing by hand, use a sturdy spoon to combine everything. Gradually add more flour, about ½ cup at a time, until the dough forms a cohesive ball that pulls away from the sides of the bowl. The ideal consistency is slightly sticky to the touch and soft, but not excessively wet or dry. Continue to knead with the dough hook for about 5 minutes, or by hand for 10-12 minutes, until the dough is smooth and elastic. This kneading process develops the gluten, which is essential for a light and chewy roll.
- The First Rise: Patience is Key
Lightly grease a clean bowl with a small amount of vegan butter or oil. Transfer the kneaded dough to this bowl, turning it once to coat the entire surface. Cover the bowl snugly with a clean kitchen towel or plastic wrap. Place the bowl in a warm, draft-free spot in your kitchen. This could be near a sunny window, on top of a warm oven, or even in a slightly warmed (but turned off) oven. Allow the dough to rise for approximately 30 minutes, or until it has roughly doubled in size. This first rise allows the yeast to produce carbon dioxide, creating air pockets that will give your rolls their characteristic fluffiness.
- Shaping the Rolls: The Trick to a Smooth Finish
Once the dough has doubled, gently punch it down to release the air. Transfer the dough to a lightly floured surface. To achieve smooth, uniformly shaped rolls, pat the dough down into a large rectangle. Using a sharp knife or a pastry cutter, divide the rectangle into 4 equal long strips. Then, cut each strip into 6 even pieces, yielding a total of 24 rolls. For each piece, take it in your hand and gently pull the edges downwards, tucking them underneath to create a smooth, rounded top. Pinch the seams together at the bottom and place the less smooth, seamed side down onto your baking sheet. This technique ensures a beautiful, professional-looking roll. Alternatively, you can simply pinch off portions of the dough and roll them between your palms to form neat balls.
- The Second Rise: Building More Airiness
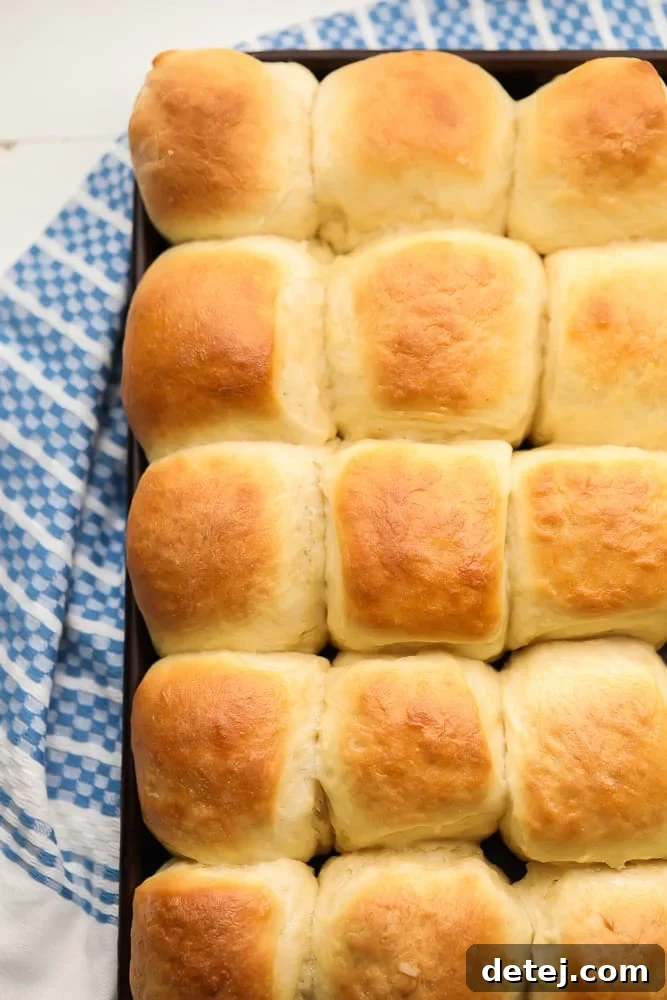
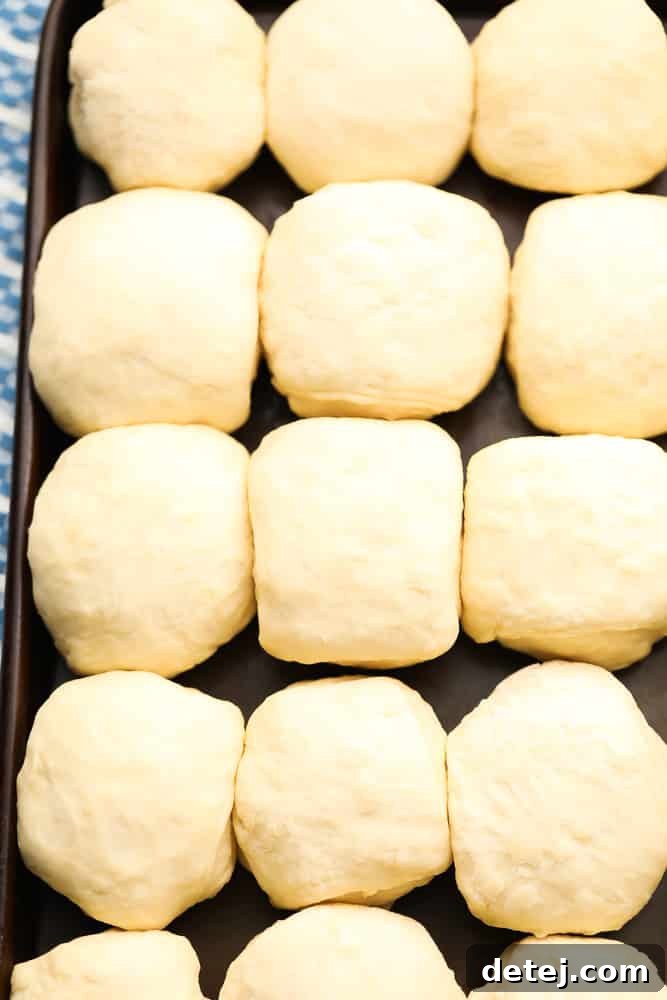
Arrange the shaped rolls on a lightly greased quarter baking sheet or a 9×13-inch baking dish. Place them close enough so they are nearly touching; this helps them rise upwards rather than outwards, resulting in softer sides. Cover the rolls again with the kitchen towel and let them rise for another 30 minutes in a warm spot. During this second rise, the rolls will puff up further, becoming noticeably larger and lighter. Towards the end of this second rising period, preheat your oven to 375°F (190°C).
- Baking to Golden Perfection: The Final Touch
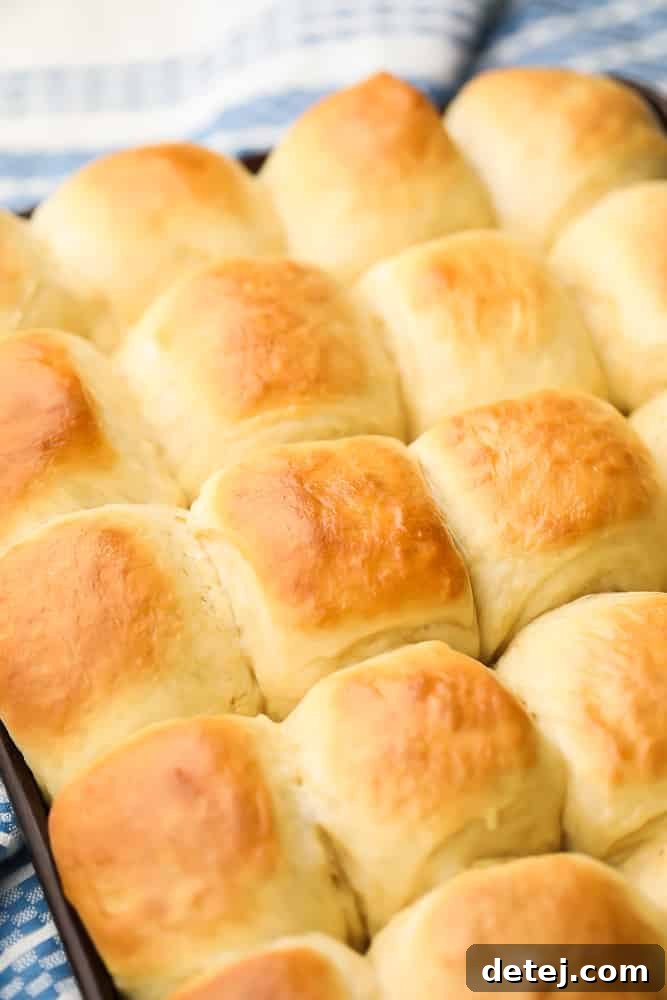
Once the rolls have completed their second rise and your oven is preheated, carefully remove the towel. Place the baking dish in the preheated oven and bake for 12 to 15 minutes, or until the tops are golden brown and the rolls are cooked through in the middle. If you notice the tops browning too quickly, loosely cover the baking dish with a piece of aluminum foil to prevent over-browning while the insides finish cooking. As soon as you remove the rolls from the oven, immediately brush their tops with 2 tablespoons of melted vegan butter. This step adds an extra layer of rich flavor and a beautiful sheen. Serve your warm, fluffy vegan dinner rolls and enjoy!
Pro Tips for Vegan Dinner Roll Success
- Achieving the Right Dough Consistency: The perfect dough should be soft, supple, and slightly sticky. Avoid adding too much flour, as this will lead to dry, dense rolls. It’s better to have a slightly stickier dough than a dry one.
- Kneading Alternatives: While a stand mixer with a dough hook makes kneading effortless, it’s not essential. You can achieve fantastic results by hand. Mix the initial ingredients with a strong spoon, then transfer to a lightly floured surface and knead vigorously for about 10-12 minutes until the dough is smooth, elastic, and no longer shaggy.
- Warm Place for Rising: A consistently warm environment is crucial for yeast activity. Besides the suggestions above, you can also place the covered bowl in your microwave (turned off!) or oven (turned off, but possibly warmed slightly beforehand) to create a mini proofing box.
- Evenly Sized Rolls: For the most consistent baking and presentation, try to make your rolls as uniform in size as possible. Using a kitchen scale to divide the dough can help achieve this precision.
Make Ahead & Storage Solutions for Your Vegan Rolls
These vegan dinner rolls are wonderful fresh, but their versatility extends to make-ahead options and easy storage, ensuring you can enjoy them whenever a craving strikes.
Freezing Dough or Baked Rolls
Yes, you can absolutely freeze the dough! For best results, I recommend shaping the dough into individual balls as instructed in the recipe, then placing them on a baking sheet lined with parchment paper. Freeze until solid, then transfer the frozen dough balls to a freezer-safe bag or airtight container. When you’re ready to bake, thaw the dough balls overnight in the refrigerator, or at room temperature for several hours, until they are soft and have risen slightly. Proceed with the second rise and baking steps. You can also freeze any leftover cooked rolls. Allow them to cool completely, then place them in a freezer bag. Reheat thawed rolls in a warm oven for a few minutes until soft.
Preparing Ahead for Stress-Free Meals
To reduce stress on a busy day, you can prepare the rolls up to the point of the second rise. After shaping the rolls and placing them in the baking dish, cover them tightly with plastic wrap and refrigerate for up to 2 days. This slow, cold proofing can actually enhance the flavor of the rolls. Before baking, remove the dish from the refrigerator and let it sit at room temperature for about 30-60 minutes, or until the rolls have puffed up again. Then, preheat your oven and bake as directed. This method is perfect for holiday meals or entertaining!
More Vegan Recipes to Serve with Your Fluffy Rolls
These delectable vegan dinner rolls are the ultimate companion to a wide variety of plant-based meals. Here are some fantastic recipes from Nora Cooks that will pair beautifully with your freshly baked rolls:
- Vegan Ham Roast with Maple Glaze: A show-stopping centerpiece for any holiday or special occasion, perfectly complemented by a soft roll.
- Vegan Scalloped Potatoes: Creamy, rich, and comforting, these potatoes will be even more satisfying with a side of warm bread.
- Vegan Pot Pie: The ultimate comfort food, a savory filling topped with a flaky crust, ideal for sopping up with a roll.
- Lentil Loaf: A hearty and flavorful alternative to meatloaf, delicious with a soft, buttery roll.
- Easy Vegan Potato Soup: A warm and creamy soup that practically begs for a crusty (or soft!) piece of bread for dipping.
- Vegan Stew – Classic & Hearty: A robust and satisfying stew, perfect for a cozy meal, and even better when served with these homemade rolls.
Vegan Dinner Rolls Recipe
Learn how to make the best vegan dinner rolls! These soft, fluffy, buttery rolls are easy to make and completely irresistible.

Recipe Details
Prep Time: 20 mins
Cook Time: 15 mins
Rising Time: 1 hr
Total Time: 1 hr 35 mins
Servings: 24 rolls
Ingredients
- 2 cups unsweetened soy milk*
- 2 tablespoons instant rapid rise yeast*
- 1/4 cup granulated sugar
- 8 tablespoons vegan butter, softened
- 5-5 1/2 cups all purpose flour
- 2 teaspoons salt
- 2 tablespoons melted vegan butter (for brushing)
Instructions
- Warm the soy milk until warm, but not too hot (bath water temperature).
- In a large bowl, add the warm milk, yeast, and sugar. Stir and let sit for 3 minutes until foamy. If not foamy, start again with fresh yeast.
- Add the softened vegan butter, 4 cups of flour, and the salt. Mix (by hand or with a stand mixer dough hook) until flour is incorporated. Add more flour, 1/2 cup at a time, until a soft, slightly sticky ball of dough forms that pulls away from the bowl. Knead for about 5 minutes with a dough hook, or 10-12 minutes by hand.
- Transfer the dough to a lightly greased bowl, cover with a towel, and let rise in a warm place for about 30 minutes, until doubled in size.
- Gently punch down the dough. Pat it into a large rectangle on a lightly floured surface. Cut into 4 long strips, then cut each strip into 6 squares (24 rolls total). To make them smooth, pull the seams downward and place the less smooth side down. Alternatively, pinch off pieces and roll into balls.
- Place the rolls on a baking sheet or 9×13 inch baking dish, touching each other. Cover with the towel again and let rise for another 30 minutes.
- Preheat oven to 375°F (190°C). Remove the towel and bake for 12-15 minutes until golden brown and cooked through. If tops brown too quickly, loosely cover with foil.
- Remove from the oven and immediately brush with melted vegan butter. Serve and enjoy! Store leftovers in a covered container or ziplock bag for about 3 days. They can also be frozen.
Recipe Notes
- Hand Kneading: If you don’t have a stand mixer, mix ingredients with a strong spoon, then knead by hand for about 10-12 minutes until the dough is soft, slightly sticky, and smooth.
- Plant Milk: Any unsweetened, unflavored creamy plant milk (almond, cashew, oat) can be used. Avoid watery milks like rice milk.
- Yeast: If using regular active dry yeast instead of rapid rise, the first rise will take longer (1 1/2-2 hours), and the second rise will be 30 minutes to an hour.
- Vegan Butter Brands: Country Crock Plant Butter Sticks, Earth Balance, Miyoko’s, or Melt are all excellent choices. Use your favorite.
- Gluten-Free: This recipe has not been tested with gluten-free flour. A gluten-free mix might work, but results may vary.
Nutrition Information
Serving: 1 of 24 rolls
Calories: 153 kcal
Carbohydrates: 24g
Protein: 4g
Fat: 4g
Saturated Fat: 1g
Sodium: 240mg
Potassium: 55mg
Fiber: 1g
Sugar: 2g
Vitamin A: 265IU
Calcium: 29mg
Iron: 1mg
Recipe Categories
Course: Side Dish
Cuisine: American
Author: Nora Taylor