
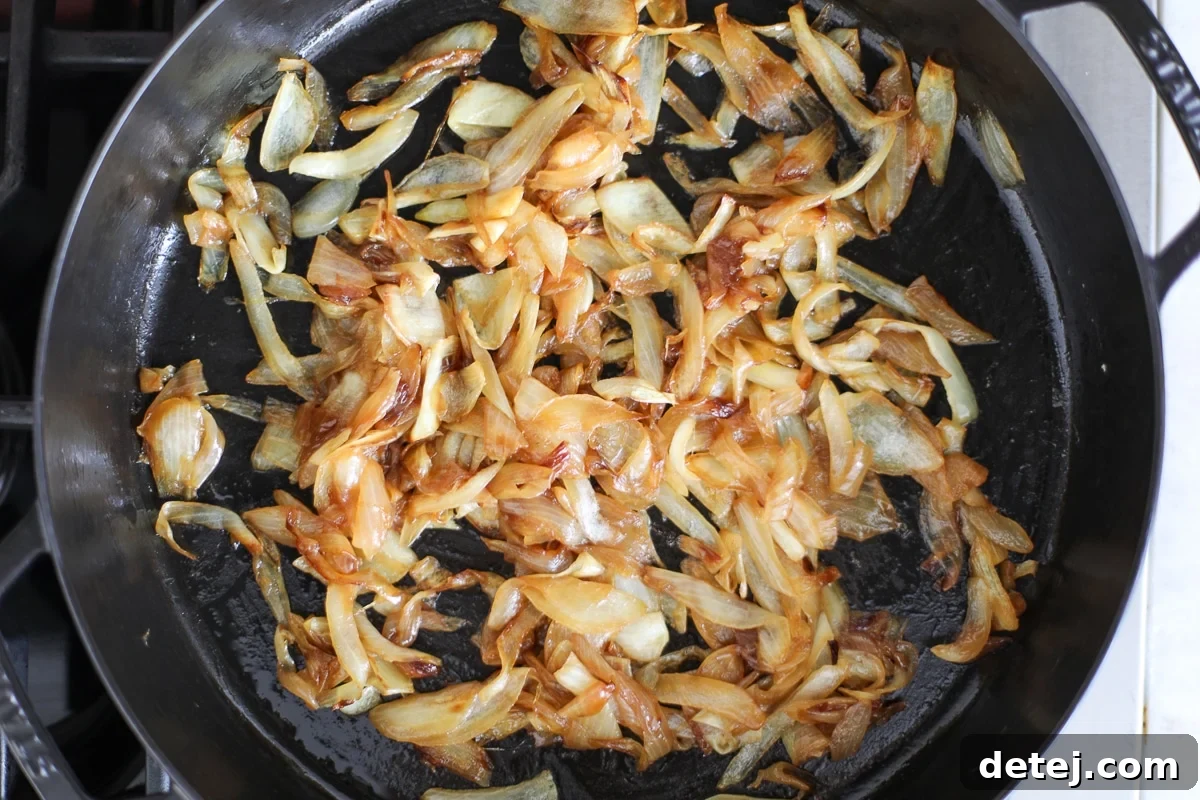
There’s an undeniable magic that happens when a humble onion is transformed into a glistening, deeply golden, and intensely flavorful pot of caramelized onions. This culinary alchemy, achieved with just a little time and patience on your stove, instantly fills your home with a warm, inviting aroma. What starts as a sharp, pungent vegetable becomes something profoundly rich, irresistibly sweet, and subtly savory – a true testament to the power of slow cooking.
More than just a topping, perfectly caramelized onions are a versatile secret weapon in any kitchen. They effortlessly upgrade a simple sandwich, add gourmet depth to a weeknight pasta, or become a star accompaniment to roasted vegetables and grilled meats. Once you discover how easy it is to make these golden strands of flavor, you’ll find yourself incorporating them into almost every meal, making everything taste undeniably better.
Why You’ll Adore This Caramelized Onion Recipe
Caramelizing onions might seem intimidating at first, but this straightforward recipe makes it accessible for every home cook. Here’s why this guide to making the best homemade caramelized onions will become a staple in your kitchen:
- Unbelievable Flavor from Minimal Ingredients: It’s astonishing how a few basic pantry staples – onions, oil, and a touch of seasoning – can produce such an incredibly deep, rich, and complex flavor. This recipe proves that you don’t need a complicated list of ingredients to create something truly extraordinary. The natural sugars in the onions are coaxed out and concentrated, resulting in a sweet-savory profile that tastes like it took far more effort than it actually did.
- Endlessly Versatile Culinary Gem: Once you have a batch of these sweet caramelized onions ready, your meal possibilities explode. They aren’t just for topping burgers; imagine them folded into fluffy omelets, swirled into creamy pasta sauces, nestled under cheese on a rustic tart, or complementing a succulent steak. Their ability to enhance almost any dish makes them an invaluable ingredient for elevating everyday meals to gourmet status.
- Perfect for Meal Prep and Batch Cooking: One of the best aspects of this recipe is that caramelized onions store beautifully and often taste even better the next day as the flavors meld. This makes them ideal for meal prepping; cook a large batch on the weekend, and you’ll have a flavor enhancer ready to go for quick weeknight dinners, lunches, and even breakfasts throughout the week.
- Simple Process, Impressive Results: While patience is a virtue when caramelizing onions, the actual steps are remarkably simple. There’s no complex technique involved, just gentle heat and occasional stirring. This means even beginner cooks can achieve restaurant-quality results, impressing family and friends with minimal fuss.
Essential Ingredients for Caramelized Onions
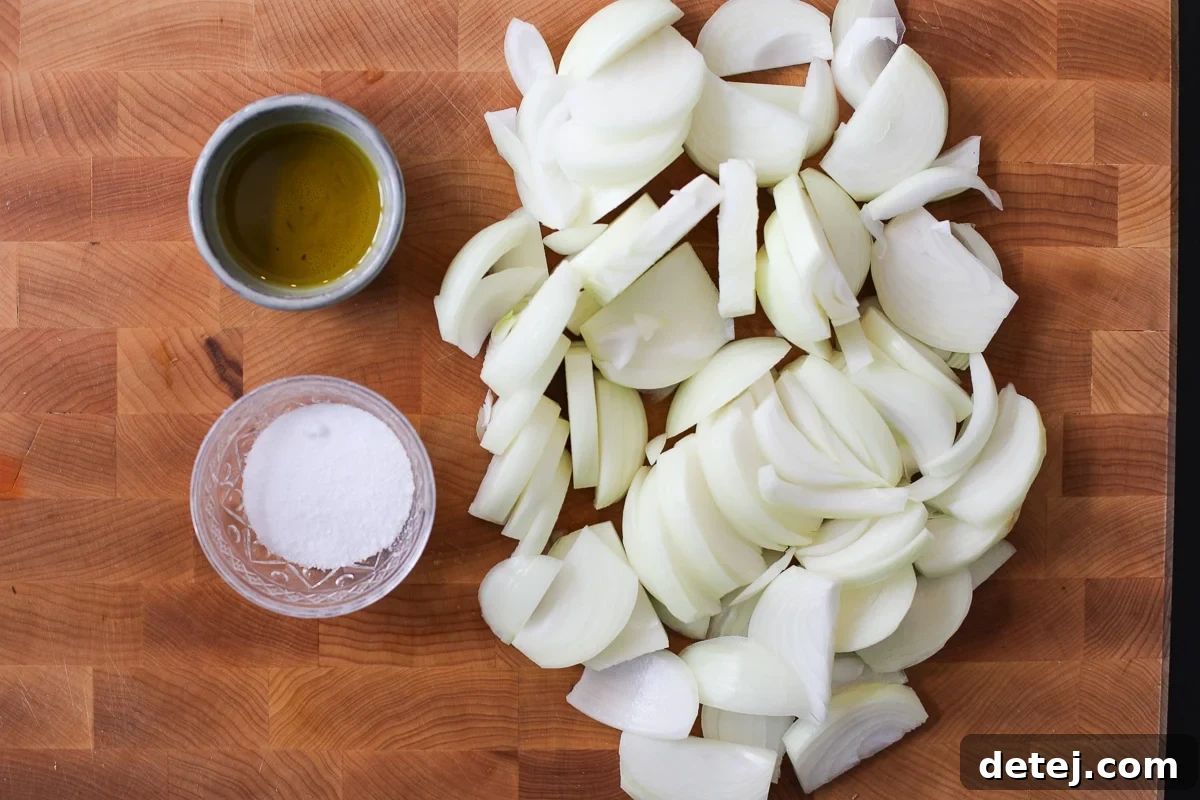
The beauty of this recipe lies in its simplicity, requiring just a handful of ingredients to create a truly delicious outcome. Each plays a crucial role in achieving that perfect caramelization:
- Onions: The star of the show! For the best balance of sweet and savory flavor, yellow onions are highly recommended. Their higher sugar content caramelizes beautifully without becoming overly sweet or too pungent. You could also use sweet onions like Vidalia for an even sweeter result, or even red onions for a slightly sharper, more vibrant hue. The key is to slice them thinly and uniformly, about 1/4 inch thick, to ensure even cooking and melting into a soft, luxurious texture.
- Oil: Extra virgin olive oil is an excellent choice, providing a subtle fruity note that complements the onions perfectly while helping them cook evenly and develop that rich caramelization. You can also use other fats like unsalted butter for a richer flavor, or a combination of olive oil and butter. Avocado oil or grapeseed oil are also good neutral-tasting options if you prefer.
- Kosher Salt: More than just a seasoning, kosher salt plays a vital role in drawing out moisture from the onions. This process helps them soften quicker and allows their natural sugars to concentrate more effectively, enhancing the overall sweetness and deepening the caramelization. Add it early in the cooking process.
- Cracked Black Pepper: While optional, a touch of freshly cracked black pepper adds a subtle depth and warmth that balances the sweetness of the caramelized onions. It’s best added towards the end of cooking or just before serving.
Step-by-Step: How to Make Perfect Caramelized Onions
Making caramelized onions is a journey of patience and gentle heat, but the reward is immense. Follow these detailed steps to achieve golden, melt-in-your-mouth perfection:
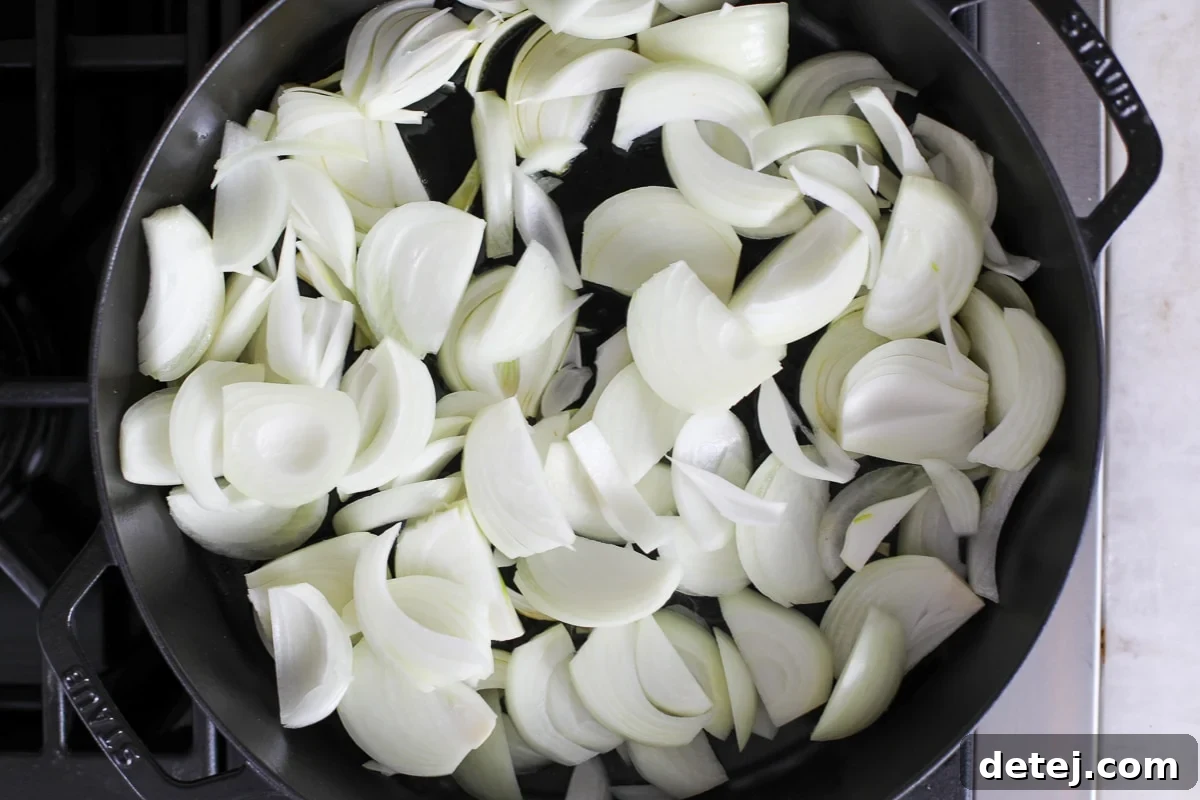
- Prepare Your Pan and Onions: Begin by heating a large, heavy-bottomed skillet – a cast iron skillet works wonderfully here for its even heat distribution – over medium heat. Add the extra virgin olive oil. Once the oil is shimmering and hot, add all of your thinly sliced onions to the pan. Don’t worry if the pan seems overcrowded; the onions will cook down significantly.
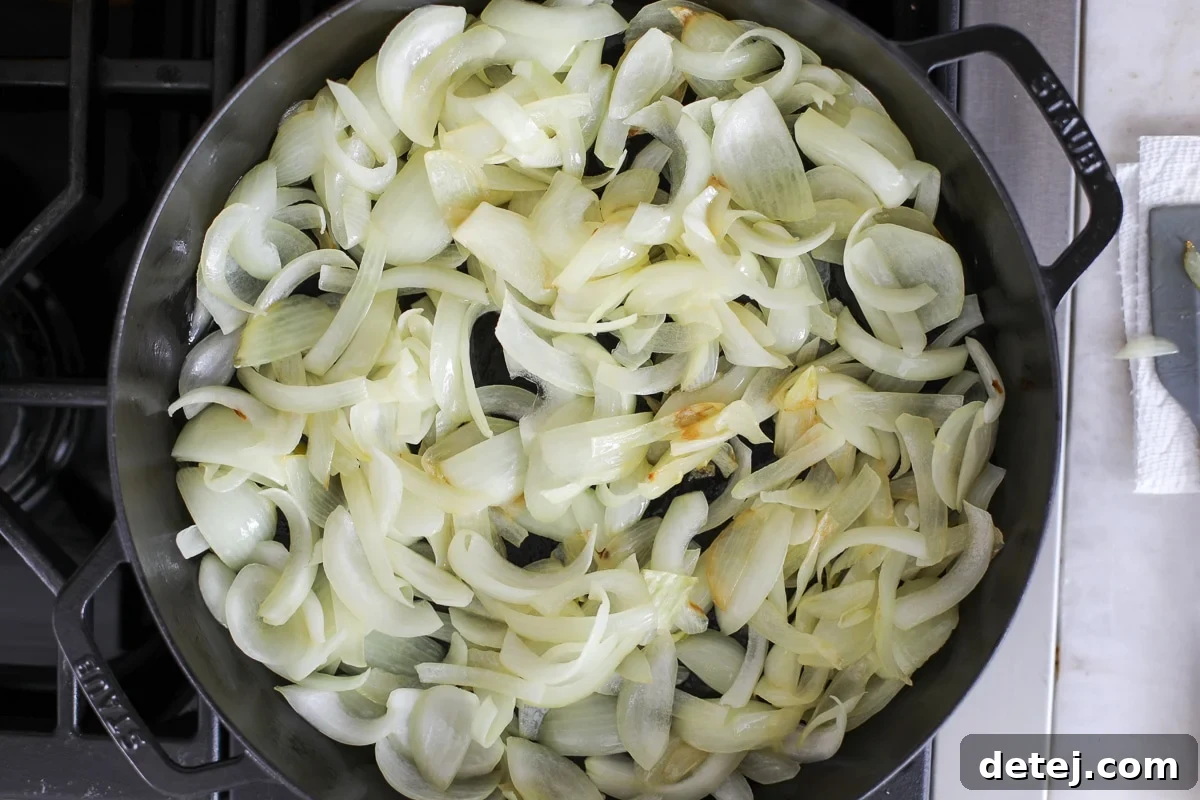
- Initial Sauté and Softening: Sauté the onions over medium heat for about 5-10 minutes, stirring occasionally. The goal here is to get them to soften and become translucent without browning. This initial higher heat helps to release some of their moisture and begins the softening process. You’ll notice their volume reducing as they cook down.
- Season and Reduce Heat: Once the onions are translucent and have softened, it’s time to reduce the heat significantly to medium-low. Season them with kosher salt and, if using, cracked black pepper. Toss well to ensure the seasoning is evenly distributed. The salt will help to further draw out moisture and contribute to the caramelization process.
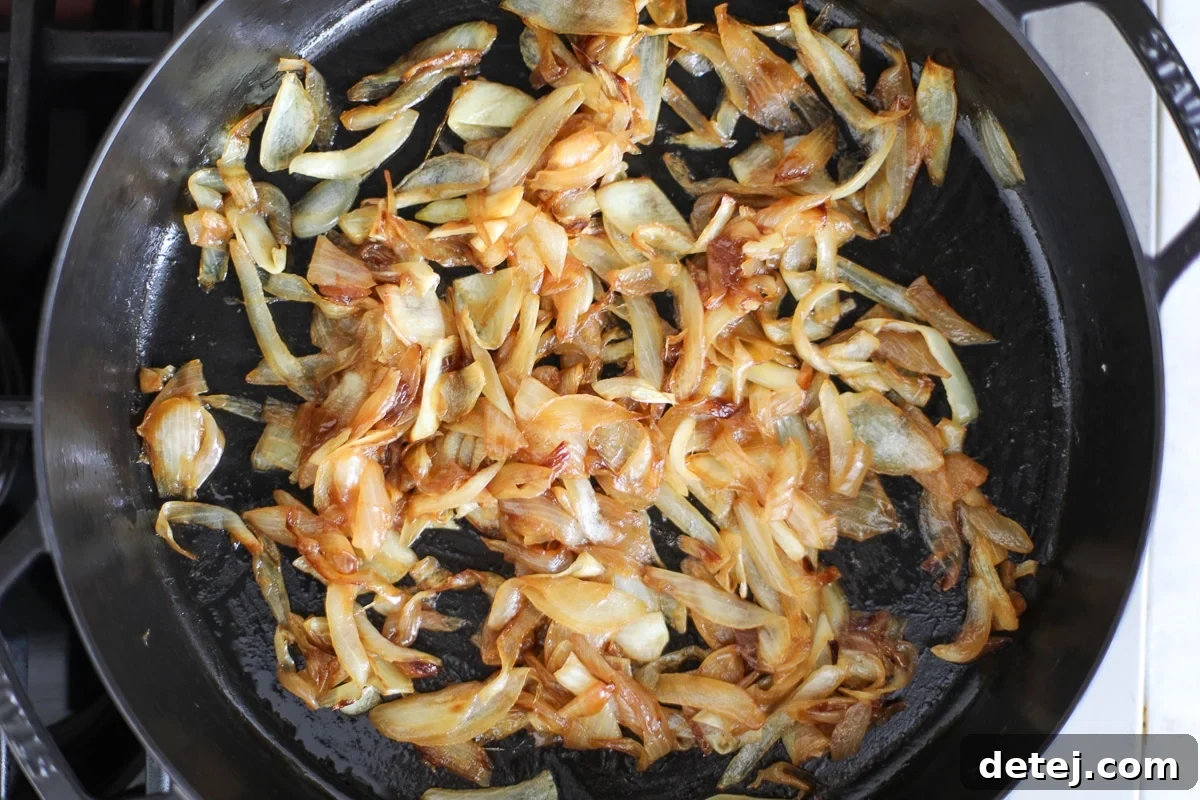
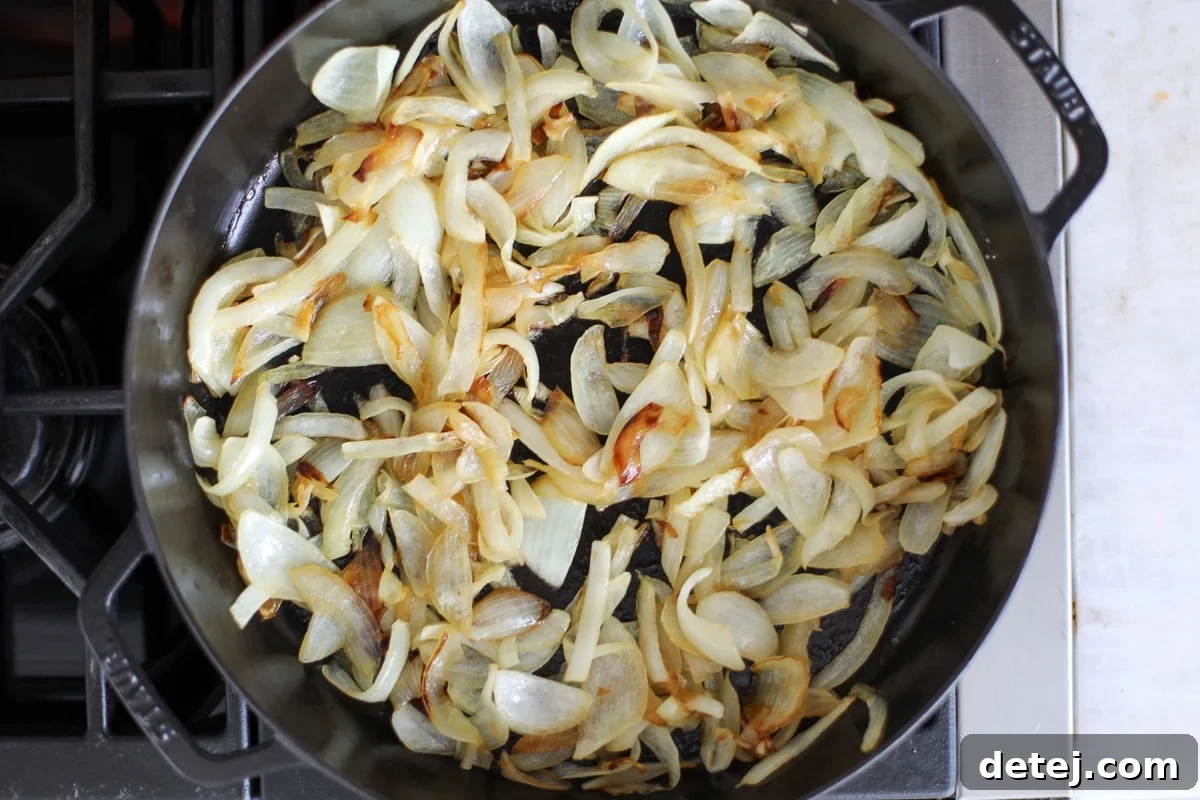
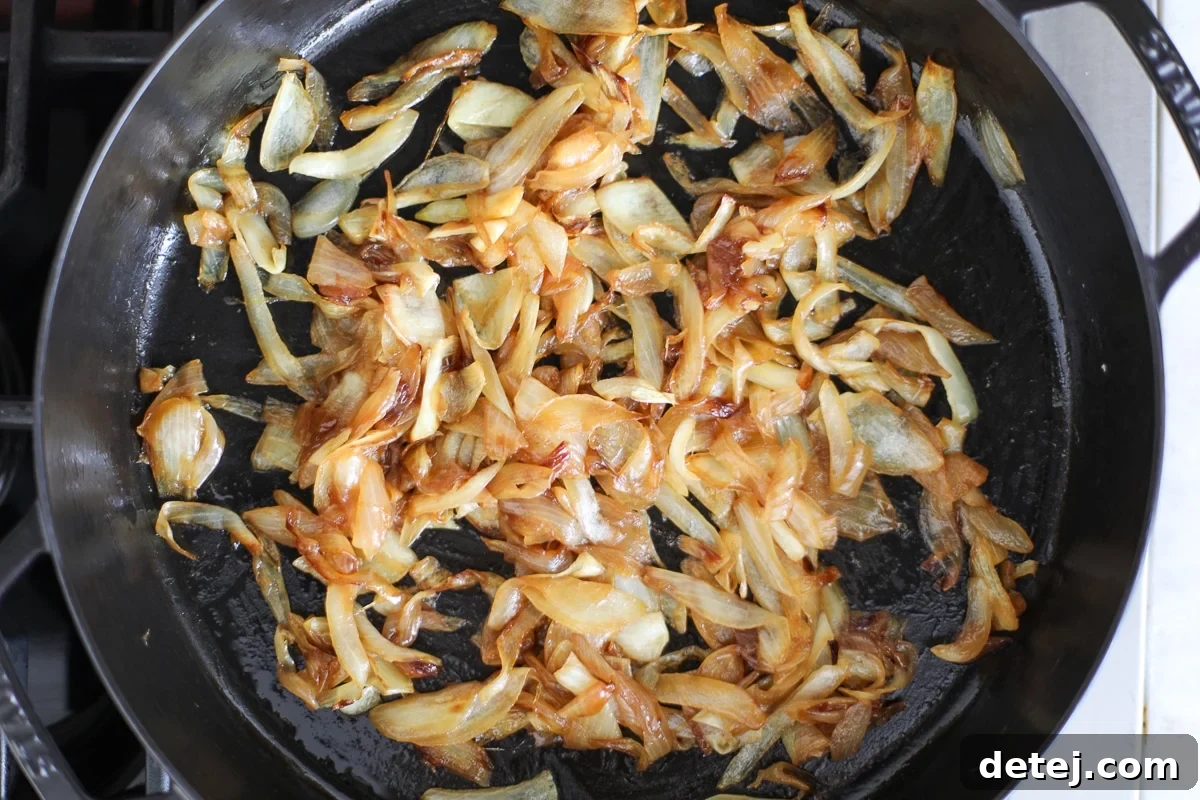
- Low and Slow Caramelization: This is the most crucial step, requiring patience. Continue to cook the onions low and slow, stirring occasionally (every 5-10 minutes), for about 40-60 minutes. The low heat is essential for developing those deep, complex sweet flavors through a process called the Maillard reaction, rather than just burning them. You’ll observe the onions slowly transitioning from pale yellow to light golden, then to a rich amber, and finally to a deep, dark brown.
- Prevent Burning and Deglaze (Optional but Recommended): Throughout the long cooking process, keep an eye on the pan. If the onions start to stick to the bottom or appear to be drying out too much and risking burning, add a small splash (1-2 tablespoons) of water, vegetable broth, or even a dry white wine or balsamic vinegar. Scrape up any browned bits from the bottom of the pan – this “fond” is packed with flavor and should be incorporated back into the onions. This deglazing technique helps build layers of flavor and ensures even caramelization.
- Achieve Deep Golden Perfection: Continue cooking until the onions are deeply golden brown, incredibly soft, and have a jam-like consistency. They should be significantly reduced in volume and intensely sweet. Taste and adjust seasoning if necessary.
- Serve or Store: Once the onions have reached your desired level of caramelization, remove them from the heat. Use them immediately while warm, or allow them to cool completely before transferring to an airtight container for storage.
Tips for Achieving the Best Caramelized Onions
While the process is simple, a few key tips can ensure your caramelized onions turn out perfectly every time:
- Embrace Patience: This is the golden rule of caramelizing onions. Resist the urge to rush the process by increasing the heat. Low and slow is the only way to gently coax out the sugars and achieve that deep, rich flavor without burning. Rushing will result in scorched, bitter onions rather than sweet, tender ones.
- Slice Uniformly: Consistent slicing (about 1/4 inch thick) is crucial for even cooking. If some slices are thick and others thin, you’ll end up with a mix of burnt and undercooked pieces.
- Don’t Overcrowd Your Pan: While onions reduce significantly, starting with too many in a small pan can steam them rather than sauté and caramelize. If you’re making a very large batch, consider dividing them into two pans or cooking them in batches. A single layer, or close to it, allows for better browning.
- Scrape the Bottom: Those browned bits that form on the bottom of the pan (the “fond”) are pure flavor. Periodically scrape them up and stir them into the onions. If they start to get too dark, a splash of water, broth, or wine will help deglaze the pan and release these delicious bits.
- Season Appropriately: Add salt early to help draw out moisture and kickstart the caramelization. You can always adjust the seasoning at the end, but getting salt in early helps build flavor from the beginning.
- Choose the Right Pan: A heavy-bottomed pan, like a cast iron skillet or a Dutch oven, is ideal because it distributes heat evenly and retains it well, preventing hot spots that can lead to burning.
Creative Ways to Enjoy Your Caramelized Onions
Once you have a batch of these sweet and savory onions, the possibilities are endless. Here are just a few ideas to inspire you:
- Breakfast & Brunch: Stir them into scrambled eggs, omelets, frittatas, or quiches for a touch of gourmet sweetness. They’re also fantastic alongside savory breakfast sausages or bacon.
- Sandwiches & Burgers: Elevate any sandwich, wrap, or burger from ordinary to extraordinary. They pair wonderfully with grilled cheese, roast beef sandwiches, or as a topping for a gourmet burger.
- Main Courses: Serve them as a rich accompaniment to grilled steaks, roasted chicken, pork chops, or even pan-seared fish. They’re also superb stirred into creamy pasta dishes, rice pilafs, or risottos.
- Appetizers & Sides: Create elegant crostini with goat cheese and caramelized onions, make a savory tart or flatbread, or add them to dips like a fancy onion dip. They can also be tossed with roasted vegetables like Brussels sprouts or potatoes.
- Soups & Sauces: Blend them into soups (like French onion soup, of course!), stews, or gravies for incredible depth of flavor.
Storage and Meal Prep Made Easy
Caramelized onions are an ideal component for meal prepping due to their excellent storage capabilities:
- Refrigerator Storage: Once cooled completely, transfer your caramelized onions to an airtight container. They will keep beautifully in the refrigerator for up to 5-7 days, becoming even more flavorful as they sit.
- Freezer Storage: Yes, caramelized onions freeze exceptionally well! For convenience, divide them into small, usable portions (e.g., in ice cube trays, small freezer bags, or individual containers). They can be frozen for up to 3-4 months. When ready to use, simply thaw them in the refrigerator overnight or gently reheat from frozen in a skillet.
- Batch Cooking: Don’t hesitate to double or triple this recipe. The effort is minimal, and having a ready supply of caramelized onions on hand will revolutionize your weekly cooking, adding a touch of gourmet flavor to countless dishes.
Frequently Asked Questions About Caramelized Onions
The full caramelization process typically takes about 40-60 minutes. This timeframe can vary slightly depending on the heat level, the size and type of your pan, and the amount of onions you’re cooking. Remember, patience is crucial for achieving that deep, sweet flavor.
While it might be tempting, increasing the heat is generally not recommended. Cooking onions too quickly can lead to them burning and becoming bitter on the outside before their natural sugars have a chance to properly caramelize and sweeten throughout. Lower heat is key to developing that deep, complex, sweet flavor and achieving the desired soft, jammy texture.
Yellow onions are generally considered ideal for caramelizing due to their balanced sweet and savory flavor and moderate sugar content. Sweet onions, like Vidalia or Walla Walla, can also be used for an even sweeter result, while red onions offer a slightly sharper taste and a beautiful reddish-brown color.
Once fully cooled, store your caramelized onions in an airtight container in the refrigerator. They will stay fresh and delicious for up to 5-7 days. In fact, many people find their flavor deepens even further after a day or two in the fridge.
Absolutely! Caramelized onions freeze exceptionally well. To freeze, allow them to cool completely, then portion them into small, usable amounts (e.g., in ice cube trays or small freezer-safe bags). Once frozen solid, you can transfer the cubes or portions to a larger freezer bag. They can be stored in the freezer for up to 3-4 months and thawed as needed for various recipes.
The most common reason for burning is the heat being too high. Caramelization requires a gentle, consistent heat over an extended period. If your onions are burning, immediately lower the temperature. You can also add a splash of water, broth, or wine to deglaze the pan and prevent further scorching, scraping up any stuck-on bits.
Sautéed onions are cooked relatively quickly over medium-high heat until they are softened and lightly golden. They retain some of their sharpness. Caramelized onions, on the other hand, are cooked slowly over low heat for a much longer period (40-60 minutes or more) to break down their complex carbohydrates into simple sugars. This process results in a significantly sweeter, deeper, and jam-like consistency with a rich, dark brown color.
Other Delicious Recipes to Consider Trying
- Zesty Pickle de Gallo
- Refreshing Fruit Salsa
- Irresistible Garlic Butter Shrimp
- Creamy Easy Tzatziki Sauce
Easy Caramelized Onions
Sarah Thomas-Drawbaugh
10 mins
1 hr
1 hr
10 mins
4 servings
Equipment
-
1 large cast iron skillet
Ingredients
Ingredients
- 3 large yellow onions, thinly sliced, about 1/4 inch
- 2 tablespoons extra virgin olive oil
- ½ teaspoon kosher salt
- ¼ teaspoon cracked black pepper, optional
Instructions
How to Make
-
Heat a large cast iron skillet over medium heat and add the extra virgin olive oil. Once hot, add the sliced onions. Sauté over medium heat until the onions begin to soften but not brown. Once translucent, reduce the heat to medium-low and season with kosher salt and cracked black pepper. Toss to coat.
-
Cook the onions low and slow, stirring occasionally, for 40-60 minutes, until they are deeply golden, soft, and caramelized. If the pan begins to dry out, add a small splash of water to prevent burning and to deglaze any flavorful browned bits from the bottom.
-
Once the onions are fully caramelized and have reached a jam-like consistency, remove from heat and use immediately or allow to cool and store for later use.
Notes
Storage: Once cooled completely, store in an airtight container in the refrigerator for up to 5–7 days. Caramelized onions can also be frozen in small portions for up to 3-4 months.
Nutrition
Calories: 107 kcal, Carbohydrates: 11g, Protein: 1g, Fat: 7g, Saturated Fat: 1g, Polyunsaturated Fat: 1g, Monounsaturated Fat: 5g, Sodium: 295mg, Potassium: 166mg, Fiber: 2g, Sugar: 5g, Vitamin A: 3IU, Vitamin C: 8mg, Calcium: 27mg, Iron: 0.3mg
Nutrition information is automatically calculated and should only be used as an approximation.
If you’ve tried this easy caramelized onions recipe, please leave a comment below
and be sure to tag your delicious images @healthyishfoods on Instagram!