
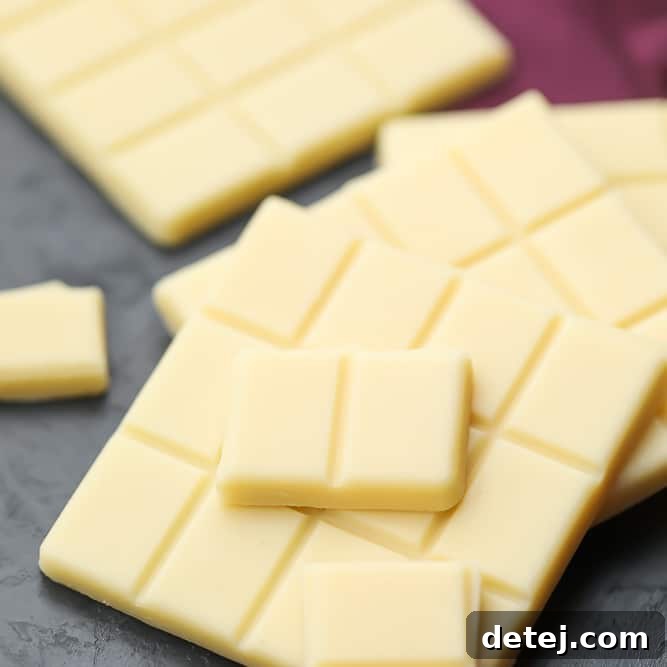
Have you ever yearned for the rich, creamy decadence of white chocolate but struggled to find a dairy-free alternative that truly satisfies? For many, including myself, white chocolate holds a special place in their hearts and taste buds. Before embracing a plant-based lifestyle over a decade ago, I was undeniably the “white chocolate queen.” My culinary world revolved around it – from white chocolate mochas and classic white chocolate chip cookies to indulgent cookies and cream candy bars. The unique, sweet, and velvety profile of white chocolate always took precedence over its milk or dark counterparts.
However, transitioning to a dairy-free diet meant letting go of this beloved indulgence, as traditional white chocolate is heavily reliant on dairy. While a few commercial brands of dairy-free white chocolate chips have emerged, they often come with a hefty price tag and can be frustratingly elusive in regular grocery stores. This scarcity and expense sparked a mission: to create my own exquisite vegan white chocolate at home. What I discovered was not only surprising but incredibly rewarding – it’s remarkably simple to make and astonishingly delicious.
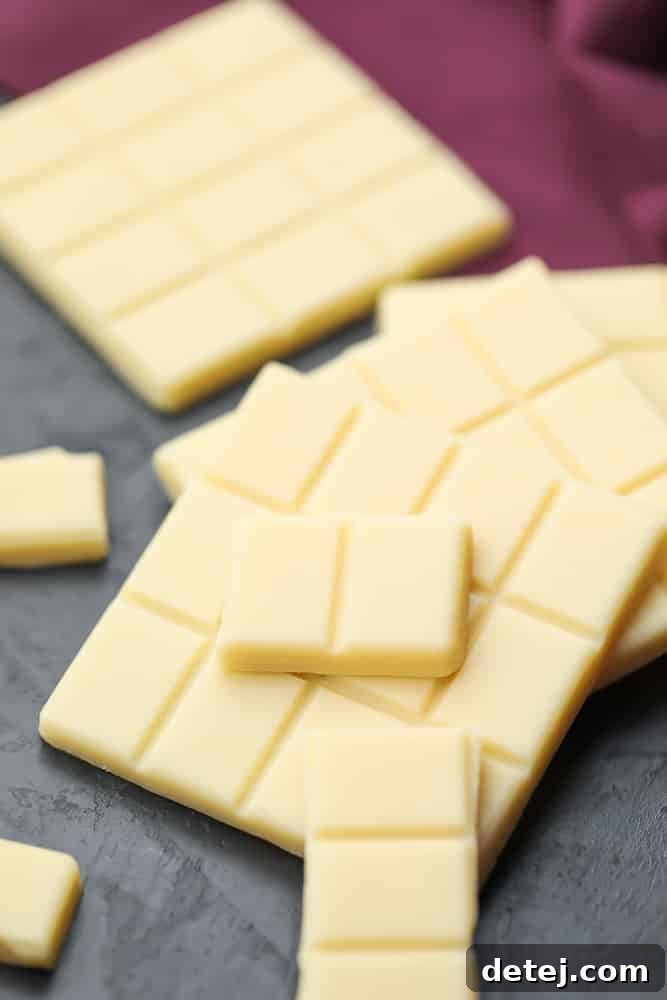
My initial attempts at homemade vegan white chocolate tasted good, but the texture often left something to be desired – a bit grainy, lacking that signature smoothness. But through persistence and experimentation, I finally pinpointed the key to achieving a truly luxurious, silky-smooth consistency. I’m excited to share this simple yet transformative solution with you, so you too can revel in perfectly creamy, smooth vegan white chocolate, crafted right in your own kitchen. This recipe doesn’t just promise a dairy-free alternative; it delivers a superior white chocolate experience that might even surpass your expectations.
The Allure of Homemade Vegan White Chocolate
Beyond satisfying a craving, there are numerous compelling reasons to venture into making your own vegan white chocolate. Firstly, it offers unparalleled control over ingredients, ensuring purity and avoiding unwanted additives often found in commercial products. For those with dairy allergies or intolerances, it’s a safe and delightful indulgence. Furthermore, making it at home can be significantly more cost-effective than purchasing specialized dairy-free versions, especially when you consider the quality and quantity you can produce.
The process itself is surprisingly therapeutic and deeply rewarding. Imagine crafting bars of creamy white chocolate, knowing exactly what went into them, and customizing them to your exact preferences. This recipe simplifies what might seem like a complex confectionery task into an approachable and enjoyable culinary adventure. It’s an opportunity to reclaim your favorite white chocolate treats, from baking to simply snacking, without compromise.
Essential Ingredients for Velvety Vegan White Chocolate
Creating exceptional vegan white chocolate relies on a few core ingredients, each playing a crucial role in achieving that desirable flavor and texture. It’s a minimalist approach that yields maximum deliciousness. Here’s a closer look at the stars of our recipe:
- Cacao Butter: The Heart of White Chocolate – This incredible ingredient is non-negotiable for authentic white chocolate. It’s the pure fat extracted from the cacao bean, separated from the cocoa solids that give dark chocolate its color and flavor. Cacao butter boasts a beautiful, natural vanilla-like aroma and a subtle chocolate flavor that forms the perfect base for white chocolate. It melts smoothly and provides the characteristic “snap” when hardened. While it might seem like a specialty item, it’s readily available online and in health food stores. A single bag will go a long way, allowing you to create multiple batches of this delightful treat. Do not attempt to substitute cacao butter with other fats, as it is essential for the structure and flavor profile of real white chocolate.
- Vegetable Shortening: For Stability and Smoothness – Cacao butter, while essential, can be quite rich on its own. Adding a touch of vegetable shortening helps to temper this richness, creating a more balanced flavor and a smoother mouthfeel. More importantly, shortening contributes to the white chocolate’s stability at room temperature, making it less prone to melting compared to alternatives like coconut oil. If you do opt for coconut oil, be aware that your white chocolate will soften much quicker, especially when incorporated into baked goods. For best results in recipes where the chocolate needs to hold its shape, shortening is the superior choice.
- Powdered Sugar: The Sweetener and Stabilizer – As the primary sweetener, powdered sugar (also known as confectioners’ sugar) is crucial for both taste and texture. Its finely ground consistency ensures it dissolves seamlessly into the melting fats, preventing a grainy texture. Granulated sugar, with its larger crystals, would make the chocolate gritty. Beyond sweetness, powdered sugar helps to stabilize the emulsion, contributing to the final smooth consistency. While I highly recommend sticking to powdered sugar for optimal results, experimenting with alternative powdered sweeteners is possible, but proceed with caution as results may vary significantly.
- Coconut Milk Powder: The Dairy-Free Creaminess – This ingredient is your secret weapon for achieving a creamy, dairy-like richness without any actual dairy. Coconut milk powder provides the essential milk solids needed for a truly authentic white chocolate experience. It also acts as a crucial stabilizer, binding the ingredients together. Rice milk powder is another viable option if you prefer or have a coconut allergy, offering a similar stabilizing effect and creamy texture.
- Pure Vanilla Extract: Aromatic Enhancement – Vanilla is a classic pairing with white chocolate, enhancing its natural sweetness and adding a layer of sophisticated aroma. Using a high-quality pure vanilla extract will significantly elevate the overall flavor profile of your homemade creation. Avoid artificial vanilla for the best taste.
- A Pinch of Salt (Optional): Flavor Balancer – Just a tiny pinch of salt acts as a flavor enhancer, balancing the sweetness and bringing out the nuanced notes of the other ingredients. It’s optional, but highly recommended for a more complex and well-rounded flavor.
Crafting Your Own Vegan White Chocolate: A Step-by-Step Guide
Creating luxurious vegan white chocolate at home is a straightforward process that anyone can master. Follow these steps carefully to ensure a smooth, creamy, and utterly delicious result.
- Prepare Your Cacao Butter: If your cacao butter comes in large, solid chunks, it’s best to chop them into smaller pieces. This will significantly speed up the melting process and ensure even heating. Aim for pieces roughly the size of a small dice.
- Set Up Your Double Boiler: The key to melting chocolate gently and evenly is a double boiler. If you don’t own one, you can easily create a makeshift version. Place a heat-safe glass or metal bowl over a small to medium-sized pot containing a few inches of simmering water. Ensure that the bottom of the bowl does not touch the surface of the water; the steam is what gently heats the bowl.
- Melt the Fats: Add the chopped cacao butter and vegetable shortening to the heat-safe bowl positioned over the simmering water. Allow the fats to melt slowly, stirring frequently with a spatula or whisk. This process typically takes about 10 minutes. The mixture will transform into a clear, oily liquid. Consistent stirring helps prevent scorching and promotes even melting.
- Incorporate Dry Ingredients: Once the cacao butter and shortening are fully melted and combined, remove the bowl from the heat (or keep it over very low, barely simmering water). Immediately add the powdered sugar, coconut milk powder, pure vanilla extract, and that tiny pinch of salt (if using).
- Whisk to Combine: Vigorously whisk the mixture for about 2 minutes until it appears mostly smooth. At this stage, you might still notice some very fine grains from the powdered ingredients. Don’t worry, the next step will take care of that.
- Achieve Ultimate Smoothness with Blending: This is the crucial step for eliminating any graininess and achieving that coveted silky texture. Carefully transfer the warm white chocolate mixture to a high-speed blender. Blend on high for 1 to 2 minutes. The powerful blades will thoroughly break down any remaining powdered sugar or coconut milk powder particles, creating a perfectly emulsified, incredibly smooth, and pourable liquid. Use hot pads when handling the bowl from the double boiler, as it will be warm.
-
Pour into Molds and Harden: Promptly pour the blended vegan white chocolate into your desired chocolate molds. Silicone molds work wonderfully for easy removal. You could also use a small, parchment-lined baking pan for a chocolate bark, or even muffin trays with liners for individual disks.
Tip: Place your molds on a flat, sturdy surface like a baking sheet before filling. This makes it much easier to transfer them to the refrigerator or freezer without spillage while the chocolate is still liquid. - Chill to Set: Transfer the filled molds to the refrigerator or freezer. The white chocolate will harden in approximately 30 minutes in the refrigerator, or even faster in the freezer. Once firm, gently remove the white chocolate from the molds.
- Cookies and Cream Dream: For an irresistible cookies and cream experience, simply stir in a generous amount of crushed vegan sandwich cookies (like Oreos) into the melted white chocolate before pouring it into molds. The contrasting textures and flavors are a match made in heaven.
- Fruity and Bright: Fold in a little crushed freeze-dried raspberries or strawberries for a burst of vibrant color and tangy fruit flavor. The freeze-dried fruit provides intense flavor without adding excess moisture, which can compromise the chocolate’s texture.
- Minty Fresh: Swap out the vanilla extract for peppermint extract to create a refreshing peppermint white chocolate. For an extra festive touch, you can also stir in finely chopped candy cane pieces once the chocolate has cooled slightly but is still pourable.
- Nutty Indulgence: Add some finely chopped nuts, such as toasted hazelnuts, almonds, or pistachios, for a delightful crunch and nutty flavor dimension. Ensure the nuts are well-distributed throughout the chocolate.
- Citrus Zest: Grate in a bit of orange or lemon zest for a subtle, aromatic citrusy note that brightens the overall flavor profile.
- Espresso Boost: For coffee lovers, a tiny amount of finely ground espresso powder can add a sophisticated depth to the white chocolate without overpowering its sweetness.
- Perfecting White Chocolate Chip Cookies: If you plan to use your white chocolate in cookies, chop it into sizable chunks. For the best results, place these chopped chunks in the freezer for 15-20 minutes before gently folding them into your cookie dough. Bake the cookies immediately. This pre-freezing step helps the white chocolate chips hold their shape better during baking, preventing them from melting completely and spreading too thin.
- Addressing Melting in Baked Goods: The stability of your white chocolate in baking can vary depending on factors like the specific brand of cacao butter you use and the baking temperature. If you find that your white chocolate tends to melt excessively during baking, there’s a simple workaround: bake your cookies as usual, then, while they are still warm and fresh out of the oven, press chunks of the homemade white chocolate onto the tops of the cookies. The residual heat will soften them beautifully, allowing them to adhere and create a lovely aesthetic without being fully baked in.
- Luxurious White Hot Chocolate: While I haven’t personally tested this specific variation yet, I envision a truly decadent vegan white hot chocolate. You could adapt a classic vegan hot chocolate recipe by omitting the cocoa powder and instead melting down a generous amount of your homemade vegan white chocolate chunks into warm plant-based milk. Imagine the creamy, sweet, and comforting beverage – a perfect treat for a chilly evening.
- Drizzling and Dipping: Melt your white chocolate gently using a double boiler, then use it to drizzle over desserts, fruit, or even to dip pretzels, strawberries, or vegan biscuits for an elegant touch.
- Frostings and Ganaches: Finely chop the white chocolate and incorporate it into vegan buttercreams or ganaches for a rich, white chocolate flavored frosting that will elevate any cake or cupcake.
- 4 ounces raw cacao butter (3/4 cup, chopped small)
- 4 tablespoons vegetable shortening
- 3/4 cup powdered sugar
- 1/2 cup coconut milk powder
- 1 teaspoon pure vanilla extract
- Tiny pinch of salt, optional (1/8th tsp)
- If your cacao butter comes in large chunks, chop them into smaller pieces to facilitate quicker melting.
- In a heat-safe bowl, add the chopped cacao butter and vegetable shortening. Place this bowl over a small to medium-sized pot with a few inches of simmering water, ensuring the bowl’s bottom does not touch the water. Allow the mixture to melt gently, stirring frequently. This process will take approximately 10 minutes, resulting in a clear, oily liquid.
- Once melted, remove from heat or reduce the water to a bare simmer. Add the powdered sugar, coconut milk powder, vanilla extract, and the optional tiny pinch of salt. Whisk diligently for about 2 minutes until the mixture appears mostly smooth.
- Carefully transfer the warm mixture to a high-speed blender using hot pads. Blend for 1-2 minutes until the chocolate is incredibly smooth and velvety.
- Promptly pour the smooth vegan white chocolate into your preferred chocolate molds. For easy handling, place the molds on a flat baking sheet before filling.
- Refrigerate until solid, which typically takes about 30 minutes. You can also place them in the freezer to speed up the hardening process. Once firm, demold and enjoy! Store your homemade white chocolate in a covered container in the refrigerator or freezer.
- While coconut oil can be substituted for vegetable shortening, be aware that your white chocolate will melt much faster at room temperature and is more likely to melt completely when used in baked goods.
- For optimal texture and sweetness, powdered sugar is highly recommended. Using other sweeteners may alter the final consistency and flavor, so substitute at your own risk.
- Get Creative with Variations: Experiment by stirring in ingredients like crushed Oreo cookie crumbs for a “cookies and cream” treat, freeze-dried raspberries or strawberries for a fruity twist, chopped nuts (like hazelnuts or almonds), or peppermint extract and/or chopped candy cane pieces for a festive minty flavor.
- Refrigeration is Key: Always store your vegan white chocolate in an airtight container in the refrigerator. This helps keep it firm, prevents melting, and extends its shelf life.
- Freezing for Longevity: For longer storage, you can also freeze your white chocolate. Ensure it’s wrapped well or placed in a freezer-safe, airtight container to prevent freezer burn and absorption of other food odors. When ready to use, thaw it in the refrigerator overnight.
- Shelf Life: Stored correctly in the refrigerator, homemade vegan white chocolate can last for several weeks, if not longer. In the freezer, it can remain fresh for several months. Always check for any off-smells or changes in appearance before consuming.
- Why is my white chocolate grainy? The most common reason for grainy white chocolate is insufficient blending. The powdered sugar and coconut milk powder need to be thoroughly broken down and incorporated into the melted fats. Using a high-speed blender for 1-2 minutes is crucial to achieve a silky-smooth texture. Also, ensure your ingredients are finely sifted to avoid large clumps.
- Can I use a different sweetener instead of powdered sugar? Powdered sugar is highly recommended because its fine consistency dissolves perfectly, contributing to the smooth texture. Granulated sugar will result in a gritty chocolate. Liquid sweeteners like maple syrup or agave nectar contain water, which will seize the chocolate and make it unusable. If you must use an alternative, ensure it is in powdered form (e.g., powdered erythritol), but be prepared for potential changes in texture and flavor.
- Is cacao butter the same as cocoa butter? Yes, cacao butter and cocoa butter are essentially the same thing. “Cacao” often refers to the raw, unroasted form of the bean, while “cocoa” typically refers to processed forms. However, in the context of the fat, they are interchangeable. It’s the pure fat extracted from the cacao bean.
- Why can’t I substitute cacao butter with coconut oil? While coconut oil is a plant-based fat and can solidify, it has a much lower melting point than cacao butter. This means white chocolate made solely with coconut oil will melt very quickly at room temperature and will not have the same firm “snap” as traditional white chocolate or one made with cacao butter. Cacao butter is also essential for the distinct flavor profile of white chocolate.
- How can I ensure my chocolate molds don’t spill? Always place your chocolate molds on a stable, flat surface like a baking sheet or a sturdy cutting board before you start pouring the liquid chocolate. This way, you can easily transport them to the refrigerator or freezer without worrying about accidental spills.
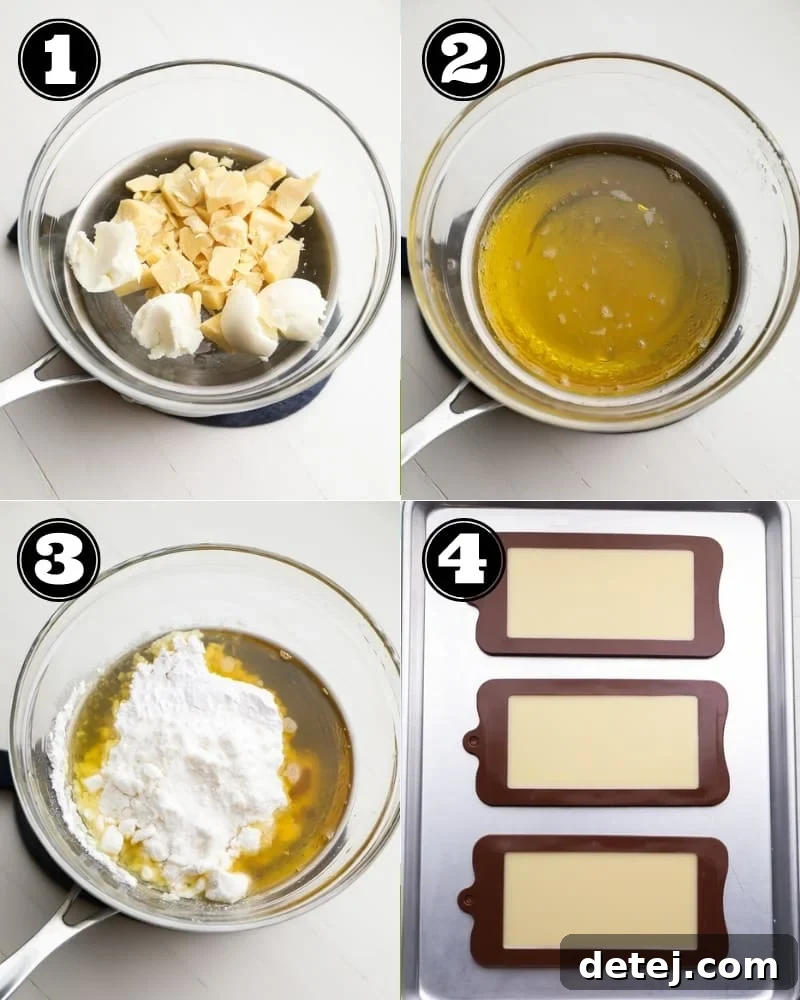
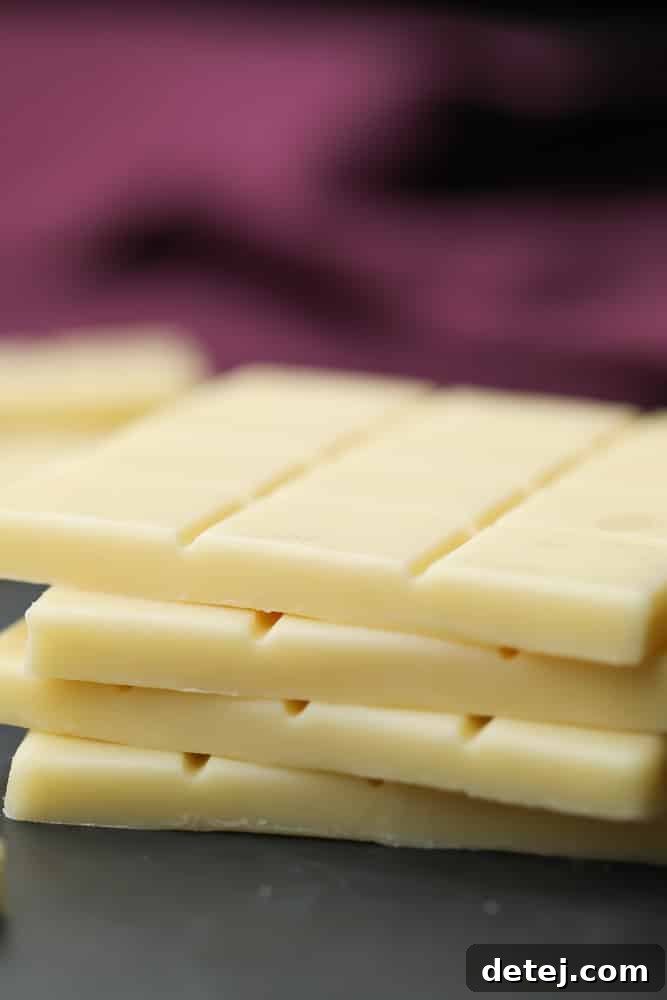
Once hardened, your homemade vegan white chocolate is ready to enjoy! This recipe typically yields about 3 large chocolate bars or a collection of smaller pieces, depending on the size and shape of your molds. Store your delectable creation in a covered airtight container in the refrigerator or freezer to maintain its freshness and firmness.
Creative Variations to Elevate Your Vegan White Chocolate
Once you’ve mastered the basic recipe, the possibilities for customizing your homemade vegan white chocolate are endless. Here are a few ideas to get your creative juices flowing:
Tips for Incorporating Homemade Vegan White Chocolate into Your Recipes
Your homemade vegan white chocolate is incredibly versatile and can be used in a myriad of ways, just like traditional white chocolate. Here are some pointers for using it effectively in various culinary applications:
Vegan White Chocolate Recipe
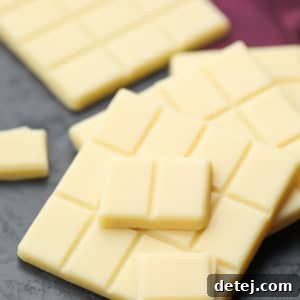
Learn how to make luscious vegan white chocolate at home in minutes with just 5 essential ingredients! Achieve a creamy, buttery, smooth, and rich dairy-free indulgence.
Prep Time: 10 mins | Cook Time: 15 mins | Chilling Time: 30 mins | Total Time: 55 mins
Servings: 6 servings (yields approx. 3 large bars)
Ingredients
Instructions
Notes
Nutrition
Serving: 1 of 6 servings | Calories: 356kcal | Carbohydrates: 21g | Protein: 3g | Fat: 30g | Saturated Fat: 17g | Sodium: 40mg | Sugar: 17g
Recipe Details
Course: Dessert | Cuisine: American | Author: Nora Taylor
Storing Your Homemade Vegan White Chocolate
Proper storage is essential to maintain the quality and texture of your homemade vegan white chocolate. Because it’s made with natural fats like cacao butter and often shortening, it’s more sensitive to temperature fluctuations than some commercial chocolates.
Frequently Asked Questions About Vegan White Chocolate
Here are answers to some common questions you might have when making your own dairy-free white chocolate:
Embrace the Sweet Freedom of Homemade Vegan White Chocolate
Making your own vegan white chocolate is more than just a recipe; it’s an empowering journey into plant-based confectionery. It offers the freedom to enjoy one of the most beloved chocolate varieties without any dairy, artificial ingredients, or the high costs associated with store-bought alternatives. With just a few simple ingredients and a little patience, you can create a truly spectacular treat that rivals, if not surpasses, its conventional counterparts.
From a personal obsession to a delightful homemade reality, this recipe has transformed my ability to enjoy white chocolate in all its forms. Whether you’re craving a luxurious snack, a special ingredient for your baking adventures, or a thoughtful homemade gift, this vegan white chocolate is sure to impress. So, gather your ingredients, follow these easy steps, and prepare to indulge in the creamy, buttery goodness of homemade dairy-free white chocolate. Your taste buds, and perhaps your vegan baking, will thank you!