
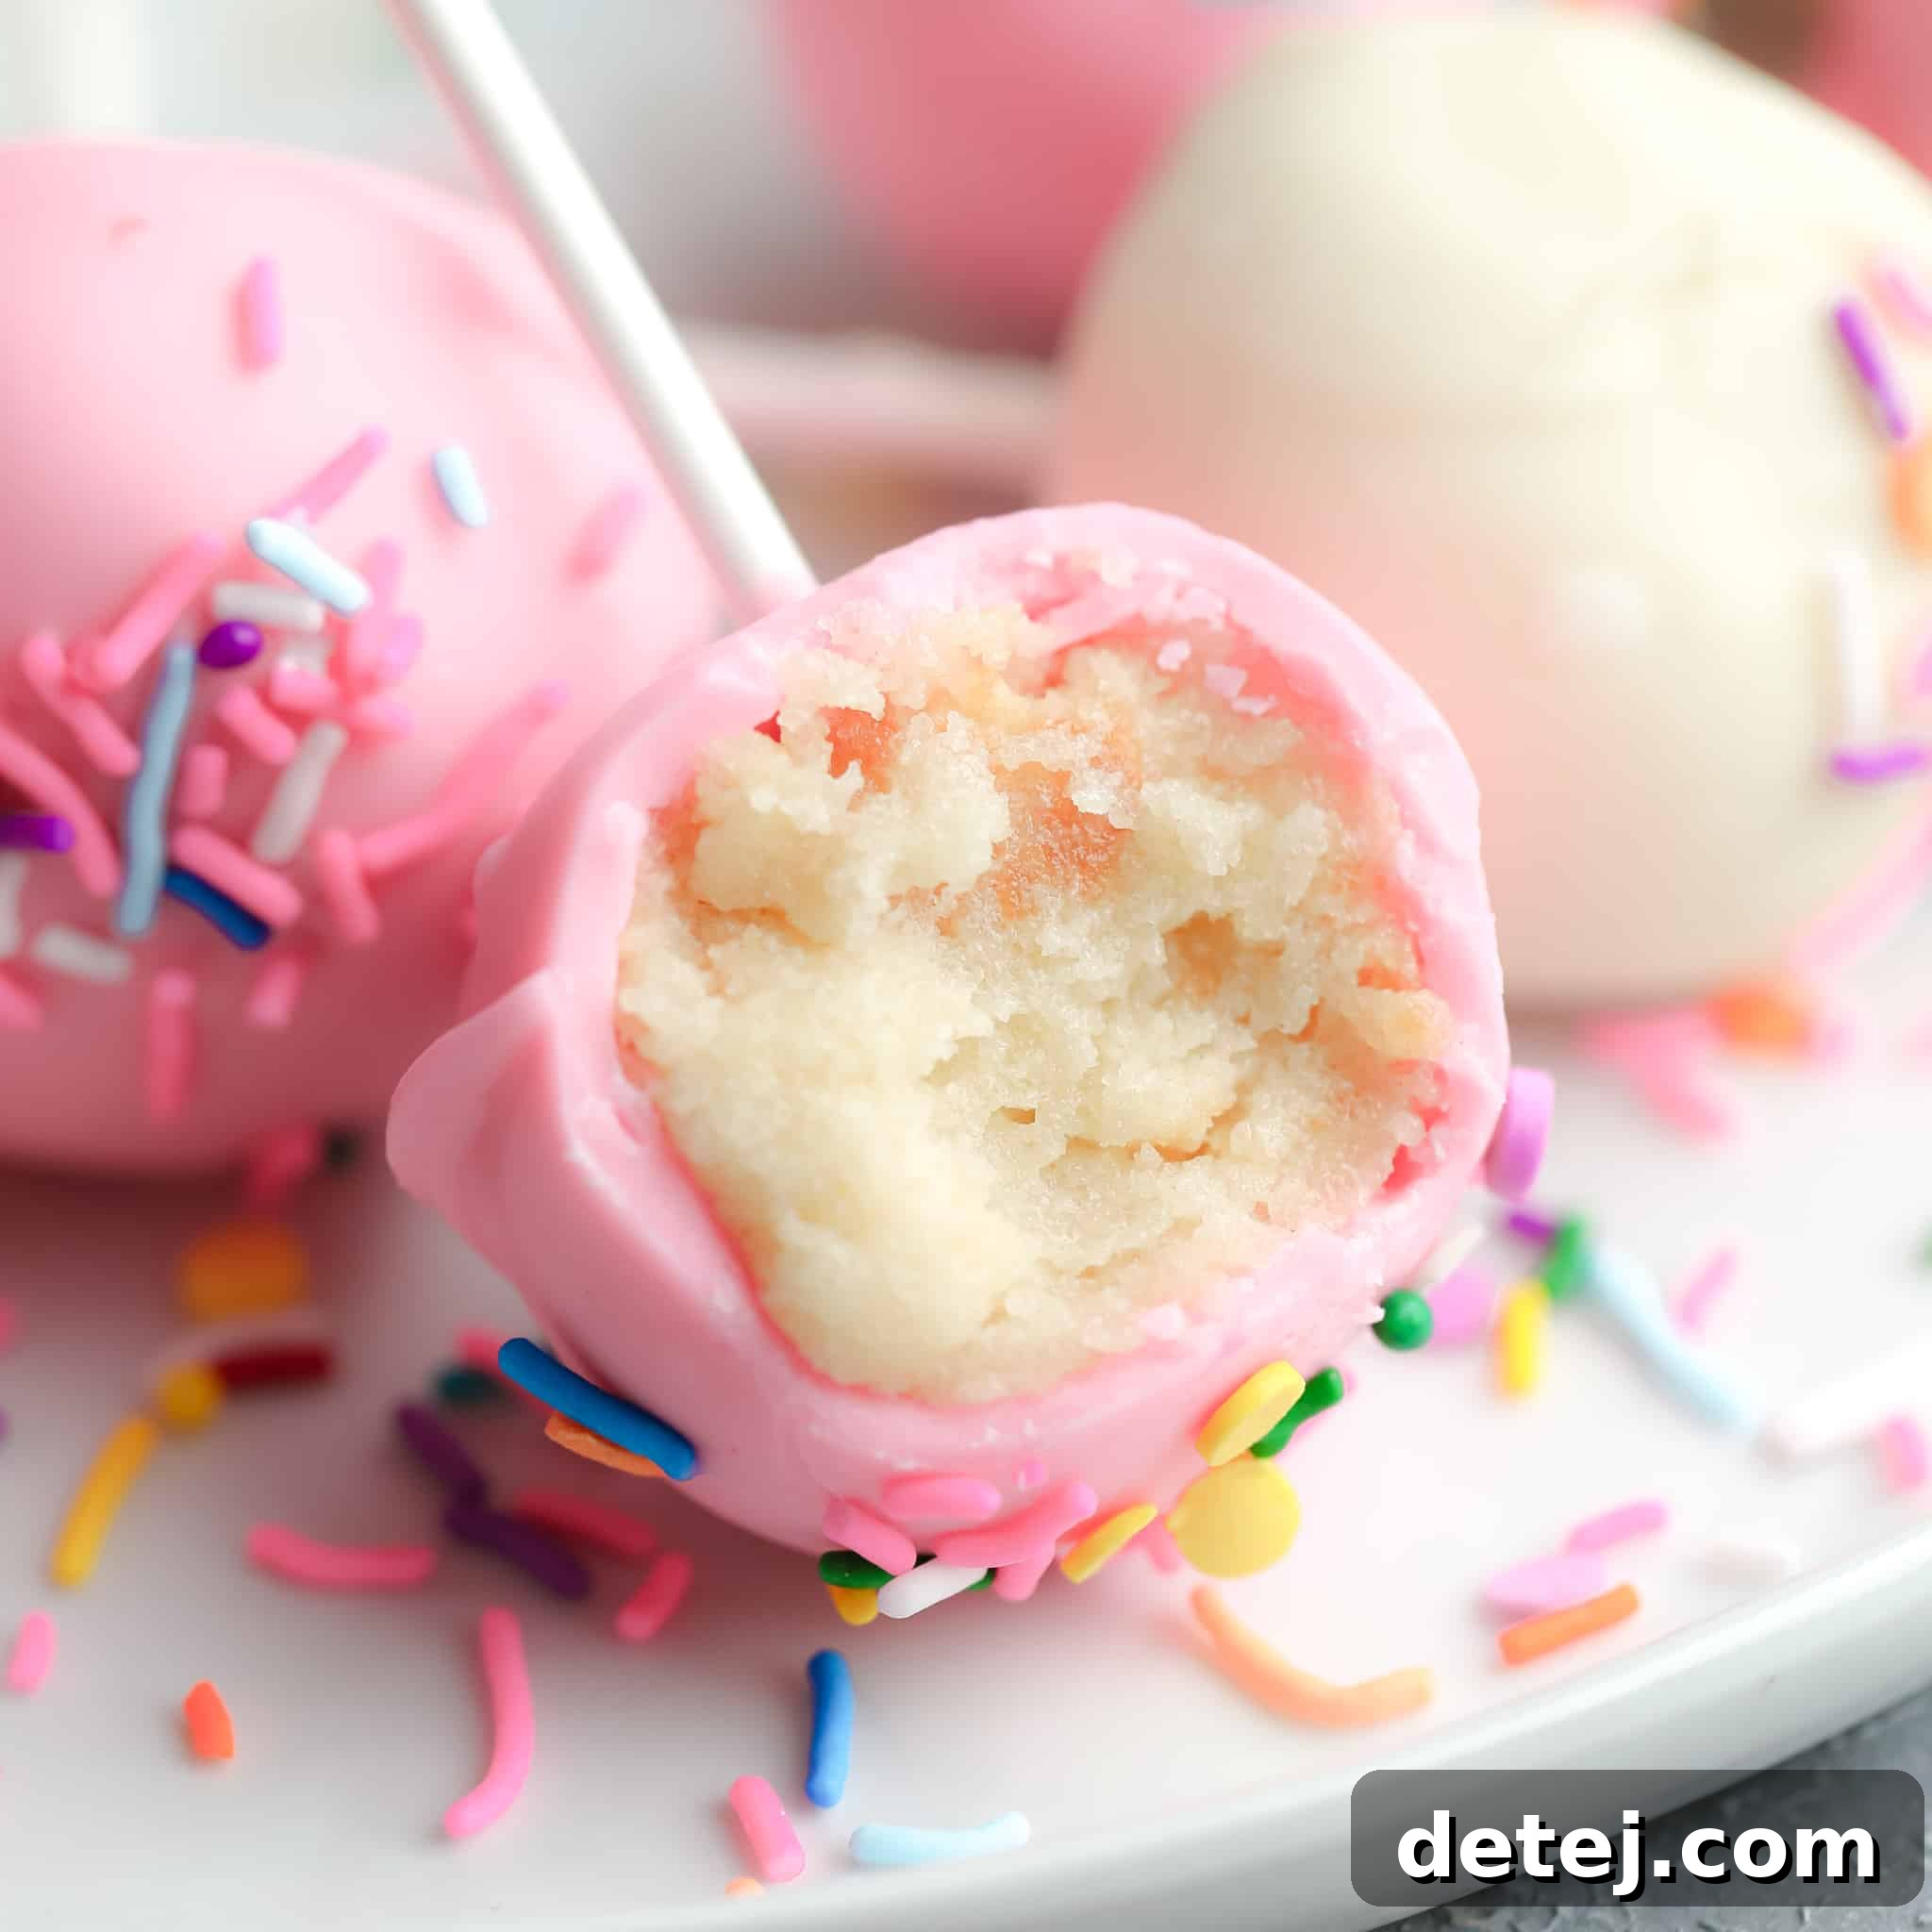
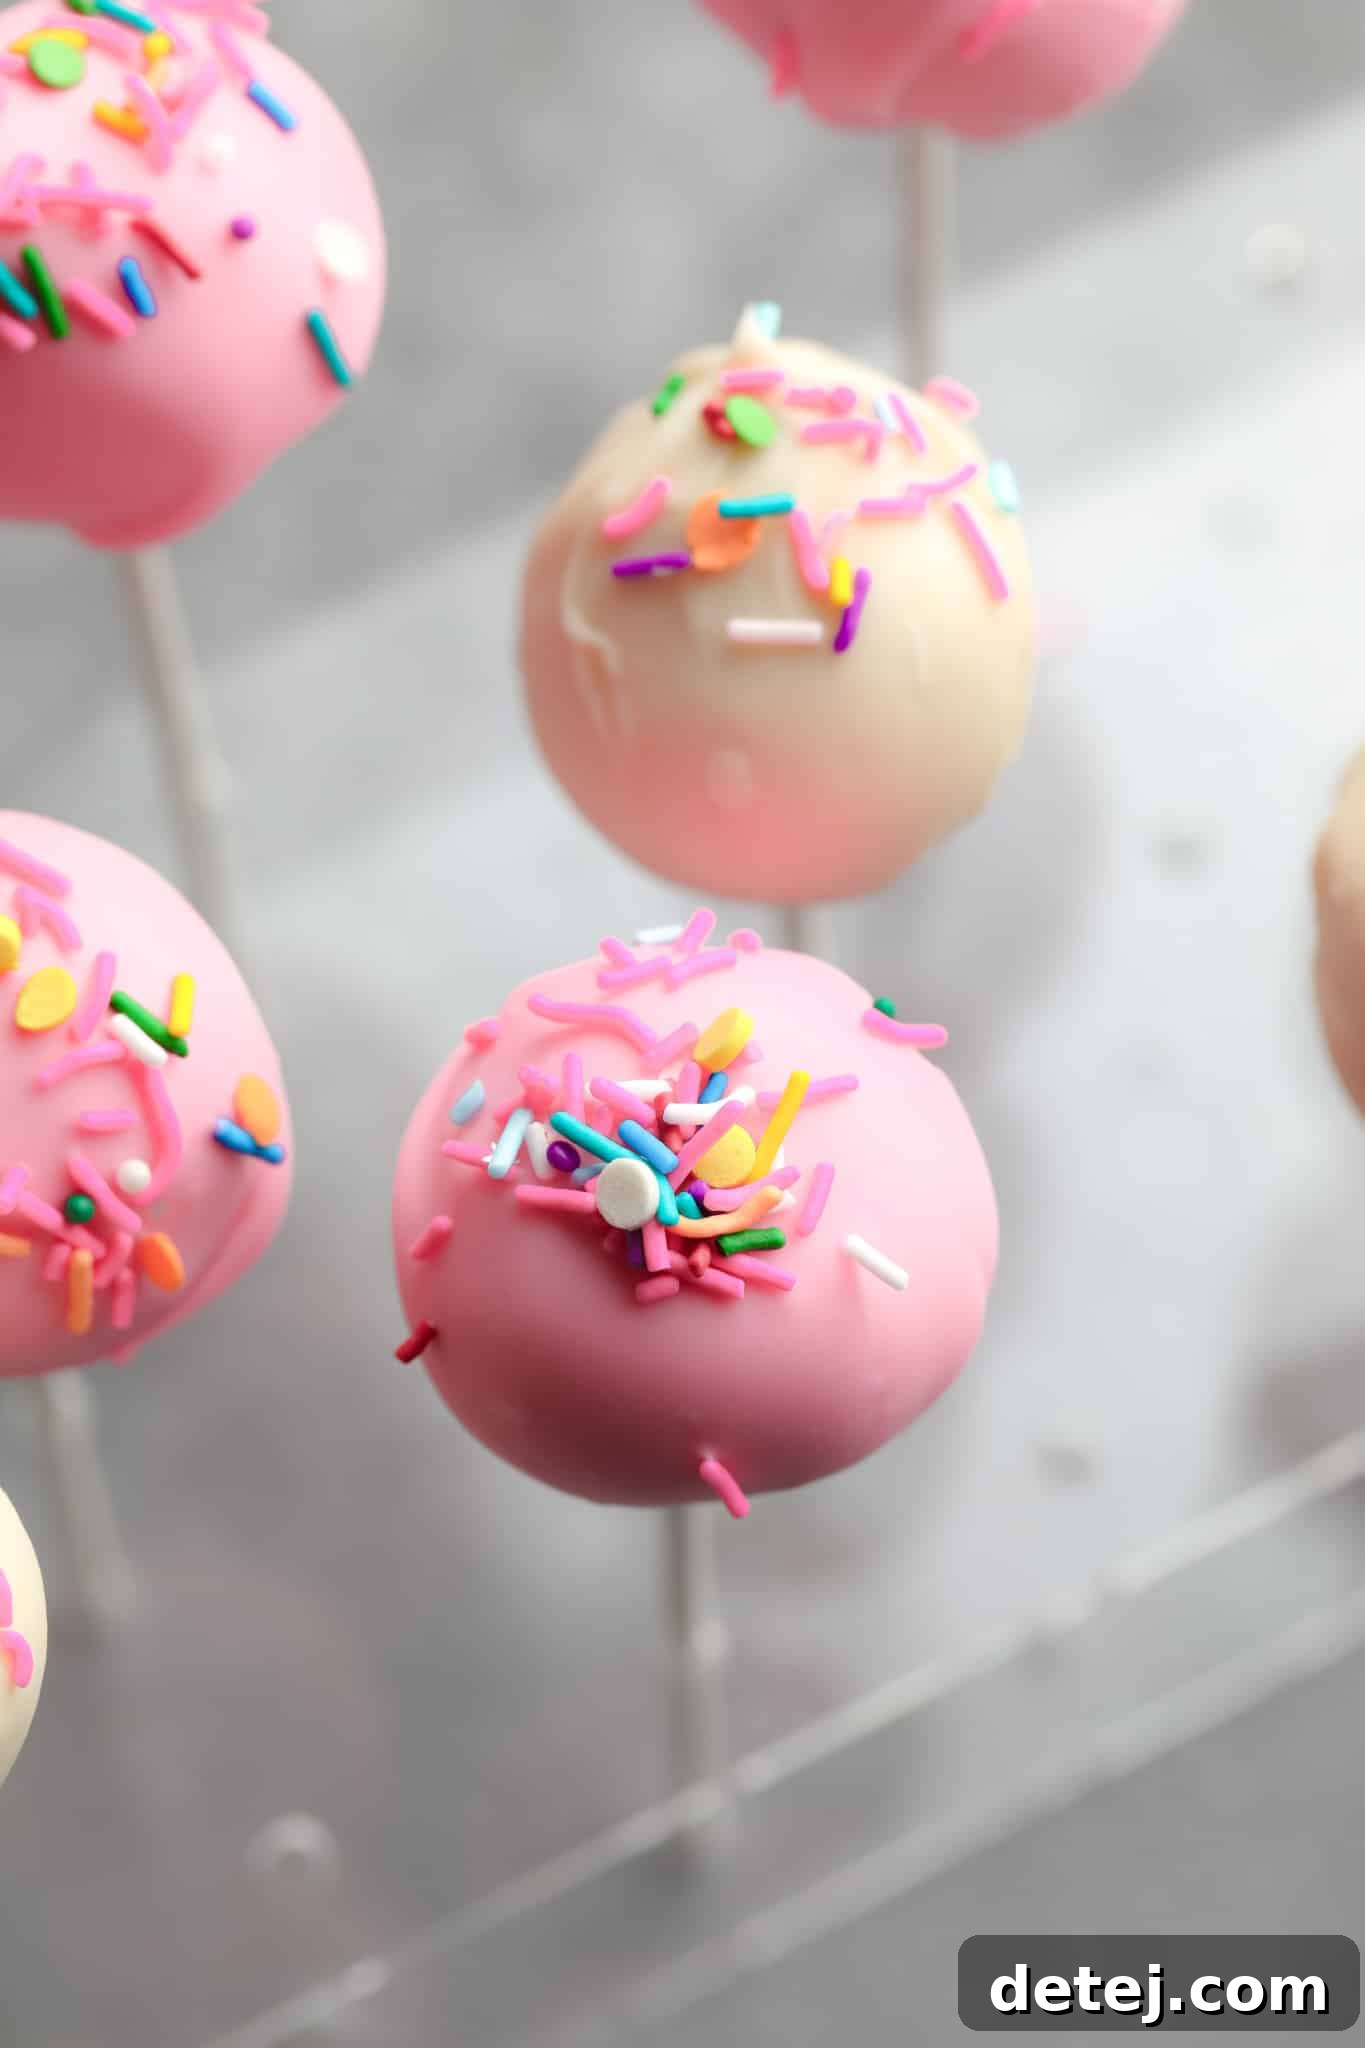
Indulge in these irresistible Vegan Cake Pops – perfectly portioned vegan vanilla cake balls, lovingly coated in luscious melted chocolate. These delightful two-bite treats are a universal favorite, offering endless possibilities for customization with different flavors and creative decorations. They’re not just delicious; they’re also incredibly fun to make and share!
Craving more plant-based delights? Satisfy your sweet tooth with other delicious vegan treats, such as these Funfetti Vegan Cupcakes, No Bake Mini Cheesecakes, Vegan Lofthouse Cookies, and Vegan Sugar Cookie Bars.
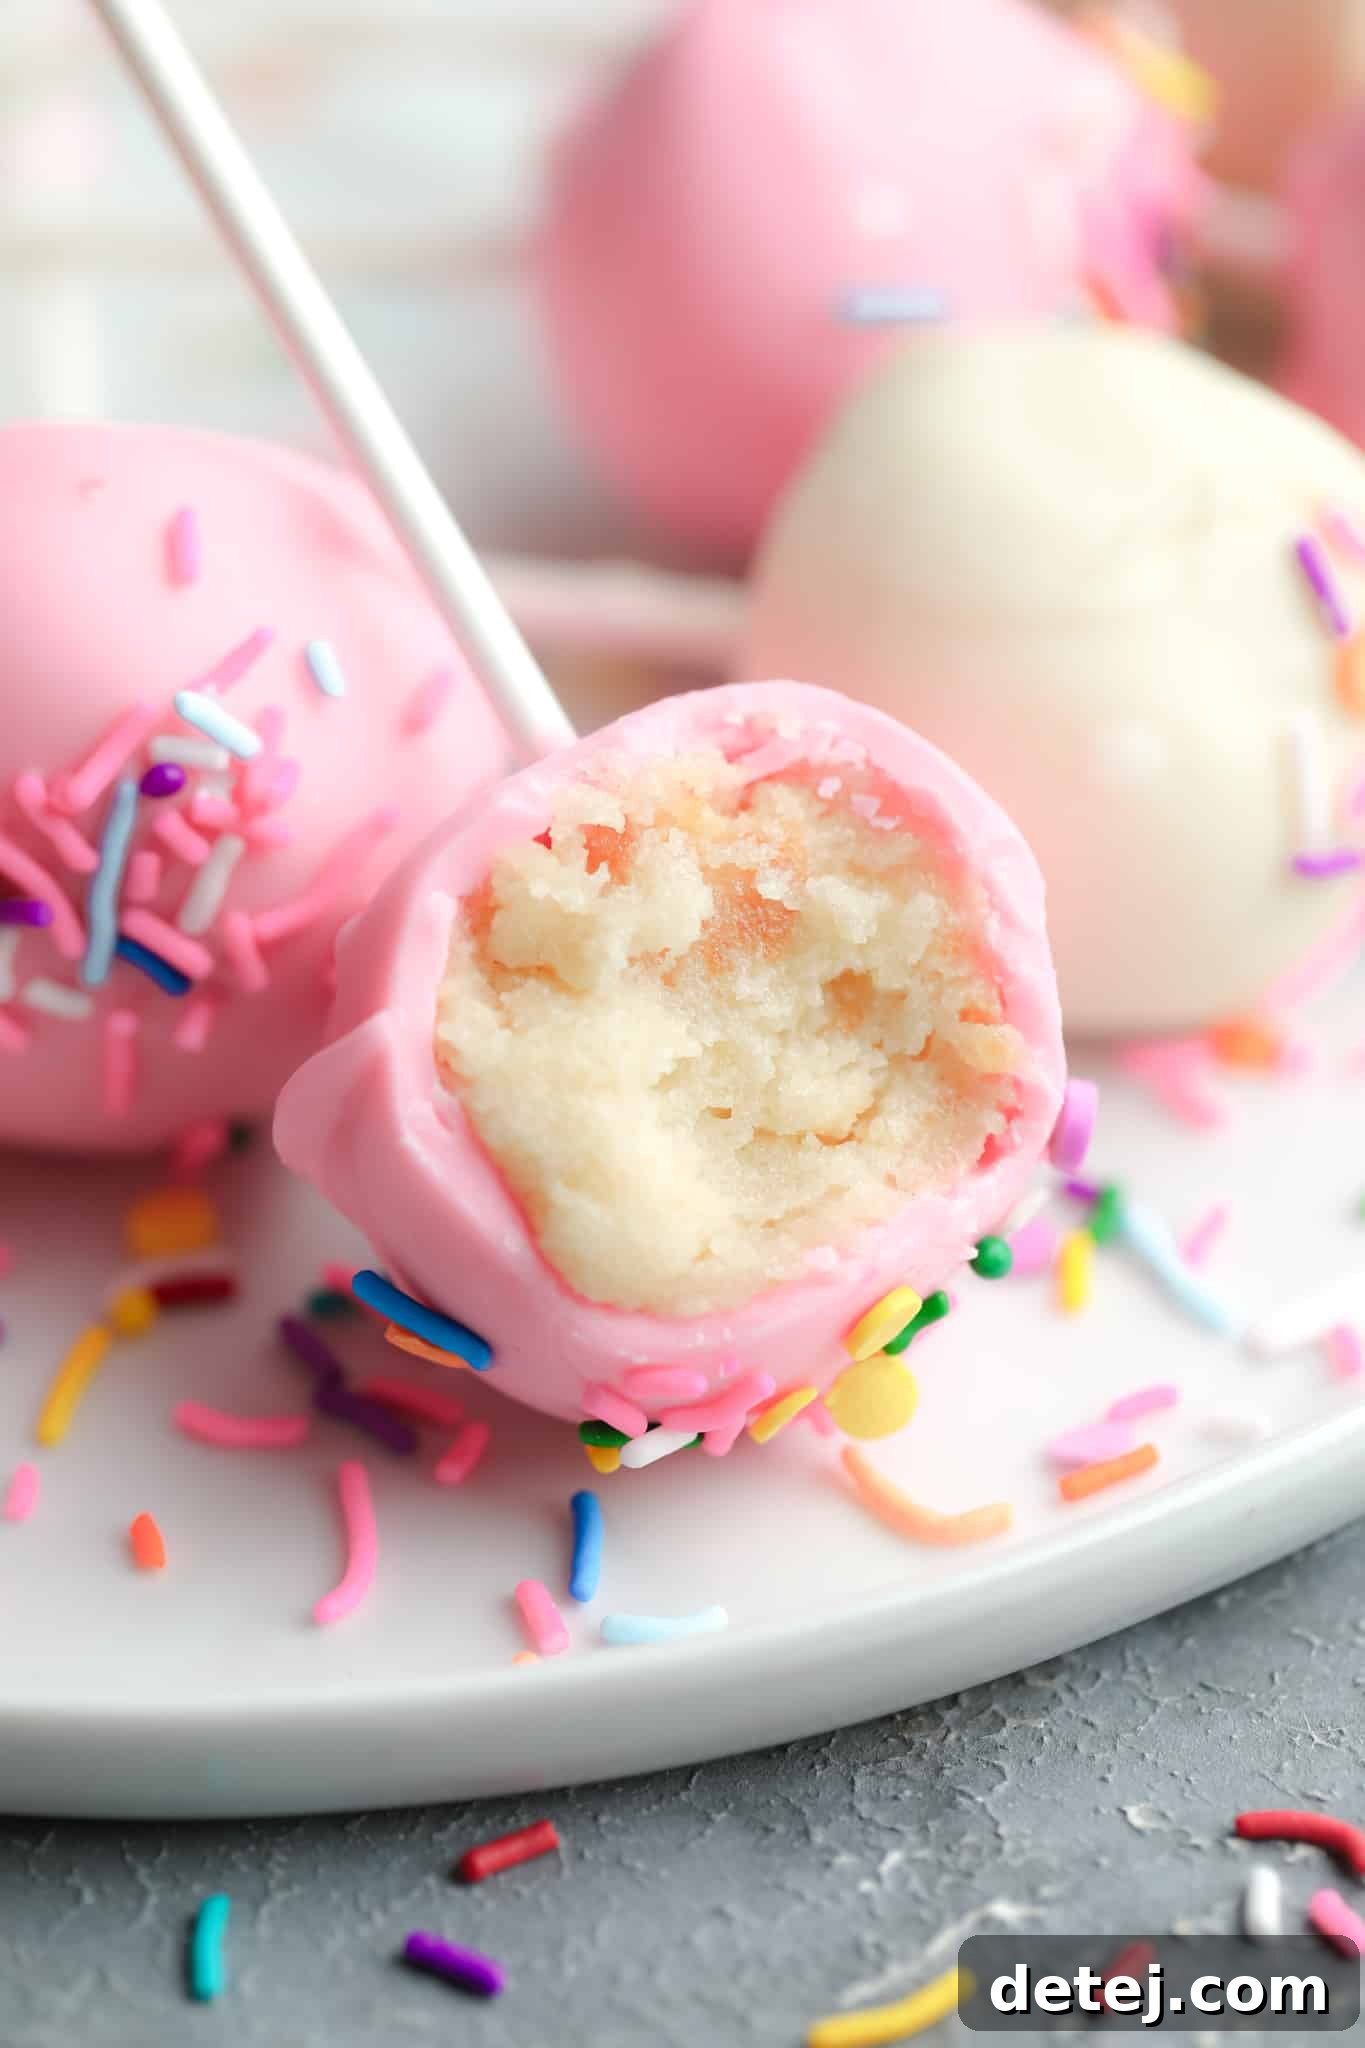
Our journey to the perfect vegan cake pop begins with a homemade vegan vanilla cake and a creamy buttercream frosting. These two components are carefully mixed, rolled into charming spheres, and then expertly dipped into melted chocolate for that signature crisp shell. You’ll find the process of creating these fun and easy treats almost as enjoyable as savoring every bite!
Why This Easy Vegan Cake Pop Recipe Will Be Your New Favorite
Vegan cake pops are more than just a dessert; they’re a celebration in every bite, offering convenience, creativity, and incredible taste. Here’s why this recipe will quickly become a cherished addition to your baking repertoire:
- Effortless Two-Bite Delight: Don’t be intimidated by their elegant appearance! If you can bake a straightforward vegan cake and whip up a simple icing, you’ll have no trouble mastering these adorable vegan cake pops. They offer all the deliciousness of a slice of cake in a convenient, mess-free package, perfect for any occasion.
- A Canvas for Culinary Creativity: Consider this vegan cake pop recipe your blank canvas, ready for your artistic touch. The possibilities for flavor and decoration are truly limitless! While we start with vanilla, feel free to swap it for a rich chocolate cake, a vibrant red velvet cake, or a sunny yellow cake. Experiment with different frosting flavors, add a hint of fruit zest, or decorate with crushed nuts, shredded coconut, colorful sprinkles, or even edible glitter. Let your imagination run wild!
- The Ultimate Party Pleaser and Thoughtful Gift: Cake pops are a brilliant solution when you want to serve a homemade dessert at a party without the fuss of cutting and plating a large cake. Their individual portions mean no slicing, no extra plates, and minimal cleanup – a host’s dream! Plus, their portability makes them fantastic edible gifts for family, friends, or neighbors, spreading joy one pop at a time.
- Clever Use for Leftover Cake: This recipe is a genius way to transform any leftover vegan cake already in your fridge into something new and exciting. Instead of letting delicious cake go to waste, crumble it up and follow the cake pop steps. Not only do cake pops made from leftover cake taste just as incredible, but they also significantly cut down on your prep time, making this an efficient and delicious choice.
- Inclusive and Allergy-Friendly Option: Being entirely vegan, these cake pops are inherently dairy-free and egg-free, making them a wonderful option for those with specific dietary restrictions or allergies. They ensure that everyone can enjoy a delectable treat without compromise, promoting inclusivity at any gathering.

Mastering the Art of Vegan Cake Pops: A Step-by-Step Guide
Creating perfect vegan cake pops is a rewarding process that combines baking with a touch of artistry. Follow these detailed steps to achieve delectable results every time:
1. Prepare and Cool Your Vegan Cake
Begin by baking your chosen vegan cake, whether it’s our classic vanilla or another delightful flavor. The cooling process is crucial for cake pops: ensure the cake is completely cool before you proceed. Ideally, bake the cake the day before you plan to assemble the pops. This allows ample time for it to reach room temperature, preventing a gooey mixture later on.
2. Whip Up the Creamy Vegan Frosting
On the day of assembly, prepare your frosting. In a large mixing bowl, beat softened vegan butter with a mixer until it’s light and creamy. Gradually add the powdered sugar, followed by a splash of soy milk (or your preferred plant-based milk) and vanilla extract. Continue beating until you achieve a wonderfully smooth, rich, and creamy frosting consistency. This frosting will bind your cake crumbs together to form the perfect cake pop base.
3. Combine Cake and Frosting
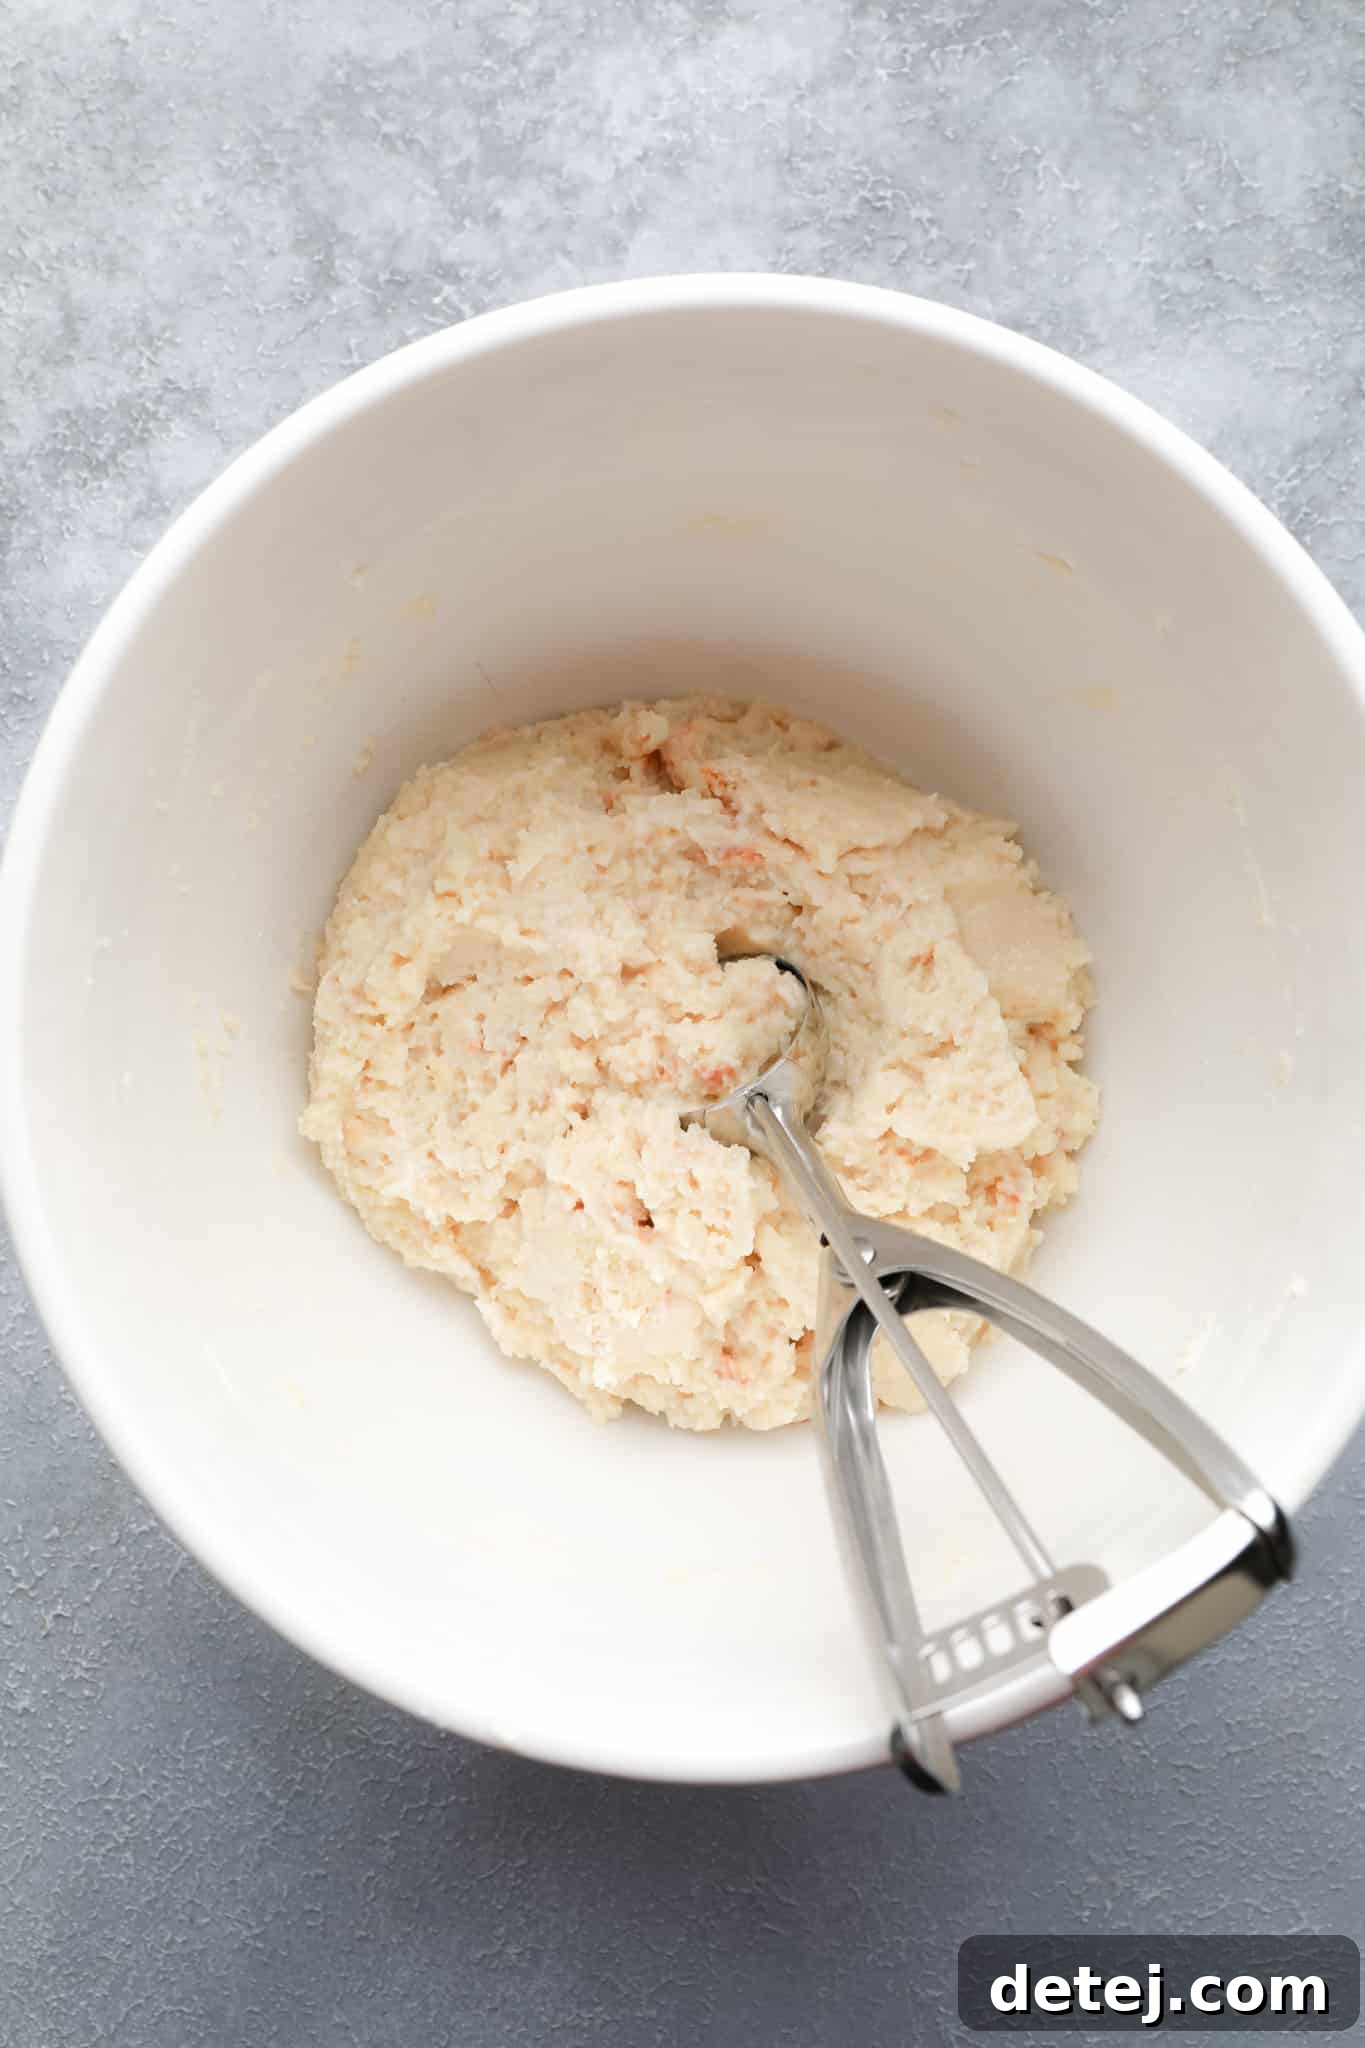
Once your cake is fully cooled, crumble it thoroughly into the bowl with the prepared frosting. The key here is to achieve a fine crumb; avoid leaving large chunks of cake, as this will result in uneven cake balls. With your mixer set to a low speed, gently beat the mixture until the cake and frosting are uniformly combined. The resulting mixture should be moist and crumbly, yet firm enough to hold its shape when pressed.
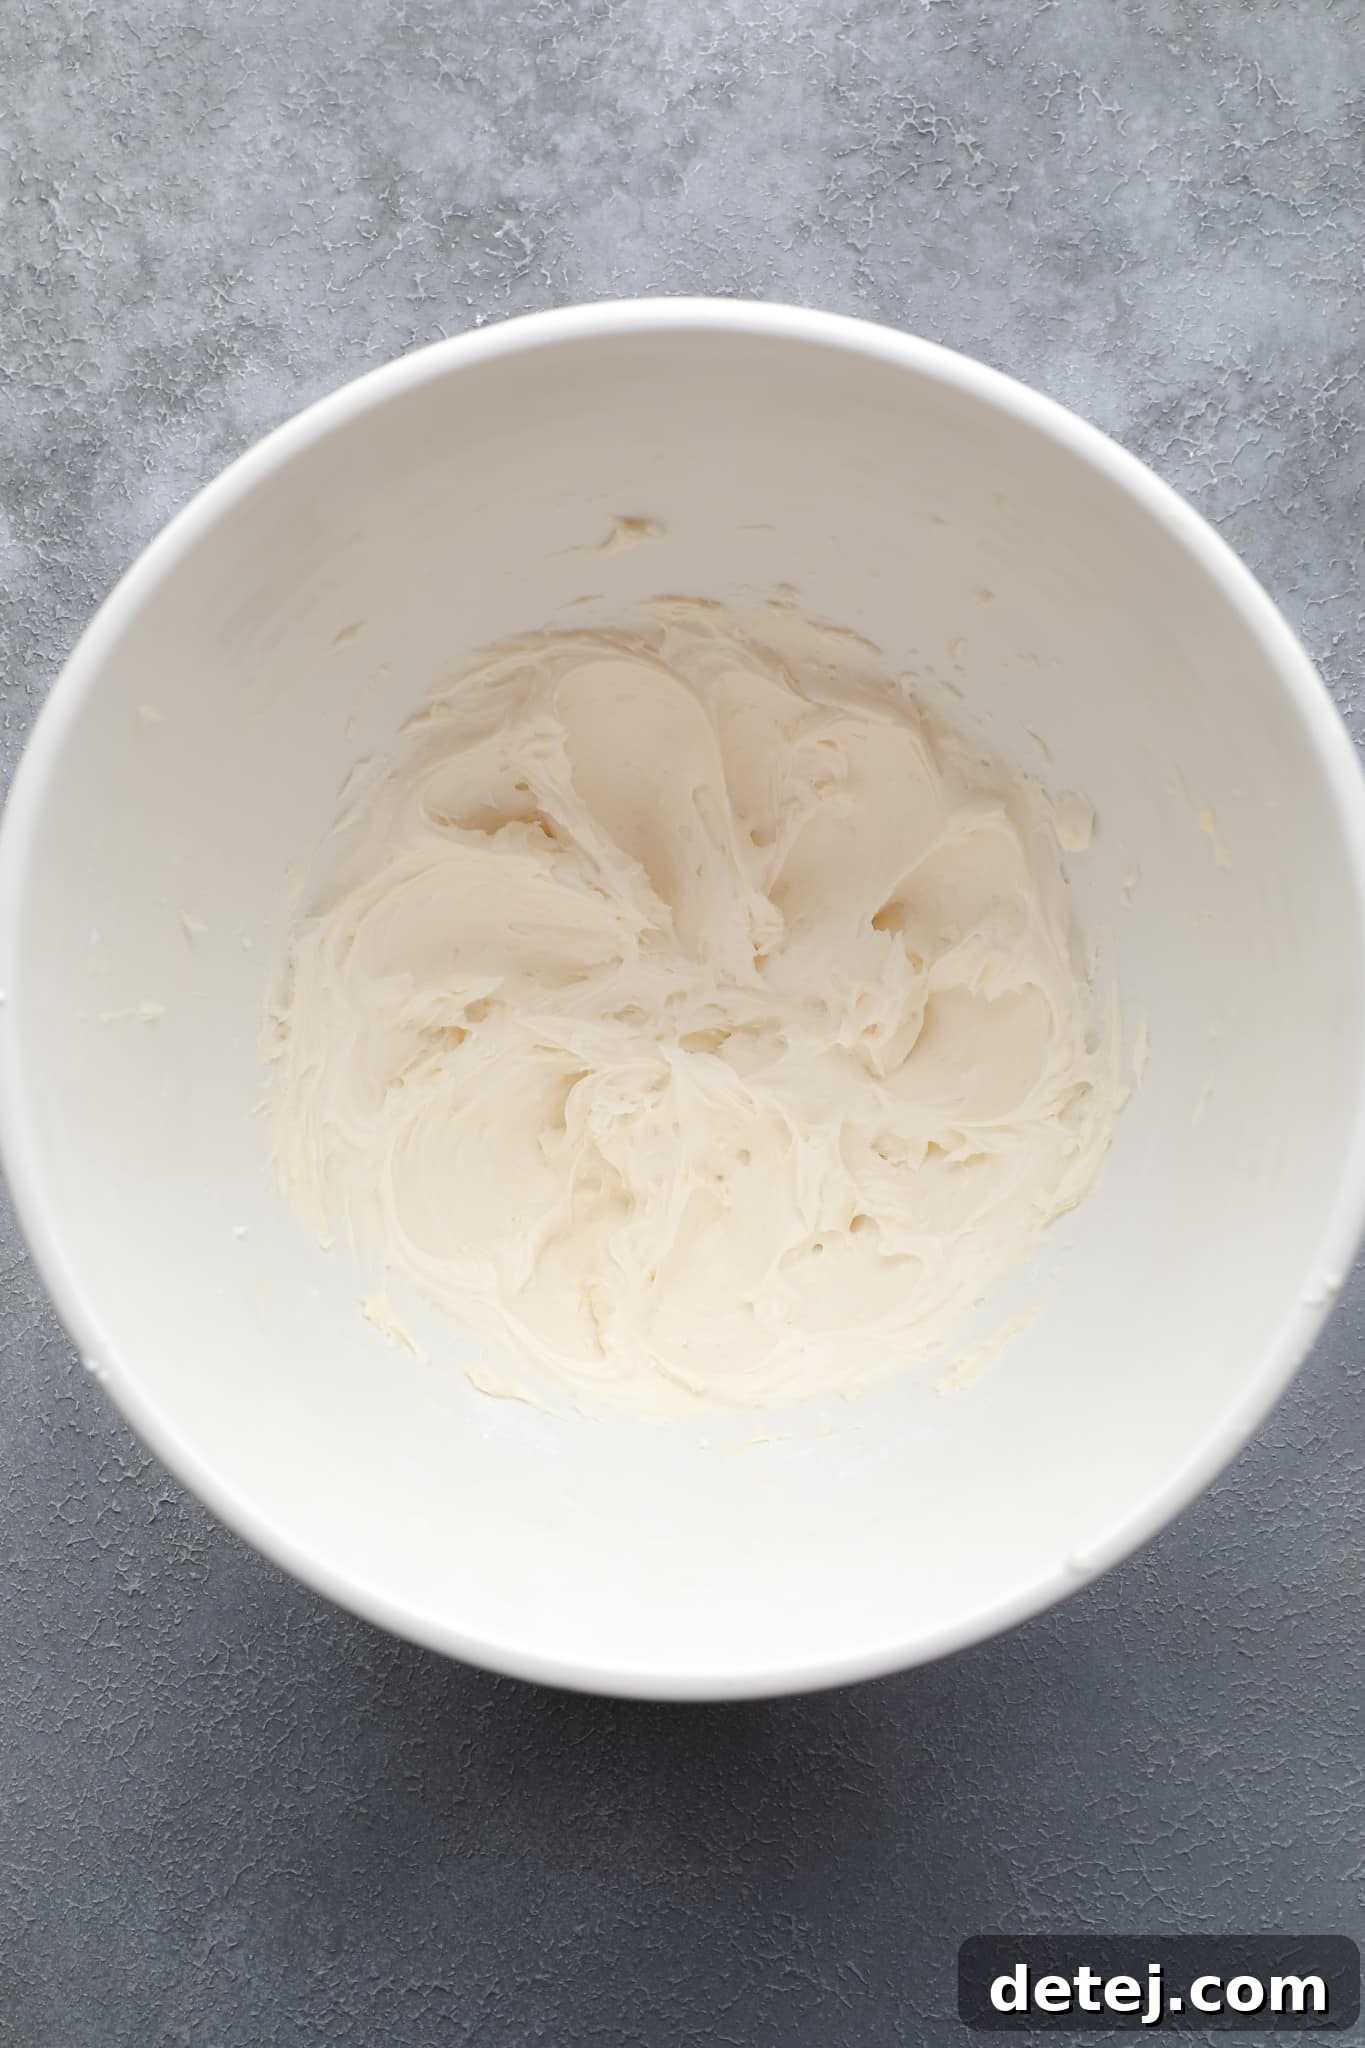
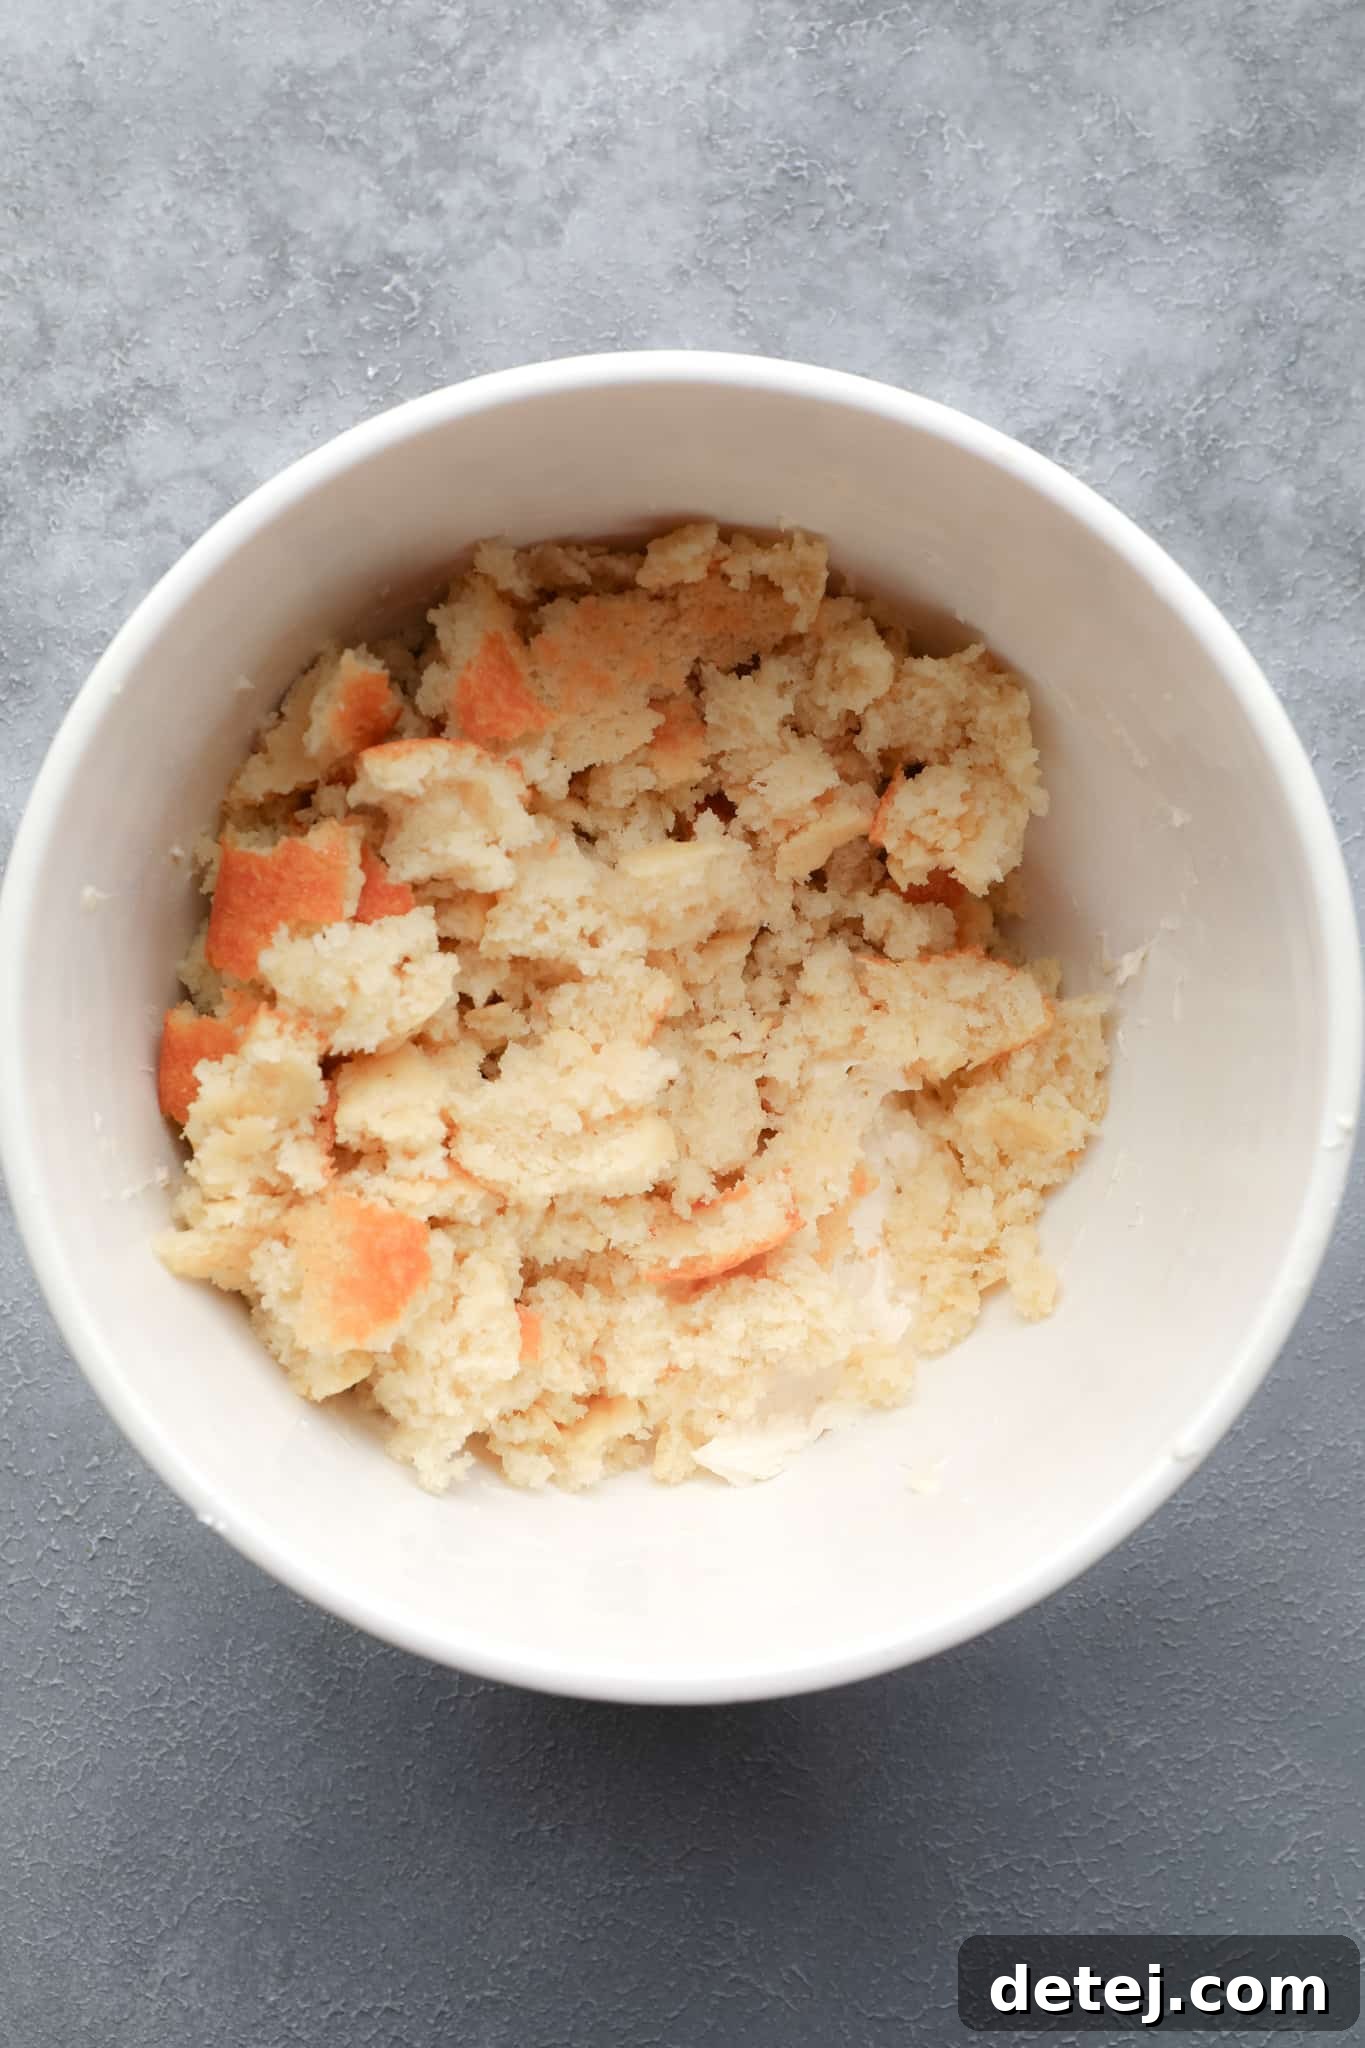
4. Form and Chill the Cake Balls
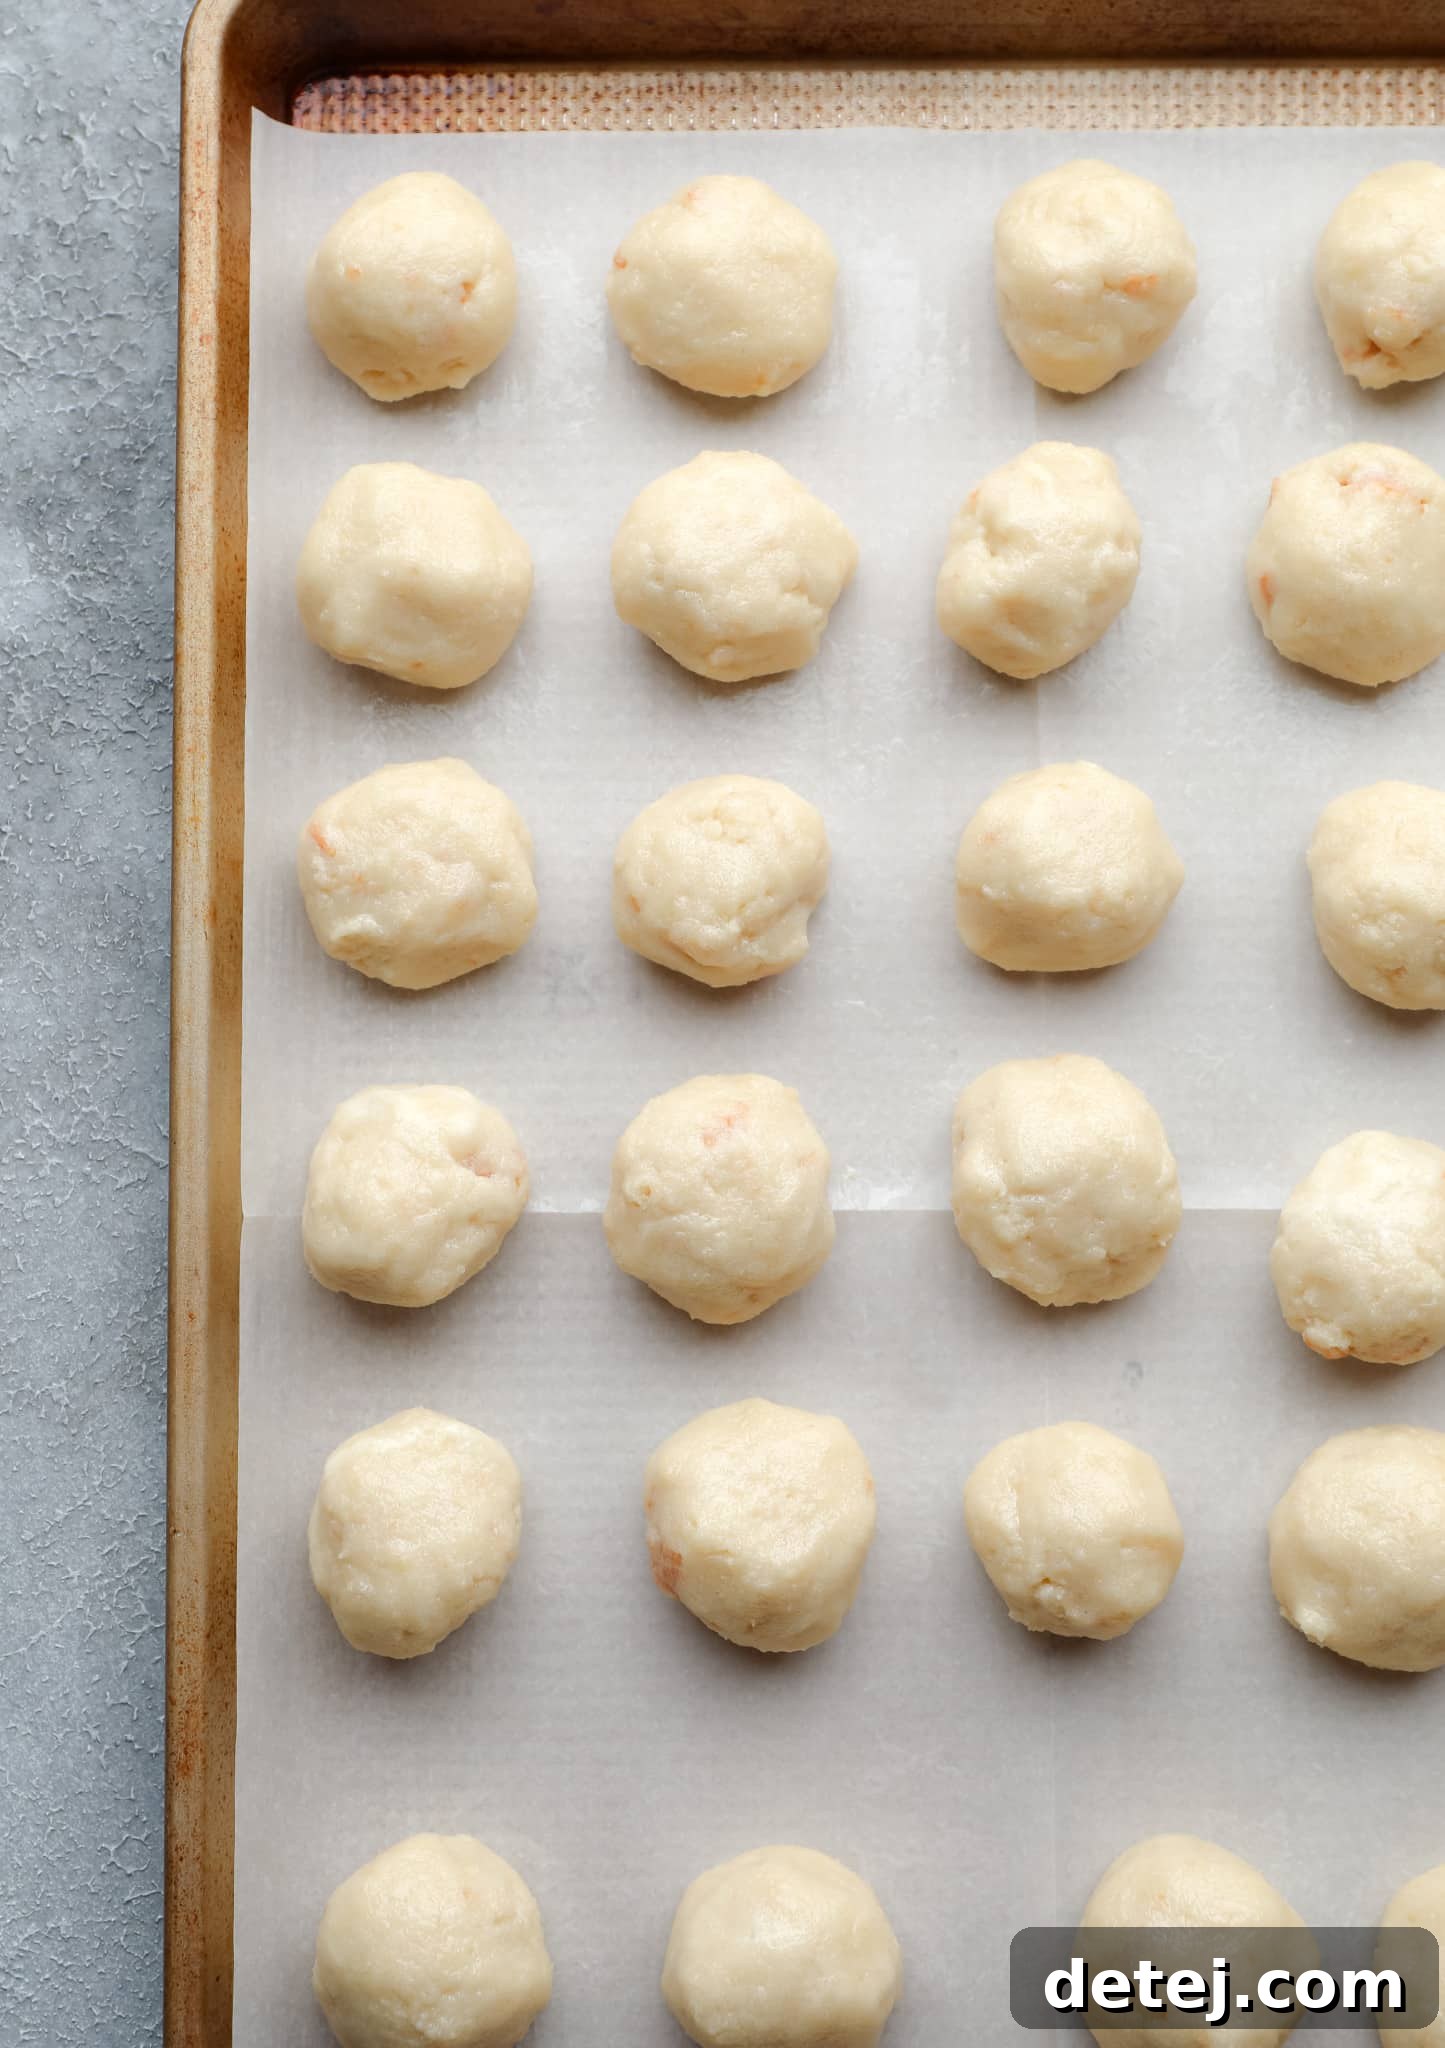
Scoop about 1 tablespoon of the cake-and-icing mixture for each cake pop. Roll each portion gently between your palms to form a ball. Don’t worry if they aren’t perfectly smooth at this stage; the initial rolling is just to get the basic shape. Place these unrefined cake balls onto a parchment-lined baking sheet. Then, transfer the baking sheet to the freezer for an initial chill of 30 minutes. This chilling period is vital for firming up the balls.
After 30 minutes, remove the balls from the freezer. They should be firm enough now to re-roll and smooth out any imperfections, creating perfectly round cake pop bases. Once reshaped, return them to the freezer for another 30 minutes. This second chilling ensures they are exceptionally firm and ready for the dipping process, preventing them from falling apart in the warm chocolate.
5. Prepare the Chocolate Coating
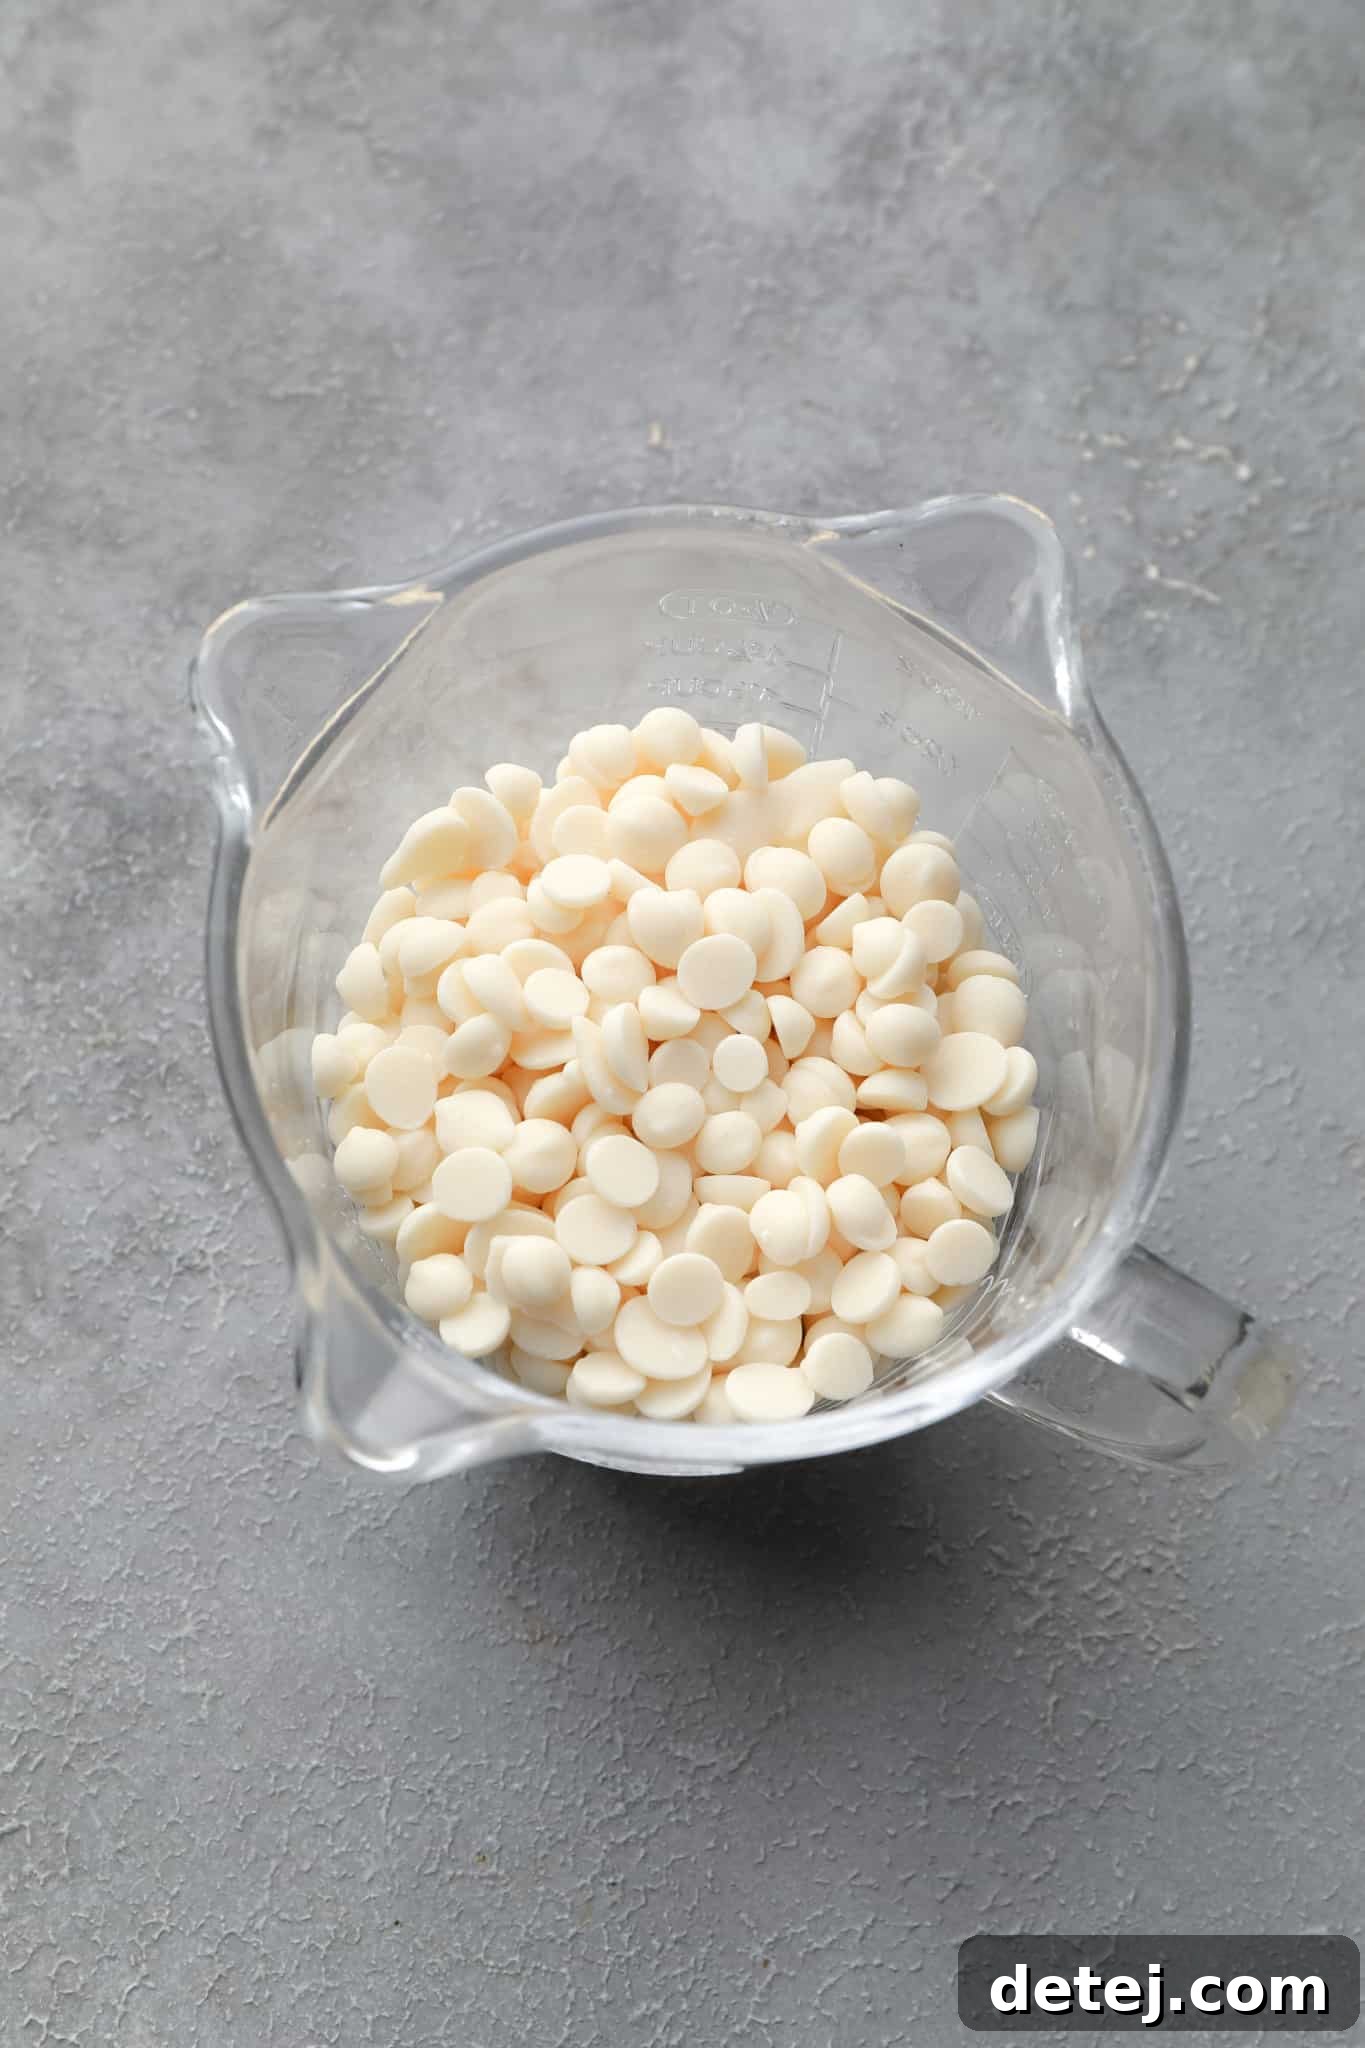
While your cake balls are chilling, prepare your chocolate coating. You can use either regular vegan chocolate chips or vegan white chocolate chips. Combine them with a small amount of vegetable oil (or refined coconut oil) – this helps create a smooth, dippable consistency. Melt the chocolate slowly and carefully, either in the microwave (in 30-second intervals, stirring well between each) or over a double boiler on the stovetop. It’s best to use a tall, narrow container like a glass measuring cup rather than a wide, shallow bowl, as this makes dipping much easier and ensures full coverage with less chocolate.
Pro Tip for Dipping: To keep your chocolate perfectly melted and easy to work with, especially if making a large batch, consider melting half the chocolate and oil at a time. This prevents the chocolate from firming up too quickly as you dip, ensuring a smooth, even coating for all your cake pops.
6. Customize Your Chocolate with Food Coloring
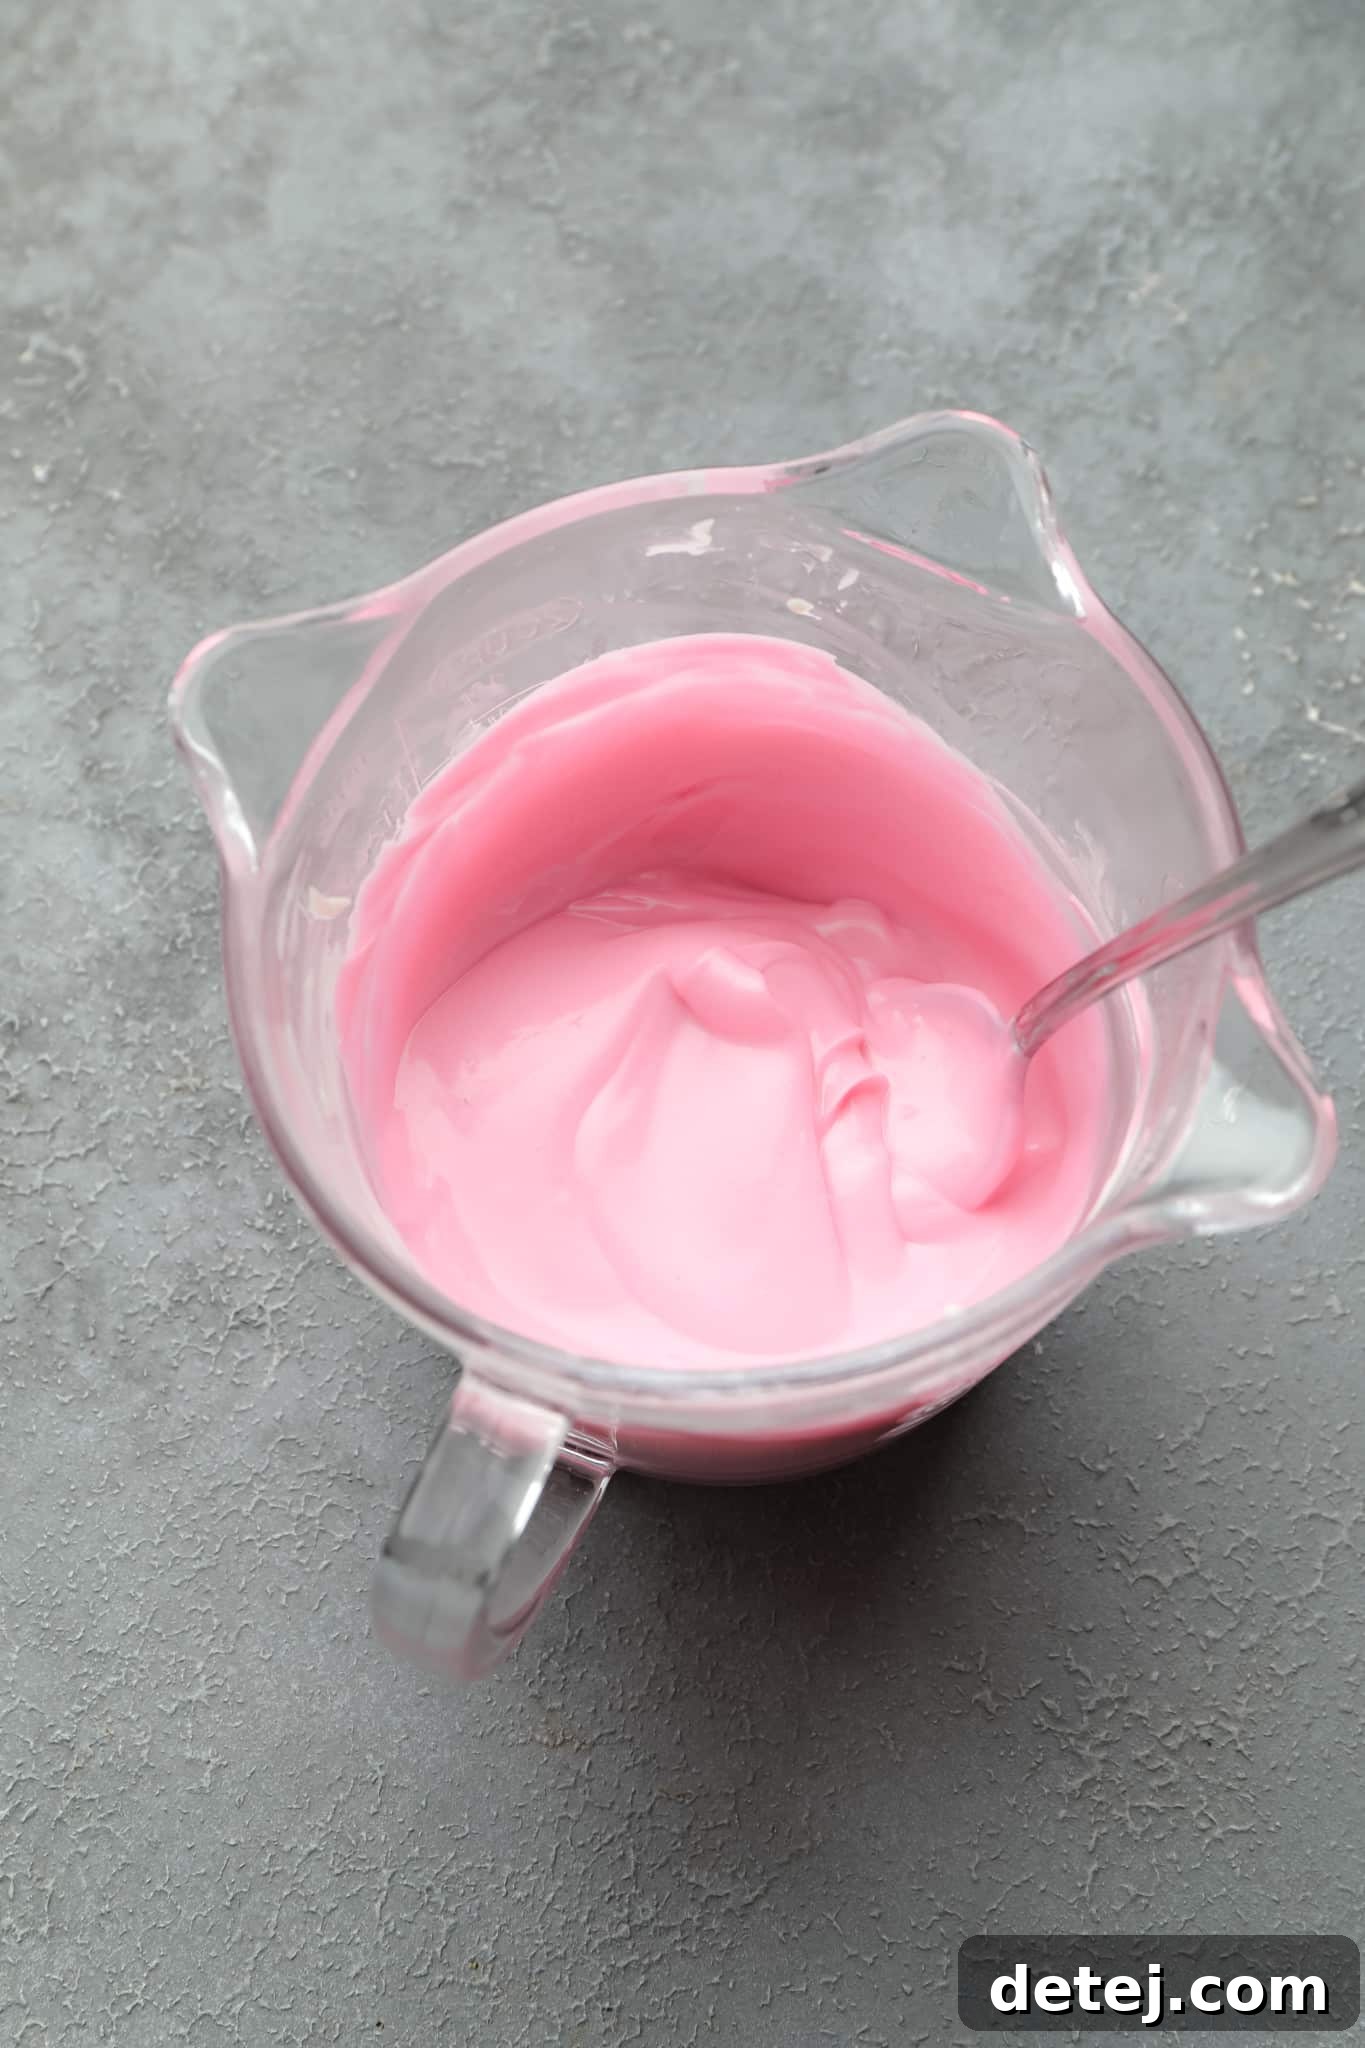
If you’re using white chocolate and desire vibrant, colorful cake pops, now is the time to add food coloring! Incorporate a drop or two of gel food coloring of your choice into all or portions of the melted white chocolate. Gel colors are highly concentrated and won’t thin out your chocolate, providing vivid hues. For high-quality, vegan-friendly food dyes and an incredible selection of sprinkles, check out Sweetapolita!
7. Dip, Decorate, and Set
Remove only a few vegan cake balls from the freezer at a time to keep the rest super cold. Take a lollipop stick and dip one end about half an inch into the melted chocolate coating. This chocolate acts as a “glue” to secure the cake ball to the stick. Immediately insert the chocolate-dipped end of the stick halfway into a cake ball. Then, fully immerse the cake ball into the melted chocolate, rotating gently to ensure complete coverage. Carefully lift the cake pop, gently tapping the stick against the edge of the bowl to allow any excess chocolate to drip off. Work quickly here, as the cold cake ball will cause the chocolate to set rapidly.
Once dipped, it’s time to decorate! Before the chocolate fully hardens, sprinkle with your chosen decorations. For setting, you can use a dedicated cake pop stand, or get creative by poking small holes into a cardboard box and standing the pops upright, similar to Sally’s method.
Important Reinforcement Tip: Always reinforce the lollipop sticks! By dipping the stick into melted chocolate before inserting it into the cake ball, you’re essentially creating a strong bond. Without this crucial step, the cake balls are much more likely to slide off the sticks, leading to a messy situation and disappointing results.
Allow the chocolate coating to harden completely and dry. This usually takes about 15-30 minutes at room temperature, or quicker in the refrigerator. Once set, your beautiful vegan cake pops are ready to be served or meticulously wrapped for gifting. Enjoy every delightful bite!
Endless Vegan Cake Pop Flavor Innovations
While vanilla is a classic choice, the world of vegan cake pops is vast and exciting! You can truly customize these treats using almost any vegan cake recipe as your base, or by simply infusing the cake and frosting with different extracts. Here are some fantastic flavor combinations and ideas to inspire your next batch of vegan cake pops:
- Velvety Red Velvet Cake Pops: Transform this recipe into a stunning red velvet version! Substitute the vanilla cake with my rich Vegan Red Velvet Cake or Cupcakes. Pair it with a tangy and sweet Vegan Cream Cheese Frosting for an authentic red velvet experience, and dip in white chocolate for a striking contrast.
- Decadent Chocolate Cake Pops: For the ultimate chocolate lover, use my best-ever Vegan Chocolate Cake as the foundation. You can use either vanilla or chocolate buttercream frosting. Dip these in melted regular vegan chocolate chips for a double chocolate delight, or use white chocolate for an elegant marble effect.
- Bright and Zesty Lemon Cake Pops: Keep the base recipe the same, but add 1 to 2 teaspoons of fresh lemon zest and 1 teaspoon of lemon extract to both the cake batter and the frosting. Dip in white chocolate and garnish with a tiny candied lemon peel or yellow sprinkles for a burst of sunshine.
- Cool and Refreshing Peppermint Cake Pops: Perfect for the holiday season or any time you need a refreshing treat! Simply add 1 teaspoon of peppermint extract to both the cake and the white chocolate coating. Decorate with crushed candy cane pieces for a festive touch and a delightful crunch.
- Nutty Peanut Butter Cake Pops: Incorporate 1/4 cup of smooth peanut butter into your vanilla frosting recipe. For the cake, you can keep it vanilla or try a subtle chocolate cake. Dip in regular vegan chocolate and sprinkle with finely chopped roasted peanuts for an irresistible combination.
- Spiced Carrot Cake Pops: Use your favorite vegan carrot cake recipe (ensure it’s well-spiced!) and combine it with Vegan Cream Cheese Frosting. Dip in white chocolate and decorate with a touch of cinnamon or finely grated carrot for a sophisticated twist.
- Gluten-Free Cake Pops: Catering to diverse dietary needs is simple! Just prepare the cake portion of this recipe using a high-quality gluten-free all-purpose flour blend (ensure it’s suitable for baking). All other ingredients and steps remain the same, creating delicious gluten-free vegan cake pops.
- Utilizing Leftover Cake: As mentioned, any leftover vegan cake is a prime candidate for cake pops! Simply crumble your chilled leftover cake, mix it with the frosting, and then proceed with rolling, freezing, and dipping as usual. It’s an ingenious way to minimize food waste and enjoy another dessert.
Frequently Asked Questions About Vegan Cake Pops
The decorating possibilities for cake pops are truly endless and part of the fun! You can use a variety of toppings such as colorful vegan sprinkles, finely crushed nuts (like almonds, pistachios, or walnuts), shredded coconut flakes (toasted or plain), delicate edible flowers, crushed candy canes (especially for holiday themes), cookie crumbs (like vegan Oreos), or even a drizzle of contrasting melted chocolate. Get creative with different themes for holidays, birthdays, or specific events!
Chilling is a critical step for perfect cake pops. The cake balls need to be thoroughly chilled and firm, ideally in the freezer, for at least 1 hour in total before you attempt to dip them in chocolate. We recommend an initial 30-minute freeze, followed by a quick re-roll to smooth them out, and then another 30-minute freeze. The colder and more solid the cake balls are, the less likely they are to crumble or melt when they come into contact with the warm melted chocolate, making the dipping process much smoother and preventing breakage.
Cake pops usually fall apart or become crumbly in the melted chocolate if they haven’t been chilled sufficiently. If the cake balls are not firm enough, the warmth of the chocolate can cause them to soften too quickly, leading to breakage. Ensure you follow the double-chilling method: freeze for 30 minutes, re-roll for perfect circles, and then freeze for another 30 minutes. This ensures maximum firmness and integrity for a successful dipping experience. Also, ensure your chocolate isn’t excessively hot; it should be just melted and warm, not piping hot.
Absolutely! Cake pops are excellent for making ahead, which is perfect for party planning. You can prepare the vegan cake, the frosting, or even the formed cake balls up to 1 month in advance. For the baked cake, wrap it tightly in plastic wrap to prevent it from drying out. Store the frosting in an airtight container. Once the cake balls are completely solid from freezing, transfer them to a freezer-safe ziplock bag or airtight container. Store all components in the freezer until you are ready to assemble and dip your cake pops. Just thaw slightly before combining, or use straight from the freezer for dipping the balls.
Once your cake pops are candy-coated and the chocolate has fully set, they can be stored in an airtight container in the refrigerator for up to 1 week. For longer storage, vegan cake pops freeze exceptionally well. Place them in an airtight freezer-safe container or a ziplock bag, ensuring they are not touching each other too much to prevent sticking. They can be frozen for up to 1-2 months. When ready to enjoy, simply remove them from the freezer and let them thaw at room temperature for about 15-30 minutes, or enjoy them chilled straight from the fridge.
Essential Equipment for Perfect Vegan Cake Pops
Having the right tools can make the cake pop process even smoother and more enjoyable. Here’s a list of equipment you’ll find helpful:
- 8-inch Round Cake Pan: For baking your cake base.
- Large Mixing Bowls: For combining dry ingredients, wet ingredients, and ultimately the cake and frosting mixture.
- Electric Mixer (Handheld or Stand): Essential for creating creamy frosting and thoroughly combining the cake and frosting.
- Whisk and Spatula: For initial mixing and scraping down bowls.
- Parchment Paper or Silicone Baking Mat: To line your baking sheets and prevent cake balls from sticking during chilling.
- Baking Sheets: For chilling your cake balls.
- Cookie Scoop (1 tablespoon size): Ensures uniform sizing for your cake balls, leading to consistent cake pops.
- Lollipop Sticks: The quintessential element for cake pops.
- Tall, Narrow Glass Measuring Cup or Mug: Ideal for melting chocolate and dipping, as it allows for full immersion with less chocolate.
- Cake Pop Stand or Styrofoam Block: For holding the cake pops upright while the chocolate sets. Alternatively, a cardboard box with poked holes works wonders.
Tips for Vegan Cake Pop Perfection
Achieving bakery-quality vegan cake pops at home is totally possible with a few extra tips and tricks:
- Patience with Cooling: Never rush the cake cooling process. A warm cake will create a greasy, unmanageable mixture when combined with frosting.
- Consistency is Key: The cake and frosting mixture should be firm enough to roll but not dry and crumbly. If it’s too wet, add a little more powdered sugar; if too dry, add a tiny bit more plant milk.
- Chocolate Temperature: Your melted chocolate should be warm, not hot. If it’s too hot, it can melt your cake balls. If it’s too cool, it will be too thick to dip smoothly. Aim for a temperature where it’s fluid but not steaming.
- Work in Batches: When dipping, remove only a few cake balls from the freezer at a time. This keeps the rest of the balls super cold, which is crucial for a smooth coating process.
- Tap, Don’t Shake: When removing excess chocolate, gently tap the stick against the side of your dipping container rather than shaking it vigorously. This helps remove drips without dislodging the cake ball.
- Creative Garnishes: Don’t limit yourself to sprinkles! Edible luster dust, fine cocoa powder, crushed freeze-dried fruit, or even simple swirls of contrasting chocolate can elevate your decorations.
- Practice Makes Perfect: Don’t get discouraged if your first few aren’t picture-perfect. Cake pop making is a skill that improves with practice. The most important thing is that they taste delicious!

4.28 stars (11 ratings)
Vegan Cake Pops
Treat yourself to these Vegan Cake Pops, vegan vanilla cake balls dipped in melted chocolate! They’re a delicious two-bite treat everyone loves and are fun to customize with different flavors and decorations.
Pin
Comment
Save
Ingredients
Vanilla Cake
- 1 1/4 cups all purpose flour
- 1 tablespoon cornstarch
- 2 teaspoons baking powder
- 1/4 teaspoon salt
- 3/4 cup granulated sugar
- 1/2 cup canola oil
- 3/4 cup unsweetened soy milk (or almond, oat, coconut)
- 1 teaspoon apple cider vinegar
- 1 teaspoon pure vanilla extract
Frosting
- 1/2 cup vegan butter softened to room temperature
- 1 1/2 cups powdered sugar
- 1-2 tablespoons unsweetened soy milk
- 1/2 teaspoon pure vanilla extract
Coating
- 32 ounces vegan white chocolate chips or regular vegan chocolate chips
- 2 tablespoons vegetable oil or refined coconut oil
- vegan friendly sprinkles (for decoration)
Instructions
Make the cake and let cool
- Preheat the oven to 350 degrees F (175 C) and grease a round 8-inch cake pan.
- In a large bowl, combine the flour, cornstarch, baking powder, salt, and granulated sugar. Whisk thoroughly to ensure all dry ingredients are well distributed.
- To the dry ingredients, pour in the canola oil, soy milk, apple cider vinegar, and pure vanilla extract. Mix gently with a large spoon or spatula until just combined. Be careful not to overmix the batter.
- Pour the batter evenly into the prepared 8-inch cake pan. Bake for 30-35 minutes, or until a toothpick inserted into the center comes out clean.
- Allow the cake to cool completely in the pan on a wire rack before attempting to crumble it. For best results, let it cool overnight or for several hours to ensure it’s at room temperature and firm.
Make the frosting and cake balls
- Using a handheld or stand mixer with the paddle attachment, beat the softened vegan butter until it is light and creamy, approximately 2-3 minutes.
- Gradually add the powdered sugar to the butter, then incorporate the soy milk and vanilla extract. Beat the mixture until it is perfectly smooth and creamy, which should take about 3 minutes.
- Once the cake has cooled completely, crumble it finely into the bowl with the prepared frosting. Ensure there are no large chunks of cake remaining.
- Turn the mixer on low speed and beat the cake and frosting together until they are fully combined and the mixture resembles moist crumbles. Scrape down the bottom and sides of the bowl as needed to ensure even mixing.
- Scoop about 1 tablespoon of the cake mixture at a time. Roll each portion into a ball between your palms. Don’t worry if they are not perfectly round yet, as they will be re-rolled later.
- Place the rolled cake balls onto a parchment-lined baking sheet and transfer them to the freezer for 30 minutes to firm up.
- After 30 minutes, remove the baking sheet from the freezer. Re-roll each cake ball between your palms to smooth out any edges and form more perfect spheres.
- Place the baking sheet back into the freezer for another 30 minutes to ensure the cake balls are very firm and cold, which is essential for successful dipping.
Coat the balls and finish
- While the cake balls are undergoing their second chill, prepare your chocolate coating. Melt half of your chosen vegan chocolate chips with half of the vegetable oil (or refined coconut oil). You can do this in the microwave in 30-second intervals, stirring well after each, or use a double boiler on the stovetop. Use a tall, narrow glass measuring cup or mug for melting to facilitate easier dipping.
- Remove only a few cake balls from the freezer at a time to keep the remaining ones extremely cold. This prevents them from softening too quickly during the dipping process.
- Dip a lollipop stick about 1/2 inch into the melted chocolate coating, then immediately insert the chocolate-coated end halfway through a cake ball. This step acts as a “glue” to secure the cake ball firmly to the stick.
- Fully immerse the cake ball on the stick into the melted chocolate, rotating gently to ensure it is completely coated.
- Gently tap the stick against the edge of the bowl to allow any excess chocolate to drip off, creating a smooth, even coating.
- Immediately after dipping and tapping off excess chocolate, decorate with vegan friendly sprinkles or other desired toppings before the chocolate sets.
- Place the decorated cake pops upright to set. You can use a cake pop stand, a piece of styrofoam, or a cardboard box with small holes poked into it.
- Allow the chocolate coating to harden completely and dry. This can take anywhere from 15-30 minutes at room temperature, or faster in the refrigerator.
- Once the chocolate has fully set, your delightful vegan cake pops are ready to serve. They can also be wrapped individually for beautiful gifting.
Notes
- Gluten-Free Adaptation: To make these cake pops gluten-free, simply substitute the all-purpose flour in the vanilla cake recipe with a high-quality gluten-free all-purpose flour blend. Ensure the blend contains xanthan gum or add 1/4 teaspoon for optimal texture.
- Flavor Variations:
- Lemon: Infuse the cake and frosting with 1-2 teaspoons of lemon zest and 1 teaspoon of lemon extract.
- Peppermint: Add 1 teaspoon of peppermint extract to both the cake and the white chocolate coating. Decorate with crushed candy cane pieces.
- Chocolate: Use a vegan chocolate cake base and chocolate frosting. Dip in either dark or white vegan chocolate.
- Red Velvet: Replace the vanilla cake with a vegan red velvet cake and use vegan cream cheese frosting.
- Peanut Butter: Mix 1/4 cup of smooth peanut butter into the frosting. Dip in dark chocolate.
For even more creative ideas, refer to the “Endless Vegan Cake Pop Flavor Innovations” section above!
Nutrition
Calories: 243 kcal
Carbohydrates: 29 g
Protein: 2 g
Fat: 14 g
Saturated Fat: 6 g
Polyunsaturated Fat: 2 g
Monounsaturated Fat: 5 g
Trans Fat: 0.03 g
Cholesterol: 5 mg
Sodium: 63 mg
Potassium: 110 mg
Fiber: 0.2 g
Sugar: 25 g
Vitamin A: 143 IU
Vitamin C: 0.1 mg
Calcium: 69 mg
Iron: 0.3 mg
Did you make this recipe?
Mention @nora_cooks_vegan_ or tag #noracooks!