
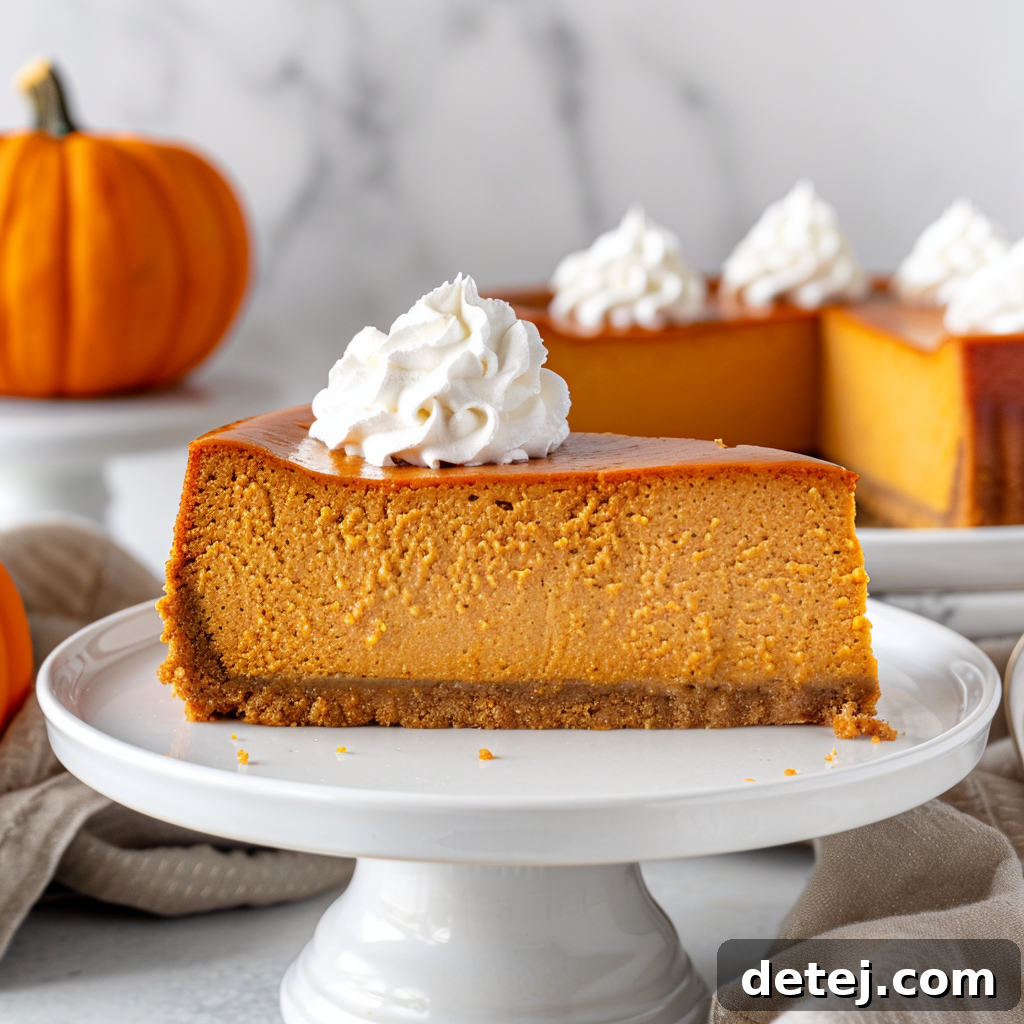
Bake the Perfect Pumpkin Cheesecake: A Comprehensive Guide for Fall and Holidays
Introduction to Your Autumn Baking Journey
Welcome, fellow baking enthusiasts! Get ready to embark on a delightful culinary adventure as we uncover the secrets to crafting the perfect homemade pumpkin cheesecake. This iconic dessert is more than just a treat; it’s a celebration of autumn’s rich bounty and the heartwarming spirit of the holiday season. Imagine a velvety smooth, spiced pumpkin filling nestled atop a crisp, buttery graham cracker crust, offering a symphony of flavors that evoke cozy evenings and festive gatherings. Whether you’re a seasoned chef or just beginning your baking exploration, this ultimate guide is designed to make the process enjoyable and foolproof, ensuring your kitchen becomes the heart of seasonal joy.
The magic of pumpkin cheesecake lies in its exquisite balance: the earthy sweetness of pumpkin puree, the tangy richness of cream cheese, and a comforting blend of aromatic spices like cinnamon, nutmeg, and a hint of ground cloves. This dessert isn’t just delicious; it’s a showstopper, promising to impress at any family dinner or holiday party. So, tie on your apron, gather your ingredients, and prepare to create a pumpkin cheesecake that will be remembered long after the last slice is savored. Let’s transform simple ingredients into an extraordinary dessert that perfectly captures the essence of fall.
Key Takeaways from This Guide:
- Discover the undeniable ease and profound joy of baking a homemade pumpkin cheesecake, perfectly suited for fall and holiday festivities.
- Access a meticulously crafted recipe that welcomes bakers of all skill levels, guaranteeing a creamy, rich, and universally adored dessert.
- Master the harmonious blend of premium spices and essential ingredients, elevating your pumpkin cheesecake to an unforgettable seasonal delight.
Essential Ingredients for Your Pumpkin Cheesecake
Every masterpiece begins with its raw materials, and our journey to the ultimate pumpkin cheesecake is no exception. Selecting and preparing the right ingredients is the fundamental first step, much like laying the groundwork for an architectural marvel. Each component, from the humble graham cracker to the vibrant pumpkin puree, plays a crucial role in constructing a dessert that truly embodies the spirit of autumn and the joy of the holidays. The precise combination of flavors and textures we’re about to create will awaken your senses and fill your home with an irresistible aroma. Here’s a detailed look at what we’ll need:
- For the Irresistible Graham Cracker Crust:
- Graham Cracker Crumbs: The foundation of our cheesecake. Finely crushed, these crumbs provide a slightly sweet and sturdy base.
- Melted Butter: The binding agent that holds the crumbs together, infusing the crust with a rich, buttery flavor and ensuring a crisp texture.
- Granulated Sugar: A touch of sweetness to complement the crackers, balancing the overall flavor profile of the crust.
- For the Velvety Pumpkin Cheesecake Filling:
- Cream Cheese (Full-Fat, Room Temperature): This is the heart of any cheesecake. Using full-fat cream cheese guarantees a rich, dense, and luxurious texture. Ensuring it’s at room temperature is crucial for a lump-free, impeccably smooth batter.
- White Granulated Sugar: Provides the primary sweetness, contributing to the cheesecake’s tender crumb.
- Brown Sugar (Packed): Adds a deeper, caramel-like sweetness and a subtle moistness that beautifully complements the pumpkin and spices.
- Vanilla Extract (Pure): Enhances all the other flavors, adding a warm, aromatic depth that is indispensable in any baked good.
- Pumpkin Puree (100% Pure, Not Pie Filling): The star of our show! Make sure you’re using pure pumpkin puree, free from any added spices or sugars, to control the flavor balance precisely.
- Ground Cinnamon: A classic autumnal spice that adds warmth and a fragrant kick.
- Ground Nutmeg: Offers a sweet, pungent, and slightly woody flavor, a quintessential partner to pumpkin.
- Ground Cloves: Provides a strong, sweet, and aromatic warmth that ties all the fall spices together. Use sparingly for balance.
- Sour Cream (Full-Fat, Room Temperature): Introduces a slight tanginess and an incredibly smooth, silky texture to the filling. It also helps to prevent cracking during baking.
- Large Eggs (Room Temperature, Lightly Whisked): Eggs act as a binder, providing structure and richness. Bringing them to room temperature prevents the batter from curdling and ensures even mixing. Lightly whisking them before adding helps prevent overmixing the batter.
Setting Up Your Kitchen for Baking Success
Before the magic of baking our perfect pumpkin cheesecake begins, let’s ensure our kitchen is prepped and primed for success. Think of this as laying the groundwork for a flawless culinary performance. A well-organized and properly prepared kitchen is not just about cleanliness; it’s about setting the stage for smooth execution and exquisite results. The first, and arguably most critical, step for any cheesecake is bringing your key ingredients—cream cheese, eggs, and sour cream—to room temperature. This isn’t merely a suggestion; it’s a golden rule.
Why is room temperature so important? When ingredients like cream cheese are cold, they resist blending, leading to a lumpy batter and overmixing. Overmixing incorporates too much air, which can cause your cheesecake to puff up dramatically in the oven and then inevitably crack as it cools. By allowing these ingredients to gently warm up, they soften and emulsify seamlessly, creating that gloriously smooth, uniform batter we all desire. You’ll thank yourself for this small but significant act of patience.
Next, let’s talk about your springform pan. This specialized pan is essential for easy release and beautifully presented cheesecakes. Pre-spraying it with a high-quality cooking spray isn’t just a recommendation; it’s a preventative measure against sticking. This simple step ensures your magnificent pumpkin cheesecake will effortlessly slide out of the pan, intact and picture-perfect. Imagine the ease of release, the pristine edges—it’s the dream, and proper pan preparation is your guarantee. Additionally, take a moment to clear your countertops, measure out all your ingredients in advance (mise en place!), and arrange your tools. A tidy workspace promotes calm and efficiency, turning the baking process into a joyful, stress-free experience. With these preparations, you’re not just baking; you’re meticulously crafting a delightful experience, one creamy pumpkin cheesecake at a time.
Crafting the Perfect Graham Cracker Crust
The foundation of any exceptional cheesecake is its crust. For our ultimate pumpkin cheesecake, a sturdy, flavorful, and perfectly baked graham cracker crust is non-negotiable. It provides that delightful textural contrast to the creamy filling and a subtle sweetness that truly enhances every bite. Getting this right is crucial, but fortunately, it’s incredibly simple. Let’s meticulously craft this vital base:
- Combine Your Ingredients with Precision: In a medium-sized mixing bowl, combine 1 1/2 cups of finely crushed graham cracker crumbs, 6 tablespoons of melted unsalted butter, and 1 tablespoon of granulated sugar. Stir these ingredients thoroughly until they are uniformly blended. The mixture should resemble wet sand and hold together when gently squeezed. Ensure the butter is fully integrated to bind all the crumbs effectively.
- Press Down Firmly and Evenly: Pour the graham cracker mixture into your pre-sprayed 9-inch springform pan. Using the bottom of a flat-bottomed cup or your clean fingers, press the mixture down very firmly and evenly across the bottom of the pan. The key here is consistency; a uniform thickness ensures even baking and prevents a crumbly crust. Think of it as meticulously setting the stage for the star of our show, ensuring every corner is perfectly covered and compacted.
- Bake to Golden Perfection: Place the prepared crust into a preheated oven at 325°F (160°C) for approximately 6 to 8 minutes. Keep a close eye on it; you’re looking for the edges to turn a beautiful golden brown and for the crust to smell wonderfully fragrant. This brief pre-baking step toasts the crumbs, deepens their flavor, and helps prevent the crust from becoming soggy once the filling is added. Once baked, remove the crust from the oven and allow it to cool completely while you prepare the filling. This cooling period is important for the crust to set fully before it’s burdened with the weight of the creamy pumpkin filling. Trust in the crust; it’s the initial step to a holiday dessert that will undoubtedly impress everyone lucky enough to try a slice.
Mixing the Velvety Pumpkin Cheesecake Filling
With our perfectly baked graham cracker crust cooling, it’s time to turn our attention to the luxurious heart of our pumpkin cheesecake: the filling. This is where the magic truly unfolds, creating that signature rich, smooth, and intensely flavorful experience. The key to a crack-free and silky-smooth cheesecake lies in proper mixing – specifically, avoiding over-incorporating air. Patience and a gentle hand are your best friends here. Let’s walk through the steps to build a filling bursting with the ideal balance of pumpkin and warming spices.
- Cream the Cream Cheese (Gently!): Begin with your 24 ounces of full-fat cream cheese, ensuring it’s softened to room temperature – this is absolutely critical for a lump-free batter. Using an electric hand mixer or stand mixer fitted with the paddle attachment, beat the cream cheese on a very low speed. Our goal is to achieve a creamy, cohesive texture, not a fluffy one. Scrape down the sides of the bowl frequently to ensure even mixing and minimal air incorporation. Beat until just smooth, about 2-3 minutes.
- Gradually Introduce Sugars and Vanilla: With the mixer still on low speed, slowly add the white granulated sugar, followed by the packed brown sugar. Continue to mix until the sugars are fully dissolved and the mixture is smooth, without any grainy texture. Then, pour in the pure vanilla extract and mix until just combined. The slow addition and low speed prevent aeration and ensure a uniform sweetness.
- Infuse with Pumpkin and Aromatic Spices: Now, it’s time to bring in the star flavors of autumn. Add the pure pumpkin puree, ground cinnamon, ground nutmeg, and a delicate touch of ground cloves to the cream cheese mixture. Mix on low speed until these ingredients are thoroughly incorporated and the batter achieves a beautiful, uniform orange hue. The aroma filling your kitchen at this stage will be absolutely divine, signaling the heart of your pumpkin cheesecake coming to life.
- Fold in the Tangy Sour Cream: Gently blend in the full-fat, room temperature sour cream on low speed until the mixture is completely smooth. The sour cream not only adds a wonderful, subtle tang that beautifully cuts through the sweetness but also contributes significantly to the cheesecake’s incredibly silky texture and helps create a more stable emulsion, further reducing the risk of cracks.
- Delicately Incorporate the Eggs: In a separate small bowl, lightly whisk the 3 large room-temperature eggs until just broken up. This pre-whisking helps them integrate into the batter more smoothly with less mixing. Pour the whisked eggs into the cream cheese mixture and mix on the lowest possible speed, just until they are barely combined. The absolute key here is to avoid overmixing the eggs. Excessive mixing at this stage can introduce too much air, leading to a cheesecake that rises too much and then falls and cracks during cooling. Stop mixing as soon as you no longer see streaks of egg.
Congratulations! You now have a velvety-smooth, perfectly spiced pumpkin cheesecake filling that is ready for baking. Remember, every slow, deliberate step taken in this stage contributes to the flawless texture and exquisite flavor of your finished cheesecake.
The Art of Baking and Perfect Cooling
The anticipation builds as your creamy, perfectly spiced pumpkin filling—infused with cinnamon, nutmeg, and those warm ground cloves—is ready for its transformation. Baking a cheesecake, particularly one as rich and delicate as our pumpkin masterpiece, requires precision and patience. This stage, encompassing both baking and the crucial cooling process, is where that sought-after smooth, crack-free texture is truly achieved. Allow me to guide you through my tried-and-true method for ensuring a velvety-smooth result every single time.
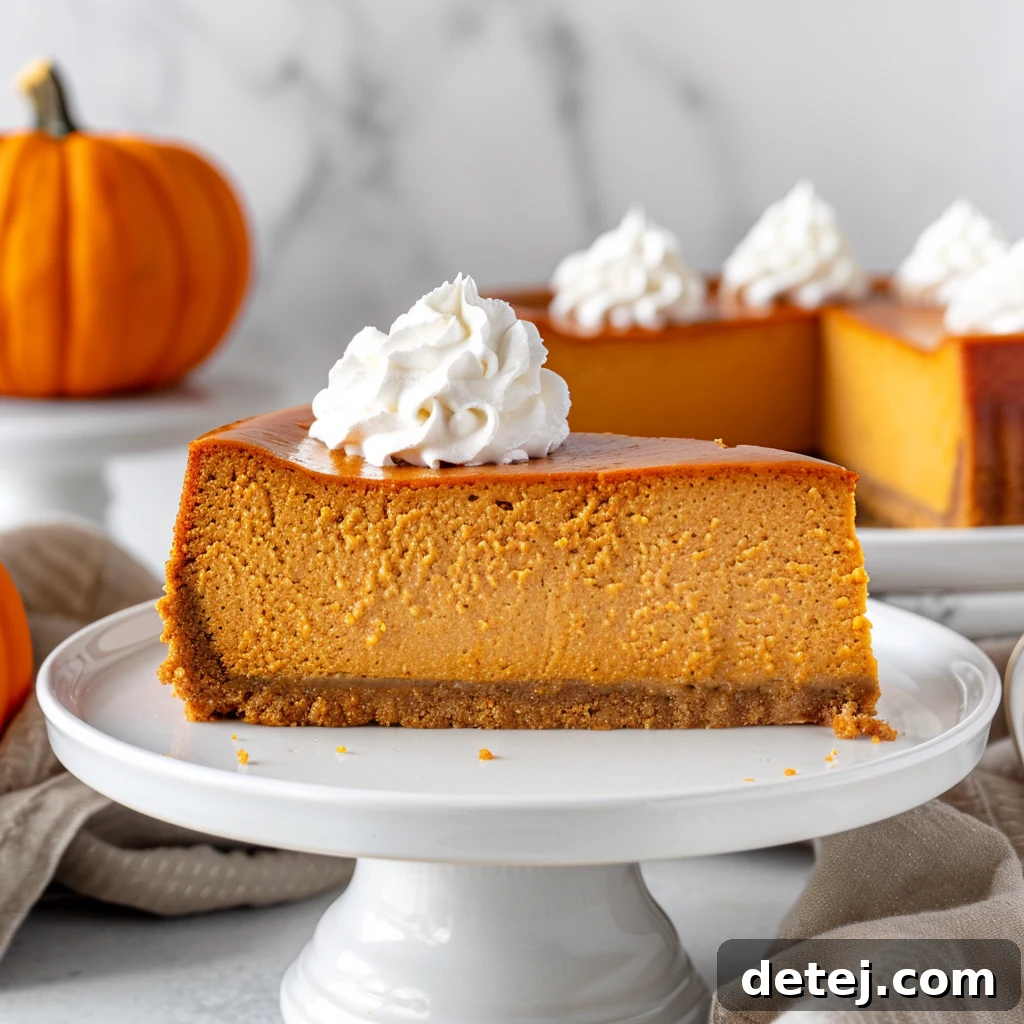
- Precision Oven Preheat: Start by preheating your oven to a gentle 325°F (160°C). This temperature is the sweet spot for cheesecakes, allowing for a slow, even bake that prevents the edges from cooking too quickly and helps maintain a uniform texture throughout. Avoid high heat, which can cause rapid rising and subsequent cracking.
- Mastering the Water Bath (Bain-Marie): This technique is your best friend for a crack-free cheesecake. Carefully wrap the outside of your springform pan with two layers of heavy-duty aluminum foil. Ensure the foil extends well up the sides of the pan to create a watertight seal, preventing any water from seeping into your crust. Place the foil-wrapped springform pan into a larger roasting pan. Then, carefully pour hot (steaming, but not boiling) water into the larger pan, ensuring it comes about halfway up the sides of your cheesecake pan. The water bath creates a moist, consistent, and gentle cooking environment, preventing the cheesecake from drying out, baking too fast, and ultimately, cracking. It’s like a serene sauna for your dessert.
- Bake, Then Gently Rest: Carefully transfer the roasting pan with its water bath and cheesecake to the preheated oven. Bake for the recommended time of approximately 65 minutes. Resist the urge to open the oven door during this time, as sudden temperature fluctuations are a primary cause of cracks. Once the baking time is complete, the center of the cheesecake should still have a slight jiggle, indicating it’s perfectly cooked but not overbaked. Turn off the oven, but leave the cheesecake inside with the door slightly ajar (you can wedge a wooden spoon in the door). Let your masterpiece sit in this gradually cooling environment for at least 1 hour, or even up to 5 hours, basking in the residual heat. This slow, controlled cooling transition is paramount; it prevents drastic temperature changes that can shock the delicate cheesecake and cause those dreaded cracks. It’s an extended spa session for your dessert, culminating in that dreamy, smooth, and perfectly set texture we all strive for.
- Transition to Thorough Chilling: After its gradual cool-down in the oven, carefully remove the cheesecake from the water bath and unwrap the foil. Place it on a wire rack to cool completely to room temperature. This typically takes another 1-2 hours. Once at room temperature, cover the cheesecake loosely with plastic wrap (while still in its springform pan) and transfer it to the refrigerator. The chilling phase is absolutely essential; it allows the flavors to fully meld and deepen, and the texture to firm up beautifully, making it perfectly sliceable. For the best results, plan to chill your pumpkin cheesecake overnight. This patience will be richly rewarded with an exquisite dessert.
The Grand Finale: Chilling and Serving Your Masterpiece
You’ve navigated the meticulous steps of preparation, mixing, and the delicate dance of baking and cooling. Now, the final, yet arguably most crucial, stage awaits: the chill. This period is not merely a waiting game; it’s a transformative process where the distinct components of your pumpkin cheesecake harmonize, deepen in flavor, and solidify into that irresistible, creamy texture you’ve worked so hard to achieve. Once your cheesecake has cooled completely to room temperature, loosely wrap the entire springform pan in plastic wrap or aluminum foil. Then, tuck your labor of love into the refrigerator to snuggle overnight. This extended chill time, ideally 8-12 hours, allows the magic to truly happen.
During its overnight repose, the vibrant flavors of the sweet pumpkin puree, the rich and tangy cream cheese, and those comforting whispers of cinnamon spice, warming nutmeg, and subtly sharp ground cloves will meld and intensify. The cheesecake’s structure will firm up perfectly, ensuring clean, elegant slices that hold their shape. When morning arrives, or whenever you’re ready for the grand unveiling, gently remove the cheesecake from its springform pan. Run a thin, sharp knife dipped in hot water around the perimeter of the cheesecake before releasing the springform ring for the cleanest edge.
Now for the delightful presentation! Dress your pumpkin cheesecake masterpiece with a generous dollop of fresh whipped cream, or for an added touch of sophisticated tang, a spoonful of plain sour cream. For an extra decorative flourish and an aromatic burst, sprinkle a whisper of extra cinnamon, nutmeg, or a blend of pumpkin pie spice on top just before serving. You could also drizzle it with a homemade caramel sauce or sprinkle it with toasted pecans for additional texture and flavor. This moment of unveiling and serving is more than just a step; it’s the sweet reward for your anticipation, a culmination of effort, and a beautiful testament to the joy of homemade baking. Prepare for admiring glances and eager forks – your ultimate pumpkin cheesecake is ready to shine!
The Final Touch: Expert Tips for Your Ultimate Pumpkin Cheesecake
To ensure your pumpkin cheesecake consistently reaches its peak of perfection, here are some invaluable tips gathered from years of baking experience. These insights will help you avoid common pitfalls and elevate your homemade dessert to professional-grade status, ensuring every slice is a testament to your culinary skill.
- Avoid Overmixing the Batter: This is perhaps the most crucial tip for a flawless cheesecake. Overmixing introduces too much air into the batter, which causes the cheesecake to rise excessively during baking and then dramatically fall and crack as it cools. Mix only until the ingredients are just combined and smooth. Remember, we’re aiming for creamy, not fluffy.
- Ensure All Ingredients Are at Room Temperature: As highlighted earlier, this step cannot be overstated. Cold ingredients will not blend smoothly with the cream cheese, leading to a lumpy batter. Room temperature ingredients emulsify seamlessly, creating a wonderfully smooth, lump-free batter that bakes evenly and prevents cracks. Plan ahead and take cream cheese, sour cream, and eggs out of the refrigerator at least 1-2 hours before you begin baking.
- Utilize a Water Bath for Consistent Results: The water bath (bain-marie) method is your secret weapon against cracks and dry edges. It creates a moist, even cooking environment, which gently bakes the cheesecake, ensuring a tender, custardy texture from edge to center. Always wrap your springform pan securely with heavy-duty foil to prevent water seepage.
- Allow for Gradual Cooling: Sudden temperature changes are a cheesecake’s worst enemy. After baking, turn off your oven and let the cheesecake cool gradually inside with the oven door slightly ajar for at least an hour, or even up to five hours. This slow transition helps prevent the cheesecake from shrinking too rapidly and cracking.
- Thorough Chilling is Non-Negotiable: While difficult to wait, overnight chilling in the refrigerator is essential. This allows the cheesecake to fully set, firm up, and for the complex flavors to meld and intensify. A properly chilled cheesecake will offer the best texture and taste, and will slice beautifully.
- Store Leftovers Properly: To preserve the freshness and flavor of your homemade pumpkin cheesecake, cover any leftovers tightly with plastic wrap or aluminum foil and store them in the refrigerator. Enjoy your delicious creation for up to 3-4 days.
- Customize and Experiment: While this guide offers a classic recipe, feel free to personalize your pumpkin cheesecake. Consider adding a splash of bourbon or rum to the filling for an adult twist, or incorporating different spices like ginger or allspice. Top with candied pecans, chocolate shavings, or a dollop of cranberry sauce for varying textures and flavors. Above all, embrace the joy of baking as a creative and rewarding outlet.
There’s an undeniable magic woven into the process of creating homemade pumpkin cheesecake, particularly as the vibrant hues of autumn emerge and the holiday season draws near. It transcends the mere act of blending cream cheese, fragrant pumpkin puree, warm cinnamon spice, and all those other carefully chosen ingredients. It’s about infusing a piece of your heart, a measure of your care, into a recipe that has the power to brighten any table and bring genuine smiles to the faces of your loved ones. The moment you gently pull that perfectly baked cheesecake, its golden graham cracker crust visible beneath a smooth, inviting surface, from the oven, there’s an unparalleled sense of accomplishment—a quiet triumph that speaks volumes.
And let us not overlook the sweet anticipation of sharing this culinary creation, knowing that each rich, creamy, and exquisitely spiced slice is a delicious testament to your effort and affection. So, consider this ultimate guide to baking pumpkin cheesecake your indispensable companion this festive season. Trust us, this is far more than just a dessert; it’s a slice of pure joy, a comforting piece of home, a compelling reason to gather cherished friends and family, and an unforgettable addition to your treasured collection of fall recipes. Dive in with confidence, bake with passion and a generous spirit, and witness how a seemingly simple holiday dessert recipe transforms into precious, lasting memories with those who matter most. Let the grand adventure of baking the perfect pumpkin cheesecake commence!
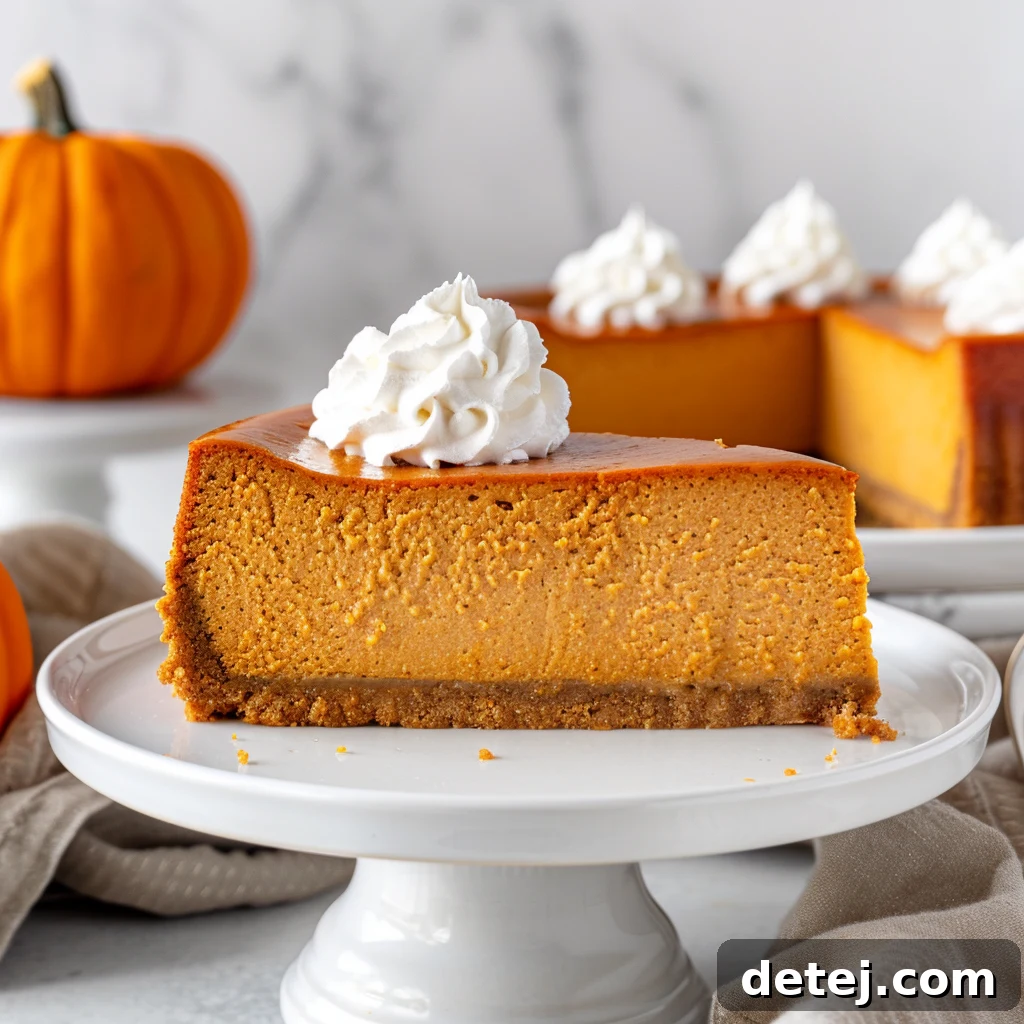
Easy Homemade Pumpkin Cheesecake Recipe
No reviews yet
Easy Homemade Pumpkin Cheesecake
Servings: 12
Prep Time: 15 mins
Cook Time: 1 hr 11 mins
Chill Time: 5 hrs
Total Time: 6 hrs 26 mins
Author: Krystel
Delight in Easy Homemade Pumpkin Cheesecake: rich, creamy, and irresistibly spiced for a perfect autumn treat.
Ingredients
- For the crust:
- 1 1/2 cups graham cracker crumbs
- 6 tablespoons butter, melted
- 1 tablespoon sugar
- For the cheesecake:
- 24 oz cream cheese, room temperature
- 2/3 cup white sugar
- 2/3 cup brown sugar
- 1 teaspoon vanilla extract
- 15 oz pumpkin puree
- 1 teaspoon cinnamon
- 1/4 teaspoon nutmeg
- 1/4 teaspoon ground cloves
- 10 oz sour cream, room temperature
- 3 large eggs, whisked, room temperature
Instructions
- Plan ahead by ensuring the cream cheese, sour cream, and eggs are at room temperature for smoother blending.
- Prepare a 9-inch springform pan by coating it with cooking spray.
- To make the crust, preheat the oven to 325°F (160°C). Mix crumbs, melted butter, and sugar in a medium bowl. Press the mixture firmly into the bottom of the springform pan. Bake for about 6 minutes until golden brown.
- Let the crust cool completely.
- Prepare the pan for a water bath by placing the springform pan in a silicone water bath mold or wrapping the outside with two layers of heavy-duty foil to prevent water from seeping in.
- For the cheesecake filling, ensure the 24 ounces of cream cheese are at room temperature.
- Use a hand mixer on low speed to blend the cream cheese until smooth, avoiding incorporating too much air. Gradually mix in white sugar, brown sugar, and vanilla extract on low speed, scraping the bowl as needed.
- Now, add pumpkin puree, cinnamon, nutmeg, and cloves, mixing until just combined on low speed. Blend in sour cream on low speed until smooth. In a separate bowl, lightly whisk the eggs, then gently incorporate them into the cream cheese mixture until just combined, ensuring not to overmix.
- To assemble and bake, pour the batter into the prepared springform pan with the pre-baked crust. Gently tap the pan on the counter a few times to release any large air bubbles.
- Let the filled pan rest for 10 minutes, and tap again if needed. Preheat the oven to 325°F (160°C). Heat 4 quarts of water until steaming (not boiling). Place a 10×15-inch baking pan in the oven, and carefully pour about an inch and a half of the hot water into it.
- Set the wrapped springform pan into the hot water bath inside the larger baking pan, ensuring the water reaches halfway up the side of the cheesecake pan. Bake the cheesecake for 65 minutes without opening the oven door.
- After baking, turn off the oven and let the cheesecake sit inside with the door slightly ajar for 5 hours to cool gradually. This slow cooling prevents cracking.
- For chilling and serving, remove the cheesecake from the oven and water bath, unwrap the foil, and let it cool completely to room temperature while still in the pan.
- Cover loosely and refrigerate overnight (at least 8-12 hours) to firm up completely and allow flavors to meld. Serve the next day with your preferred toppings.
Did you make this recipe?Please leave a star rating and review below!