
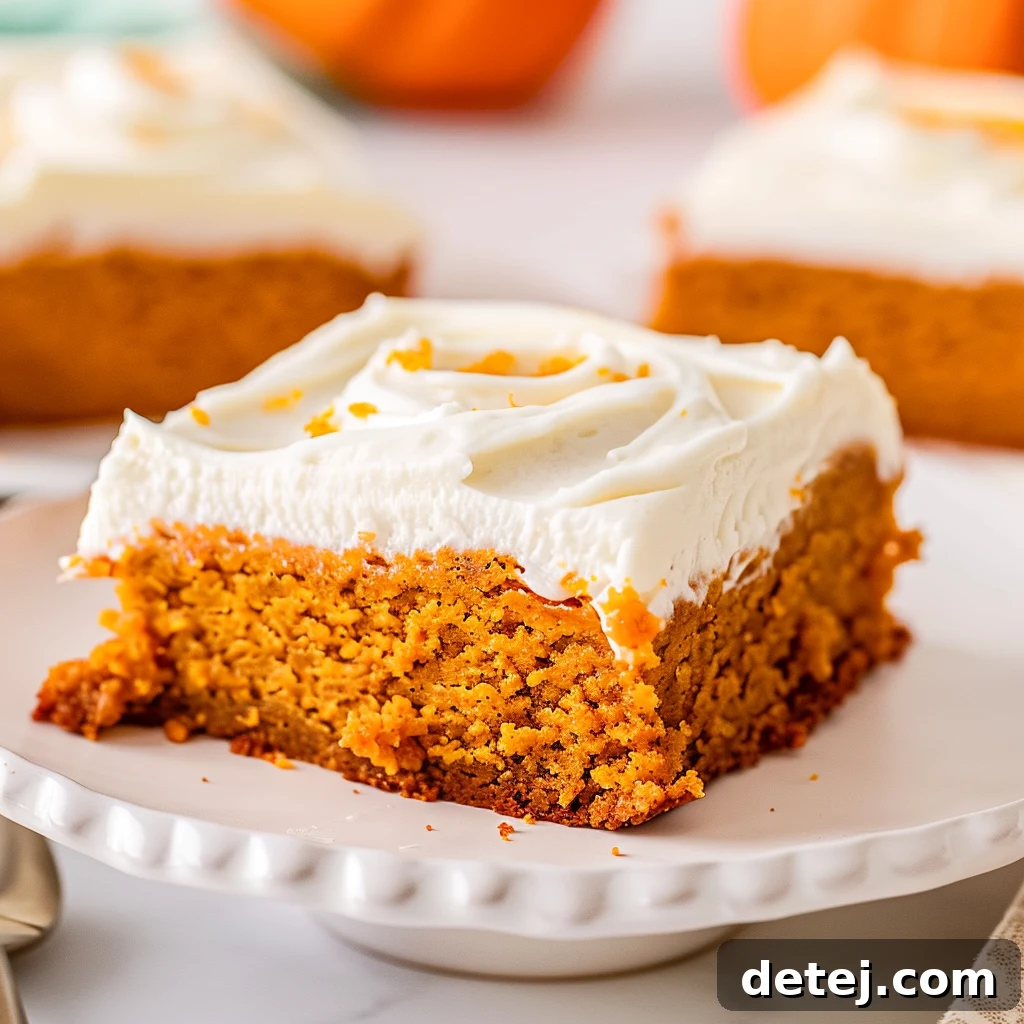
Pumpkin Delight: Crafting the Ultimate Pumpkin Bars with Cream Cheese Frosting
Introduction to the Best Pumpkin Bars for Fall
As the crisp autumn air gently sweeps through, painting landscapes in breathtaking hues of amber and gold, our senses awaken to the comforting aromas of fall. Among the myriad seasonal delights, nothing quite captures the essence of this magical time like a perfectly baked **pumpkin bar**. More than just a dessert, these moist, spiced treats embody the warmth and joy of the harvest season, making them an indispensable centerpiece for any autumn gathering or a delightful indulgence for a cozy evening in. While many recipes promise a taste of fall, this particular guide introduces you to the ultimate method for crafting **pumpkin bars** that truly stand apart, crowned with a rich, velvety **cream cheese frosting** that elevates them to an unforgettable culinary experience.
This isn’t merely a recipe; it’s an invitation to create a masterpiece of fall flavors. Each bite of these **homemade pumpkin bars** offers a symphony of taste and texture: a wonderfully moist, fluffy cake base infused with the deep, earthy notes of pumpkin, harmoniously blended with an aromatic medley of classic autumn spices like cinnamon, nutmeg, and a whisper of cloves. The crowning glory, our decadent **cream cheese frosting**, adds a luxurious tang and an unparalleled creamy smoothness, making these bars absolutely irresistible. Whether you’re a seasoned baker or just beginning your culinary journey, this straightforward recipe ensures spectacular results, guaranteeing that your **pumpkin bars with cream cheese frosting** will become the most requested dessert of the season. Prepare to impress your loved ones and savor the true taste of autumn with every delightful square.
Key Takeaways for Baking Perfect Pumpkin Bars:
- Pumpkin bars are the quintessential fall dessert, ideal for any celebration or a simple, comforting treat.
- This enhanced recipe masterfully combines traditional pumpkin flavors with a rich blend of spices for a uniquely delicious experience.
- The luscious, homemade **cream cheese frosting** provides a dreamy, creamy finish, making these bars utterly addictive.
- Achieving the perfect texture involves precise measurement and proper cooling techniques for moist, fluffy results.
- These **easy pumpkin bars** are versatile, perfect for baking for a crowd or enjoying as a personal indulgence.
Essential Ingredients for Your Ultimate Pumpkin Bars
Crafting the best **pumpkin bars** starts with assembling the highest quality ingredients. Each component plays a vital role in achieving that perfect balance of flavor and texture, from the tender crumb of the cake to the silken smoothness of the **cream cheese frosting**. Here’s a detailed look at what you’ll need, along with a brief explanation of each ingredient’s contribution:
- 2 cups all-purpose flour: This forms the structural foundation of our bars, providing the necessary body and ensuring they are tender yet robust enough to hold their shape under the creamy frosting.
- 2 cups granulated sugar: Beyond just sweetness, sugar contributes to the moistness and tender crumb of the bars, balancing the rich pumpkin and spices.
- 2 teaspoons baking powder & 1 teaspoon baking soda: This dynamic duo is crucial for leavening. Baking powder gives the initial lift, while baking soda, activated by the acidic pumpkin, ensures a consistently light and airy texture.
- 1 teaspoon ground cinnamon & 1 teaspoon ground nutmeg: These are the heart of our fall flavor profile. Cinnamon offers a warm, sweet spice, while nutmeg provides a subtly sweet and slightly pungent aroma, both quintessential to pumpkin desserts.
- ½ teaspoon salt & ½ teaspoon ground cloves: Salt enhances all the other flavors, bringing them into sharper focus. Cloves introduce a warm, intensely aromatic note, adding complexity and depth to the spice blend.
- 1 cup vegetable oil: The secret to exceptionally moist pumpkin bars. Vegetable oil keeps the cake wonderfully tender and prevents it from drying out, ensuring a delectable texture.
- 15 oz canned pumpkin (pure pumpkin puree, not pie filling): The star ingredient! Canned pumpkin provides the signature flavor, rich color, and a significant amount of moisture, making the bars incredibly soft and flavorful.
- 4 large eggs: Acting as a binder, eggs hold all the ingredients together, adding structure, richness, and contributing to the overall moisture and tenderness of the bars.
- For the Cream Cheese Frosting (The Irresistible Topping):
- 3 cups powdered sugar: The base for our frosting, providing sweetness and a fine texture that dissolves smoothly.
- ¾ cup unsalted butter, softened: Butter adds richness, flavor, and helps create a stable, spreadable frosting. Ensure it’s softened to room temperature for optimal creaminess.
- 6 oz cream cheese, softened: The essential ingredient for that characteristic tangy flavor and incredibly creamy texture. Like butter, it must be softened for a lump-free frosting.
- 2 tablespoons milk: A small amount of milk helps achieve the perfect spreading consistency for the frosting, allowing it to glide effortlessly over the bars.
- 2 teaspoons vanilla extract: A touch of vanilla enhances all the flavors in the frosting, adding a warm, aromatic note that complements the cream cheese beautifully.
Preparation: Laying the Foundation for Delicious Pumpkin Bars
Before the magic of mixing begins, a few foundational steps are essential to ensure your **pumpkin bars** bake perfectly and release effortlessly. Proper preparation sets the stage for success, transforming raw ingredients into a golden-hued delight.
First, preheat your oven to a welcoming 350°F (175°C). Allowing your oven to reach the correct temperature beforehand is crucial for even baking and a consistent rise, preventing the bars from becoming dense or unevenly cooked. While your oven warms up, turn your attention to the baking vessel. For these bars, a 15 x 10-inch jelly roll pan is ideal, yielding a perfect thickness for these delectable treats. If a jelly roll pan isn’t available, a 9×13 baking dish can be used, but be aware you may have some extra batter, and the baking time might need slight adjustment.
Next, prepare your chosen pan for a seamless release. Line it generously with parchment paper, allowing a slight overhang on the sides. This thoughtful step creates “handles” that make lifting the entire batch of baked bars out of the pan incredibly easy. To further guarantee a non-stick experience, lightly spray the parchment paper with non-stick cooking spray. This double layer of protection ensures your beautifully baked **pumpkin bars** will slide out without a hitch, preserving their perfect form for frosting and serving. With your oven preheated and your pan meticulously prepared, you are now perfectly poised to begin mixing your delightful batter.
Mixing the Batter: The Heart of Your Pumpkin Bars
Now that your ingredients are measured and your pan is ready, it’s time to bring these elements together to create the foundation of our delightful **pumpkin bars**. The mixing process is straightforward, designed to ensure a smooth, uniform batter that bakes into a moist and fluffy cake.
Begin by combining all the “bar” ingredients in a large mixing bowl. This includes your all-purpose flour, granulated sugar, baking powder, baking soda, cinnamon, nutmeg, salt, cloves, vegetable oil, canned pumpkin, and eggs. While some recipes suggest separating wet and dry ingredients, for these **easy pumpkin bars**, a one-bowl method works beautifully, simplifying the process without compromising quality. Using either a hand mixer or a stand mixer fitted with the paddle attachment, start by blending the ingredients on low speed. This initial low-speed mix helps to moisten the dry ingredients and prevent a cloud of flour from escaping the bowl.
Once the ingredients are just moistened and no visible dry flour remains, increase the mixer speed to medium. Continue to beat the batter for approximately 2 minutes. This step is crucial for incorporating air and developing a smooth, homogenous mixture, which contributes to the bars’ wonderfully light and tender texture. During these two minutes, scrape down the sides of the bowl occasionally with a spatula to ensure all ingredients are thoroughly combined. You’re looking for a smooth, thick batter that flows evenly, free of any lumps. This perfectly mixed batter is now ready to be poured into your prepared jelly roll pan, promising an impeccable bake and the ultimate foundation for your **cream cheese frosted pumpkin bars**.
Baking and Cooling: Patience for Perfection
With your perfectly mixed batter gently spread into the prepared jelly roll pan, it’s time for the transformation to begin in the warmth of your oven. Place the pan into your preheated 350°F (175°C) oven and let the magic unfold. The baking time for these **ultimate pumpkin bars** is typically between 25-30 minutes. However, oven temperatures can vary, so it’s always best to rely on visual cues and the classic “toothpick test” to determine doneness.
As the bars bake, your kitchen will fill with the most inviting aroma of pumpkin and spices, a true harbinger of autumn. To check if they are done, carefully insert a clean toothpick into the center of the pumpkin bars. If the toothpick comes out clean, with no wet batter clinging to it, your bars are perfectly baked. If you see streaks of wet batter, return the pan to the oven for a few more minutes, checking frequently. Be diligent, as overbaking can lead to dry bars, and the goal is a moist, tender crumb that melts in your mouth.
Once baked to golden-brown perfection, remove the pan from the oven. This next step is just as critical as the baking itself: proper cooling. Allow the **spiced pumpkin bars** to cool in the pan for about 10-15 minutes. This initial cooling allows them to set and firm up slightly. Then, using the parchment paper overhang as handles, carefully lift the entire slab of pumpkin bars out of the pan and transfer it to a wire cooling rack. It is absolutely essential that the bars cool completely to room temperature before you even think about applying the **cream cheese frosting**. Spreading frosting on warm bars will cause it to melt and create a messy, soupy texture instead of the beautiful, smooth layer you desire. This patience is a virtue that will be richly rewarded with perfectly frosted, delicious **fall dessert bars**.
Crafting the Dreamy Cream Cheese Frosting: A How-To Guide
No **pumpkin bar** is complete without its iconic companion: a rich, tangy, and incredibly smooth **cream cheese frosting**. This velvety topping is what elevates these seasonal treats from delicious to truly divine. Making this frosting is simpler than you might think, and the effort is undoubtedly worth it.
To begin, gather your powdered sugar, softened unsalted butter, softened cream cheese, milk, and vanilla extract. The key to a lump-free, perfectly smooth frosting lies in ensuring your butter and cream cheese are at proper room temperature. If they are too cold, they won’t cream properly, resulting in a lumpy texture. In a medium mixing bowl, combine the softened butter and cream cheese. Using a hand mixer or a stand mixer with the paddle attachment, beat them together on medium speed until the mixture is light, fluffy, and completely smooth. This usually takes 2-3 minutes. Scrape down the sides of the bowl often to ensure everything is evenly incorporated.
Next, gradually add the powdered sugar, one cup at a time, mixing on low speed until just combined after each addition. Once all the powdered sugar is incorporated, the mixture will be quite thick. Now, pour in the milk and vanilla extract. Increase the mixer speed to medium and beat for another 1-2 minutes until the frosting is incredibly smooth, creamy, and spreadable. Be careful not to overbeat, as this can incorporate too much air, leading to a less dense texture. The final result should be a frosting that is luscious, holds its shape, and is easy to spread. This heavenly **cream cheese frosting** is the perfect complement to the spiced pumpkin bars, creating a taste sensation that captures the very essence of autumn.
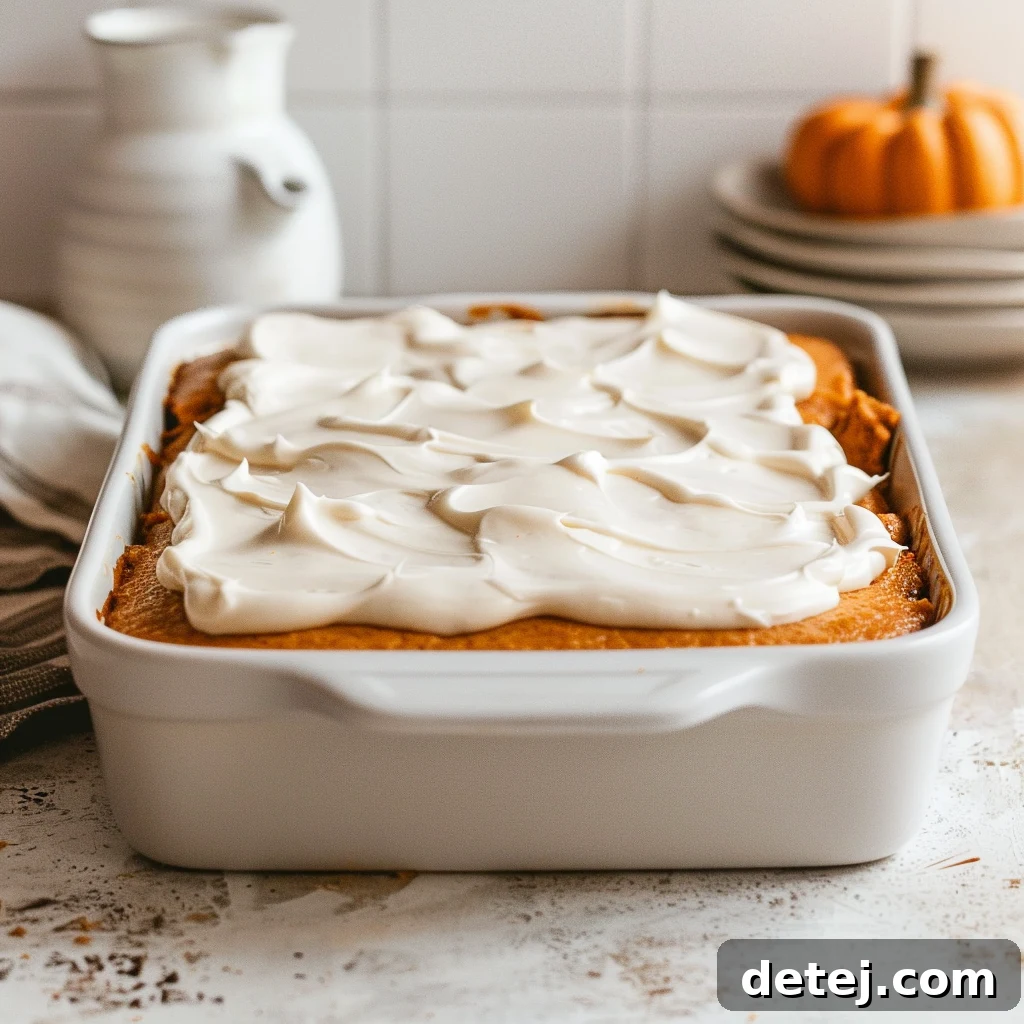
Frosting and Finishing Your Delightful Pumpkin Bars
The moment has arrived to crown your beautifully baked and perfectly cooled **pumpkin bars** with the irresistible **cream cheese frosting**. This is the sweet finale of your baking journey, transforming simple squares into a visually appealing and utterly delicious dessert.
Ensure your pumpkin bars are completely cool to the touch. If there’s any residual warmth, the frosting will melt, creating a less than ideal presentation and texture. Spoon the prepared cream cheese frosting onto the center of the cooled bars. Using an offset spatula or the back of a spoon, gently spread the frosting evenly across the entire surface, working from the center outwards to cover every inch. Aim for a smooth, uniform layer that highlights the rich color of the pumpkin bars beneath.
For an added touch of elegance and visual appeal, you can get creative with your frosting. Before the frosting sets, use the tip of your spatula to create gentle swirls or decorative patterns on the surface. A light dusting of cinnamon or a sprinkle of finely chopped pecans can also add a delightful finish and an extra layer of flavor. Once frosted, these **fall dessert bars** are ready to be cut. For traditional squares, a standard 15×10 inch pan will yield approximately 48 generous pieces. Use a sharp knife, wiping it clean between cuts, to achieve neat, defined slices. Each beautifully frosted piece is now a canvas of culinary creativity, ready to be shared and savored.
Serving Suggestions for Your Perfect Pumpkin Bars
Once your **pumpkin bars with cream cheese frosting** are baked and beautifully decorated, it’s time to present them. How you serve them can elevate the experience, making them not just a dessert, but a memorable part of your fall feast.
- Perfect Portions for Any Gathering: For larger crowds or a dessert buffet, consider cutting your pumpkin bars into smaller, bite-sized squares. These “two-bite” treats are easy to pick up, perfect for mingling, and ideal for ensuring everyone gets a taste without overindulging.
- Elegant Display: Arrange the bars artfully on a rustic wooden board, a vintage ceramic platter, or a pristine white serving dish. The contrast of the orange and cream colors is naturally appealing. For an extra touch of sophistication, dust the frosted tops lightly with a fine mesh sieve of cinnamon or nutmeg just before serving.
- Personal Touch with Toppings: Offer a small bowl of optional garnishes alongside your bars. Freshly whipped cream adds a cloud-like texture and extra richness. Crushed pecans or walnuts can provide a delightful crunch and nutty flavor, complementing the pumpkin beautifully. A drizzle of caramel sauce or a sprinkle of toasted shredded coconut can also add a gourmet flourish.
- Festive Garnish for Special Occasions: For holidays like Thanksgiving or a fall dinner party, consider garnishing individual bars with a delicate edible flower, a candied pecan, or even a tiny pumpkin-shaped fondant cutout for a truly festive and sophisticated look.
- Warm Beverage Pairing: Serve your **homemade pumpkin bars** alongside a steaming mug of spiced cider, a rich cup of coffee, or a comforting chai latte. The warm beverages perfectly complement the sweet and spicy notes of the dessert, creating an ultimate fall indulgence.
Storage Tips to Keep Your Pumpkin Bars Fresh
After the joyful experience of baking these delightful **pumpkin bars** with their luscious **cream cheese frosting**, you’ll want to ensure they remain as fresh and flavorful as possible for days to come. Proper storage is key to preserving their moist texture and creamy topping.
- Refrigeration is Essential: Due to the cream cheese in the frosting, these pumpkin bars must be stored in the refrigerator. This keeps the frosting firm and prevents spoilage, while also maintaining the overall freshness of the cake.
- Airtight Protection: Always store your bars in an airtight container. If you don’t have a container large enough for the entire batch, you can transfer them to a cake carrier or cover the original pan tightly with several layers of plastic wrap or aluminum foil. This prevents them from drying out and absorbing any refrigerator odors.
- Prevent Sticking: If you need to stack the bars (though a single layer is always best), place a sheet of parchment paper or waxed paper between layers. This simple trick will prevent the delicate cream cheese frosting from sticking to the bars above and ruining their pristine appearance.
- Enjoy at Optimal Temperature: While refrigerated storage is necessary, the flavors and textures of these **spiced pumpkin bars** are best appreciated at room temperature. Take the desired number of bars out of the refrigerator approximately 30-60 minutes before serving, allowing the frosting to soften slightly and the cake’s flavors to fully blossom.
- Freezing for Future Enjoyment: For longer storage, pumpkin bars can be frozen. Once completely chilled and firm from refrigeration, wrap individual bars or small batches tightly in plastic wrap, then again in aluminum foil, and place them in a freezer-safe container or bag. They can be stored in the freezer for up to 2-3 months. Thaw overnight in the refrigerator before bringing to room temperature to serve.
With these straightforward storage tips, your **ultimate pumpkin bars** will remain a delightful treat, ready to bring comfort and joy whenever a craving for fall flavors strikes. Happy baking and even happier eating!
A Sweet Ending to Your Fall Feast: The Enduring Charm of Pumpkin Bars
There’s an undeniable magic that happens when a platter of homemade **pumpkin bars**, glistening with their smooth **cream cheese frosting**, graces a table. It’s more than just a dessert; it’s a tangible expression of the warmth, generosity, and comforting spirit of the autumn season. For me, these bars have become a cherished tradition, a beacon of fall gatherings that consistently brings smiles and contented sighs from friends and family alike. Whether it’s the centerpiece of a bustling Thanksgiving spread, a welcoming treat after a chilly hayride, or simply a sweet accompaniment to an afternoon cup of tea, these **moist pumpkin bars** with their luscious frosting are always the perfect fit.
The journey of crafting these **ultimate pumpkin bars** is a delightful one, from the mixing of simple ingredients like all-purpose flour, eggs, and vegetable oil, to the moment that essential canned pumpkin transforms into a golden, aromatic cake. Each element, from the precisely measured baking powder and baking soda ensuring a perfect rise, to the fragrant vanilla extract that rounds out the frosting’s sweetness, plays a crucial role in creating a dessert that is both profoundly satisfying and deceptively simple. I often reflect on the little details that contribute so much: the faithful jelly roll pan, the anticipation during the toothpick test, and those patient cooling racks—all partners in bringing this delightful treat to life. And let’s not forget the unsung heroes like non-stick spray and parchment paper, ensuring our **pumpkin delight** story has a happy, non-sticky ending, making serving effortless.
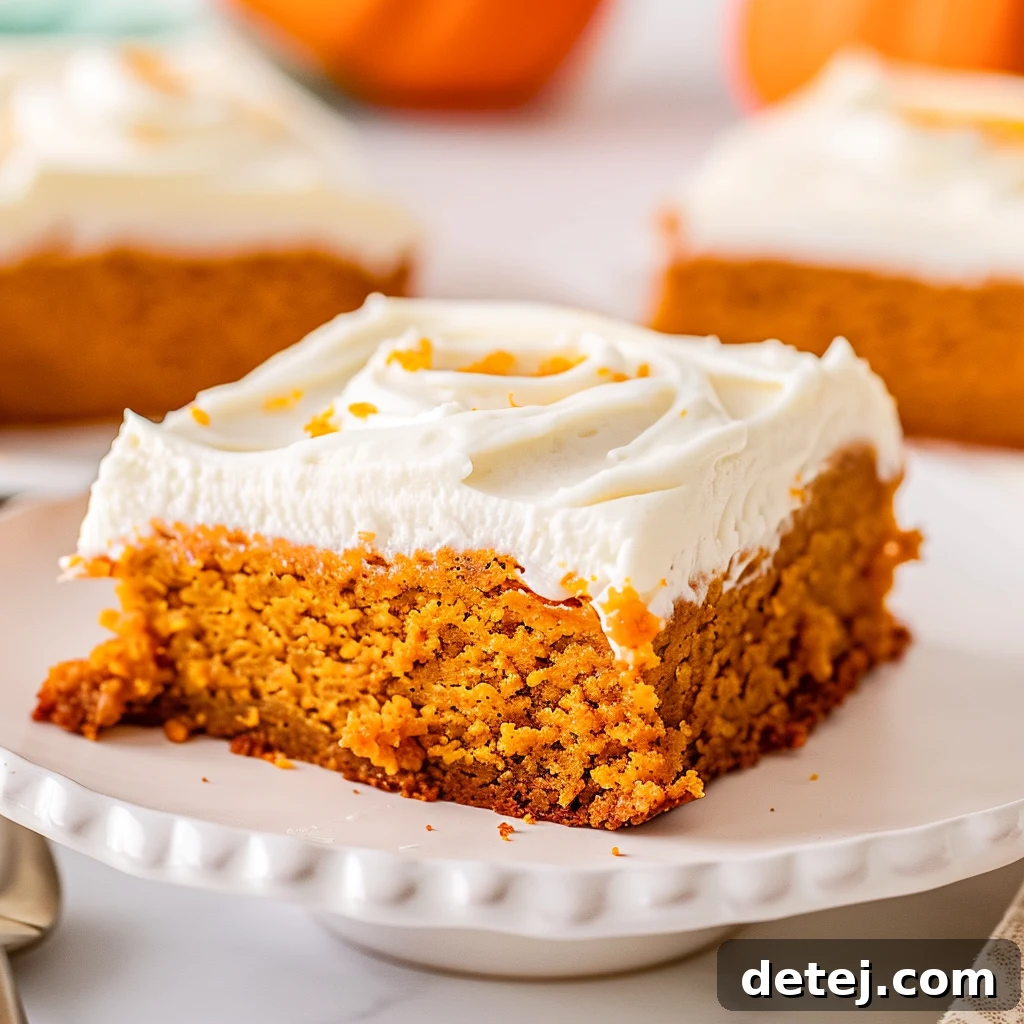
The deep, comforting flavors of cinnamon, nutmeg, and pumpkin, perfectly complemented by the creamy, tangy **cream cheese frosting**, create a sensory experience that speaks directly to the soul of autumn. These **homemade pumpkin bars** are more than just a recipe; they are an invitation to create lasting memories and share the joy of homemade goodness. So, as the leaves continue to fall and the days grow shorter, why not embrace the baking adventure and try your hand at these irresistible **fall dessert bars**? I promise, the rich flavors and the warmth they bring to your table will make it an endeavor well worth undertaking.
If you’re a fan of delicious fall recipes, be sure to check out my Easy Pumpkin Bread Pudding recipe for another budget-friendly autumn favorite!
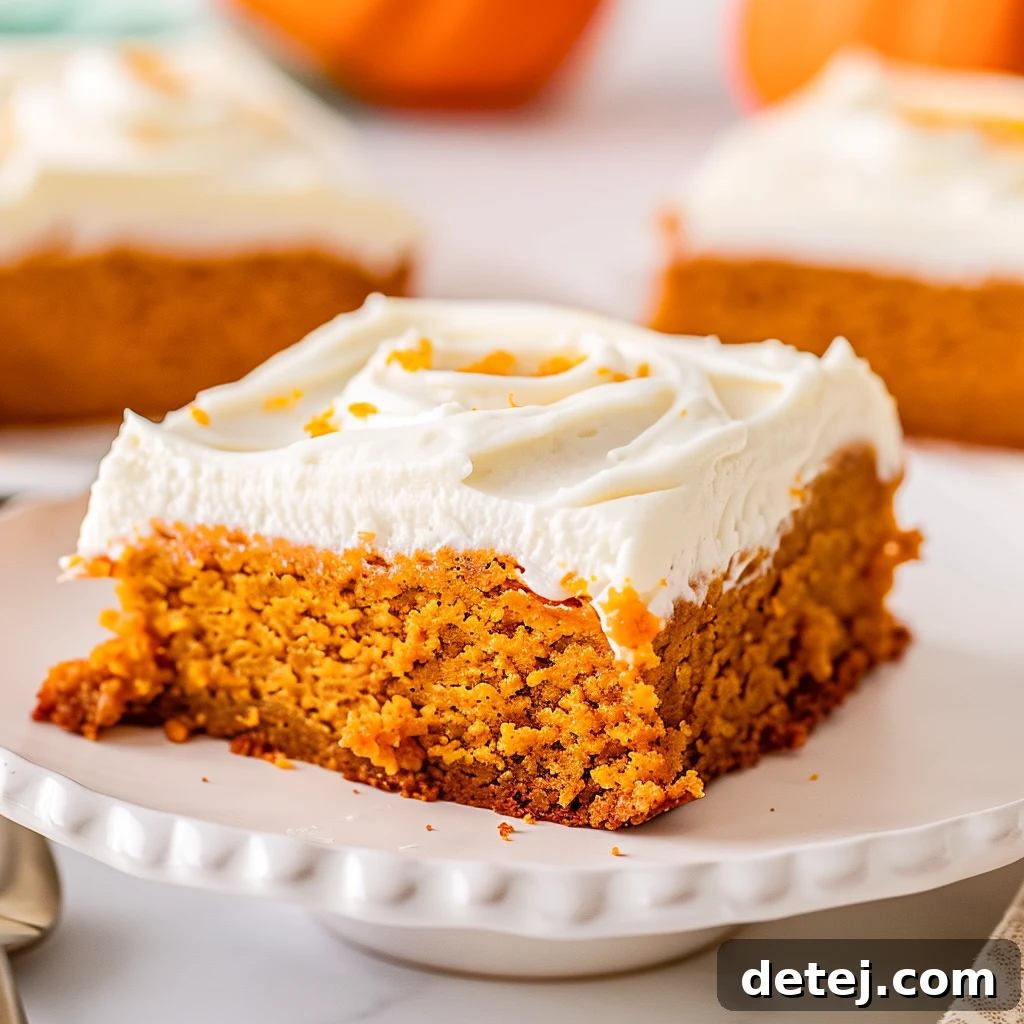
The Best Pumpkin Bars
Ingredients
- 2 cups all-purpose flour
- 2 cups sugar
- 2 teaspoons baking powder
- 1 teaspoon baking soda
- 1 teaspoon cinnamon
- 1 teaspoon nutmeg
- ½ teaspoon salt
- ½ teaspoon cloves
- 1 cup vegetable oil
- 15 oz canned pumpkin
- 4 eggs
- Cream Cheese Frosting:
- 3 cups powdered sugar
- ⅔ cup butter, softened
- 6 oz cream cheese, softened
- 2 Tb milk
- 2 teaspoons vanilla extract
Instructions
- Preheat your oven to 350°F (175°C) and line a 15 x 10-inch jelly roll pan with parchment paper, lightly spraying it with non-stick spray. If using a 9×13 baking dish, note that you will have extra batter.
- In a large bowl, combine all “bar” ingredients (flour, sugar, baking powder, baking soda, cinnamon, nutmeg, salt, cloves, vegetable oil, canned pumpkin, and eggs). Use a hand mixer or stand mixer to blend on low speed until moistened, then on medium speed for 2 minutes. Pour the mixture into the prepared pan and bake for 25-30 minutes, or until a toothpick inserted in the center comes out clean.
- While the bars cool completely, prepare the frosting.
- For the Cream Cheese Frosting: In a medium mixing bowl, combine all “frosting” ingredients (powdered sugar, softened butter, softened cream cheese, milk, and vanilla extract) and beat on medium speed until smooth and creamy.
- Once the bars have completely cooled to room temperature, spread the frosting evenly over the top. Cut into 48 bars and enjoy!