
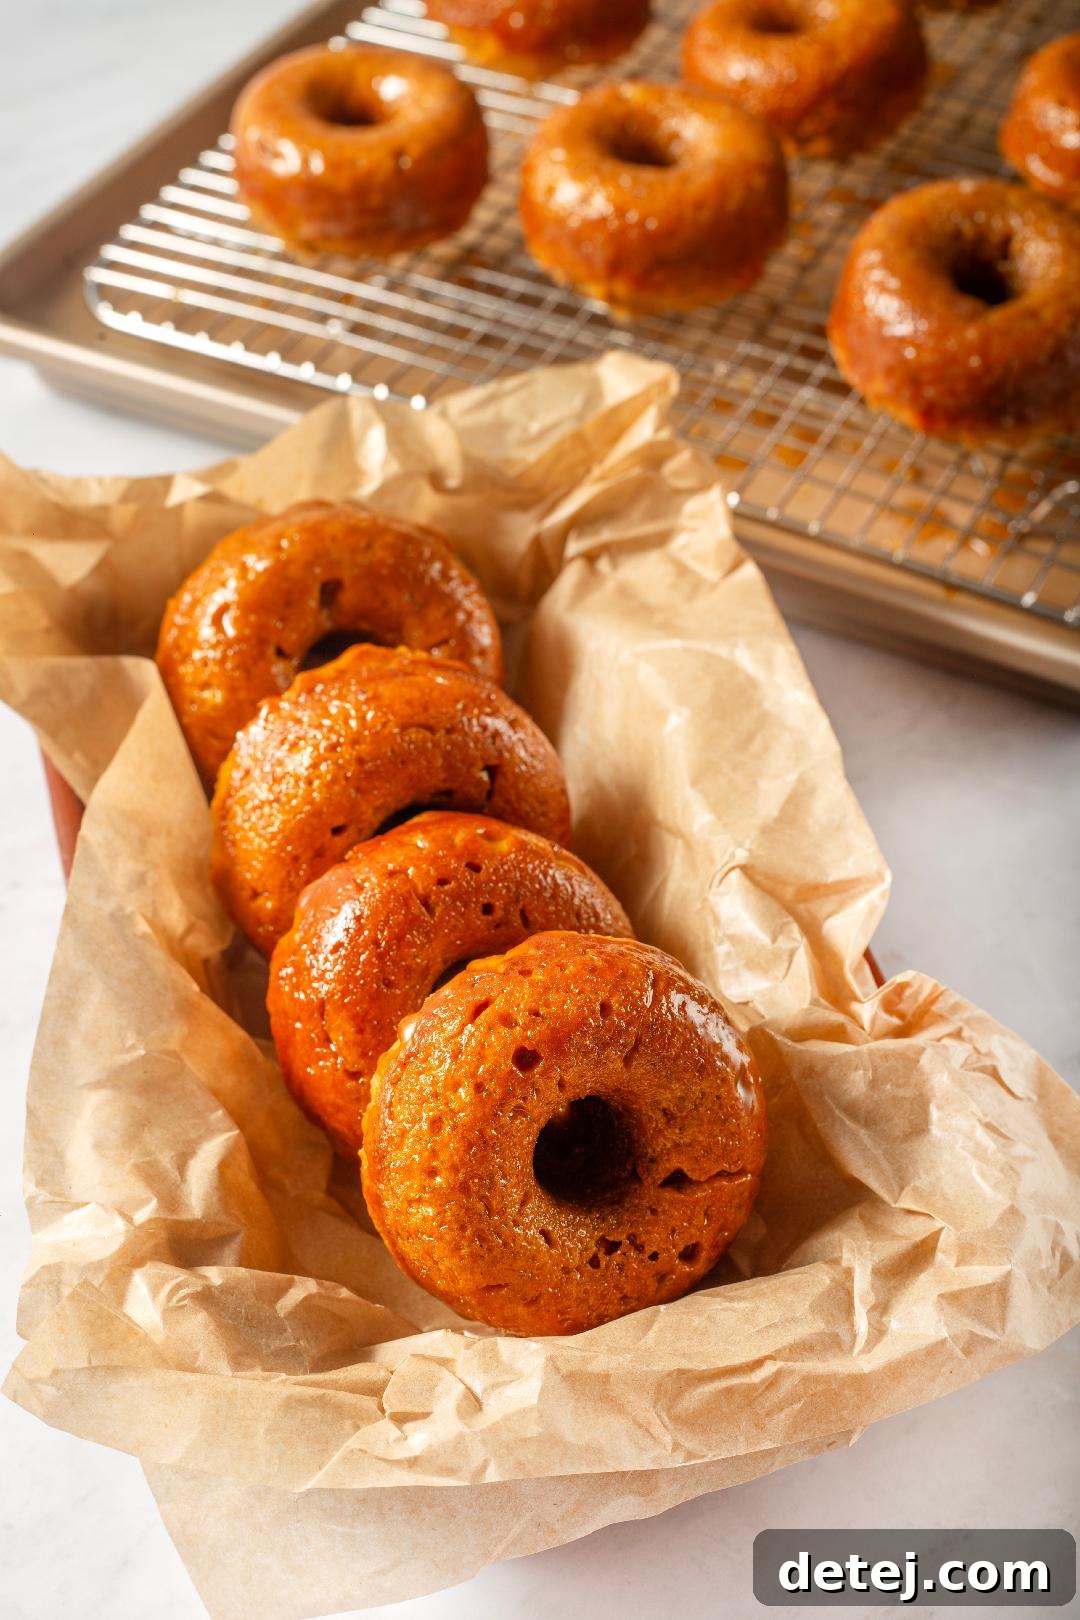
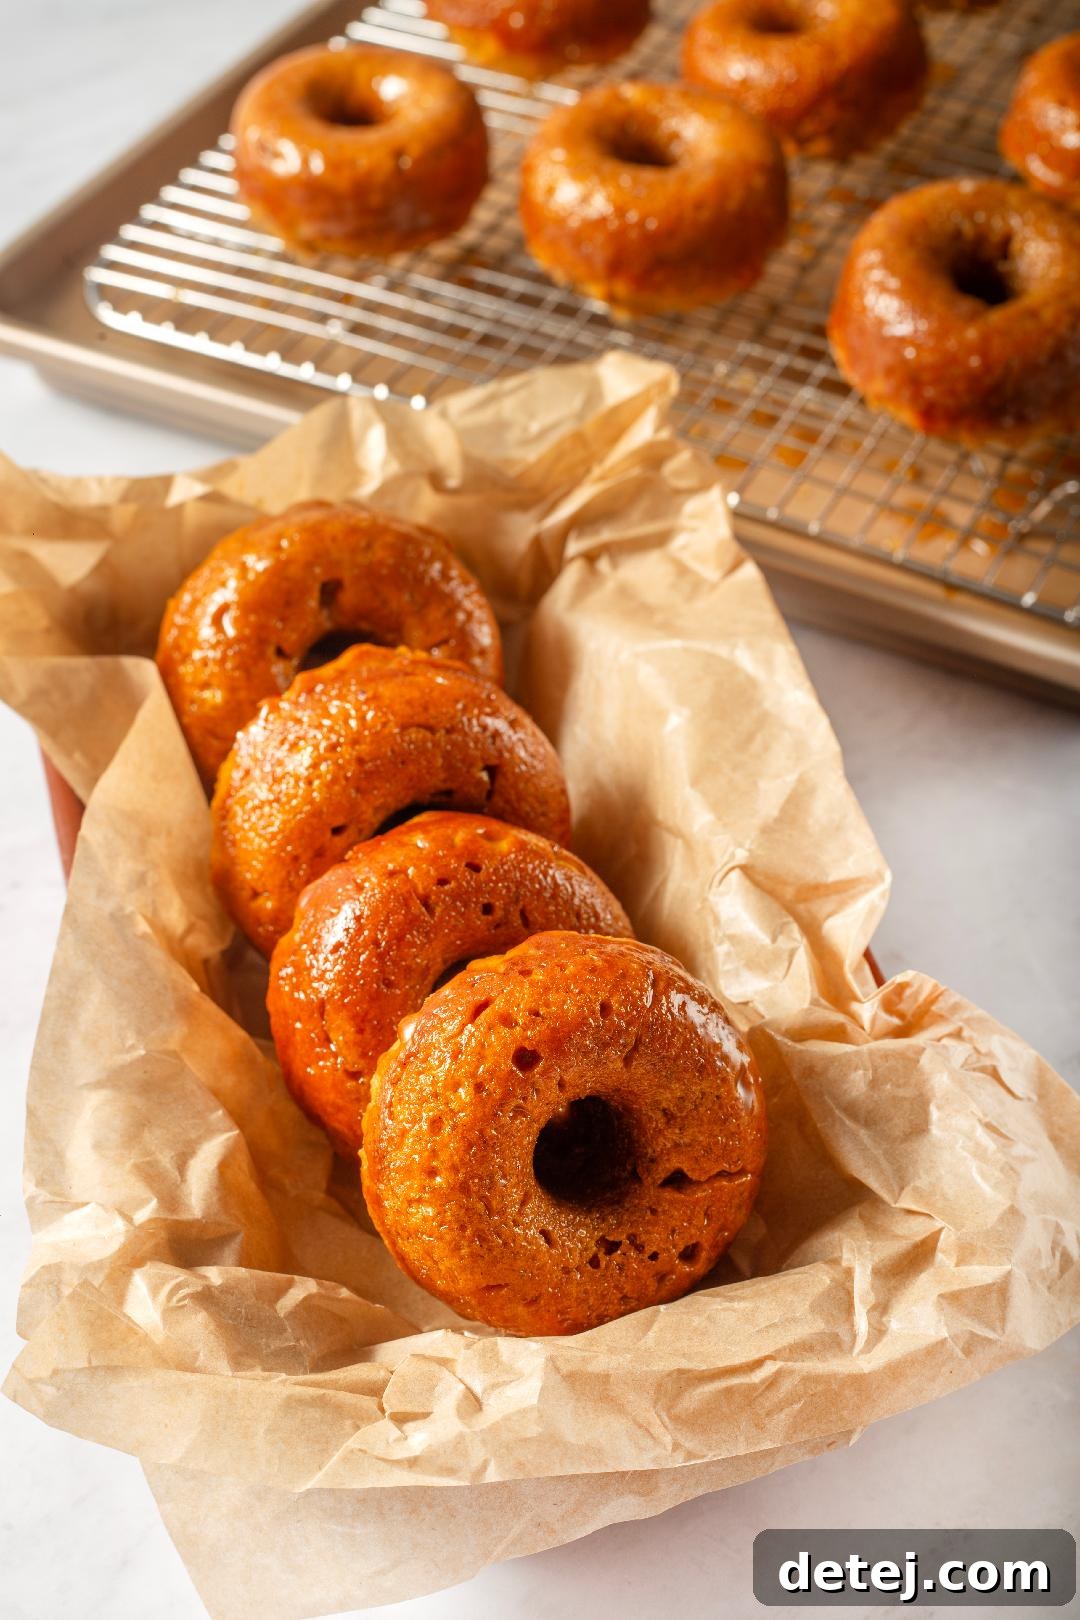
Embrace Autumn’s Best: Homemade Pumpkin Donuts with Maple Glaze
Welcome to my cherished kitchen haven, where the enchanting aromas of fall come alive through the art of baking. Today, we’re diving deep into the heartwarming world of homemade pumpkin donuts with maple glaze – a truly irresistible treat that captures the very essence of autumn. Imagine the comforting scent of rich pumpkin spice mingling with the sweet, caramel notes of maple, creating an atmosphere of pure warmth and coziness. Each bite of these tender, baked pumpkin donuts is like a gentle hug, transporting you to crisp fall mornings, vibrant foliage, and festive gatherings. The magical pairing of velvety pumpkin puree and genuine maple syrup is not merely a flavor combination; it’s a celebration of the season itself. Baking these delights isn’t just about following a recipe; it’s an experience of gathering loved ones, sharing smiles, and crafting delicious memories that will linger long after the last crumb has vanished. In this comprehensive guide, I’m thrilled to lead you through every step of creating these delightful pumpkin spice donuts, ensuring your kitchen becomes a fragrant sanctuary and your taste buds sing with joy. From selecting the perfect blend of warming spices that define that beloved pumpkin flavor to applying the final, glossy touch of a sweet maple glaze, we’re about to embark on a culinary adventure that promises to be incredibly rewarding. Get ready to bake a batch of the best pumpkin donuts you’ve ever tasted!
Why You’ll Fall in Love with This Pumpkin Donut Recipe
There are countless reasons why these baked pumpkin donuts with maple glaze will quickly become a cherished autumn tradition in your home. Firstly, they offer an unparalleled taste experience, combining the earthy sweetness of pumpkin with the rich, unmistakable flavor of pure maple syrup. The texture is simply divine – incredibly moist, light, and fluffy, a stark contrast to heavier fried donuts, thanks to our careful baking method. Secondly, this recipe is surprisingly approachable, even for novice bakers. We’ve simplified the process to ensure success, making it a joy to create these bakery-quality treats right in your own kitchen. Thirdly, the aroma alone is worth the effort; as these donuts bake, your home will be filled with the most comforting scents of cinnamon, nutmeg, and ginger, instantly evoking the spirit of fall. These pumpkin spice donuts are not just a breakfast item; they are perfect for brunch, an afternoon snack with coffee, or a delightful dessert. They also make wonderful edible gifts for friends and family, spreading the joy of the season. Finally, baking these donuts offers a wonderful opportunity to slow down, be present, and engage in a creative process that results in something truly delicious and soul-satisfying.
Gathering Your Ingredients: The Heart of Our Pumpkin Donuts
Embarking on the creation of these heavenly pumpkin donuts requires a carefully curated collection of ingredients, each playing a vital role in achieving that perfect balance of flavor and texture. For the donuts themselves, we build upon the comforting foundations of pure pumpkin puree and rich brown sugar. The pumpkin puree provides essential moisture and that iconic autumn flavor, while brown sugar lends a deep, molasses-like sweetness that complements the pumpkin beautifully. The soul of our pumpkin spice donuts comes from a carefully measured blend of spices, including fragrant cinnamon, warm nutmeg, and a hint of zesty ginger, all contributing to that nostalgic taste of fall mornings. Our dry ingredients – precisely measured all-purpose flour, light-as-air baking powder, a crucial pinch of sea salt, and a dash of baking soda – are essential for creating the donuts’ signature fluffy structure and tender crumb. These leavening agents work in harmony to ensure our baked donuts rise perfectly without becoming dense.
But what truly elevates these pumpkin donuts is the exquisite maple glaze! Here, the star is undeniably 100% pure maple syrup, its natural, complex sweetness providing the ideal counterpoint to the spiced pumpkin base. When teamed with rich melted butter and fine confectioners’ sugar, it transforms into a lusciously smooth, glossy glaze that beautifully drapes each donut in a sweet, irresistible embrace. A touch of pure vanilla extract further deepens the flavor profile of both the donuts and the glaze, adding a layer of sophisticated sweetness. Every single ingredient, from the moistening wet components to the texture-giving dry elements, and finally, to the crowning maple glaze, is pivotal in bringing these delightful autumn treats to life. Choosing high-quality ingredients will truly make a discernible difference in the final taste, making each bite a memorable experience.
Preparing Your Workspace: Setting the Stage for Baking Success
Before we dive headfirst into the comforting art of baking our irresistible pumpkin donuts draped in sweet maple glaze, let’s ensure our kitchen is perfectly prepped and organized. A well-prepared workspace is the secret ingredient to a smooth, enjoyable, and successful baking adventure! The first crucial step is to preheat your oven to a precise 400°F (200°C). This optimal temperature ensures that our donuts will bake evenly and develop that coveted golden hue and tender interior. Next, take your donut pan and give each cavity a generous spray with a good quality nonstick cooking spray. This tiny step is paramount; there’s nothing quite as disheartening as having your perfectly baked donuts stick to the pan, disrupting their beautiful shape and texture. If you don’t have spray, a light brushing of melted butter or oil will also work wonders.
My personal philosophy for kitchen bliss is all about mise en place – getting all your “ducks in a row” before the mixing even begins. This means carefully measuring out every single ingredient, from the precise amount of pumpkin purée and maple syrup to the light brown sugar and all those wonderfully fragrant spices. Having everything pre-measured and conveniently within arm’s reach not only streamlines the entire baking process but also significantly reduces stress and enhances the joy of cooking. Imagine less frantic searching and more seamless whisking and pouring! A clean, organized, and adequately lit workspace infuses a sense of calm into your baking, allowing you to focus on the pleasure of creation rather than the chaos of preparation. Let’s set ourselves up for absolute success, ensuring every whisk, scoop, and gentle pour brings us closer to those dreamy, perfectly baked pumpkin spice donuts.
The Foundation: Mixing Your Dry Ingredients
Here we are, ready to embark on one of the most fundamental yet crucial steps in creating these incredible pumpkin donuts: meticulously combining our dry ingredients. This stage lays the essential foundation for the texture and rise of our delightful treats. Grab a spacious mixing bowl – one that allows for plenty of room to whisk everything together thoroughly – and let’s get started. First off, we’ll carefully measure out our two cups of all-purpose flour. And here’s a pro tip that makes all the difference: always spoon and level your flour. Dipping your measuring cup directly into the flour bag can compact it, leading to an excess amount, which in turn results in donuts that are denser than desired, rather than the light and airy texture we’re aiming for. Gently spoon the flour into the measuring cup until it overflows, then use the back of a knife or a straight edge to level it off.
Next up, we’re infusing our dry mixture with the very soul of our pumpkin spice donuts: the warming spices. Carefully add one and a half teaspoons of baking powder, a half teaspoon each of ground cinnamon, fragrant nutmeg, and a comforting touch of ginger. These aren’t just mere seasonings; they are the heart of our fall-inspired flavor profile, promising that warm, fuzzy feeling of autumn right in your kitchen. Don’t forget the three-quarters of a teaspoon of sea salt, which balances the sweetness and enhances all the other flavors, along with a quarter teaspoon of baking soda. Use a whisk to thoroughly combine all these ingredients. Whisking ensures that the leavening agents and spices are evenly distributed throughout the flour, preventing pockets of unmixed ingredients and guaranteeing a consistent rise and flavor in every single pumpkin donut. This magical alchemy transforms these basic components into the perfect base for our moist and flavorful pumpkin-flavored delights, setting the stage for true baking perfection.
Crafting the Wet Mixture: Layers of Flavor and Moisture
There’s a genuine excitement that builds as I prepare to blend the wet ingredients for these incredible pumpkin donuts. This stage is where the rich flavors and essential moisture truly come together. First, in a separate mixing bowl, I take the half cup of gloriously melted butter and combine it with one cup of packed light brown sugar. I whisk these two together until the mixture is beautifully creamy and homogenous. The simplicity of this combination, yet its profound impact on the depth of flavor, is truly comforting. It forms a sweet, buttery base that will infuse our donuts with richness.
Next, it’s time to incorporate the eggs. I add them one at a time, ensuring each egg is thoroughly beaten into the butter and sugar mixture before adding the next. This incremental approach guarantees a smooth, emulsified batter. A crucial tip for achieving the best texture: make sure your eggs are at room temperature. Room temperature eggs blend more easily and evenly into the batter, preventing lumps and contributing to a more uniform, tender crumb in your finished pumpkin donuts. This small detail truly makes a noticeable difference in the overall quality.
Finally, I fold in the star of the show: one cup of canned pumpkin puree, along with a generous two teaspoons of fragrant pure vanilla extract. The pumpkin puree, with its distinct earthy and slightly sweet tones, combines beautifully with the warm, aromatic vanilla, deepening the flavor profile of these donuts significantly. This mixture is what imparts that unmistakable moistness and rich depth of flavor that we all crave in a perfect pumpkin donut. Gently mix until just combined, being careful not to over-mix at this stage. Truly, this is where the magic of texture and taste for our homemade pumpkin donuts begins to unfold.
Bringing it All Together: Merging Wet and Dry Mixtures
Having meticulously whisked together our dry ingredients in one large bowl and seamlessly blended our wet ingredients in another, the anticipated moment has arrived: it’s time to unite them. Think of it as a delicate introduction, where harmony is key. Gently pour the wet ingredients into the dry, allowing them to slowly combine and hint at the wonderful transformation to come. This step requires a gentle hand and mindful approach – we’re aiming for folding, not aggressive mixing, to preserve the tender texture of our future pumpkin donuts.
The primary goal here is to mix just until the ingredients are combined. Overmixing is the notorious culprit behind dense, tough donuts, robbing them of their desired light and fluffy texture. Use a spatula or a wooden spoon and fold the batter carefully, stopping as soon as no pockets of dry flour are visible. A few small lumps are perfectly acceptable and even desirable, as they often lead to a more tender finished product. The batter should be thick, smooth, and easily manageable.
Once your luscious batter is ready, the next step is efficiently transferring it into the prepared donut pan. While a spoon can certainly get the job done, resembling a creative art project, I’ve found that for ultimate precision and ease, a piping bag fitted with a wide round tip (or simply a Ziploc bag with a corner snipped off) is your best friend. Fill the bag with the batter, twisting the top to secure it, and then gently pipe the batter evenly into each greased donut cavity, filling them about two-thirds full. This method ensures uniform donuts that bake perfectly and look professionally made. This smooth transfer sets the stage for the next exciting step – baking these beauties into golden, perfectly shaped, and utterly delicious pumpkin-spiced perfection.
Baking Perfection: Golden Pumpkin Donuts
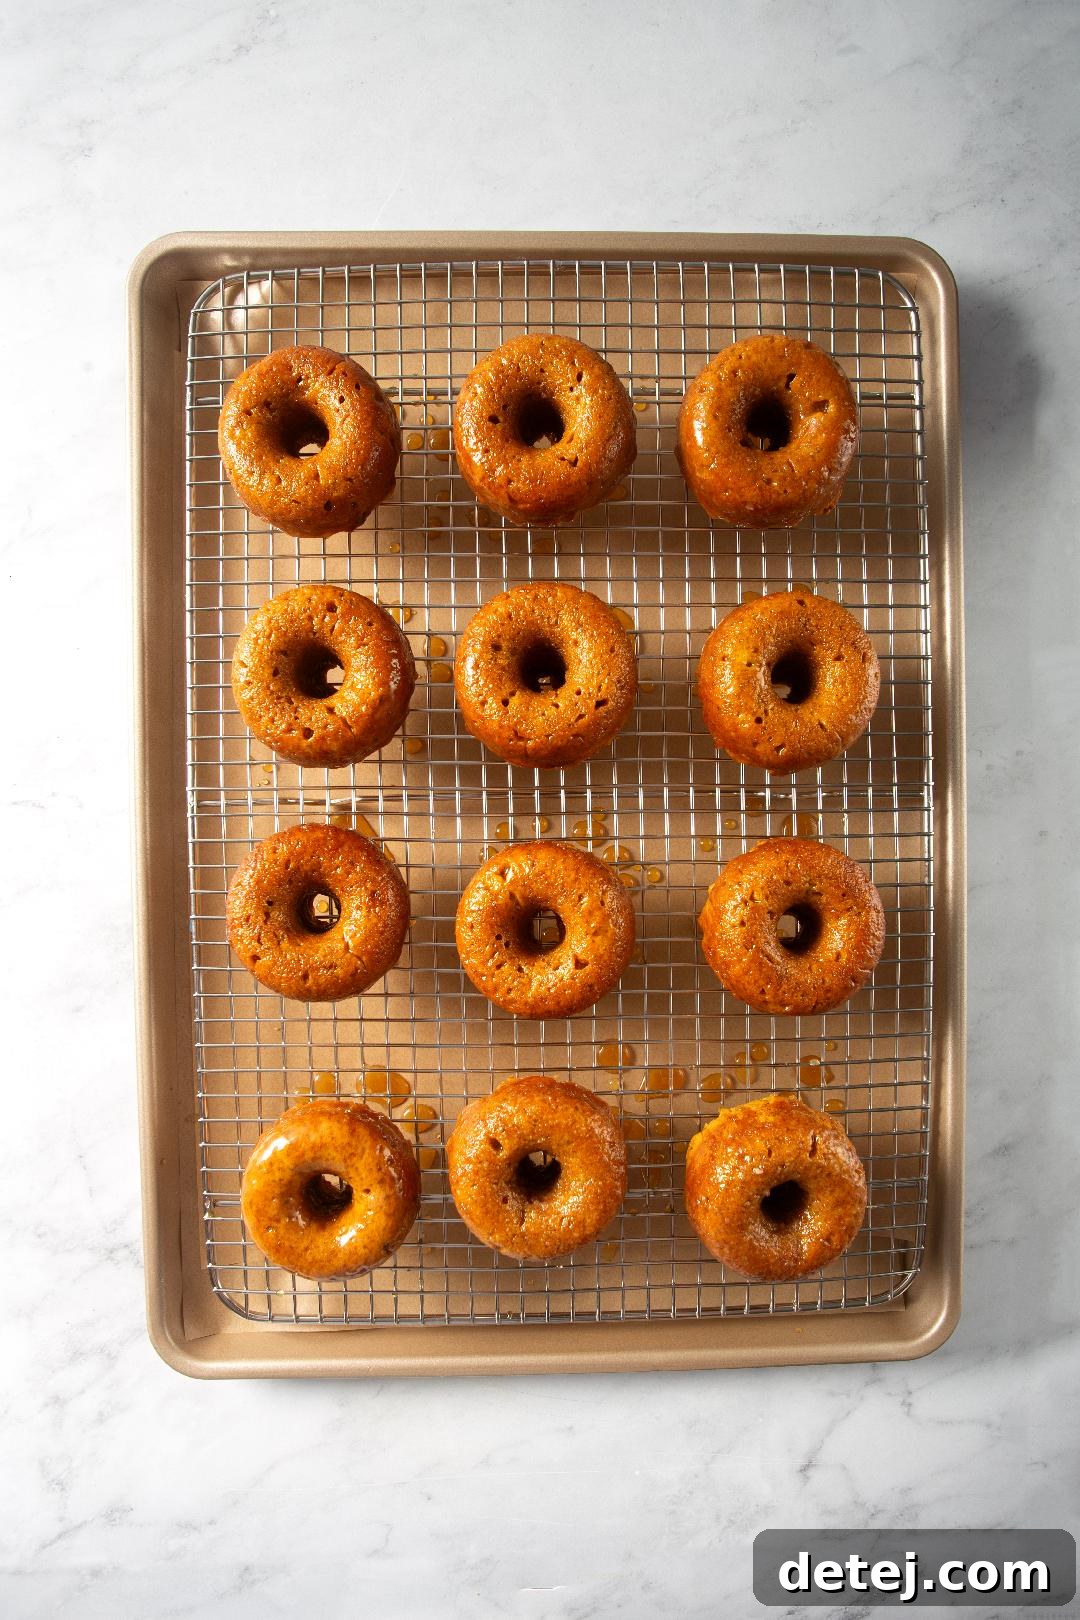
With your perfectly mixed pumpkin donut batter now neatly piped into the prepared donut pan, it’s time for the true magic of transformation to unfold in the oven. Ensure your oven is preheated to a cozy 400°F (200°C), a temperature expertly chosen to guarantee these treats bake through evenly and develop that irresistible, beautiful golden-brown hue on the outside while remaining delightfully moist on the inside. Carefully slide your donut pan into the preheated oven, allowing them to bake for approximately 10 to 12 minutes. Baking times can vary slightly depending on your oven, so it’s always wise to stay vigilant and trust your senses.
What we’re looking for is that glorious moment when the donuts appear lightly golden around the edges and, most importantly, spring back gently to the touch when you lightly press on them. This springiness is the ultimate signal that they are perfectly baked through. Over-baking, my friends, is the moisture’s worst enemy, leading to dry, crumbly donuts – a fate we definitely want to avoid! So, vigilance is key to preserving that tender, soft, and moist crumb we all adore in a homemade donut. If you find yourself in any doubt, a quick and reliable toothpick test can confirm their readiness: insert a toothpick into the center of a donut, and if it comes out clean, you’ve nailed it. Once baked to perfection, remove the pan from the oven and allow the baked pumpkin donuts to cool in the pan for about 5-10 minutes before carefully transferring them to a wire rack to cool completely. Just like finding the perfect balance in life, it’s all about observing those subtle signs and trusting your baking instincts to achieve donut bliss.
The Grand Finale: Crafting the Irresistible Maple Glaze
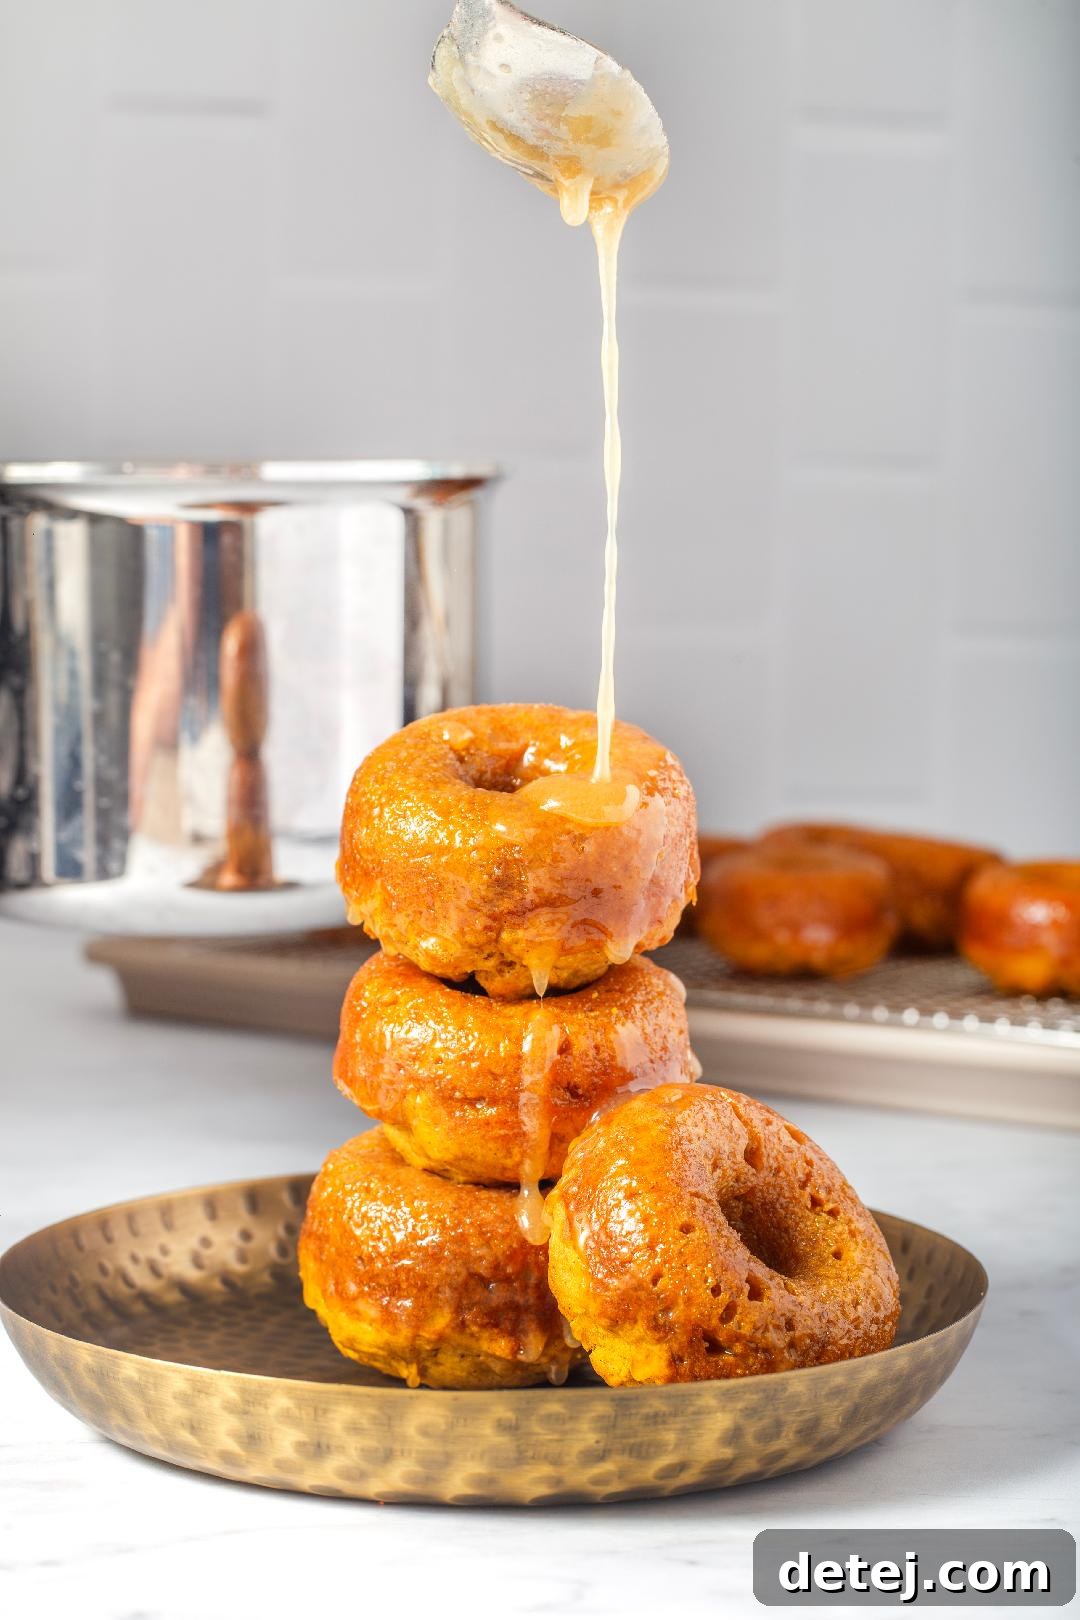
Now, let’s turn our attention to the exquisite finishing touch that truly elevates our pumpkin donuts: the luscious and utterly irresistible maple glaze. This glaze is more than just a topping; it’s a harmonious symphony of flavors that perfectly complements the spiced pumpkin. First, I take the pure maple syrup – and I stress pure, as imitation syrup simply won’t deliver the same depth of flavor – and gently simmer it in a small saucepan over medium heat. The aroma that begins to waft through the kitchen at this stage is absolutely heavenly, instantly conjuring images of crisp, cool fall mornings and cozy breakfasts. We want to simmer it until it reduces slightly, concentrating its rich, natural sweetness to about ½ cup. This reduction process intensifies the maple flavor, making it even more pronounced and delicious.
Once reduced, remove the saucepan from the heat. It’s now time to whisk in a generous dollop of unsalted butter – about 1½ tablespoons – which adds a beautiful richness and silkiness to the glaze. Follow this with a splash of pure vanilla extract for an extra layer of depth and warmth, and a tiny pinch of sea salt to balance the sweetness. Then, gradually sift in the confectioners’ sugar (powdered sugar), whisking continuously until everything melds into a velvety, smooth, and utterly tempting concoction. You’ll find it incredibly hard to resist dipping a finger in for a taste!
The true magic of this particular maple glaze lies in its simplicity and the remarkable alchemy of these everyday ingredients coming together to create something so rich, decadent, and visually appealing. Witnessing this transformation always feels a little like kitchen wizardry to me. I highly encourage you to taste-test as you go; this allows you to fine-tune the consistency and sweetness to your exact preference. If you prefer a slightly thicker glaze, add a touch more confectioners’ sugar. For a thinner, more drizzly consistency, a tiny bit of heavy cream or milk can be whisked in, just a teaspoon at a time. The goal is a glaze that’s pourable but still thick enough to coat the back of a spoon and adhere beautifully to your warm pumpkin spice donuts. This personalization ensures your glaze sings perfectly on your taste buds, making each donut an unforgettable delight.
The Final Touch: Glazing and Serving Your Donuts
Once your exquisite pumpkin spice donuts have had ample time to cool completely on a wire rack – patience is a virtue, especially here! – it’s finally time for what many consider the most satisfying part of the process: applying that irresistibly sweet and glossy maple glaze. To keep your workspace tidy and minimize mess, I always recommend placing your wire rack over a sheet of parchment paper or a baking sheet. This ingenious trick catches any drips, making cleanup a breeze. Now, gently take each cooled donut and delicately dip its top into the prepared, silky smooth maple glaze. Give it a slight twist as you pull it out, allowing any excess glaze to gracefully drip back into the bowl. This ensures a beautifully even coating without being overly thick.
If you’re feeling particularly artistic and want to achieve that artisanal bakery look, forgo the full dip. Instead, grab a small spoon and elegantly drizzle the glaze back and forth over the donuts in a zigzag pattern. This method creates a lovely visual appeal and a lighter glaze coating. Once glazed, place the donuts back on the wire rack and allow the glaze to set. This doesn’t take very long – usually about 10-15 minutes – but it’s definitely worth the short wait, as it allows the glaze to firm up slightly, preventing stickiness. And here’s a little secret for optimal enjoyment: these glorious warm pumpkin donuts, now lovingly hugged by that delicious glaze, truly taste their absolute best when served at room temperature. Allowing them to rest for a moment helps the flavors meld and deepen, letting the nuanced notes of pumpkin, spice, and maple really shine through.
So, resist that immediate temptation to devour them straight away; a few minutes on the cooling rack will elevate your experience. These maple-kissed pumpkin treats are the perfect indulgence for any crisp fall morning, complementing a hot cup of coffee or a warming mug of apple cider. But honestly, their charm isn’t limited to autumn; they’re a delightful treat to savor any time of the year. Enjoy every last bite of these homemade pumpkin donuts – a testament to simple ingredients creating extraordinary joy.
Savvy Storage: Keeping Your Pumpkin Donuts Fresh
After the immense joy and warmth of baking and indulging in these delightful pumpkin donuts with that irresistibly sweet maple glaze, you might, surprisingly, find yourself with a few extras. And let’s be honest, there’s nothing quite as comforting or sweet as waking up to these heavenly treats for a quick fall morning breakfast or an afternoon pick-me-up. So, here’s how to ensure every last donut remains as tempting and delicious as when you first pulled them from the oven, preserving their moistness and exquisite flavor. The key to successful storage begins with the right container. First thing’s first, grab an airtight container or a reliable resealable plastic bag (like a Ziploc bag) that is spacious enough to hold your donuts in a single layer. This crucial step prevents them from getting squished or deformed and, more importantly, helps to seal in that delicious moisture, keeping them from drying out.
If you’re planning to enjoy your leftover pumpkin donuts within the next day or two, simply stashing them at room temperature on your kitchen counter is perfectly fine. Just make sure they are completely cooled before placing them in the airtight container to prevent condensation, which can make them soggy. However, for longer storage and to extend their freshness, your refrigerator or freezer will be your best allies. For refrigeration, they will last wonderfully for up to 5 days. For freezing, wrap each donut individually in plastic wrap, then place them in a freezer-safe bag or container; they can be stored for up to 2-3 months. When you’re ready to enjoy a frozen donut, simply let it thaw at room temperature. A brief zap in the microwave (10-15 seconds) or a few minutes in a warm oven can gently refresh them, bringing back some of that just-baked warmth and softness. Just remember, the magic of recapturing that just-baked taste and texture lies in allowing them to come back to room temperature (or slightly warmed) before digging in again. Happy baking and even happier snacking on your perfectly preserved homemade pumpkin donuts!
A Sweet End to a Perfect Treat: The Joy of Pumpkin Donuts
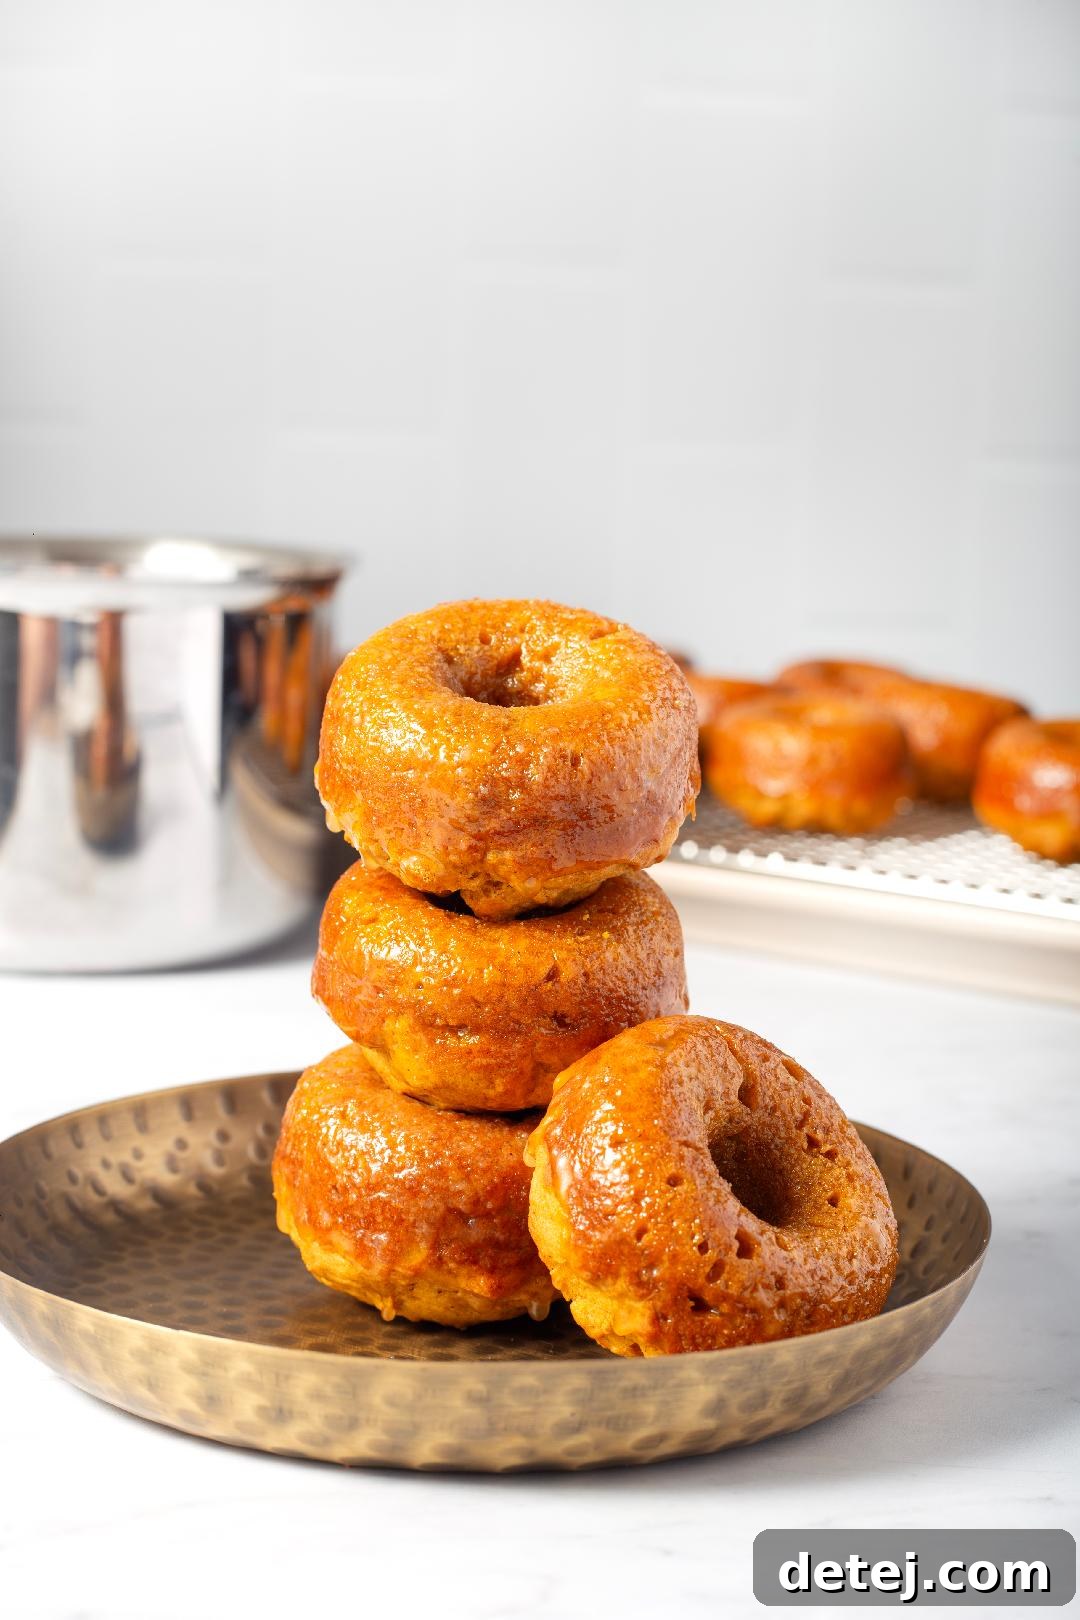
As we lovingly wrap up this culinary journey of baking the most scrumptious pumpkin donuts drizzled with that sweet maple glaze, I want to invite you to take a moment to reflect on the profound joy that fills a kitchen during moments like these. It’s truly more than just about baking a batch of treats; it’s about the creation of cherished memories, the shared laughter over a flour-dusted countertop, and, most profoundly, about spreading love and comfort through every single bite of these delectable autumn delights. There’s an undeniable, almost magical, quality to the act of baking, especially when it involves a recipe as comforting and delightful as this one. It effortlessly envelops your home in the warm, inviting, and truly intoxicating scents of pumpkin pie spice and pure maple syrup, transforming your space into a sanctuary of autumnal bliss.
Imagine the bright smiles on faces, the cozy conversations shared over a plate of these warm, freshly glazed donuts, the maple glaze glistening and ever-so-slightly melting as you bite into their soft, fluffy texture. It’s these fleeting, heartwarming moments that elevate a simple recipe into a treasured memory, etched into the fabric of your family traditions. So, I wholeheartedly encourage you, yes, you, to embrace this not just as another recipe to conquer, but as a heartfelt invitation to establish these pumpkin spice donuts as a new, beloved autumn tradition in your home. Let this recipe be a joyful catalyst that brings you back to the pure pleasure of home cooking, the serene beauty of crisp fall mornings, and the unmatched sweetness of spending quality time with your loved ones. After all, isn’t that what imbues every pinch of sea salt, every cup of flour, and every luxurious swirl of maple cinnamon glaze with such incredible value and worth? It’s the love and intention baked into every step.
Happy baking, my dear friends. May your pumpkin donuts be exceptionally fluffy, your maple glaze perfectly sweet and glistening, and your hearts be utterly full as you dive into the delightful adventure of making these delicious pumpkin donuts. Here’s to creating new, heartwarming traditions, savoring every single bite with gratitude, and, most importantly, to doing it all in the beautiful name of love, happiness, and the simple pleasures of a homemade treat. Cheers to the sweet, satisfying end of a truly perfect treat, and to many more baking adventures to come!

Pumpkin Donuts with Maple Glaze
Pin
Rate
Ingredients
- 2 cups all-purpose flour, spooned and leveled
- 1 ½ teaspoons baking powder
- 1/2 teaspoon ground cinnamon
- ½ teaspoon nutmeg
- ½ teaspoon ginger
- ¾ teaspoon sea salt
- ¼ teaspoon baking soda
- ½ cup butter, melted
- 1 cup light brown sugar, packed
- 2 large eggs
- 1 cup canned pumpkin puree
- 2 teaspoons vanilla extract
- Maple glaze:
- ¾ cup 100% maple syrup
- 1 ½ tablespoons butter
- 1 teaspoon pure vanilla extract
- ¼ teaspoon sea salt
- ¼ cup confectioners sugar
Instructions
-
Preheat the oven to 400°F and lightly coat a donut pan with nonstick cooking spray.
-
In a large mixing bowl, whisk together the flour, baking powder, cinnamon, nutmeg, ginger, salt, and baking soda until well combined.
-
In a separate bowl, beat the melted butter and sugar until creamy and blended, about 1 to 2 minutes. Add the eggs one at a time, mixing well after each addition. Stir in the pumpkin puree and vanilla extract until just combined.
-
Slowly add the dry ingredients to the wet mixture and mix just until combined — be careful not to overmix.
-
Spoon or pipe the batter evenly into the prepared donut pan. Bake for 10 to 12 minutes, or until the donuts are lightly golden and spring back when gently pressed.
-
While the donuts are baking, prepare the glaze. In a small saucepan over medium heat, simmer the maple syrup until reduced to about ½ cup (about 5 minutes). Remove from the heat and whisk in the butter, vanilla extract, and salt until smooth. Stir in the confectioners’ sugar until the glaze is silky and smooth. If the glaze is too thick, add a teaspoon of milk or cream.
-
Once the donuts are done baking, let them cool in the pan for about 10 minutes. Then, gently transfer to a wire rack. Dip the tops of the donuts into the warm glaze and set them aside to let the glaze firm up.
-
Serve warm or at room temperature — and enjoy every bite!