
The Ultimate Guide to Baking Irresistible Christmas Reindeer Cookies
As the holiday season draws near, the aroma of freshly baked cookies fills homes with warmth and cheer. Among the countless festive treats, Christmas Reindeer Cookies stand out as an absolute favorite, charming both young and old with their whimsical designs and delectable taste. These aren’t just any cookies; they are little parcels of holiday magic, perfect for sharing with loved ones, leaving out for Santa, or simply enjoying with a mug of hot cocoa. If you’re ready to embark on a delightful baking adventure that promises smiles and satisfied sweet cravings, you’ve come to the right place. This comprehensive guide will reveal the secrets to crafting the most irresistible reindeer cookies, offering a perfected recipe, detailed step-by-step instructions, creative decoration ideas, and invaluable tips to ensure your baking success. Prepare to transform simple ingredients into enchanting holiday masterpieces and spread an abundance of festive joy through the art of baking!
Essential Ingredients for Your Magical Reindeer Cookies
Creating truly spectacular Christmas Reindeer Cookies begins with selecting the right ingredients. Each component plays a vital role in achieving that perfect balance of flavor, texture, and structural integrity that makes these cookies so beloved. Below is a carefully curated list of ingredients, detailing their purpose and offering insights to help you gather everything needed for this festive bake. Pay attention to quality and temperature, as these small details can significantly impact the final result of your enchanting reindeer treats.
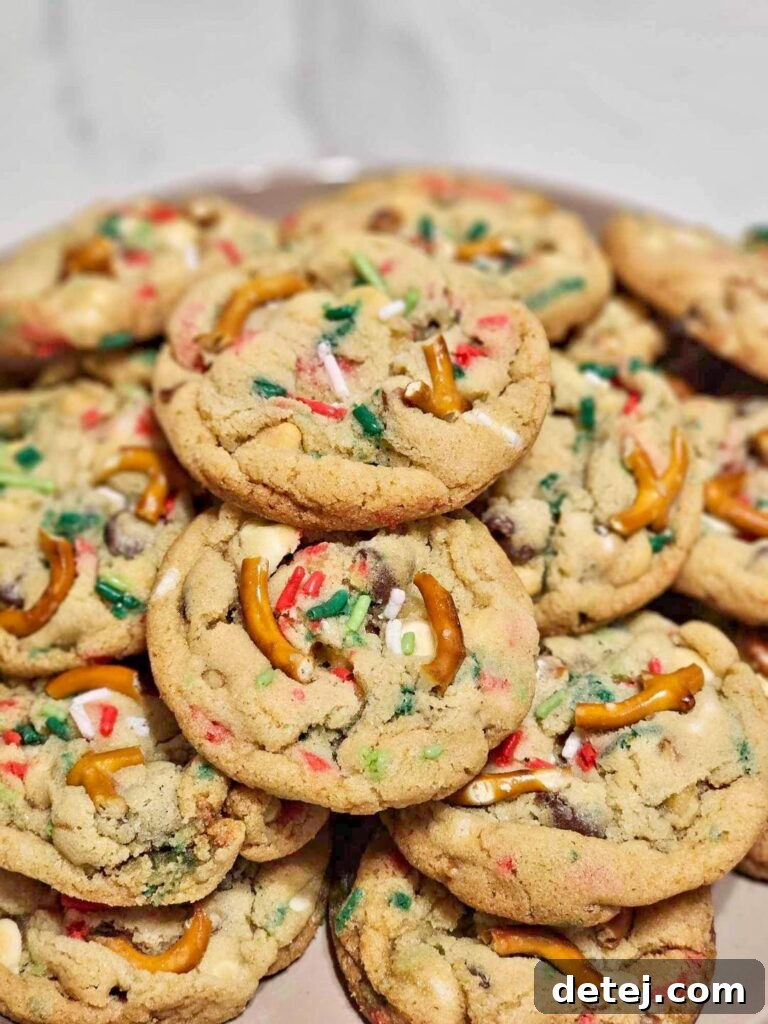
Here are the key ingredients you’ll need, along with their functions:
- Unsalted Butter (¾ cup, softened): The foundation of any great cookie, butter provides richness and flavor. Using unsalted butter allows you to control the overall saltiness of the dough. Ensure it’s softened to room temperature for proper creaming, which incorporates air and creates a tender crumb.
- Light Brown Sugar (¾ cup, packed): Brown sugar contributes moisture and a delicious caramel-like depth of flavor, resulting in a chewier and softer cookie. Packing it ensures accurate measurement.
- Granulated Sugar (¼ cup): This sugar adds crispness to the edges and balances the sweetness, contributing to the cookie’s overall structure and golden-brown hue.
- Large Egg Yolks (2, at room temperature): Egg yolks add richness, color, and act as a binding agent, helping to hold the dough together and keep the cookies moist. Using only yolks (instead of whole eggs) can lead to a more tender, less cake-like texture.
- Vanilla Extract (2 teaspoons): A quintessential flavor enhancer, vanilla extract infuses the cookies with a warm, inviting aroma and a classic, comforting taste that complements all other ingredients. Don’t skimp on quality here!
- All-Purpose Flour (1 ½ cups, spooned and leveled): The structural backbone of your cookies. Measuring flour correctly by spooning it into the cup and leveling it off prevents adding too much, which can result in dry, dense cookies.
- Baking Powder (½ teaspoon): This leavening agent helps the cookies rise and achieve a soft, slightly fluffy texture, preventing them from being too flat or dense.
- Baking Soda (½ teaspoon): Working in conjunction with the brown sugar’s acidity, baking soda aids in leavening, contributing to the cookie’s spread and achieving a desirable chewy texture.
- Salt (½ teaspoon): A crucial ingredient that often goes unnoticed, salt enhances all other flavors, balances the sweetness, and prevents the cookies from tasting bland.
- White Chocolate Chips (⅔ cup): These will be folded into the dough, providing bursts of sweet, creamy flavor and texture. They can also be used for decorating features like eyes.
- Pretzel Pieces (⅓ cup): A delightful addition for a salty crunch that perfectly complements the sweet cookie dough. These are also essential for creating the reindeer’s iconic antlers.
- Red and Green Christmas Sprinkles (¼ cup): For an added touch of festive color and fun, these sprinkles will make your cookies visually appealing and extra special for the holidays.
Step-by-Step Guide to Crafting Your Festive Reindeer Cookies
With all your ingredients prepped and ready, it’s time to bring these adorable Christmas Reindeer Cookies to life. Follow these detailed steps carefully, and you’ll soon be enjoying a batch of perfectly baked, festive treats that are as fun to make as they are to eat. Remember, baking is a joyful process, so take your time and savor each moment!
Step 1: Preparing Your Workspace and Initial Dough Mixture
Begin by preheating your oven to 350°F (175°C). While the oven heats, line several baking sheets with parchment paper; this prevents sticking and ensures even baking. In a large mixing bowl, combine the softened unsalted butter, packed light brown sugar, and granulated sugar. Using an electric mixer, cream these ingredients together on medium speed until the mixture is light, fluffy, and noticeably paler in color. This process typically takes 2-3 minutes and is crucial for incorporating air, which gives your cookies a tender texture. Next, beat in the two egg yolks one at a time, ensuring each is fully incorporated before adding the next. Stir in the vanilla extract until just combined. The mixture should be smooth and fragrant.
Step 2: Combining Dry Ingredients and Folding in Festive Add-Ins
In a separate medium bowl, whisk together the all-purpose flour, baking powder, baking soda, and salt. Gradually add this dry ingredient mixture to your wet butter and sugar mixture, mixing on low speed until just combined. Be careful not to overmix the dough, as this can develop the gluten in the flour, leading to tough cookies. Stop mixing as soon as no streaks of flour remain. Finally, gently fold in the white chocolate chips, pretzel pieces, and festive red and green sprinkles. Use a spatula for this step to avoid crushing the pretzels and ensure the add-ins are evenly distributed throughout the dough.
Step 3: Shaping and Baking Your Reindeer Cookies to Perfection
Once your dough is ready, use an ice cream scoop (about 1.5 to 2 tablespoons) to portion out uniform cookie balls. Gently roll each scoop into a smooth ball between your palms. For an extra visual appeal and a truly “stand out” look, you can press a few additional white chocolate chips and pretzel pieces onto the tops of each dough ball before placing them on the prepared baking sheets. Arrange the cookie balls about 2 inches apart to allow for spreading during baking. This recipe yields approximately 20-24 cookies. Slide the baking sheets into your preheated oven and bake for 10-12 minutes, or until the edges are lightly golden brown and the centers are still soft. Avoid overbaking, as this will result in dry cookies.
Step 4: Achieving Perfect Round Shapes and Cooling
Once baked, immediately remove the baking sheets from the oven. While the cookies are still warm and pliable, use a large round cookie cutter (or even the rim of a glass) slightly larger than your baked cookies. Place the cutter around each warm cookie and gently swirl it in a circular motion. This clever trick helps to push the edges back in, reforming any irregular shapes into perfectly round, aesthetically pleasing cookies. This step is optional but highly recommended for a professional finish. Allow the cookies to cool on the baking sheets for about 5 minutes before carefully transferring them to a wire rack to cool completely. Cooling on a wire rack allows air to circulate, preventing the bottoms from becoming soggy.
Delightful Variations to Personalize Your Reindeer Cookies
While the classic Christmas Reindeer Cookie recipe is undeniably delicious, the holiday season is the perfect time to experiment and infuse your creations with unique flavors and dazzling decorations. Personalizing your cookies not only makes them extra special but also allows you to cater to different tastes and unleash your inner culinary artist. Here are some delightful variations to add extra flair to your reindeer cookies:
Flavorful Twists for Your Dough
- Minty Freshness: For a refreshing holiday twist, add ½ teaspoon of peppermint extract along with the vanilla extract to your cookie dough. The cool mint pairs wonderfully with the sweetness of the chocolate chips.
- Warm Spices: Introduce ½ teaspoon of ground cinnamon and a pinch of nutmeg to the dry ingredients for a cozy, spiced reindeer cookie. These warm flavors evoke the classic essence of Christmas.
- Citrus Zest: Grate the zest of one orange or lemon into the wet ingredients for a bright, zesty note that cuts through the sweetness and adds an unexpected layer of flavor.
- Gingerbread Inspired: Incorporate 1 teaspoon of ground ginger and a ¼ teaspoon of ground cloves for a subtle gingerbread flavor that’s perfect for the festive season.
- Nutty Crunch: Add ½ cup of finely chopped pecans or walnuts to the dough for an additional layer of texture and a rich, nutty flavor.
Creative Embellishments for Charming Reindeer Faces
The true magic of reindeer cookies lies in their adorable decorations. Once your cookies are cooled, it’s time to transform them into cheerful reindeer! Here are some ideas for bringing their personalities to life:
- Antlers: The most iconic feature! Break mini pretzel twists in half to create the perfect “antlers.” Gently press two halves into the top of each cooled cookie. Alternatively, use chocolate-dipped pretzels for a fancier look.
- Rudolph’s Red Nose: Small red candies (like M&M’s, Skittles, or even red jelly beans cut in half) make excellent Rudolph noses. Attach them with a tiny dab of frosting or melted chocolate. For other reindeer, use mini chocolate chips or brown M&M’s for their noses.
- Expressive Eyes: Edible googly eyes are readily available and instantly add character and charm. If you prefer to make your own, use two mini chocolate chips for eyes, or pipe small dots of white and black icing.
- Cheeks and Smiles: A tiny dot of pink frosting or a small pink candy can be used for rosy cheeks. A thin line of black icing can create a cheerful smile.
- Colorful Accents: Beyond the dough, you can further decorate with various sprinkles, edible glitter, or metallic pearl dust for an extra touch of sparkle and whimsy. Use a light brush to apply dust for an elegant sheen.
- Royal Icing Details: For those with a steady hand, royal icing can be used to pipe intricate details like scarves, bows, or even elaborate antler patterns onto your reindeer.
By combining these variations, you can create a truly unique and diverse batch of reindeer cookies, each with its own special charm. Don’t be afraid to let your imagination run wild and turn your baking into a fun, artistic endeavor!
Expert Tips for Cookie Baking Success
Baking perfect cookies consistently can seem daunting, but with a few expert tips, you can elevate your baking game and ensure every batch of Christmas Reindeer Cookies is a triumph. These fundamental principles apply to many cookie recipes and are invaluable for any home baker.
- Accurate Measuring is Key: Baking is a science. Always measure your ingredients precisely, especially flour. Too much flour can make cookies dry and crumbly, while too little can make them spread too much. For flour, spoon it into your measuring cup and then level it off with a straight edge.
- Room Temperature Ingredients: Ensure butter and egg yolks are at true room temperature. This allows them to cream together properly, creating an emulsion that traps air. This trapped air is vital for a light, fluffy texture and even baking.
- Don’t Overmix the Dough: Once you add the dry ingredients to the wet, mix only until just combined. Overmixing develops gluten, which can lead to tough, dense cookies. A few streaks of flour are better than an overmixed dough.
- Chill Your Dough (If Needed): While this recipe might not explicitly require it, chilling cookie dough for at least 30 minutes (or up to 24 hours) can prevent spreading, deepen flavors, and improve texture. If your kitchen is warm or your dough feels too soft, a quick chill is always a good idea.
- Uniform Cookie Size: Use an ice cream scoop or a kitchen scale to ensure all your cookie balls are the same size. This guarantees they bake evenly, preventing some from being undercooked while others are overbaked.
- Parchment Paper is Your Friend: Always line your baking sheets with parchment paper or silicone baking mats. This prevents sticking, promotes even browning, and makes cleanup a breeze.
- Watch Your Oven, Not Just the Clock: Oven temperatures can vary. The suggested baking time is a guideline. Keep an eye on your cookies; they are typically done when the edges are set and lightly golden, and the centers still look slightly soft or puffy. They will continue to set as they cool.
- Cooling Process: Allow cookies to cool on the baking sheet for a few minutes before transferring them to a wire rack. This helps them firm up and prevents breakage. Cooling completely on a wire rack ensures air circulation, preventing soggy bottoms.
- Storage: Store cooled cookies in an airtight container at room temperature for up to 5 days to maintain their freshness and texture.
Serving and Gifting Your Festive Reindeer Cookies
Once your irresistible Christmas Reindeer Cookies are baked, decorated, and cooled, they are ready to bring joy! These charming treats are incredibly versatile and perfect for a variety of holiday occasions. Here are some ideas for serving and gifting them:
- Holiday Gatherings: Arrange your decorated reindeer cookies on a festive platter as a centerpiece for your holiday party or family dinner. Their adorable appearance will instantly draw attention and compliments.
- Cookie Exchange: Reindeer cookies are a fantastic addition to any holiday cookie exchange. Their unique design and delicious flavor are sure to make them a popular choice.
- Santa’s Plate: Don’t forget to leave a few out for Santa Claus on Christmas Eve! A plate of these delightful cookies, perhaps with a glass of milk, is the perfect way to welcome him.
- Thoughtful Gifts: Pack your reindeer cookies into decorative tins, cellophane bags tied with festive ribbons, or small gift boxes. They make wonderful homemade gifts for neighbors, teachers, colleagues, or friends. Add a handwritten tag with the recipe or a simple “Merry Christmas!” message.
- Party Favors: Individually wrap smaller cookies and use them as delightful party favors for your holiday guests.
- Dessert Bar: If you’re hosting a larger event, include these reindeer cookies as part of a varied dessert bar alongside other holiday treats like brownies, cupcakes, and tarts.
No matter how you choose to share them, these Christmas Reindeer Cookies are guaranteed to spread smiles and embody the true spirit of the festive season. Their homemade charm and delicious taste make them a memorable addition to any holiday celebration.
As you present this beautiful creation, your loved ones will be drawn in by the irresistible flavors and eye-catching presentation.
Krystel’s Cooking
Conclusion: The Magic of Homemade Reindeer Cookies
Baking Christmas Reindeer Cookies is more than just following a recipe; it’s an experience that encapsulates the spirit of the holidays. From the heartwarming aroma filling your kitchen to the artistic joy of decorating each unique reindeer face, this baking journey is designed to create lasting memories and delicious treats. We’ve walked through every step, from gathering the finest ingredients and mastering the baking process to unleashing creativity with delightful variations and ensuring flawless execution with expert tips. You now possess all the knowledge and inspiration needed to bake a batch of these irresistibly cute and wonderfully flavorful cookies that will undoubtedly impress your loved ones.
These homemade delights are not just cookies; they are a symbol of festive cheer, a testament to the joy of giving, and a sweet invitation to celebrate. So, embrace the magic of holiday baking, gather your ingredients, and let your imagination soar. Share this recipe, share your cookies, and most importantly, share the joy. Your kitchen is now ready to become a hub of holiday delight, churning out batch after batch of the ultimate Christmas Reindeer Cookies that will keep everyone coming back for more, year after festive year!
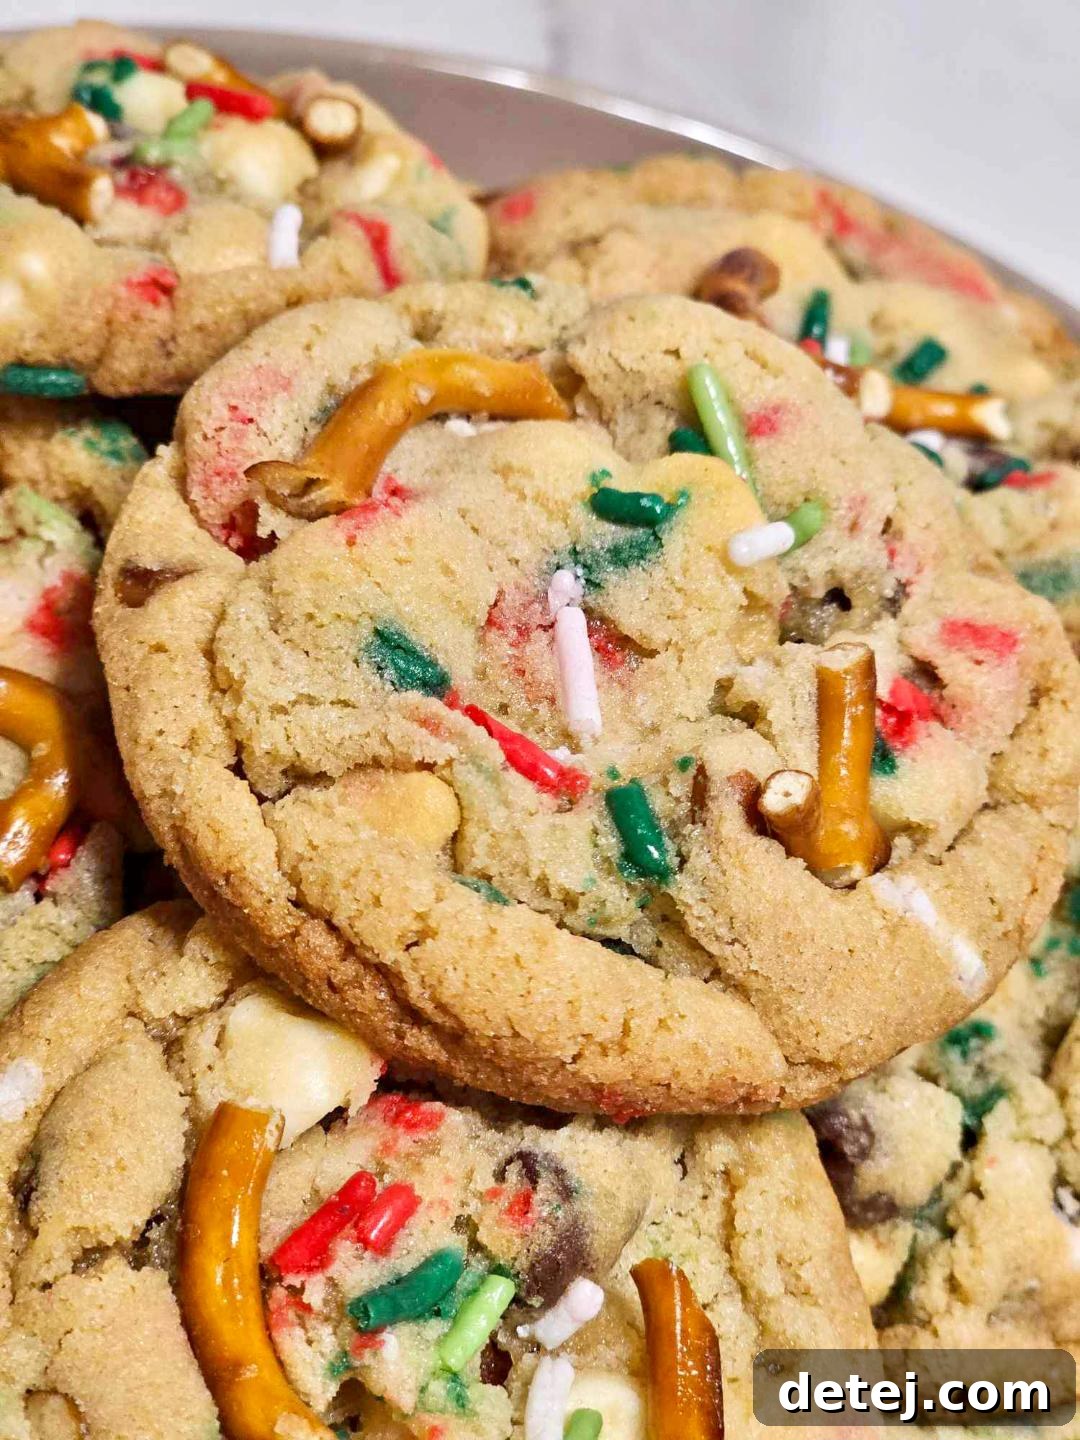
Christmas Reindeer Cookies
12 cookies
15 mins
10 mins
25 mins
Krystel
Ingredients
- 1 ½ cups all-purpose flour, spooned and leveled
- ¾ cup butter, softened
- ¾ cup light brown sugar, packed
- ⅔ cup white chocolate chips
- ⅓ cup pretzel pieces
- ¼ cup granulated sugar
- ¼ cup red and green Christmas sprinkles
- 2 egg yolks, at room temperature
- 2 teaspoon vanilla extract
- ½ teaspoon salt
- ½ teaspoon baking powder
- ½ teaspoon baking soda
Instructions
- Preheat the oven to 350°F (175°C). Line baking sheets with parchment paper.
- Cream softened butter, brown sugar, and granulated sugar until light and fluffy.
- Add egg yolks and vanilla, mixing until pale and well combined.
- In a separate bowl, combine flour, baking powder, baking soda, and salt. Gradually add to the wet ingredients and mix until just combined.
- Gently fold in white chocolate chips, pretzel pieces, and sprinkles until evenly distributed.
- Scoop dough into 20-24 uniform balls and arrange on prepared baking sheets, leaving space between them.
- Optional: Press a few extra mix-ins (chocolate chips, pretzels) on top of each cookie dough ball for an enhanced visual appeal before baking.
- Bake for 10-12 minutes, or until the edges are lightly golden and the centers are still soft.
- Optional: Immediately after removing from the oven, use a circular cookie cutter to gently swirl around each warm cookie to create a perfect round shape.
- Cool on baking sheets for 5 minutes, then transfer to a wire rack to cool completely before decorating and enjoying your delightful cookies!
Serving:
2
cookies
,
Calories:
315
kcal
,
Carbohydrates:
41
g
,
Protein:
3
g
,
Fat:
16
g
,
Saturated Fat:
10
g
,
Polyunsaturated Fat:
1
g
,
Monounsaturated Fat:
4
g
,
Trans Fat:
0.5
g
,
Cholesterol:
65
mg
,
Sodium:
294
mg
,
Potassium:
76
mg
,
Fiber:
1
g
,
Sugar:
27
g
,
Vitamin A:
401
IU
,
Vitamin C:
0.1
mg
,
Calcium:
52
mg
,
Iron:
1
mg