
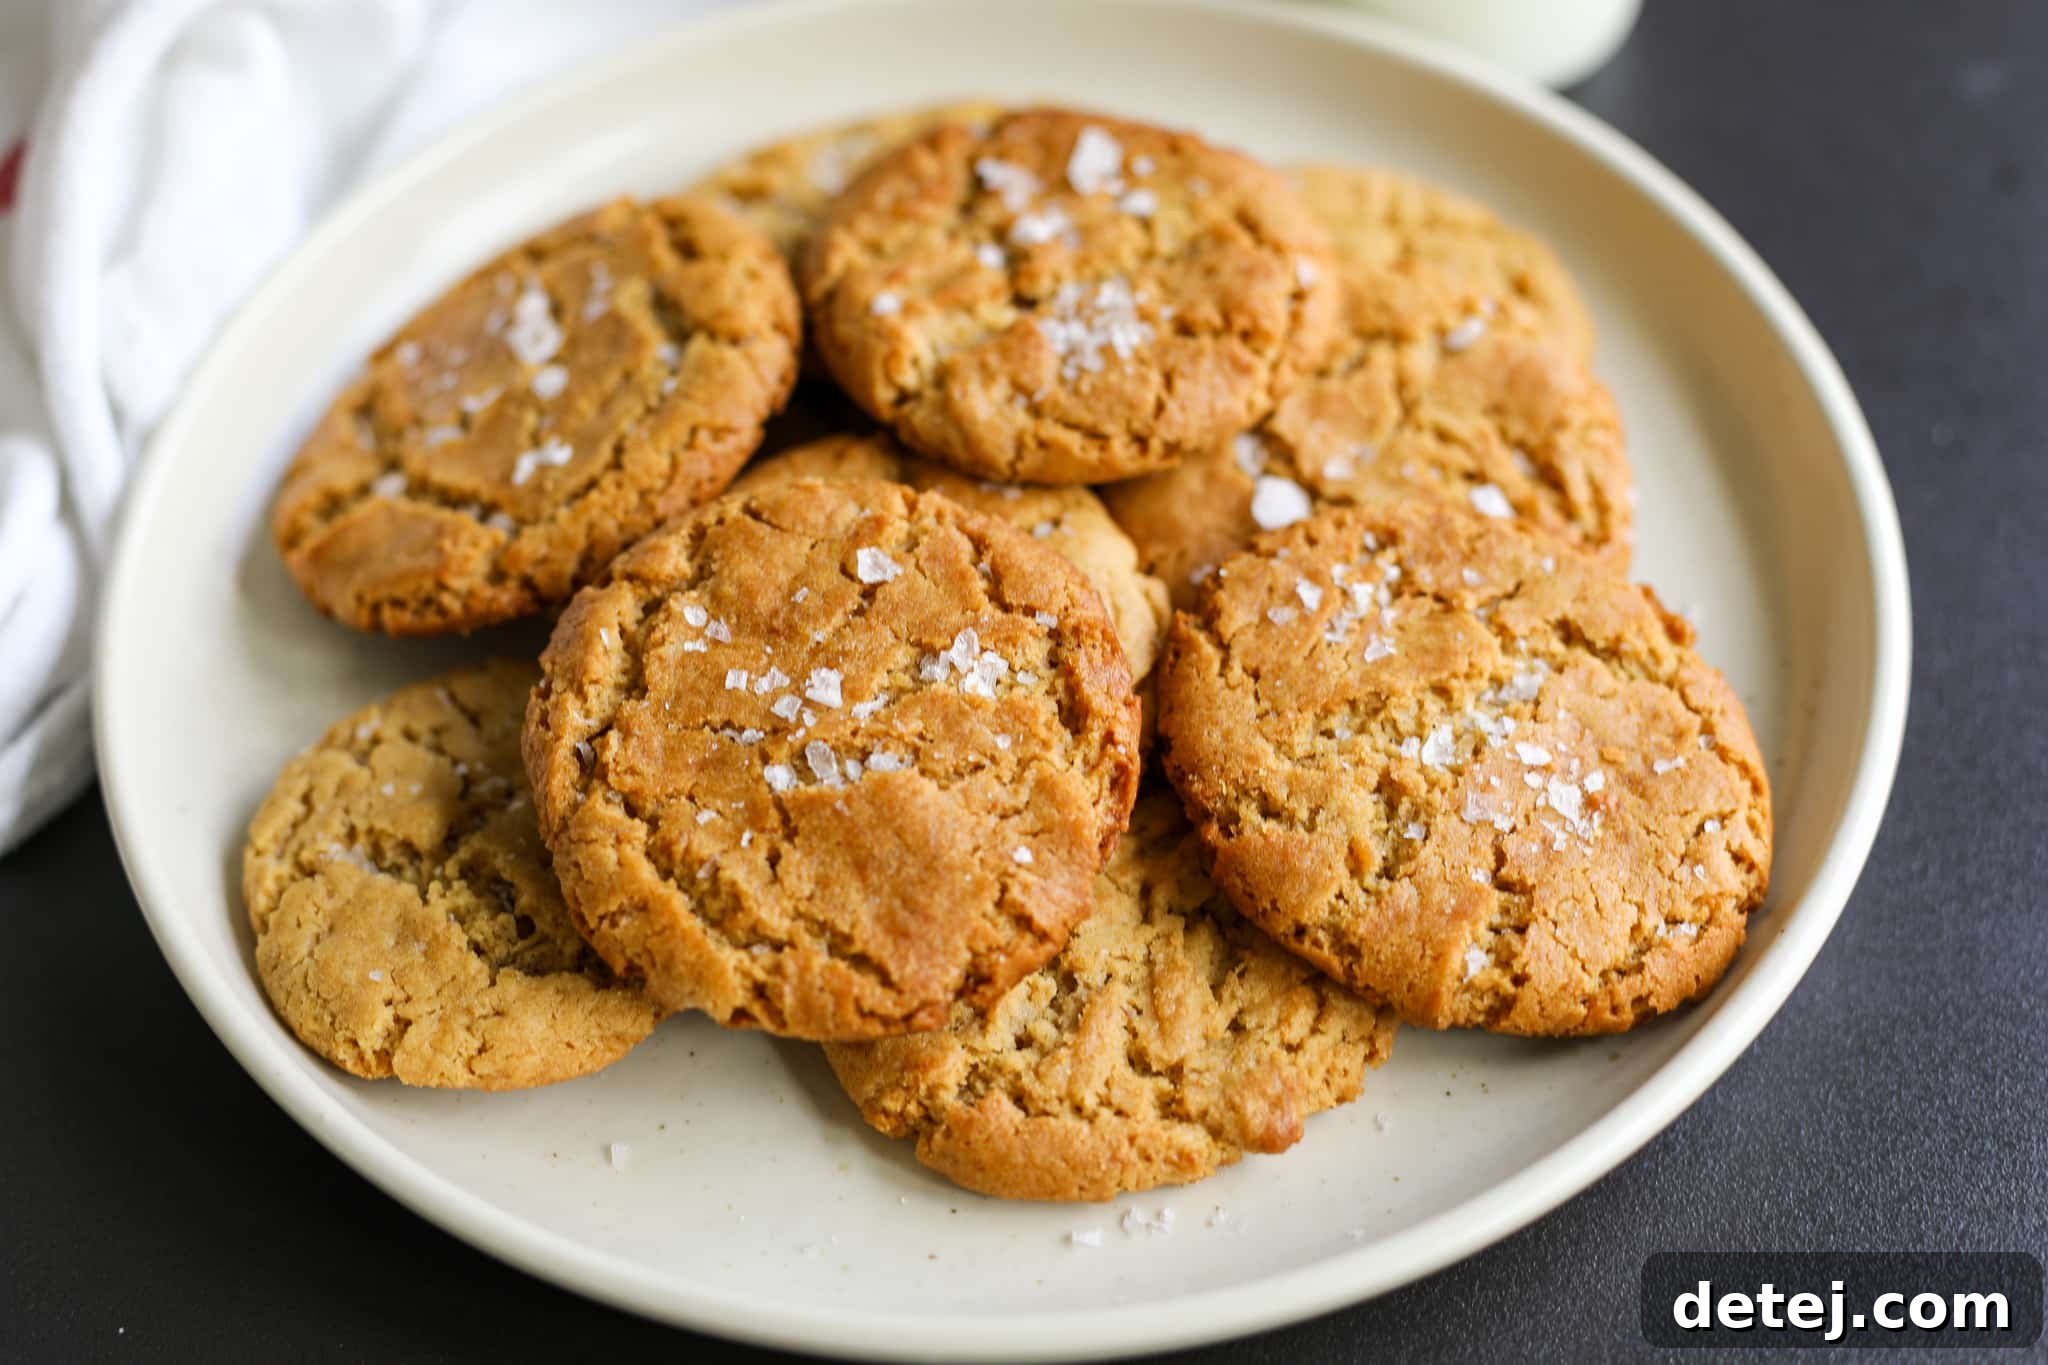
Easy Peanut Butter Banana Cookies: Your Go-To One-Bowl Recipe (Dairy-Free & Plant-Based)
Craving a sweet treat that’s both comforting and healthier? Look no further than this incredibly simple, one-bowl Easy Peanut Butter Banana Cookies recipe. Featuring just seven common ingredients, these cookies are a revelation for anyone seeking a delightful, dairy-free, and plant-based indulgence. In less than 30 minutes, you can have a batch of these subtly sweet, perfectly chewy cookies ready to enjoy, complete with a wonderful hint of natural banana flavor that truly elevates the classic peanut butter cookie.
Cookies have a magical way of brightening any day, don’t they? While seasonal favorites like Hot Chocolate Cookies and Gingersnap Cookies grace our tables during holidays, there’s always a need for a reliable, everyday option. This easy peanut butter banana cookie recipe stands out as a constant favorite, offering a guilt-free pleasure that doesn’t compromise on taste or texture.
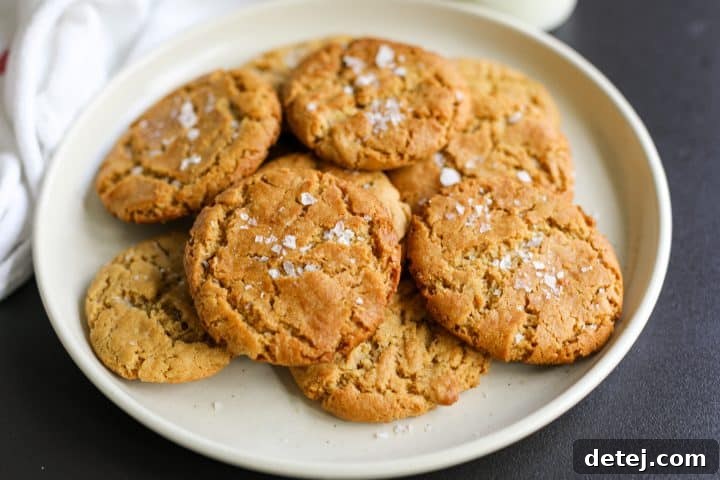
What makes these cookies truly special is their thoughtful composition. Crafted with slightly “better-for-you” ingredients compared to traditional peanut butter cookie recipes, this version is entirely dairy-free and plant-based. We’ve also managed to significantly reduce the sugar and fat content without sacrificing any of the deliciousness you expect from a great cookie. This makes them a fantastic choice for those with dietary restrictions, or simply anyone looking to enjoy a sweet treat with a little less indulgence.
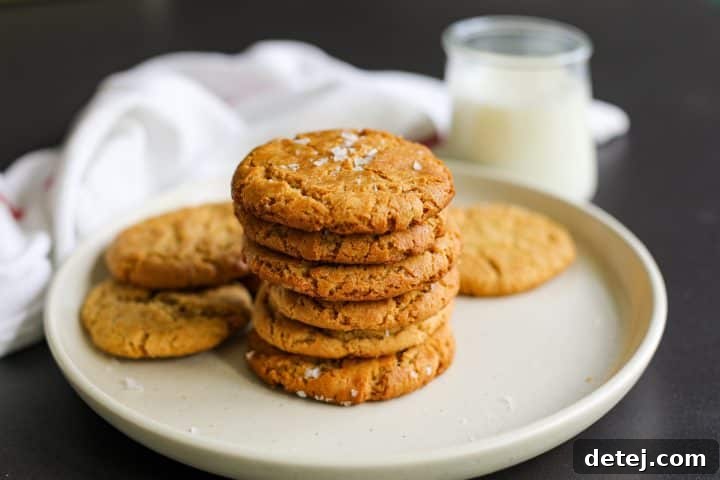
Despite their healthier profile, these cookies are remarkably flavorful. Each bite delivers a delightful contrast: a satisfyingly crispy exterior that gives way to a soft, wonderfully chewy center. The harmonious blend of rich peanut butter and sweet banana creates a flavor profile that’s both familiar and exciting. They are absolutely delicious on their own, but truly shine when paired with a tall, cold glass of plant-based milk or a steaming cup of your favorite hot coffee.
Beyond their irresistible taste, the sheer simplicity of this recipe is a major draw. All the ingredients come together effortlessly in a single bowl, minimizing cleanup and making the baking process a breeze. Just mix, scoop, and bake – it’s virtually foolproof! This straightforward approach also makes these cookies an excellent way to involve children in the kitchen, fostering a love for baking from an early age. Whether you’re a seasoned baker or a complete novice, and especially when you need a quick sweet fix, these peanut butter banana cookies are your perfect solution.
Why You’ll Love These Easy Peanut Butter Banana Cookies
These aren’t just any peanut butter cookies; they’re a game-changer for your snack routine. Here’s why this recipe will quickly become a household favorite:
- Effortless One-Bowl Preparation: Say goodbye to piles of dirty dishes! This recipe streamlines the baking process, requiring only a single mixing bowl from start to finish. This makes cleanup incredibly quick, leaving you more time to savor your delicious creations.
- Lightning-Fast & Foolproof: From mixing to baking, these cookies are ready in under 30 minutes, making them perfect for unexpected cravings or last-minute dessert needs. The straightforward steps are easy to follow, ensuring success even for beginner bakers.
- Healthier Indulgence: We’ve consciously crafted this recipe to be lower in sugar and fat than many traditional cookie recipes. The natural sweetness from ripe bananas contributes to a reduced need for added sugars, allowing you to enjoy a treat that feels lighter and better for you.
- Dairy-Free & Plant-Based: Catering to various dietary needs, these cookies are completely free of dairy and animal products, making them suitable for vegans and those with lactose intolerance or dairy allergies.
- Irresistible Texture & Flavor: Experience the best of both worlds with a crispy edge and a wonderfully soft, chewy interior. The classic combination of creamy peanut butter and sweet, ripe banana creates a comforting and uniquely delicious flavor that’s hard to resist.
- Kid-Friendly Fun: The simple, hands-on nature of this recipe makes it an excellent activity for involving kids in the kitchen. They’ll love mashing the bananas and rolling the dough, and even more, they’ll love eating the fruits of their labor!
Key Ingredients for Perfect Peanut Butter Banana Cookies
The beauty of this recipe lies in its minimal yet impactful ingredient list. Each component plays a crucial role in creating the perfect texture and flavor:
- Ripe Banana: This is the secret weapon! Very ripe bananas (with plenty of brown spots) are essential. They provide natural sweetness, eliminating the need for excessive added sugar, and contribute moisture, which keeps the cookies wonderfully soft and chewy. Make sure to mash it thoroughly until smooth to avoid lumps in your dough.
- Creamy Peanut Butter: The star of the show, delivering that rich, nutty flavor we all love. For this specific recipe, it’s vital to use a creamy, emulsified peanut butter like Skippy or Jif, rather than natural varieties. Natural peanut butter tends to separate oils, which can make your cookie dough too runny and lead to flat, greasy cookies.
- Cane Sugar (White Sugar): While bananas add natural sweetness, a touch of cane sugar enhances the overall sweetness and aids in achieving that delightful crispy edge. You can adjust the amount slightly to your personal preference, but the ¾ cup specified perfectly balances the flavors.
- Vanilla Extract: Don’t skimp on quality here! Pure vanilla extract adds a warm, aromatic depth that complements both the peanut butter and banana beautifully. Avoid imitation vanilla for the best flavor results.
- Almond Milk: This plant-based milk acts as a binder, bringing all the ingredients together to form a smooth, workable dough. Feel free to substitute it with any other plain, unsweetened dairy-free milk you prefer, such as oat milk or soy milk. Regular dairy milk can also be used if you’re not adhering to a strict plant-based diet.
- All-Purpose Flour: This forms the foundational structure of our cookie dough. For consistent results, ensure you measure your flour correctly, ideally by weight or using the “spoon and level” method to avoid compacting it.
- Baking Soda: A crucial leavening agent that helps the cookies rise slightly and achieve their soft, airy texture. Always check that your baking soda is fresh for optimal effectiveness. An old or expired batch might result in flat, dense cookies.
- Flaky Sea Salt (Optional Garnish): A sprinkle of flaky sea salt right after baking is a gourmet touch that enhances all the flavors, cutting through the sweetness and adding a delightful textural contrast. It’s highly recommended for a truly elevated cookie experience.
Step-by-Step Guide: How to Bake Your One-Bowl Peanut Butter Banana Cookies
Baking these delightful cookies is incredibly straightforward. Follow these simple steps for perfect results every time:
- Prepare Your Workspace: Begin by preheating your oven to 350 degrees Fahrenheit (175 degrees Celsius). While the oven heats up, line a large baking tray with parchment paper. This prevents sticking and makes for easy cleanup. Set the prepared tray aside.
- Combine the Wet Ingredients: In a spacious mixing bowl, combine the mashed ripe banana, creamy peanut butter, cane sugar, vanilla extract, and almond milk. Using a sturdy spatula or a hand mixer on low speed, mix these ingredients until they are thoroughly combined and the mixture appears smooth and homogenous. Ensure there are no large lumps of banana remaining.
- Integrate the Dry Ingredients: Gently add the all-purpose flour and baking soda to the wet mixture in the bowl. Using a spatula, fold the dry ingredients into the wet until they are just combined. Be careful not to overmix the dough, as this can lead to tougher cookies. Stop mixing as soon as no dry streaks of flour are visible.
- Shape the Cookie Dough: You can use your hands, a small ice cream scoop, or a melon baller to portion out the cookie dough. Aim for roughly one tablespoon of dough per cookie. Roll each portion into a smooth ball. For consistent baking and appearance, try to make each cookie ball similar in size.
- Arrange and Bake: Place the cookie dough balls on your prepared baking sheet, ensuring there’s enough space between each cookie (about 1.5 to 2 inches) to allow for spreading. For a classic peanut butter cookie look, gently press the back of a fork onto the top of each cookie in a criss-cross pattern. Bake in the preheated oven for 13 to 14 minutes, or until the edges are beautifully golden brown and the centers appear set.
- Cool and Garnish: Once baked, remove the cookies from the oven. While they are still warm on the baking tray, sprinkle them generously with flaky sea salt, if desired. Allow the cookies to cool on the baking sheet for about 5-10 minutes. This crucial step allows them to firm up before transferring. Afterward, move them to a wire rack to cool completely. Enjoy them warm for a gooey treat, or cooled for a chewier texture.
Expert Tips & Tricks for the Best Peanut Butter Banana Cookies
Achieving cookie perfection is easy with a few insider tips:
- Banana Ripeness is Key: For the most flavorful and naturally sweet cookies, always use very ripe bananas. These are typically yellow with abundant brown spots, indicating a higher sugar content and softer texture, which makes them easier to mash and sweeter in the final product. Thoroughly mash them to a smooth consistency, eliminating any large chunks.
- Room Temperature Ingredients: Allowing your ingredients, especially the peanut butter and banana (if refrigerated), to come to room temperature before mixing ensures they combine smoothly and evenly. This leads to a more uniform dough and better cookie texture.
- Precise Portioning for Consistency: While the recipe yields approximately 24 small cookies (about 1 tablespoon of dough each), you can adjust the size. For slightly larger, medium-sized cookies, aim for about 22 per batch. Consistent portioning is crucial for even baking, ensuring all cookies are perfectly done at the same time.
- Customize Baking Time for Desired Texture: The recommended baking time of 13-14 minutes provides a fantastic balance. If you prefer your cookies softer and chewier, bake for closer to 13 minutes. For those who love a crispier edge and a firmer cookie, extend the baking time to the full 14 minutes. Keep a close eye on them during the last few minutes to prevent burning, as ovens can vary. The edges should be golden, and the centers should look set but still slightly soft.
- Avoid Overmixing: Once you add the flour, mix the dough just until combined. Overmixing can develop the gluten in the flour, leading to tough, dense cookies.
- Don’t Overcrowd the Baking Sheet: Give your cookies space to spread. Placing too many on one sheet can cause them to merge and bake unevenly. Use two baking sheets if necessary.
- Consider Parchment Paper or Silicone Mats: These are invaluable for preventing sticking and ensuring easy removal of the baked cookies. They also contribute to more even heat distribution.
- Cool Completely for Best Texture: While warm cookies are tempting, allowing them to cool completely on a wire rack firms up their structure and achieves the ideal chewy texture.
Elevate Your Cookies: Delicious Variations & Serving Suggestions
These peanut butter banana cookies are fantastic on their own, but don’t hesitate to get creative! Here are some ideas to customize them and enhance your enjoyment:
Delicious Variations:
- Chocolate Chip Delight: Fold in ½ to ¾ cup of your favorite dairy-free chocolate chips (or regular chocolate chips if not strictly plant-based) into the dough along with the dry ingredients. Peanut butter and chocolate are a match made in heaven!
- Nutty Crunch: For added texture and flavor, mix in ¼ to ½ cup of finely chopped nuts like pecans, walnuts, or even more peanuts.
- Spice It Up: A pinch of cinnamon or a tiny dash of nutmeg can add warmth and complexity to the banana and peanut butter flavors. Start with ¼ teaspoon and adjust to taste.
- Coconut Kiss: Add ¼ cup of shredded unsweetened coconut for a tropical twist.
- Espresso Boost: A teaspoon of instant espresso powder (dissolved in the almond milk) can deepen the chocolate flavor if you add chocolate chips, or simply add a subtle coffee note that pairs beautifully with peanut butter.
- Salted Caramel Swirl: After forming the dough balls, create a small indentation and dollop a tiny amount of dairy-free caramel sauce before baking. Be mindful that this will increase the sugar content.
Serving Suggestions:
- Classic Pairing: Enjoy them with a cold glass of your preferred plant-based milk or a warm cup of coffee or tea.
- Ice Cream Sandwich: For an extra decadent treat, sandwich a scoop of your favorite vegan vanilla or chocolate ice cream between two cooled cookies.
- Cookie Crumble Topping: Crumble cooled cookies over a bowl of plant-based yogurt or oatmeal for a delicious breakfast or snack topping.
- Dipping Delight: Serve them alongside a small bowl of melted dairy-free chocolate for dipping, or with extra peanut butter for the ultimate peanut butter lover.
- Dessert Platter: Arrange them on a dessert platter with fresh fruit, other small pastries, and perhaps some vegan whipped cream for an impressive spread.
Storage & Freezing: Keep Your Cookies Fresh Longer
These cookies are so delicious, they might not last long! But if you find yourself with leftovers or want to prepare them in advance, here’s how to store and freeze them properly to maintain their freshness and flavor:
Storing Baked Cookies:
Once your Easy Peanut Butter Banana Cookies have completely cooled to room temperature, transfer them to an airtight container. They will stay fresh and delicious at room temperature for up to four days. To maintain their texture, you can place a piece of parchment paper between layers of cookies if stacking them to prevent them from sticking together.
Freezing Baked Cookies:
If you’re looking to extend their shelf life, baked cookies freeze beautifully for up to two months. To freeze, ensure the cookies are entirely cooled. Place them in a single layer on a baking sheet and freeze for about an hour until firm. Then, transfer them to a freezer-safe, sealable bag or an airtight container. For best results, place a piece of parchment paper between each cookie to prevent them from sticking together. When you’re ready to enjoy them, thaw the cookies in the refrigerator overnight or simply let them come to room temperature on the counter for a few hours. You can also warm them slightly in a microwave for a few seconds for a freshly baked feel.
Freezing Cookie Dough:
Preparing a batch of cookie dough ahead of time is a fantastic way to have fresh-baked cookies on demand. To freeze the cookie dough, prepare the dough as normal according to the recipe instructions. Then, portion it into individual balls, just as you would for baking. Place these dough balls onto a baking sheet lined with parchment paper, ensuring they don’t touch. Freeze for one to two hours, or until the dough balls are solid. Once frozen, transfer them to a freezer-safe, sealable bag, label with the date, and freeze for one to two months.
When you’re ready to bake from frozen dough, you have two options:
- Bake from Frozen: Place the frozen cookie dough balls on a prepared baking sheet and bake directly from frozen. You will likely need to add a few minutes (typically 2-4 minutes) to the regular baking time, as needed, until the cookies are golden brown and set.
- Thaw First: Alternatively, you can let the cookie dough balls thaw in the refrigerator overnight or at room temperature for about 30-60 minutes before baking them as normal, following the original recipe’s baking time.
Having frozen dough or baked cookies on hand means you’re always just minutes away from a warm, homemade treat!
Frequently Asked Questions (FAQs) About Peanut Butter Banana Cookies
Here are answers to some common questions you might have about making these delicious cookies:
- Why do you put fork marks in peanut butter cookies?
- Traditionally, fork marks are used to press down peanut butter cookies, creating a distinctive criss-cross pattern. This flattening helps the cookies spread out into a more uniform shape and ensures they bake evenly throughout. Many traditional peanut butter cookie doughs are quite dense and wouldn’t spread much in the oven without this extra step.
- Do peanut butter cookies need to be flattened before baking?
- Flattening homemade peanut butter cookies ensures they achieve that classic round cookie shape and bake uniformly. While it’s common practice for many recipes, I find that with this specific peanut butter banana cookie recipe, the dough spreads well enough on its own due to the banana’s moisture. However, if you prefer a flatter, more classic-looking peanut butter cookie, you can certainly gently flatten the dough balls with a fork before baking. It’s a matter of preference for this recipe, not a strict requirement for proper baking.
- Should you chill the dough before baking?
- Unlike many other cookie recipes that benefit from chilling the dough (to prevent over-spreading or deepen flavors), there is absolutely no need to chill the dough for these easy peanut butter banana cookies! They are designed for quick preparation and will bake perfectly right after mixing. However, if you prefer, or if you’re freezing a portion of the dough, chilling won’t harm the recipe and might even intensify the flavors slightly, though it’s not necessary for success.
- Can I use natural peanut butter in this recipe?
- For this specific recipe, we highly recommend using creamy, processed peanut butter (like Skippy or Jif) instead of natural peanut butter. Natural peanut butter tends to separate its oils, which can make the dough too soft and greasy, leading to cookies that spread excessively and become very flat. If you only have natural peanut butter, make sure it’s very well stirred and consider adding an extra tablespoon or two of flour if the dough seems too wet.
- How can I tell if my bananas are ripe enough?
- The ideal bananas for this recipe will have a significant amount of brown spots or even be mostly brown. They should be soft to the touch and easy to mash. Under-ripe bananas (mostly yellow or green) won’t provide the same natural sweetness or moisture, which can affect both the flavor and texture of your cookies.
- Can I make these cookies gluten-free?
- While this recipe uses all-purpose flour, you can experiment with a 1:1 gluten-free baking flour blend. Ensure the blend contains xanthan gum, or add about ¼ teaspoon per cup of flour, to help with structure. Results may vary slightly in texture.
Full Recipe Card: Easy Peanut Butter Banana Cookies (One Bowl)

Easy Peanut Butter Banana Cookies (One Bowl)
Author: Sarah Thomas-Drawbaugh
Yield: 24 cookies
Prep Time: 10 mins
Cook Time: 14 mins
Total Time: 24 mins
Summary: This plant-based easy peanut butter banana cookies recipe combines seven simple ingredients in one bowl and is ready to eat in less than 30 minutes!
Pin Recipe
Equipment
- 1 baking tray
- 1 mixing bowl
Ingredients
- 1 medium ripe banana, brown spots preferred, mashed until smooth
- ¾ cup creamy peanut butter, Skippy Brand, do not use natural peanut butter
- ¾ cup cane sugar
- 1 tablespoon almond milk, option to use regular milk
- 1 teaspoon vanilla extract
- ¾ cup AP flour, all purpose
- 1 teaspoon baking soda
- flaky sea salt, as garnish (optional)
Instructions
- Preheat the oven to 350 degrees Fahrenheit (175°C). Line a baking tray with parchment paper.
- In a large mixing bowl, combine the mashed banana, creamy peanut butter, cane sugar, vanilla, and almond milk. Mix until well combined and smooth. Add the AP flour and baking soda and blend until just combined.
- Form the dough into small, even-sized balls using your hands, about 1 tablespoon of batter per cookie. Arrange them on the prepared baking sheet. Option to use the back of a fork to gently press fork marks into the top of the cookies. Bake for 13-14 minutes.
- Remove from the oven and, if desired, finish with a sprinkle of flaky sea salt. Let the cookies cool on the baking tray for 5-10 minutes before enjoying or transferring to a wire rack to cool completely.
Notes
Once cool, you can transfer leftover cookies to an airtight container, and store them at room temperature for up to four days.
Or, freeze baked cookies for up to two months. To do so, transfer them to a sealable bag, and place a piece of parchment paper between each cookie to prevent them from sticking together. Thaw them in the fridge or at room temperature when you’re ready to eat.
To freeze the cookie dough, assemble it as normal. Next, portion it into balls, and place them on a baking sheet. Freeze for one to two hours or until solid. Then, transfer them to a sealable bag, and freeze for one to two months.
Bake the cookie dough from frozen, adding a few minutes as needed. Or, let the cookie dough balls thaw in the fridge overnight, and bake as normal.
Nutrition Information (per serving)
- Serving Size: 1 cookie
- Calories: 94 kcal
- Carbohydrates: 12g
- Protein: 3g
- Fat: 5g
- Saturated Fat: 1g
- Polyunsaturated Fat: 1g
- Monounsaturated Fat: 2g
- Sodium: 134mg
- Potassium: 64mg
- Fiber: 1g
- Sugar: 7g
- Vitamin A: 1IU
- Vitamin C: 1mg
- Calcium: 12mg
- Iron: 1mg
Course: Dessert
Cuisine: Cookies
More Delicious Plant-Based Dessert Ideas
If you loved these Easy Peanut Butter Banana Cookies, you’re in for a treat! Explore more delightful “healthyish” dessert recipes to satisfy your sweet tooth:
- Try my The Best Dutch Apple Cake for a comforting, fruit-filled dessert that’s perfect for any occasion.
- For a quick and elegant pastry, my easy-to-make Cranberry Cream Cheese Turnovers are a fantastic choice, combining tart cranberries with creamy goodness.
These recipes offer diverse flavors and textures, ensuring there’s always something new and exciting to bake. Happy baking!