
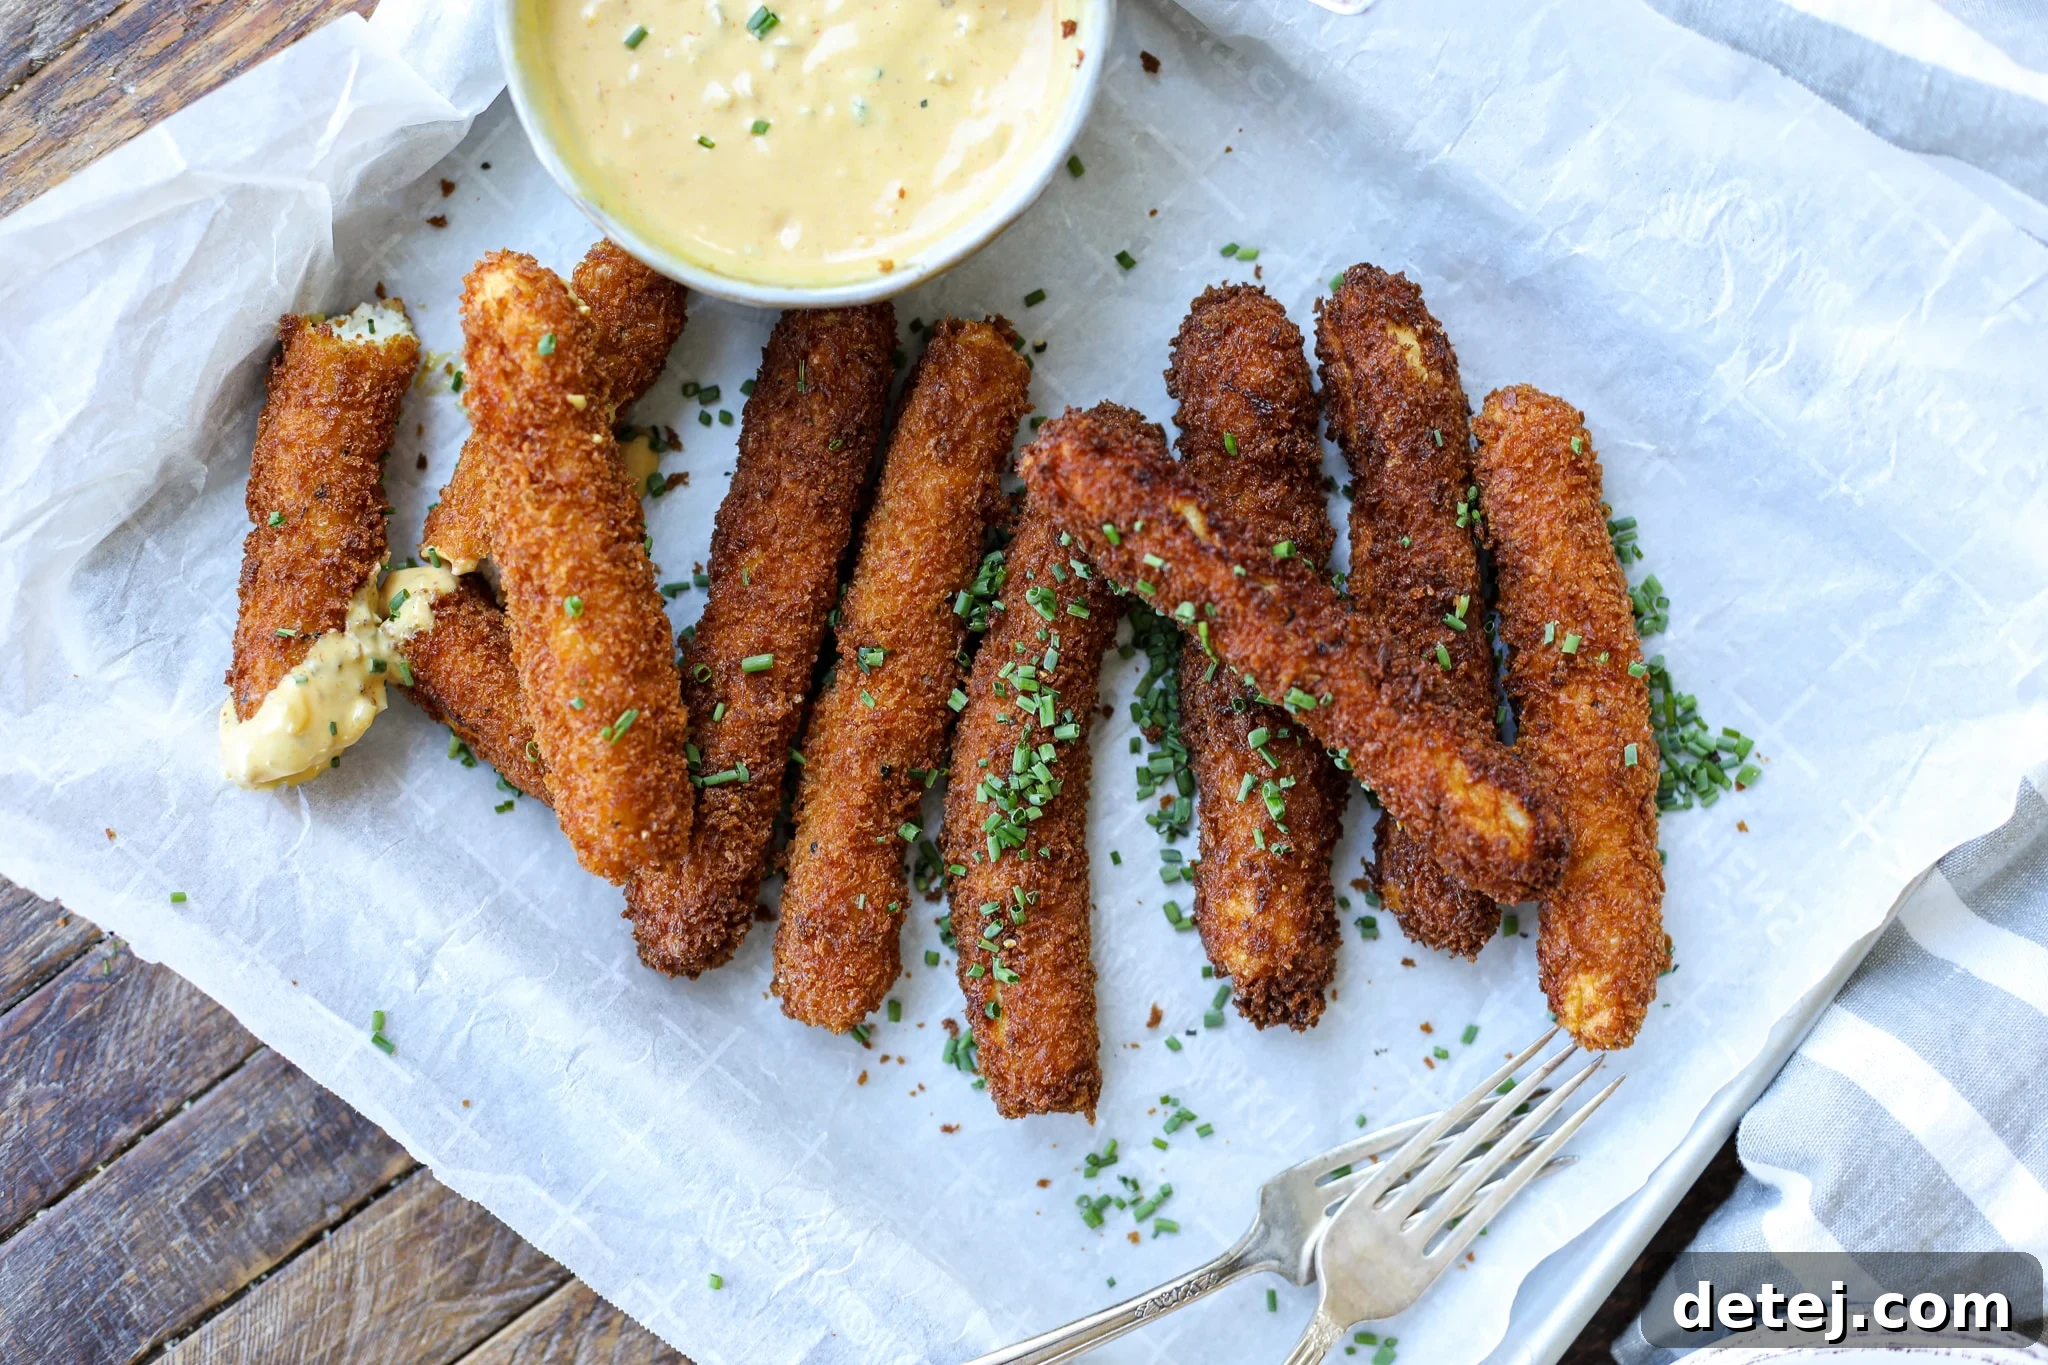
Craving that satisfying crunch of crispy chicken fries, but want a homemade version that’s even better than your fast-food favorites? Look no further! These **Homemade Chicken Fries** offer an irresistible combination of a perfectly golden, crispy exterior and a tender, juicy interior that will have your whole family asking for more. Forget the drive-thru; with simple ingredients and straightforward steps, you can create a batch of these fun-to-eat chicken sticks that are ideal for dipping, wrapping, or enjoying on their own.
Whether you’re planning a fun family dinner, a game-day snack, or a quick and delicious appetizer, these chicken fries are a versatile crowd-pleaser. They’re wonderfully adaptable to different spice preferences and can even be prepared ahead of time for ultimate convenience. Get ready to elevate your chicken game and discover a new go-to recipe that truly shines.
If you’re a fan of delicious, family-friendly chicken recipes, you might also enjoy my Homemade Broccoli Cheddar Chicken Nuggets.
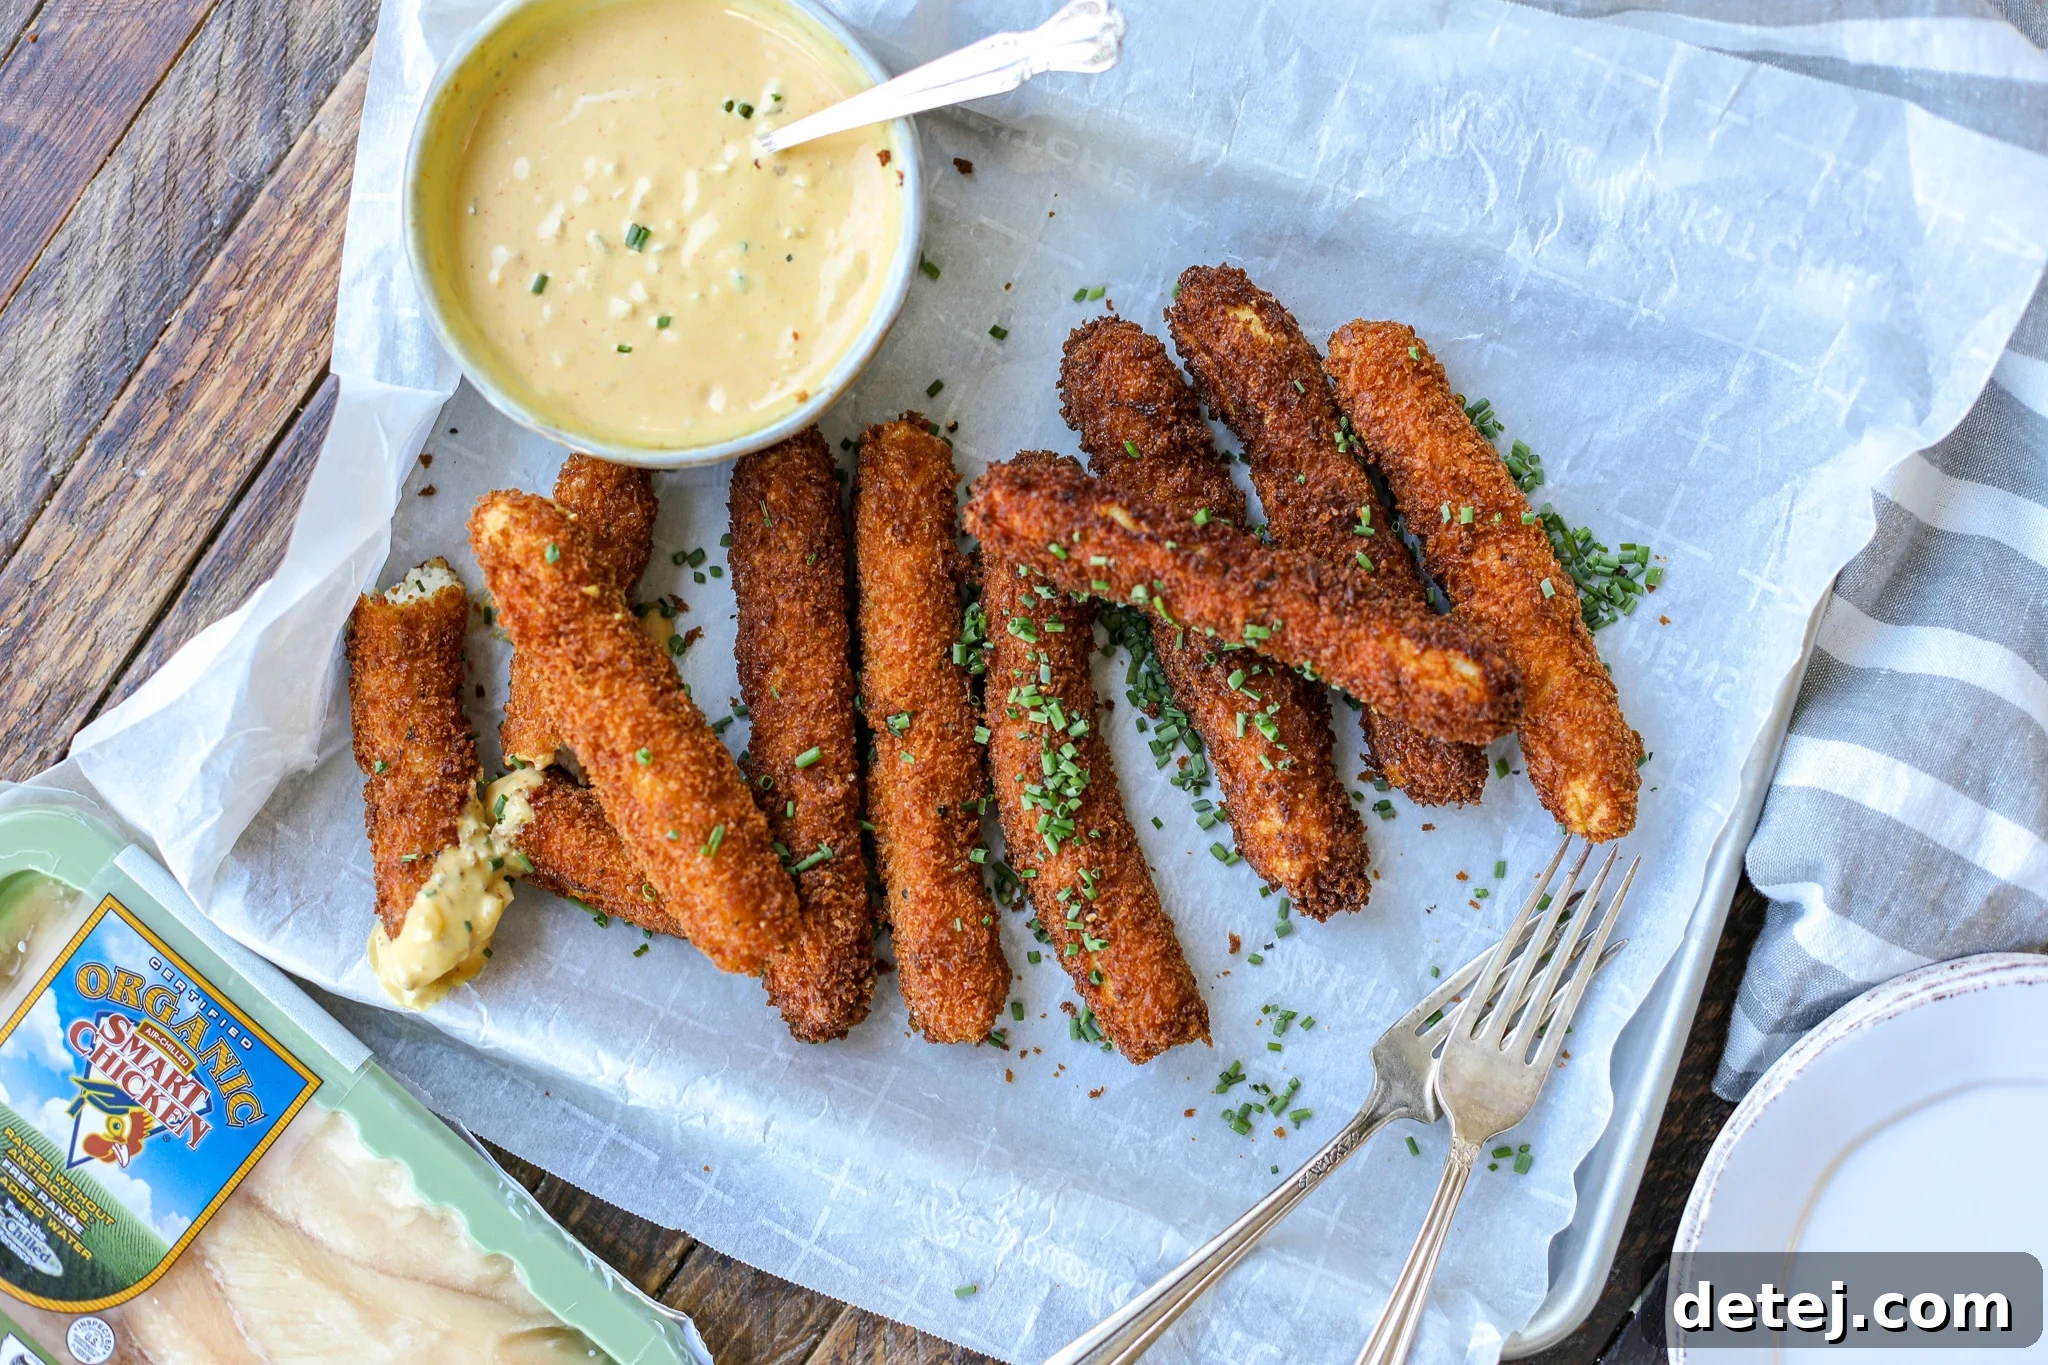
Why You’ll Love These Homemade Chicken Fries
These homemade chicken fries aren’t just a snack; they’re an experience! Here’s why this recipe is sure to become a staple in your kitchen:
- Irresistibly Fun to Eat: There’s something inherently delightful about finger foods, and chicken fries are no exception. Their convenient stick shape makes them perfect for dipping into an array of sauces, making mealtime or snack time enjoyable for both kids and adults. They evoke a sense of nostalgic comfort, reminiscent of classic fast-food treats, but with the superior taste and quality of a homemade dish.
- Remarkably Versatile: Don’t limit these crispy delights to just a side dish! They are incredibly adaptable. Leftover chicken fries can be transformed into a fantastic protein boost for salads, adding texture and flavor. Tuck them into a warm pita or tortilla with fresh veggies and a dollop of sauce for a quick and satisfying wrap. You can also easily customize the flavor profile by adding different spices to the ground chicken mixture. For an Italian flair, a pinch of dried oregano and basil works wonders. Craving something spicier? A dash of cayenne pepper or chili powder can add a pleasant kick. Incorporating a little grated low-moisture cheese directly into the chicken mixture also enhances flavor and adds extra protein, making them even more satisfying.
- Healthier Than Fast Food Alternatives: When you make chicken fries at home, you have complete control over the ingredients. This means you can opt for leaner ground chicken, use healthier oils, and avoid artificial additives often found in commercially prepared versions. This recipe offers a guilt-free way to enjoy a beloved treat without compromising on taste or quality.
- Simple and Approachable: Despite their impressive taste and texture, these chicken fries are surprisingly easy to make. The steps are straightforward, making this an ideal recipe for home cooks of all skill levels. With minimal fuss, you can achieve restaurant-quality results right in your own kitchen.
- Cost-Effective: Preparing meals at home is almost always more economical than dining out or opting for takeout. Making your own chicken fries allows you to save money while enjoying a superior product, stretching your food budget further without sacrificing flavor.
Essential Ingredients for Perfect Chicken Fries
Crafting these delectable chicken fries requires a few key ingredients, each playing an important role in achieving their signature taste and texture:
- Ground Chicken: The foundation of our fries. This recipe specifically calls for ground chicken, which provides a smooth texture that’s easy to form into the characteristic fry shape. You can choose between lean ground chicken breast or a blend that includes some thigh meat for a slightly richer flavor and juicier result. Ensure your chicken is fully thawed before use for best results.
-
Seasoning: A carefully selected blend of spices brings these chicken fries to life.
- Garlic Powder: Adds a savory depth and aromatic warmth.
- Onion Powder: Contributes a subtle, sweet, and pungent flavor that complements the garlic.
- Paprika: Provides a mild, earthy flavor and a beautiful reddish hue to the breading, enhancing visual appeal.
- Kosher Salt: Essential for seasoning the chicken from within and ensuring a balanced flavor in the breading.
- Black Pepper: Offers a mild, sharp bite that rounds out the spice profile.
- Grated Parmesan Cheese: While optional, adding grated parmesan to the chicken mixture infuses a delicious umami flavor and helps with binding, contributing to a more flavorful and cohesive fry.
-
Oil: Two types of oil are used for distinct purposes.
- Olive Oil: A small amount of olive oil is incorporated into the ground chicken mixture to add moisture, improve texture, and help the spices meld together.
- Avocado Oil: This is our oil of choice for frying due to its high smoke point, which makes it ideal for achieving a crispy crust without burning. Other neutral oils with high smoke points, such as canola, vegetable, or grapeseed oil, can also be used as alternatives.
- Eggs: Two whisked eggs are crucial for the breading process. They act as a binder, creating a sticky layer that helps the cornstarch mixture and panko breadcrumbs adhere to the chicken, ensuring a full, even coating.
- Cornstarch Mixture: This initial coating is key to extra crispiness. Combine cornstarch with a touch of paprika, kosher salt, and black pepper. The cornstarch forms a thin, dry layer that adheres to the chicken, preventing sogginess and providing an extra barrier for the breadcrumbs to stick to, resulting in an incredibly crisp fry.
- Breadcrumbs: For the ultimate crunch, **panko breadcrumbs** are highly recommended. Their larger, flakier texture creates a much crisper coating than regular breadcrumbs. If panko isn’t available, standard breadcrumbs can be used, but the texture will be slightly less crunchy.
Pro Tips for Making Perfectly Crispy Chicken Fries
Achieving the perfect chicken fry – golden, crispy, and juicy – is easier with these expert tips:
- Ensure Chicken is Fully Thawed: This is a critical step. If your ground chicken is even slightly frozen or semi-frozen, it will release excess moisture as it cooks. This moisture can make your fries soggy and prevent the breading from crisping up properly. Always start with thoroughly thawed chicken for the best texture.
- Uniform Size for Even Cooking: Consistency is key. When forming your chicken fries, try to make them all roughly the same size and thickness. This ensures they cook evenly and at the same rate. If some fries are larger and others smaller, the smaller ones may overcook and dry out by the time the larger ones are done, while the larger ones might still be undercooked if you pull them too early.
- Wet Hands Prevent Sticking: Ground chicken mixture can be quite sticky. To prevent it from clinging to your hands while forming the fries, simply wet your hands with water. You can also lightly oil your hands if you prefer. This simple trick makes the shaping process much smoother and less messy.
- The Importance of Freezing: Don’t skip the brief freezing step! Placing the formed fries in the freezer for 20-30 minutes helps them firm up significantly. This firmness is crucial for two reasons: it makes them much easier to handle during the breading process without losing their shape, and it helps the breading adhere better, resulting in a more robust and even crust.
- Maintain Optimal Oil Temperature: For shallow frying, the oil temperature is paramount. Aim for 325°F (165°C). If the oil isn’t hot enough, the fries will absorb too much oil and become greasy and soggy. If it’s too hot, the breading will brown quickly on the outside while the inside remains undercooked. Use a kitchen thermometer for accuracy, or test by dropping a tiny pinch of breadcrumb into the oil – it should sizzle gently and immediately.
- Avoid Overcrowding the Pan: When frying, resist the urge to add too many fries to the pan at once. Overcrowding lowers the oil temperature dramatically, leading to greasy, less crispy results. Fry in batches, leaving enough space between each fry for even cooking and proper browning.
- Drain on Paper Towels, Then Transfer to a Rack: After frying, immediately transfer the golden-brown fries to a plate lined with paper towels. This helps absorb any excess oil. However, for ultimate crispiness, don’t leave them there too long. Transfer them to a wire cooling rack set over a baking sheet. This allows air to circulate around all sides, preventing condensation and keeping the crust crisp.
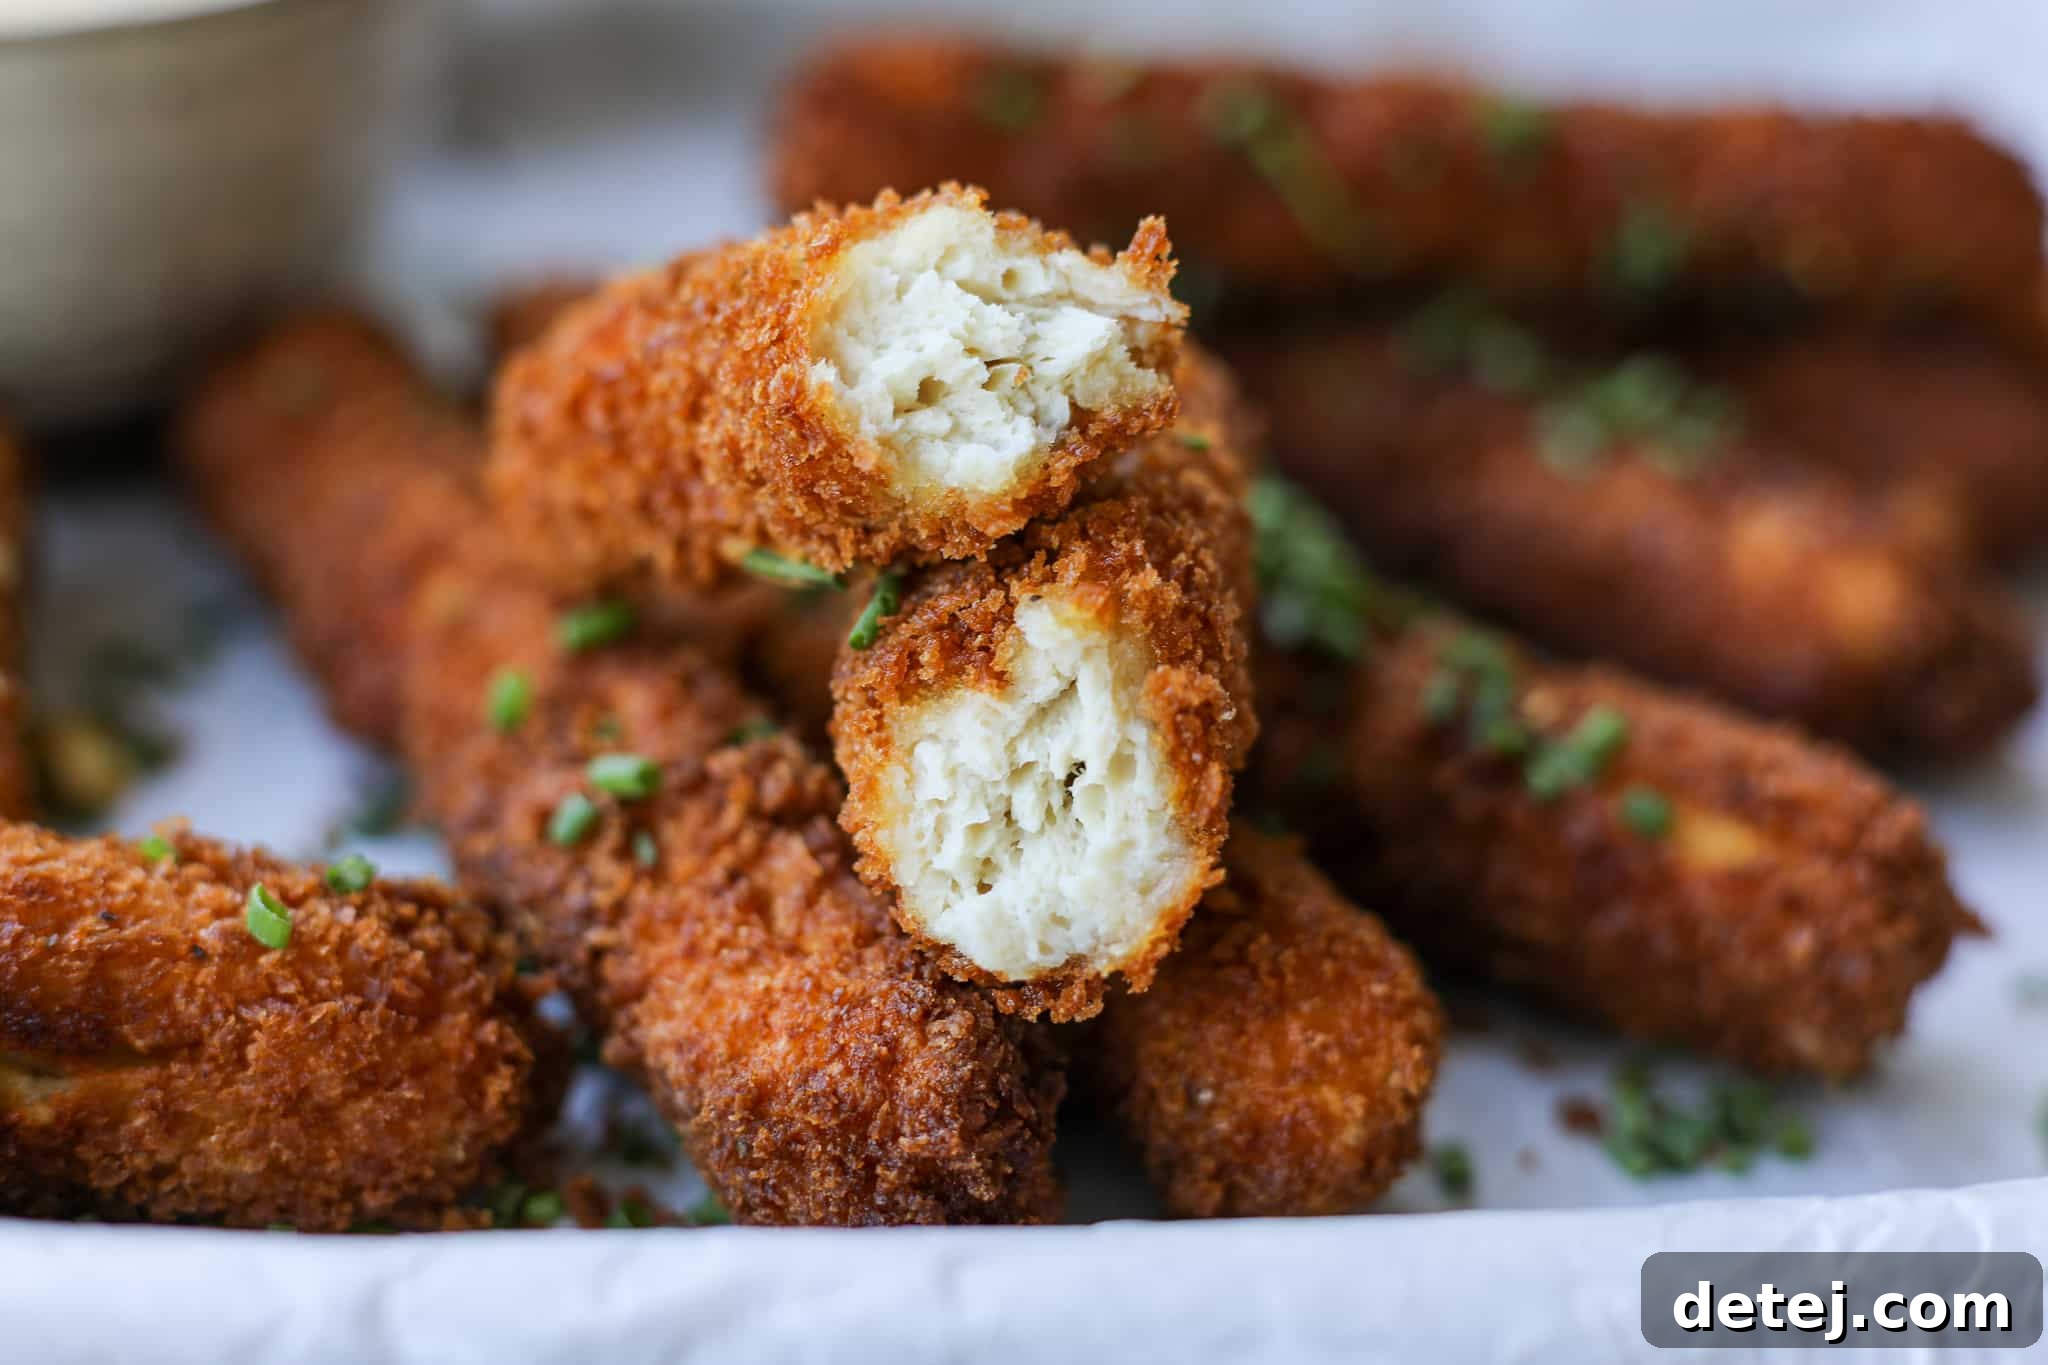
Step-by-Step Guide: How to Make Homemade Chicken Fries
Follow these detailed steps to create your own batch of irresistible homemade chicken fries:
- Prepare Your Workspace: Begin by lining a large baking tray with parchment paper. This non-stick surface will prevent the chicken fries from sticking and make cleanup easier. Set this tray aside for later.
- Mix the Chicken Mixture: In a spacious mixing bowl, combine the ground chicken with the seasonings: onion powder, garlic powder, black pepper, and kosher salt. Add one tablespoon of olive oil and the grated parmesan cheese. Using your hands (or a spoon), gently mix all the ingredients until they are just combined. Be careful not to overmix, as this can make the chicken tough.
- Form the Chicken Fries: Lightly wet your hands with water to prevent the chicken mixture from sticking. Take small portions of the chicken mixture and roll them into fry shapes. Aim for a diameter of about ¼ to ½ inch and a length of approximately 4-5 inches. This size helps them cook efficiently and ensures they resemble traditional chicken fries. Carefully place each formed fry onto the prepared parchment-lined baking tray, leaving a little space between each one. This recipe typically yields about 15-16 fries.
- Chill the Fries: Once all the fries are shaped, place the baking tray into the freezer for 20-30 minutes. This crucial step allows the fries to firm up, making them much easier to handle during the breading process and helping them maintain their shape while frying.
While the Fries are Freezing, Set Up the Breading Station
A well-organized breading station makes the process efficient and mess-free. Arrange three shallow plates or dishes in a row:
- First Plate (Cornstarch Mixture): On the first plate, combine the cornstarch, ½ teaspoon paprika, kosher salt, and black pepper. Whisk these dry ingredients together until well blended. This provides the first layer of crispiness and helps the egg adhere.
- Second Plate (Whisked Eggs): In the second plate, crack and whisk the two eggs until the yolks and whites are fully combined and slightly frothy.
- Third Plate (Panko Breadcrumbs): On the third plate, spread out the panko breadcrumbs evenly. You’ll need about 1 to 1.5 cups to ensure full coverage.
-
Breading the Fries: Once the chicken fries are lightly frozen and firm, remove them from the freezer. Working with one fry at a time:
- Gently dredge the fry through the cornstarch mixture, ensuring it’s completely coated. Lightly tap off any excess.
- Next, dip the cornstarch-coated fry into the whisked egg, allowing any extra egg to drip off.
- Finally, roll the fry thoroughly in the panko breadcrumbs, pressing gently to ensure a thick and even coating on all sides.
Repeat this process for all the remaining chicken fries, placing the breaded fries back on the parchment-lined tray if you’re working in batches.
- Shallow Frying the Chicken Fries: Heat a neutral oil, such as avocado oil, in a large, heavy-bottomed pan over medium-high heat. You’ll want enough oil to come about ½ inch up the sides of the pan. Heat the oil to 325°F (165°C). If you don’t have a thermometer, you can test the oil by dropping a tiny piece of breading into it; it should immediately sizzle gently without burning.
- Fry in Batches: Carefully add two to three breaded chicken fries to the hot oil at a time, being careful not to overcrowd the pan. Overcrowding will drop the oil temperature and lead to greasy fries.
- Cook to Golden Perfection: Fry the chicken fries for about 2-3 minutes per side, or until they are a rich golden brown on all sides and cooked through. To ensure they are fully cooked and safe to eat, their internal temperature should reach 165°F (74°C). Use a meat thermometer to check the thickest part of a fry.
- Drain and Serve: Once perfectly golden and cooked, use tongs to remove the fried chicken fries from the oil. Place them immediately on a plate lined with paper towels to absorb any excess oil. For maximum crispiness, transfer them from the paper towels to a wire cooling rack after a minute or two. Serve your delicious homemade chicken fries hot with your favorite dipping sauce, such as ketchup, honey mustard, BBQ sauce, or ranch dressing. Enjoy!
Baking Option: Healthier Chicken Fries
For a lighter alternative that uses less oil without sacrificing too much crispiness, baking your chicken fries is an excellent choice. This method is also great for easier cleanup!
- Preheat Oven and Prepare Tray: Preheat your oven to 400°F (200°C). Line a baking tray with parchment paper to prevent sticking and aid in browning.
- Arrange and Spray: Place the breaded chicken fries on the prepared baking tray in a single layer, ensuring there is some space between each fry for even heat circulation. Lightly spray the tops of the fries with avocado oil cooking spray. This helps them achieve a golden-brown color and a crispier texture in the oven.
- Bake and Flip: Bake the chicken fries for 25-30 minutes. Halfway through the baking time (around 12-15 minutes), carefully flip each fry to ensure even browning. Lightly spray the second side with avocado oil cooking spray before continuing to bake.
- Optional Broiling for Extra Crispness: If you desire an extra crispy coating, you can broil the fries for 1-2 minutes at the very end of the baking process. Keep a close eye on them, as broilers can brown food very quickly and even burn it if left unattended for too long.
- Check for Doneness: Ensure the internal temperature of the chicken fries reaches 165°F (74°C) before serving.
Storage and Reheating Instructions
These homemade chicken fries are best enjoyed fresh, but they can certainly be stored and reheated for later enjoyment. Here’s how to keep them delicious:
Storing Cooked Chicken Fries
- Refrigeration: Place any leftover cooked chicken fries in an airtight container and store them in the refrigerator for three to four days. To maintain their quality and prevent them from becoming soggy, ensure they are completely cooled before storing.
- Freezing: Cooked chicken fries can be frozen for longer storage. Arrange cooled fries in a single layer on a baking sheet and freeze until solid (this prevents them from sticking together). Once frozen, transfer them to a freezer-safe bag or container, removing as much air as possible. They can be stored in the freezer for up to one month.
Storing Uncooked, Breaded Chicken Fries
- You can also freeze uncooked, breaded chicken fries for future meals. After breading, arrange them on a parchment-lined baking sheet and freeze until solid. Then, transfer them to a freezer-safe bag or container. They can be stored for up to three months. When ready to cook, thaw them overnight in the refrigerator before frying or baking according to the recipe instructions.
Reheating Chicken Fries
To bring your stored chicken fries back to life with maximum crispiness, avoid the microwave if possible:
- Oven Reheating (Recommended): Preheat your oven or toaster oven to 375°F (190°C). Place the chicken fries on a wire rack set over a baking sheet (this allows air circulation for crispiness). Reheat for 10-15 minutes, or until heated through and crispy. For frozen cooked fries, you might need to increase the time by 5-10 minutes.
- Air Fryer Reheating (Best for Crispiness): An air fryer is excellent for reheating! Preheat your air fryer to 350°F (175°C). Place the chicken fries in a single layer in the air fryer basket. Reheat for 5-8 minutes, shaking the basket halfway through, until hot and crispy.
- Microwave Reheating (Quick, but Less Crispy): While convenient, the microwave will soften the breading. If time is of the essence, microwave on a microwave-safe plate in 30-second intervals until heated through.
Frequently Asked Questions About Chicken Fries
Here are some common questions about making and enjoying homemade chicken fries:
Can I make these chicken fries ahead of time?
Absolutely! These chicken fries are great for meal prepping. You can prepare and cook them fully, then store them in the refrigerator or freezer. Simply reheat them when you’re ready to eat for a quick and satisfying meal or snack.
What can I serve these homemade chicken fries with?
The possibilities are endless! They are fantastic dipped in classic sauces like ketchup, ranch, BBQ sauce, or honey mustard. For a twist, try a spicy sriracha mayo, a cool avocado crema, or a tangy buffalo sauce. They also make a wonderful addition to a fresh green salad, providing a delicious protein component and a satisfying crunch. Consider serving them alongside sweet potato fries or a simple coleslaw for a complete meal.
Can I air fry these chicken fries?
Yes, air frying is a fantastic cooking method for these chicken fries! While I haven’t specifically tested this recipe with air frying to provide exact times, the process would be similar to the baking option. Preheat your air fryer to around 375°F (190°C). Place the breaded fries in a single layer in the basket, lightly spray with oil, and air fry for approximately 12-18 minutes, flipping halfway through, until golden brown and cooked to 165°F (74°C) internal temperature. Keep an eye on them as air fryers can vary. The air fryer will yield an incredibly crispy result, often rivalling deep-frying with less oil. Oven baking instructions are also provided above if you prefer that method.
Can I use different ground meat instead of chicken?
While this recipe is specifically for chicken, you could experiment with other ground meats. Ground turkey is a very popular substitute and would yield a similar texture and flavor. Lean ground pork or a pork-and-beef blend could also work, but the flavor profile would be different. Adjust seasoning as needed for your chosen meat.
How do I make these chicken fries gluten-free?
Making them gluten-free is quite simple! Ensure you use gluten-free panko breadcrumbs, which are widely available. The cornstarch is naturally gluten-free. All other ingredients listed are typically gluten-free, but always double-check labels to be certain, especially for seasonings.
What’s the secret to truly crispy chicken fries?
Several factors contribute to ultimate crispiness:
- Panko Breadcrumbs: Their flaky texture creates a superior crunch.
- Cornstarch Coating: This initial layer helps wick away moisture and forms an extra crisp barrier.
- Proper Oil Temperature: Ensure your frying oil is at 325°F (165°C). Too low, and they’ll be greasy; too high, and they’ll burn before cooking through.
- Don’t Overcrowd: Fry in batches to maintain oil temperature.
- Cooling Rack: After draining on paper towels, transfer to a wire rack. This allows air to circulate, preventing sogginess.
Other Delicious Chicken Recipes to Explore
If you enjoyed making these homemade chicken fries, you might want to try these other fantastic chicken dishes:
- Family Style Chicken Fajitas: A vibrant and flavorful dish perfect for sharing.
- Greek Chicken Meatballs: Juicy meatballs packed with Mediterranean flavors.
- Ground Chicken Lasagna Roll Ups: A comforting classic with a lighter chicken twist.
- One Pan Buffalo Ground Chicken: Easy, spicy, and perfect for a quick weeknight meal.
- Crispy Chicken with Hot Honey Mustard: Another take on crispy chicken, elevated with a sweet and spicy sauce.
Homemade Chicken Fries
Sarah Thomas-Drawbaugh
Yield:
16 fries
1 hr
20 mins
1 hr 20 mins
These Homemade Chicken Fries are a fantastic alternative to fast-food versions, boasting a perfectly crispy exterior and a tender, juicy center. They’re incredibly fun to eat and perfect for dipping into your favorite sauces or tucking into a wrap for a flavorful sandwich. Easy to make and highly customizable, they’re sure to become a family favorite!
Print Recipe
Pin Recipe
Average Rating: 4.50 from 2 votes
Leave a Review »
Equipment
- 1 baking tray lined with parchment paper
- 1 mixing bowl
- 3 plates for breading station
- 1 pan for frying
- 2 paper towels for absorbing excess oil
Ingredients
Chicken Fries
- 1 lb. ground chicken
- ½ cup grated parmesan cheese
- 1 teaspoon kosher salt, or ½ teaspoon table salt
- ¾ teaspoon garlic powder
- ½ teaspoon onion powder
- ¼ teaspoon black pepper
- 1 tablespoon olive oil
Breading Station
- 2 eggs, whisked
- ⅓ cup cornstarch
- ½ teaspoon paprika
- black pepper, to season
- kosher salt, to season
- 1 – 1.5 cups panko breadcrumbs
- avocado oil, for frying
Instructions
-
Line a baking tray with parchment paper and set it aside.
Add ground chicken to a large mixing bowl. Season it with onion powder, garlic powder, black pepper, and kosher salt. Add one tablespoon olive oil and grated parmesan cheese. Mix everything until it’s well combined.
Wet your hands with water and form the fries. You want them to be about ¼ – ½ inch thick in diameter and about 4-5 inches long. Place the fries on the parchment paper. You should be able to get 15-16 fries. Place the fries in the freezer for 20-30 minutes.
Setup Breading Station
-
Add cornstarch, kosher salt, paprika, and black pepper to one plate. Then, add two whisked eggs to a second plate. Next, add panko breadcrumbs to a third plate.
Once lightly frozen, dredge the fries through the cornstarch mixture, then the whisked egg, followed by the panko breadcrumbs. Repeat this process for all fries, making sure all sides are well breaded.
-
Heat avocado oil in a large pan to 325 degrees Fahrenheit. Add two-three fries at a time, making sure not to overcrowd the pan.
Fry for about 2-3 minutes or until they are golden brown on all sides and cooked through to 165 degrees Fahrenheit internal temperature.
Place the golden-brown fries on a paper towel to absorb any excess oil, then transfer them to a cooling rack. Serve with your favorite dipping sauce.
Notes
Best enjoyed hot! Leftovers can be stored in an airtight container for up to five days in the refrigerator and reheated in the oven or air fryer for best crispiness.
Nutrition
Serving: 1 serving, Calories: 95kcal, Carbohydrates: 6g, Protein: 7g, Fat: 5g, Saturated Fat: 1g, Polyunsaturated Fat: 1g, Monounsaturated Fat: 2g, Trans Fat: 0.02g, Cholesterol: 48mg, Sodium: 253mg, Potassium: 172mg, Fiber: 0.2g, Sugar: 0.3g, Vitamin A: 62IU, Vitamin C: 0.2mg, Calcium: 40mg, Iron: 1mg
Appetizer, Main Course
American
95
Sarah Thomas-Drawbaugh