
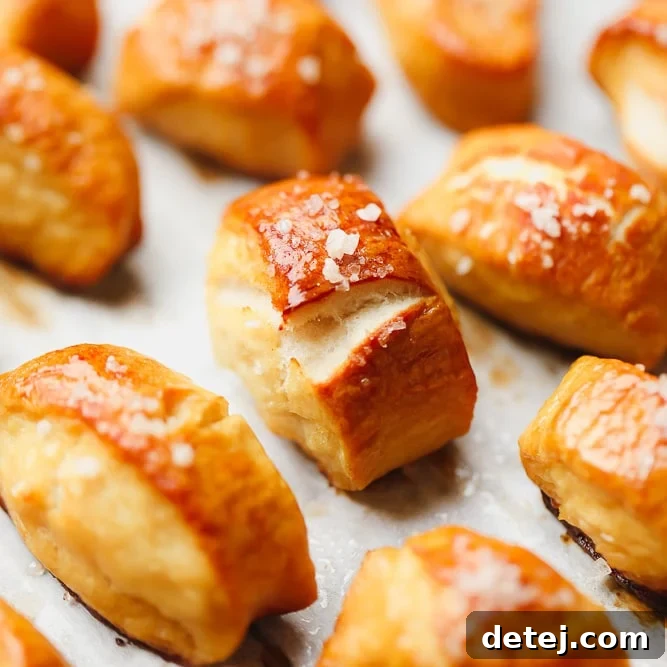
Get ready to elevate your snack game with these incredibly easy and unbelievably quick vegan pretzel bites! In just 30 minutes, with only 6 simple ingredients, you’ll be enjoying warm, soft, and perfectly buttery homemade pretzels right from your kitchen. Forget complicated baking; these plant-based delights are designed for effortless indulgence.

Mastering Vegan Pretzel Bites: Your 30-Minute Guide to Soft, Chewy Perfection
There’s nothing quite like the warm, soft, and slightly salty embrace of a freshly baked pretzel. But what if we told you that achieving this culinary bliss at home, completely vegan, could be incredibly simple and lightning-fast? Say goodbye to long kneading sessions and endless waiting for dough to rise. Our recipe for vegan pretzel bites is here to revolutionize your snack time, offering a quick, fuss-free path to irresistible soft pretzels that are perfect for any occasion.
Imagine soft, chewy, perfectly salted pretzel bites, begging to be dipped in your favorite vegan cheese sauce, mustard, or even a sweet cinnamon-sugar coating. These little nuggets of joy are an absolute hit for parties, game days, movie nights, or simply as a delightful treat for yourself and your loved ones. Unlike many yeast-based recipes that demand patience and precision, this recipe is crafted for speed and simplicity, ensuring delicious results even for beginner bakers.
Why These Homemade Vegan Pretzel Bites Will Become Your Go-To Snack
- Unbelievably Quick: From start to finish, you’ll have hot, fresh pretzel bites on your table in under 30 minutes. No lengthy proofing times needed!
- Only 6 Main Ingredients: Pantry staples are all you need to create these delightful plant-based treats.
- Effortlessly Easy: Don’t be intimidated by yeast! This recipe is designed to be beginner-friendly, guiding you through each step with clarity.
- Dairy-Free & Plant-Based: Enjoy all the classic pretzel flavor without any animal products. Perfect for those with dietary restrictions or embracing a vegan lifestyle.
- Versatile Flavor Profile: Easily customize them for a savory experience with coarse sea salt or transform them into a sweet sensation with cinnamon sugar.
- Perfectly Soft & Chewy: The unique baking soda bath method ensures that iconic pretzel crust and tender interior every time.

Getting Started: Preparing Your Light & Pliable Vegan Pretzel Dough
Crafting the perfect pretzel starts with the dough, but fear not, this isn’t your average complicated yeast dough. Our method is streamlined to be incredibly straightforward, ensuring a manageable dough that’s a joy to work with. While a stand mixer makes the process even easier, a large bowl and a sturdy wooden spoon are all you truly need to achieve success.
Step 1: Activating the Yeast for Maximum Flavor
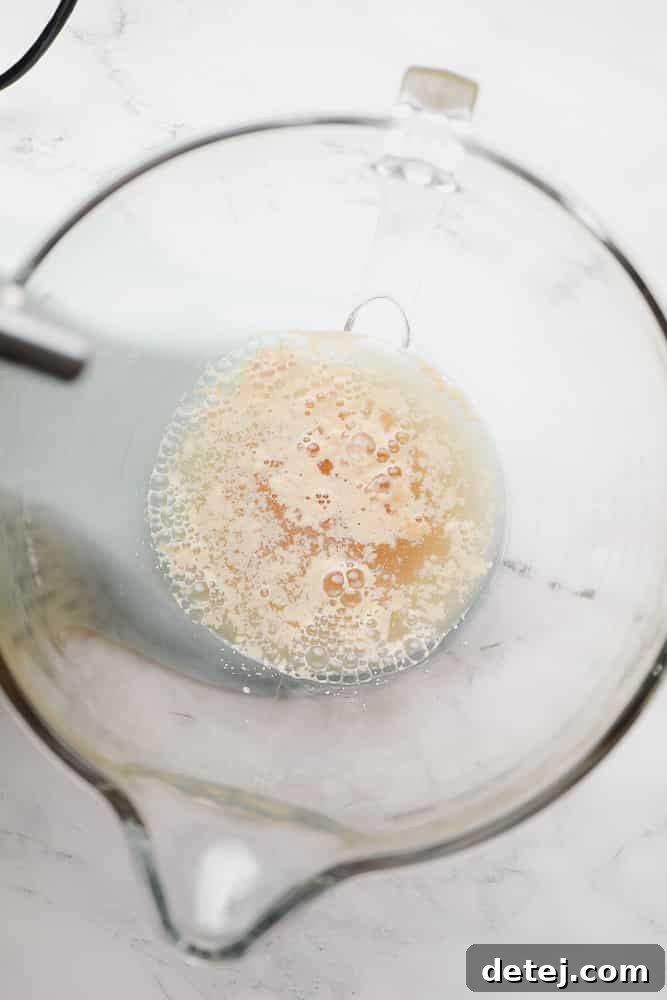
The magic of pretzels begins with active yeast. This step is crucial for giving your pretzels that airy, soft texture. Start by combining your instant yeast with warm water and a touch of brown sugar. The sugar acts as food for the yeast, helping it activate and get bubbly. The water temperature is key here – too hot and it kills the yeast; too cold and it won’t activate. Aim for water that feels like a warm bath (between 105-115°F or 40-46°C).
In a large mixing bowl (or the bowl of your stand mixer), simply add the packet of instant yeast, the specified amount of warm water, and the brown sugar. Give it a gentle stir. You’ll want to let this mixture sit for about 5 minutes. During this time, the yeast will begin to “bloom,” creating a foamy, bubbly layer on top. This is your sign that the yeast is active and ready to work its wonders! If your mixture doesn’t get frothy, your yeast might be old or the water temperature wasn’t quite right; it’s best to start again.
Step 2: Expertly Mixing the Dough to the Perfect Consistency
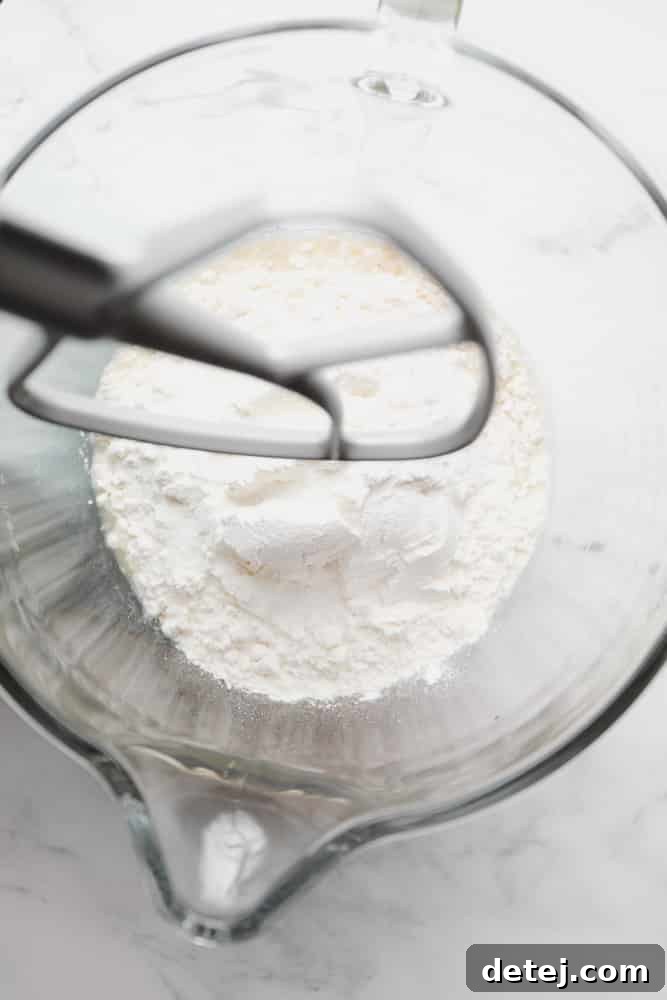
Once your yeast is activated, it’s time to bring the dough together. This recipe uses all-purpose flour, which is readily available and provides a great texture for soft pretzels. Along with the flour, salt is added to balance the flavor, giving your pretzels that classic savory edge.
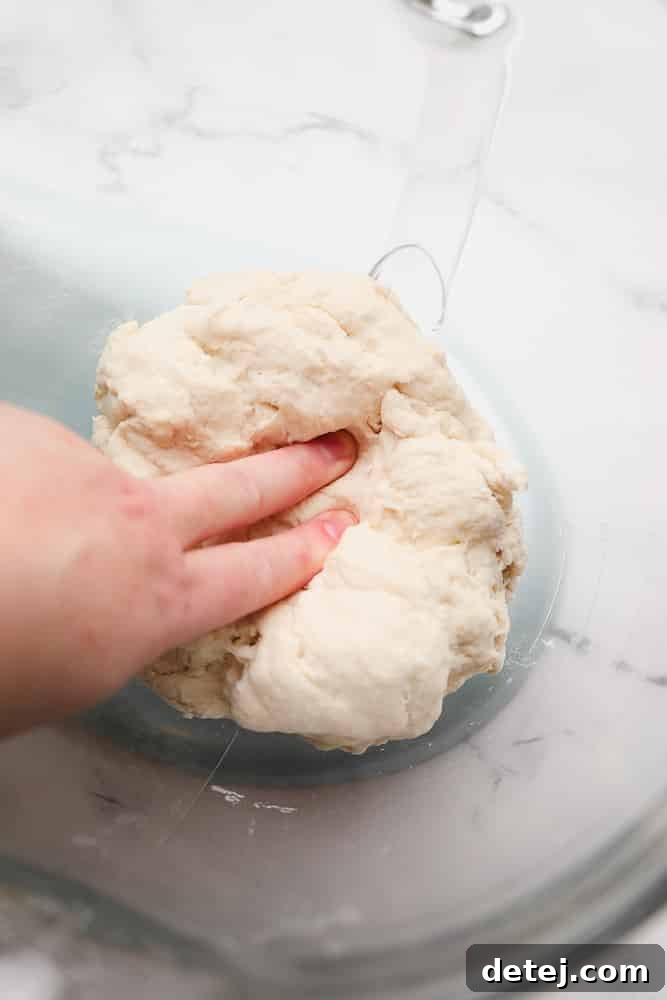
Add 3 cups of all-purpose flour and 1 teaspoon of salt to your yeast mixture. If using a stand mixer, attach the paddle and mix on low speed. If mixing by hand, use a sturdy spoon. Continue mixing until the ingredients are well combined and the dough starts to come together, pulling away from the sides of the bowl. The goal is a dough that is slightly sticky but doesn’t adhere to your hands. This means it’s pliable and easy to handle without being dry and crumbly or overly wet and messy. Don’t be afraid to adjust the flour as needed. I often find myself adding an extra 1/4 cup of flour, bringing the total to about 3 1/4 cups, to achieve that ideal non-stick consistency. The beauty of this recipe is its flexibility – you can easily tweak the flour content to get the dough just right.
To test the dough’s consistency, gently press a clean finger into it. If it leaves a slight residue but doesn’t completely stick, you’ve hit the sweet spot. If it’s too sticky, add a tablespoon of flour at a time and mix until it reaches the desired texture. This hands-on check is far more reliable than simply relying on precise measurements, as flour absorption can vary based on humidity and brand. The good news is, unlike some sensitive yeast doughs, this one is very forgiving!
Step 3: Shaping Your Pretzel Bites with Ease
Once your dough is perfectly mixed, it’s time for the fun part: shaping! This is where your pretzel bites truly come to life. Transfer the dough onto a clean, lightly floured flat surface. Give it a quick knead to form a smooth ball. This brief kneading helps to ensure an even texture throughout your pretzel bites.
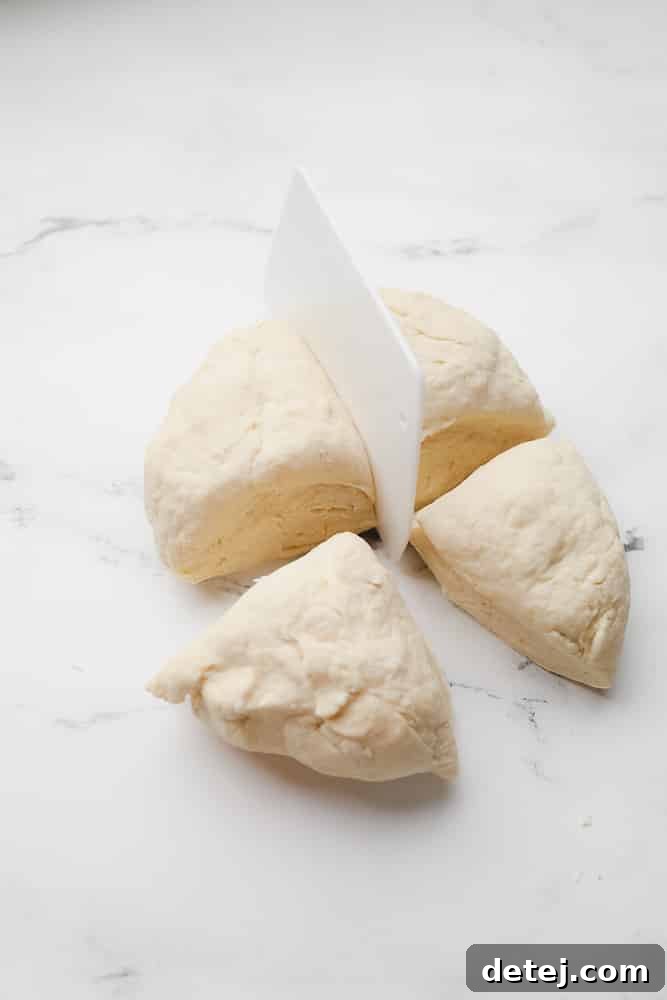
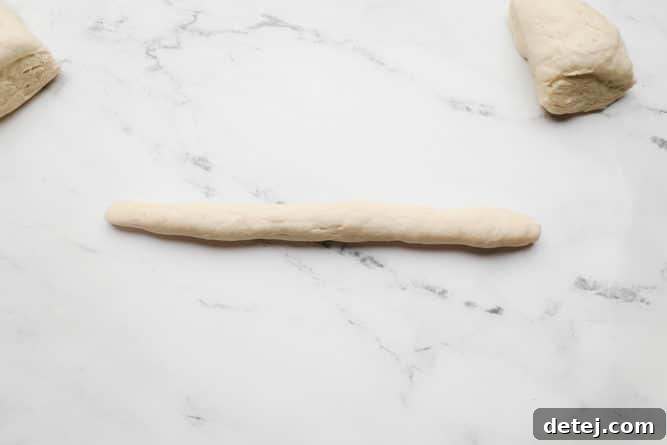
Next, divide the dough into four equal sections. This makes the rolling process more manageable and helps ensure uniform pretzel bite sizes. Take one section of dough and roll it out into a long, thin log, aiming for approximately 1 inch in thickness. Don’t worry about perfection; rustic charm is part of the appeal of homemade pretzels!
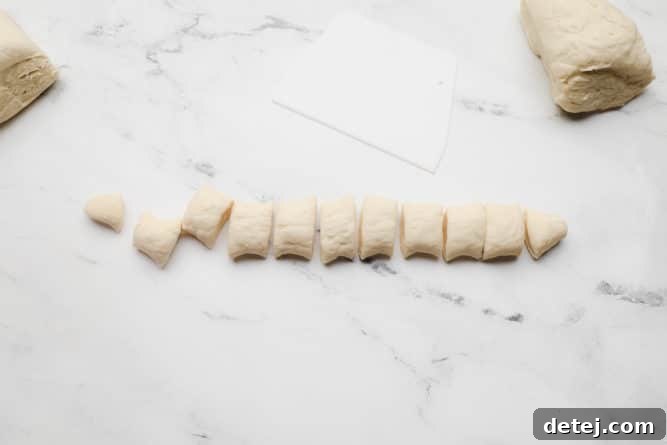
Once you have your log, use a knife or a bench scraper to cut it into 1-inch pieces. These small pieces are your individual pretzel bites. From each section of dough, you should be able to yield about 11-12 bites, resulting in roughly 44-48 delicious bites from the entire batch. Repeat this rolling and cutting process with the remaining three sections of dough. Before moving on, preheat your oven to 425°F (220°C) and line a large baking sheet with parchment paper, preparing for the final bake.
The Essential Step: Boiling Pretzel Bites in a Baking Soda Bath
This is the secret weapon to achieving the signature taste, texture, and beautiful dark crust of authentic pretzels. The baking soda bath isn’t just an extra step; it’s a crucial chemical reaction that makes a pretzel a pretzel!
When the dough is briefly boiled in a highly alkaline solution (the baking soda water), it causes the Maillard reaction to occur more readily during baking. This is the chemical process responsible for the golden-brown crust, distinct flavor, and slightly chewy exterior that we all associate with pretzels. Without this step, your “pretzels” would simply be bread rolls shaped like pretzels. It’s truly what makes them unique and gives them that classic shiny finish.
You’ll need a generous amount of water – about 12 cups – and a full 1/2 cup of baking soda for this process. Bring the water to a rolling boil in a large pot. This large volume of water ensures that the temperature doesn’t drop too drastically when you add the pretzel bites. Once the water is boiling, slowly and carefully add the baking soda. Be extremely cautious during this step, as the baking soda will react with the boiling water, causing it to fizz and bubble up considerably. Add it gradually, stirring gently, and be prepared to lower the heat slightly if the mixture threatens to overflow. Safety first!
Once the baking soda is fully dissolved and the water is simmering (it doesn’t need to be at a furious boil after the baking soda is in), it’s time to bathe your pretzel bites. Drop approximately 12 pieces of dough into the boiling mixture at a time. Do not overcrowd the pot, as this will lower the water temperature and hinder the desired effect. Let them boil for only 20-30 seconds. This short duration is critical; boiling for too long can make your pretzels tough or rubbery. You’ll notice they quickly rise to the surface as they cook.
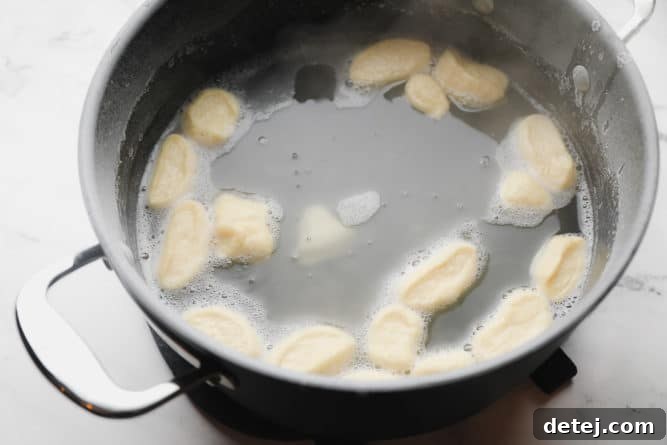
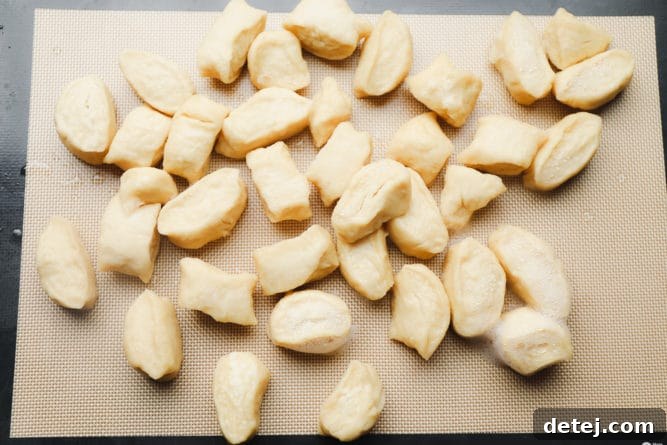
Using a slotted spoon, carefully remove the pretzel bites from the water, allowing any excess liquid to drain off. Transfer them to a silicone mat or a separate piece of parchment paper placed nearby. This provides a clean, non-stick surface for them to rest while you continue boiling the remaining batches. Repeat this process until all your raw dough pieces have taken their quick dip in the baking soda bath. The boiled pieces will look slightly puffy and may have a subtle sheen – this is exactly what you want!
Baking to Golden Perfection: Finishing Your Vegan Pretzels
With the critical boiling step complete, your pretzel bites are now ready for their final transformation in the oven. This is where they develop their rich color, distinct texture, and intoxicating aroma.
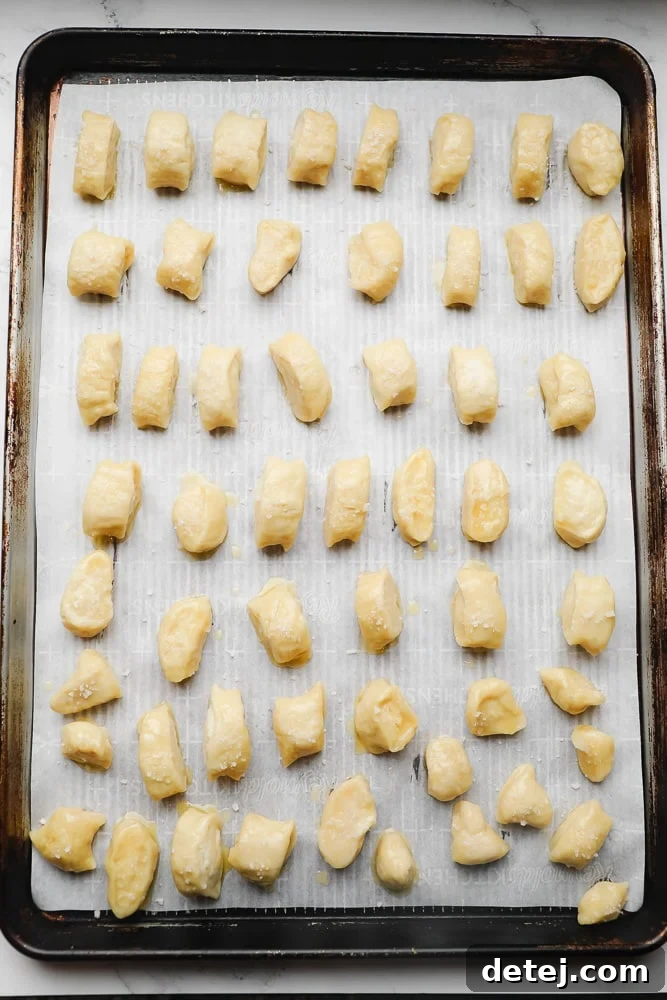
Carefully arrange the boiled pretzel pieces on your parchment-lined baking sheet, ensuring there’s a little space between each one for even baking. Next, generously brush the tops of each pretzel bite with melted vegan butter. This not only adds a wonderful richness and flavor but also contributes to that desirable golden-brown crust. Finally, for a classic savory pretzel, sprinkle them liberally with coarse sea salt. The large crystals of sea salt provide that satisfying crunch and burst of flavor that’s synonymous with pretzels.
Bake the pretzel bites in your preheated 425°F (220°C) oven for approximately 12-15 minutes. Keep an eye on them; baking times can vary slightly depending on your oven. You’re looking for a beautiful, deep golden-brown color on top. Once they reach this perfect hue, remove them from the oven. The aroma filling your kitchen will be absolutely divine! Serve them warm and fresh for the ultimate experience.
Sweet Tooth Delight: An Irresistible Cinnamon Sugar Pretzel Bites Variation
While the classic salty pretzel bite is undeniably delicious, sometimes you crave something a little sweeter. This recipe is incredibly versatile and can easily be transformed into a heavenly cinnamon sugar treat! The process is almost identical, with just a couple of simple adjustments.
For the cinnamon sugar version, follow all the steps for preparing the dough, shaping, and boiling the pretzel bites. When it comes time to bake, brush the boiled pretzel pieces with melted vegan butter, but skip the coarse sea salt. Bake them in the oven as instructed (12-15 minutes at 425°F / 220°C) until they are golden brown. While they are baking, prepare your cinnamon sugar mixture. In a small bowl, whisk together 3/4 cup of granulated sugar with 2 teaspoons of ground cinnamon until well combined. This ratio creates a perfect balance of sweetness and warm spice.
Once the pretzel bites are fresh out of the oven and still warm, brush them with a little more melted vegan butter. This extra butter acts as an adhesive for the cinnamon sugar. Then, immediately dip or toss the warm, buttered pretzel bites generously into your cinnamon sugar mixture, ensuring they are thoroughly coated. The warmth of the pretzels and the freshly applied butter will help the cinnamon sugar cling beautifully. Serve these sweet delights warm, perhaps with a side of vegan cream cheese frosting or a sweet fruit dip, for an unforgettable dessert or snack.
Tips for Success & Frequently Asked Questions (FAQ)
To ensure your vegan pretzel bites turn out perfectly every time, keep these tips in mind:
- Yeast Activation: Always check your yeast! If the water/sugar/yeast mixture doesn’t get frothy after 5 minutes, your yeast might be expired or the water wasn’t the right temperature. Start with fresh yeast and properly warmed water.
- Dough Consistency: The perfect dough is slightly sticky but doesn’t stick to your hands. Adjust flour sparingly, one tablespoon at a time, until you reach this ideal texture. Over-flouring can lead to dry, tough pretzels.
- Baking Soda Bath Safety: When adding baking soda to boiling water, do it slowly and carefully. It will bubble up. A large, deep pot is recommended to prevent overflow.
- Boiling Time: Stick to the 20-30 second boil time per batch. Longer boiling makes for tougher pretzels.
- Salt Type: Coarse sea salt or pretzel salt is ideal for savory pretzels as it provides a satisfying texture and visual appeal without dissolving quickly. Fine salt will simply melt away.
- Serving Suggestions: Beyond cheese sauce, these savory bites are fantastic with spicy mustard, creamy hummus, or even a simple garlic aioli. For sweet ones, try chocolate dipping sauce or a vanilla glaze.
Storage and Reheating Tips for Lasting Freshness
These vegan pretzel bites are undoubtedly best enjoyed fresh from the oven, when they are at their softest and chewiest. However, if you happen to have any leftovers (a rare occurrence!), they can be stored and enjoyed later.
Keep leftover pretzel bites in an airtight container at room temperature for up to 3 days. They will naturally lose some of their initial softness and become a bit chewier over time. To refresh them, a quick reheat in the oven (at about 350°F / 175°C for 5-7 minutes) or an air fryer will bring back some of their warmth and tender texture.
For longer storage, these pretzel bites freeze exceptionally well! Once completely cooled, place them in a freezer-safe bag or container, ensuring they are tightly sealed to prevent freezer burn. They can be stored in the freezer for 2-3 months. When you’re ready to enjoy them, simply thaw the frozen pretzel bites at room temperature, then reheat as described above for a nearly-fresh experience.
Exploring Gluten-Free Vegan Pretzel Bites
The question of gluten-free alternatives is a common one, and while this specific recipe was developed using all-purpose wheat flour, it’s certainly possible to explore gluten-free options. However, I haven’t personally tested a gluten-free version of these exact pretzel bites, so I can’t provide a definitive guarantee on the outcome.
If you’re looking to adapt this recipe to be gluten-free, your best bet would be to use a high-quality, all-purpose gluten-free baking mix. Many of these mixes are formulated to mimic the properties of wheat flour and often contain a blend of different gluten-free flours (like rice flour, tapioca starch, and potato starch) along with a binder like xanthan gum, which is crucial for elasticity in gluten-free baking. Using individual gluten-free flours might require more experimentation to achieve the right texture and structure.
Expect some variations in the dough consistency and the final pretzel texture when using gluten-free flour. The rise might be slightly different, and the chewiness could vary. If you decide to give it a try, please let me know your results! Sharing your experience can be incredibly helpful for others in the vegan and gluten-free baking community.

More Irresistible Vegan Party Food Ideas You’ll Love
These vegan pretzel bites are just the beginning of your plant-based party food journey! If you’re hosting a gathering or simply looking for more delicious animal-friendly snacks, explore some of these other fantastic recipes:
- Ultimate Vegan Chili
- Vegan Jalapeno Popper Dip
- Buffalo Cauliflower
- BBQ Cauliflower Wings
- 5 Ingredient Vegan Queso
- The Best & Easiest Vegan Spinach Artichoke Dip
Vegan Pretzel Bites: The Complete Recipe

Yields: Approximately 8 servings (44-48 bites)
Prep time: 15 minutes
Cook time: 15 minutes
Total time: 30 minutes
Ingredients
- 1 packet (2 1/4 teaspoons) instant yeast
- 1 1/4 cups warm water (105-115°F / 40-46°C)
- 2 tablespoons light brown sugar
- 3 cups all-purpose flour, plus additional (up to 1/4 cup) as needed
- 1 teaspoon salt
- 12 cups water for boiling pretzels
- 1/2 cup baking soda
- 3-4 tablespoons vegan butter, melted
- 1 tablespoon coarse sea salt (for savory pretzels only)
Instructions
- Preheat your oven to 425°F (220°C). Line a large baking sheet with parchment paper.
- In a large mixing bowl (or the bowl of a stand mixer), add the warm water, brown sugar, and instant yeast. Stir gently and let it sit for 5 minutes until frothy, indicating the yeast is active.
- Add 3 cups of all-purpose flour and 1 teaspoon of salt to the yeast mixture. With the paddle attachment (or a sturdy spoon), mix on low until the dough starts to come together. Add more flour, 1 tablespoon at a time, as needed (I typically use 3 1/4 cups total) until you have a slightly sticky dough that doesn’t stick to your hands.
- Transfer the dough to a clean, lightly floured surface. Briefly knead it into a smooth ball. Divide the dough into four equal sections.
- Roll each section of dough into a long rope, approximately 1 inch thick. Cut each rope into 1-inch pieces using a knife. You should get about 11-12 bites per section.
- In a very large pot, bring 12 cups of water to a rolling boil. Carefully and slowly add the 1/2 cup of baking soda. Be cautious, as the water will fizz and bubble up significantly; reduce heat if necessary to prevent overflow.
- Working in batches of about 12 pieces, gently drop the pretzel bites into the boiling baking soda bath. Boil for exactly 20-30 seconds, or until they rise to the surface.
- Using a slotted spoon, remove the boiled pretzel bites and place them on a silicone mat or a separate piece of parchment paper to drain excess water. Continue until all the dough pieces have been boiled.
- Arrange the boiled pretzel bites on your prepared parchment-lined baking sheet, leaving a little space between each. Brush the tops generously with melted vegan butter. For savory pretzels, sprinkle immediately with coarse sea salt. (Omit salt for cinnamon sugar variation).
- Bake for 12-15 minutes, or until the pretzel bites are beautifully golden brown.
- Remove from the oven and serve warm with your favorite dipping sauces!
Recipe Notes & Variations
- Leftover Pretzel Bites: Store cooled leftovers in an airtight container at room temperature for up to 3 days. Reheat briefly in the oven or air fryer to restore softness.
- Freezing: Freeze completely cooled pretzel bites in a freezer-safe bag or container for 2-3 months. Thaw at room temperature and reheat before serving.
- Cinnamon Sugar Pretzel Bites: For a sweet treat, omit the coarse sea salt before baking. Once baked and still warm, brush with additional melted vegan butter, then toss generously in a mixture of 3/4 cup granulated sugar and 2 teaspoons ground cinnamon.
- Gluten-Free Option: This recipe has not been tested with gluten-free flour. A quality all-purpose gluten-free baking mix may work, but results in texture and rise could vary.
Nutrition Information (Approximate Per Serving)
Serving: 1 of 8 servings
Calories: 216kcal | Carbohydrates: 39g | Protein: 5g | Fat: 4g | Saturated Fat: 1g | Polyunsaturated Fat: 1g | Monounsaturated Fat: 1g | Trans Fat: 1g | Sodium: 1100mg | Potassium: 64mg | Fiber: 2g | Sugar: 3g | Vitamin A: 200IU | Vitamin C: 1mg | Calcium: 12mg | Iron: 2mg
Recipe Details
Course: Appetizer, Snack
Cuisine: American
Author: Nora Taylor
Did you make this recipe? We’d love to see it! Mention @nora_cooks_vegan_ or tag #noracooks on Instagram!