
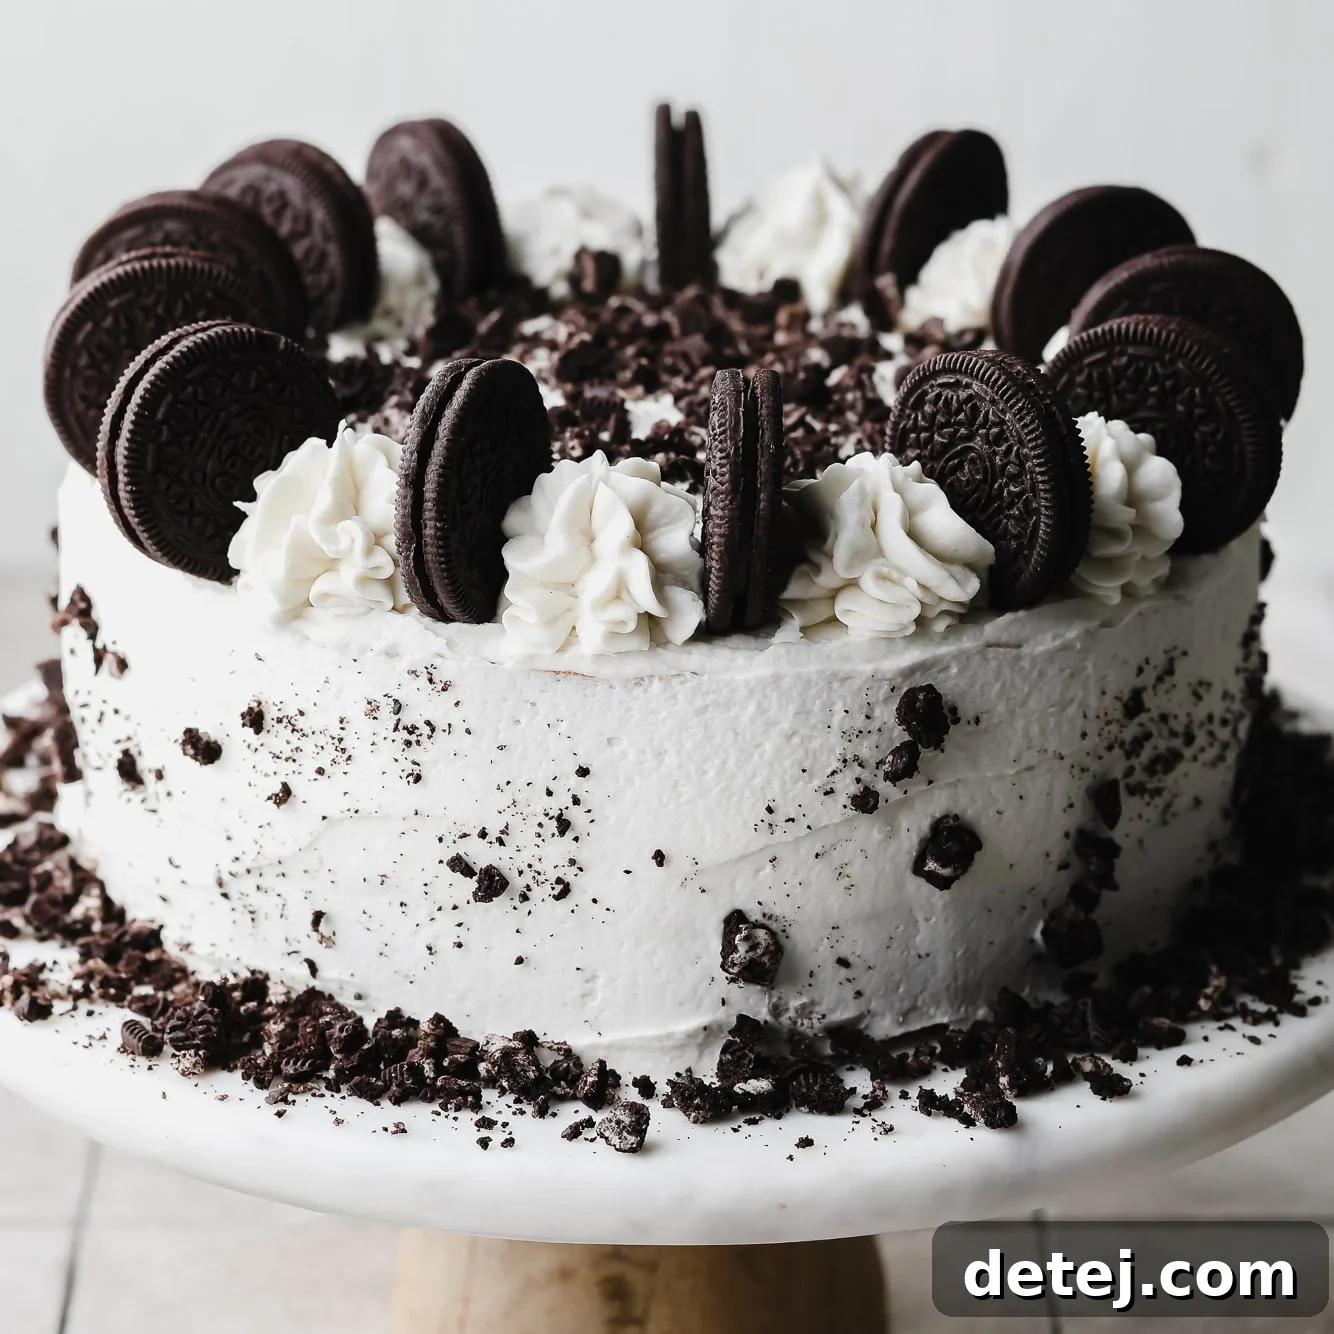
Welcome to the ultimate indulgence for every dessert enthusiast and Oreo lover! This Vegan Oreo Cake is more than just a dessert; it’s a celebration—a stunning, multi-layered masterpiece that tastes as incredible as it looks. Featuring two moist, homemade Oreo cake layers generously filled and frosted with the richest chocolate whipped cream, this cake is a dream come true for anyone seeking a truly decadent, yet entirely plant-based treat. Prepare to be amazed by its smooth, sweet, and delightfully rich flavor profile. If you adore Oreos, get ready to experience them in their most glorious form yet!
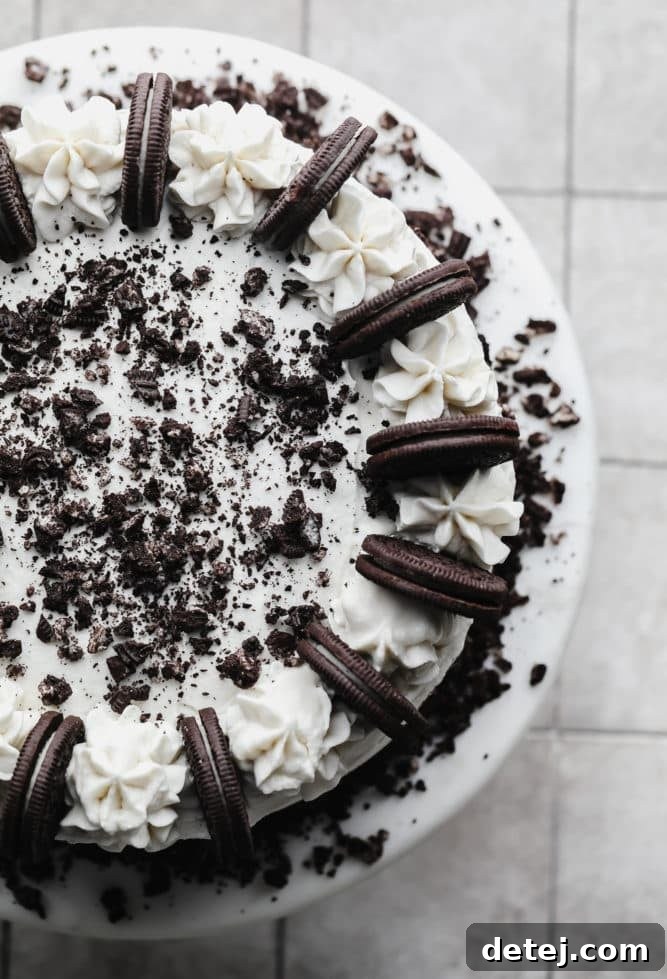
For those who can’t get enough of “oat milk’s favorite cookie,” this Vegan Oreo Cake is a must-try. Its rich chocolate flavor and creamy texture make it an instant classic for any occasion. If you’re a true connoisseur of these iconic sandwich cookies, you might also love exploring other delightful plant-based creations such as our Vegan Oreo Cheesecake or these charming Vegan Mint Chocolate Oreo Cupcakes. While original Oreos are surprisingly dairy-free and vegan-friendly, you can certainly opt for other chocolate cream-filled cookies from brands like Newman’s Own or Trader Joe’s if you prefer. However, for that authentic, beloved taste, nothing quite beats the classic Oreo!
Why This Vegan Oreo Cake Is a Must-Bake
This isn’t just another cake recipe; it’s an experience designed to delight. Here’s why this Vegan Oreo Cake will quickly become your go-to dessert for parties, celebrations, or simply when you crave something truly special:
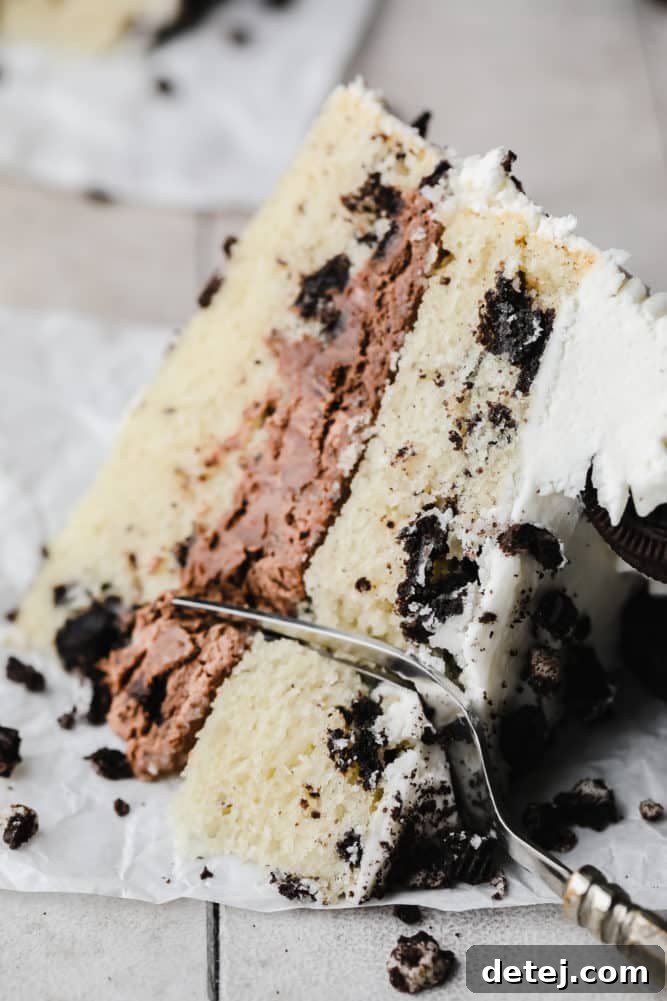
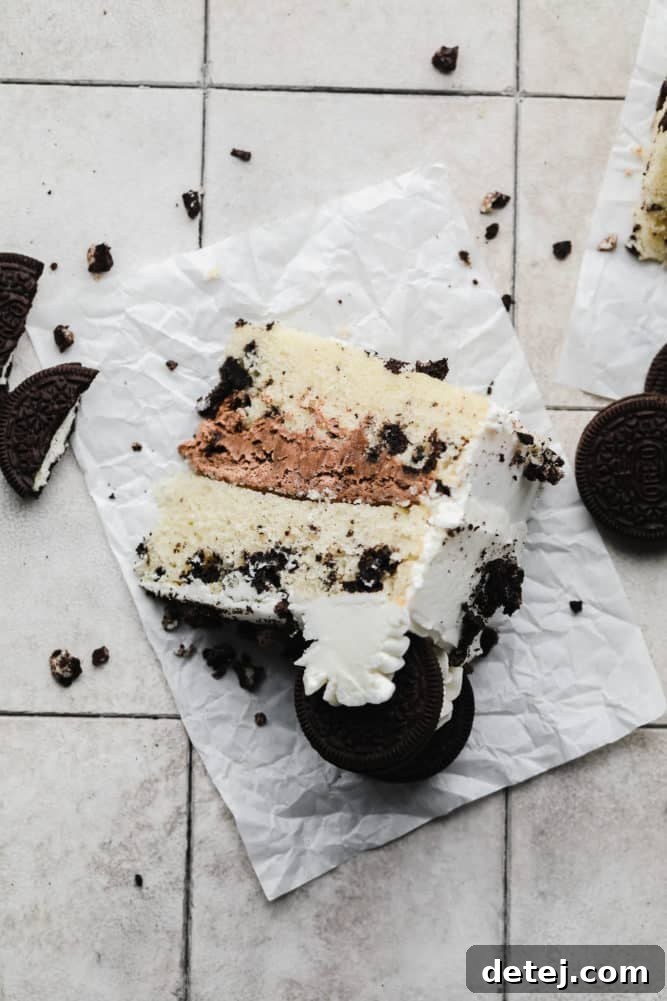
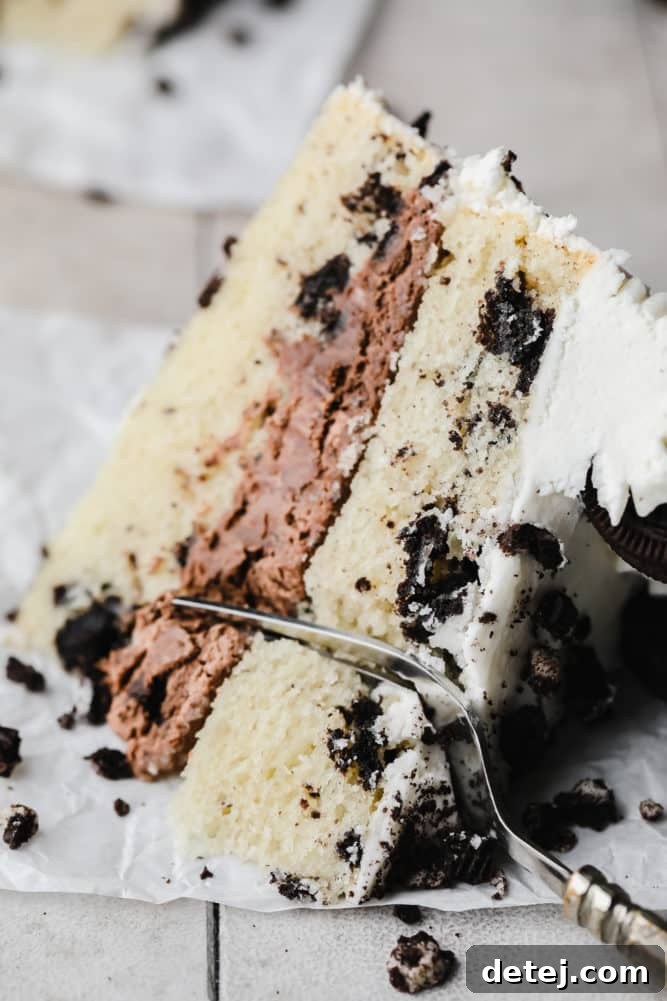
- Oreo Overload in Every Bite: Let’s be honest, if you’re making an Oreo cake, you’re here for the Oreos! This recipe doesn’t hold back. Crushed Oreos are folded directly into the moist cake batter, ensuring a delightful cookie crunch and familiar flavor throughout each layer. Then, more crushed Oreos are generously mixed into the luscious chocolate whipped cream frosting, culminating in a cake where every single forkful is an homage to your favorite cookie. It’s a true Oreo fan’s dream!
- Visually Stunning & Impressively Elegant: Beyond its incredible taste, this layered cake is a showstopper. The contrasting dark chocolate cake layers and creamy white (or chocolate) frosting, often adorned with whole or crushed Oreos, create a visually appealing dessert that’s guaranteed to draw gasps of “oohs” and “ahhs” at any gathering. Whether it’s a birthday, holiday, or just a casual get-together, this gorgeous cake brings a touch of elegance and fun that earns endless compliments.
- A Vegan Marvel That Fools Everyone: Prepare to astound your friends and family! The rich, silky smooth chocolate whipped cream frosting, paired with the unbelievably moist and tender cake layers, makes it incredibly difficult for anyone to believe this masterpiece is entirely free of eggs and dairy. It showcases just how luxurious and satisfying vegan baking can be, proving that you don’t need traditional ingredients to create an intensely flavorful and supremely indulgent dessert. It’s a revelation in plant-based deliciousness!
- Easier Than You Think: While the final presentation looks sophisticated, the process of making this cake is surprisingly straightforward. With simple mixing steps for the cake batter and a bit of overnight chilling for the frosting base, even intermediate bakers can achieve professional-looking results. The detailed instructions ensure a smooth baking journey, leading to a perfectly balanced and incredibly rewarding dessert.
Essential Ingredients for Your Vegan Oreo Cake (with Smart Substitutions)
Crafting this incredible Vegan Oreo Cake requires a few key components, all easily found and many with flexible substitutions. Here’s a detailed look at what you’ll need for both the signature frosting and the delightful cake layers:
For the Decadent Chocolate Whipped Cream Frosting:
This frosting is a game-changer, offering a light yet rich texture that perfectly complements the Oreo cake. Alternatively, you can opt for a classic Vegan Buttercream Frosting and mix in chopped Oreos for a different but equally delicious experience.
-
Unsweetened Soy Milk: This forms the creamy base of our whipped frosting. It’s crucial to use unsweetened varieties to prevent the frosting from becoming overly sweet.
- Substitution Tip: If soy is not an option, other plain, unsweetened non-dairy milks like almond or oat milk can work, though soy milk tends to yield the best creamy consistency for whipping. Ensure it’s not a “light” version.
-
Refined Coconut Oil: Essential for achieving the rich, stable whipped cream texture. The “refined” type is key as it has a neutral flavor, ensuring your frosting tastes of chocolate, not coconut. Melt it before blending.
- Why it works: Just like in our popular Heavy Whipping Cream Substitute, coconut oil provides the necessary fat and structure for the soy milk to emulsify and whip into a stable cream.
-
Powdered Sugar (Confectioners’ Sugar): This fine sugar dissolves seamlessly, creating a smooth frosting without any grainy texture.
- Pro Tip: Sifting powdered sugar is always recommended to avoid lumps.
-
Natural Unsweetened Cocoa Powder: The source of our rich chocolate flavor. Opt for natural unsweetened cocoa powder for a deep, true chocolate taste.
- Substitution Tip: Dutch-processed cocoa powder can also be used, which will result in a darker color and slightly mellower chocolate flavor.
-
Pure Vanilla Extract: A touch of vanilla enhances and rounds out the chocolate flavors beautifully.
- Quality Matters: Always prefer pure vanilla extract over imitation for the best taste.
-
Oreo Cookies: Chopped into small pieces or finely crushed, these add texture, flavor, and that unmistakable Oreo charm to your frosting.
- Creative Twist: For an even smoother frosting, you can blend the Oreos into a fine crumb before adding.
For the Irresistibly Moist Oreo Cake:
These two tender cake layers are infused with Oreo pieces, making them incredibly flavorful and moist.
-
Cake Flour: The secret to an extra tender and light cake crumb. Its lower protein content results in a softer texture.
- Substitution Tip: No cake flour? No problem! You can easily make your own by combining 2.5 cups of all-purpose flour with 2 tablespoons of cornstarch (or arrowroot powder), then sifting them together. For a gluten-free option, a good quality gluten-free all-purpose baking mix (that includes xanthan gum) will also work well.
-
Baking Powder: Our primary leavening agent, ensuring the cake rises beautifully and achieves a light, airy texture.
- Freshness Check: Always ensure your baking powder is fresh for optimal results.
- Salt: A pinch of salt is vital for balancing the sweetness and enhancing all the other flavors in the cake.
- Granulated Sugar: Provides sweetness and contributes to the cake’s moistness and tender crumb.
-
Canola Oil: A neutral-flavored oil that keeps the cake incredibly moist without imparting any unwanted taste.
- Substitution Tip: Any other neutral-flavored oil, such as vegetable oil, sunflower oil, or even a light olive oil (not extra virgin), will work perfectly.
-
Unsweetened Soy Milk: Adds moisture and richness to the cake batter.
- Substitution Tip: Feel free to use any other unsweetened non-dairy milk you prefer, such as almond, oat, or cashew milk.
-
Apple Cider Vinegar: This acidic ingredient reacts with the baking powder to create additional lift and a light texture in the cake.
- Substitution Tip: Lemon juice or white vinegar can be used interchangeably without affecting the outcome.
- Pure Vanilla Extract: Enhances the overall flavor profile of the cake.
-
Oreo Cookies: Roughly chopped into small pieces. These are folded into the cake batter, creating delightful pockets of cookie goodness throughout each slice.
- Preparation: For best results, avoid crushing them too finely; you want distinct pieces.
Baking Your Beautiful Vegan Oreo Cake: A Step-by-Step Guide
Creating this stunning layered cake is a rewarding process. Follow these detailed steps to ensure your Vegan Oreo Cake turns out perfectly moist, flavorful, and beautifully frosted. You’ll find the complete recipe with exact measurements in the recipe card below.
Step 1: The Crucial Overnight Frosting Preparation
For the best chocolate whipped cream frosting, planning is key! This step needs to be done the night before you plan to assemble your cake. If you’re opting for a different frosting, you can skip this initial preparation.
- Gently warm the unsweetened soy milk in the microwave for about 1 to 2 minutes. It should be warm to the touch, but not boiling. If your soy milk is straight from a cold fridge, it might need an extra minute.
- Carefully pour the warm soy milk and the melted refined coconut oil into a blender. Blend on high speed until the mixture is completely emulsified and smooth. This typically takes about 1 minute in a high-powered blender, ensuring no oil streaks remain.
- Transfer this milky, oily mixture into a clean bowl. Cover it tightly with plastic wrap and refrigerate overnight (or for at least 8 hours). This chilling period is absolutely vital for the mixture to thicken and become ready for whipping.
Step 2: Crafting the Moist Oreo Cake Layers
The next day, once your frosting base is chilling happily, it’s time to bake the cake layers. This part is surprisingly simple, mostly done in one bowl.
- Preheat your oven to 350°F (175°C). Prepare two 9-inch round cake pans by greasing them thoroughly, then lining the bottoms with parchment paper circles. This ensures your cakes release easily without sticking.
- In a large mixing bowl, whisk together all the dry ingredients for the cake: cake flour, baking powder, salt, and granulated sugar. Make sure they are well combined.
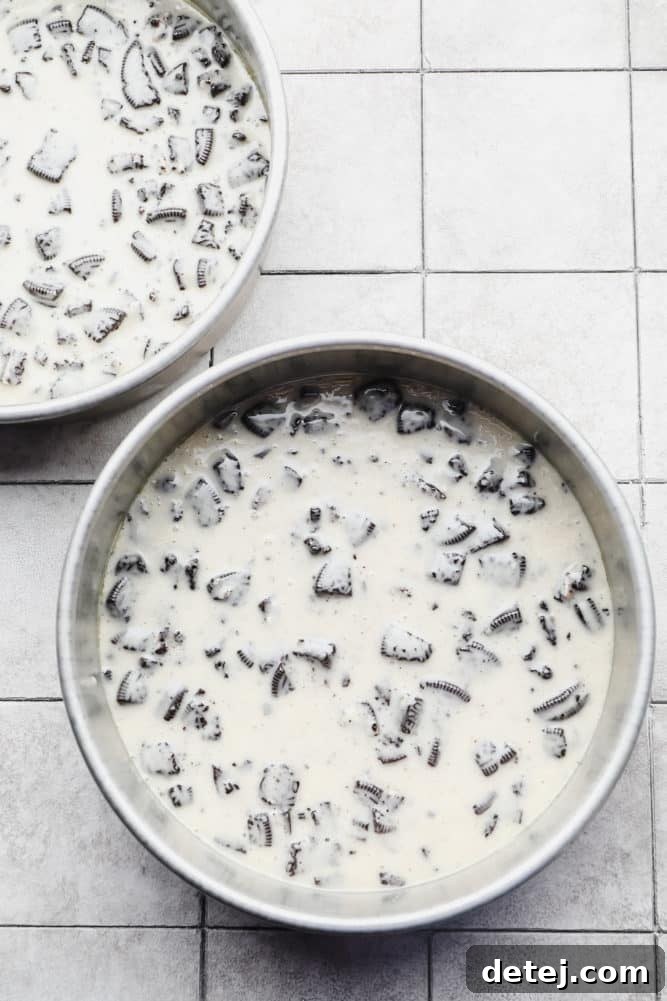
- Now, pour in the wet ingredients: canola oil, unsweetened soy milk, apple cider vinegar, and pure vanilla extract. Using a large spoon or spatula, mix gently until just combined. Be careful not to overmix the batter, as this can lead to a dense, tough cake. Stop mixing as soon as you no longer see dry streaks of flour.
- Finally, gently fold in the chopped Oreo pieces. You want them distributed throughout the batter without crushing them too much.
- Divide the cake batter evenly between your two prepared cake pans. Spread it smoothly with a spatula.
- Bake for 30-35 minutes, or until a toothpick inserted into the center of a cake comes out clean or with only a few moist crumbs attached.
- Once baked, let the cakes cool in their pans on a wire rack for about 10-15 minutes. This allows them to firm up slightly.
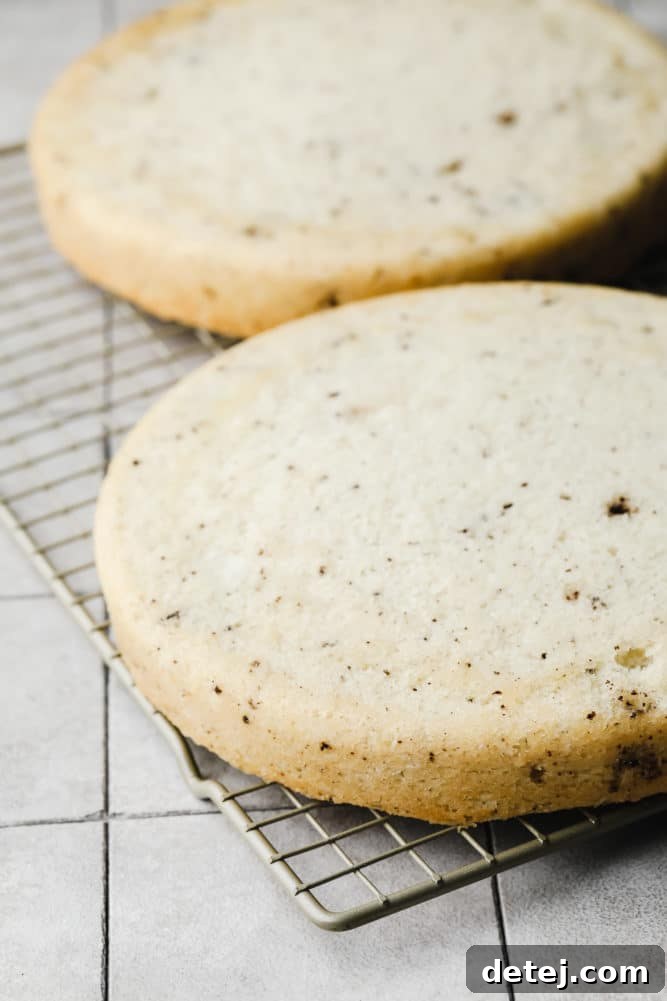
- After this initial cooling, carefully invert the cakes onto the wire rack, remove the parchment paper, and allow them to cool completely. This is critical—do not attempt to frost even slightly warm cakes, or your frosting will melt and slide off!
Step 3: Whipping Up the Dreamy Chocolate Frosting
Once your cake layers are completely cool (and we mean *completely*!), it’s time to transform your chilled soy milk and coconut oil mixture into a fluffy, decadent whipped cream frosting.
- Retrieve the chilled soy milk and coconut oil mixture from the refrigerator. It should be thick and somewhat solid. Transfer it to the bowl of a stand mixer fitted with a whisk attachment (or use a large bowl with an electric hand mixer).
- Add the powdered sugar, sift in the cocoa powder (to prevent lumps), and add the vanilla extract to the bowl.
- Begin beating on low speed to incorporate the ingredients without a cloud of powdered sugar. Gradually increase the speed to high.
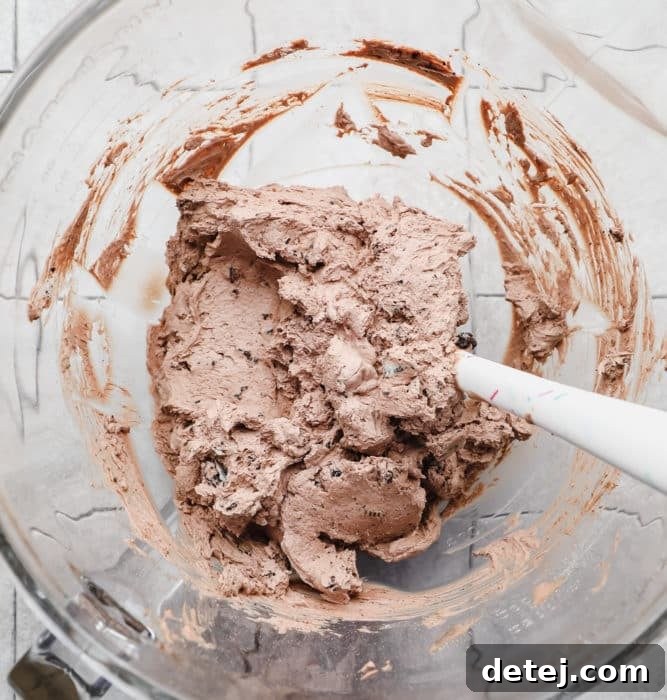
- Continue to beat the mixture. This is where patience pays off! It usually takes anywhere from 3 to 10 minutes for the cream to thicken. Keep a close eye on it; with a powerful stand mixer, it can sometimes thicken in as little as 3 minutes.
- Beat until the frosting is thick, creamy, and wonderfully fluffy, resembling traditional whipped cream. As soon as it reaches this consistency, stop mixing immediately. Overmixing can cause it to become too thick, grainy, or even separate.
- Scrape down the sides of the bowl as needed to ensure all ingredients are evenly incorporated. Finally, gently fold in your chopped Oreo pieces or crumbs.
Step 4: Frost, Decorate, and Serve!
The moment has arrived! With perfectly baked and cooled cake layers and a luscious frosting ready, all that’s left is to assemble your magnificent Vegan Oreo Cake.
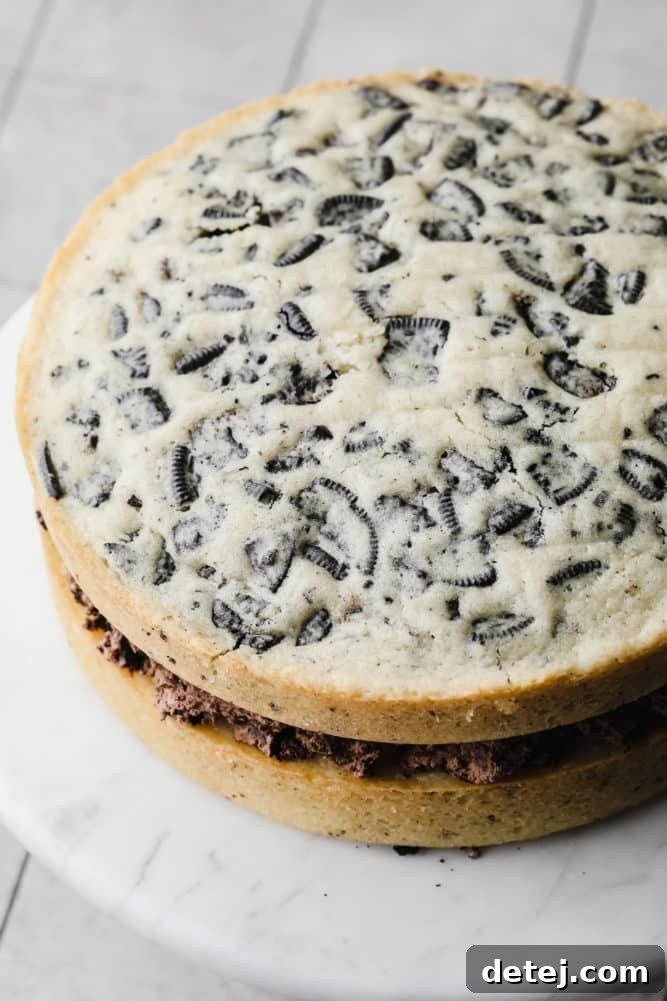
- Place one cooled cake layer on your serving plate or cake stand. Spread a generous amount of the chocolate whipped cream frosting evenly over the top. I particularly love putting a super thick layer of this frosting in the middle for an extra indulgent experience!
- Carefully place the second cake layer on top, aligning it.
- Now, you can choose how to finish the cake. You can use the remaining chocolate whipped cream frosting to cover the entire cake with a thinner layer, or, as I often do for a beautiful contrast and stability, use a batch of Vegan Buttercream Frosting for the outside.
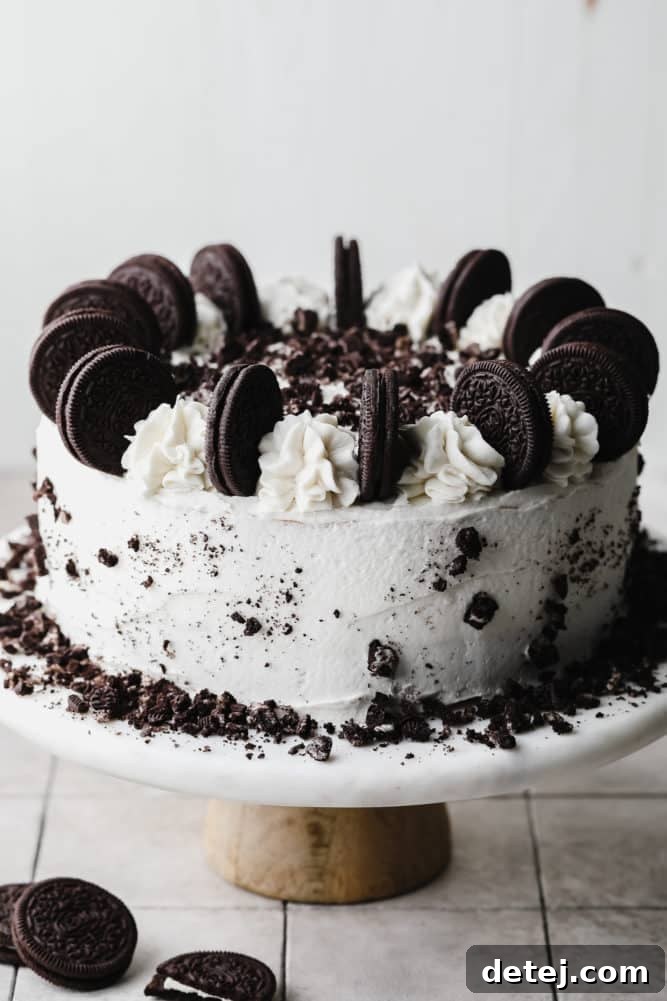
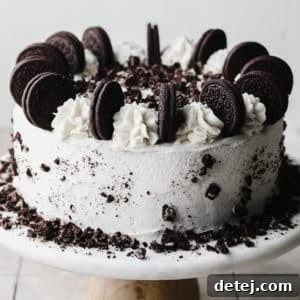
- Decorate the top of your cake with additional piped frosting, whole Oreo cookies, or extra crushed Oreo crumbs for a truly stunning finish. Let your creativity shine!
- Slice, serve, and enjoy the blissful taste of your homemade Vegan Oreo Cake! Remember, this cake must be stored in the refrigerator due to the whipped cream frosting. It also freezes exceptionally well, allowing you to enjoy slices later.
Beyond Chocolate: Exploring Other Vegan Frosting Choices
While the chocolate whipped cream frosting is a star, this versatile Vegan Oreo Cake can be paired with a variety of other delicious vegan frostings. Depending on your preference or what you have on hand, any of these options would make a fantastic alternative or complement:
- Vegan Cream Cheese Frosting: For a tangy, rich, and slightly less sweet option that still complements the chocolate and cookie flavors.
- Vegan Chocolate Frosting: A classic choice if you want to double down on rich, creamy chocolate flavor without the whipped texture.
- Vegan Swiss Meringue Buttercream: For an incredibly light, silky, and stable frosting that’s perfect for intricate piping and a more refined texture.
No matter which frosting you choose, I highly recommend folding in some chopped small Oreo pieces or fine Oreo cookie crumbs. This simple addition ensures that signature Oreo flavor and texture is present throughout your entire cake, tying everything together beautifully.
Frequently Asked Questions About Vegan Oreo Cake
Here are answers to some common questions you might have when baking this delightful Vegan Oreo Cake:
Absolutely! This Oreo Cake can be easily adapted to be both vegan and gluten-free. Simply ensure you use certified gluten-free Oreos (yes, they exist!) and substitute the regular cake flour with a high-quality gluten-free all-purpose flour blend. Look for a blend that includes xanthan gum for the best texture and structure in your cake layers.
When stored properly in an airtight container in the refrigerator, your Vegan Oreo Cake will remain fresh and delicious for approximately 3 to 4 days. The whipped cream frosting requires refrigeration, so don’t leave it out at room temperature for extended periods.
Yes, this cake freezes exceptionally well! To freeze, ensure the cake is fully cooled and the frosting is set. You can freeze the whole cake, wrapped tightly in plastic wrap and then aluminum foil, or freeze individual slices for convenient grab-and-go treats. Place it in a freezer-safe food storage container, and it will stay perfectly fresh for up to 3 months. When ready to enjoy, simply thaw in the refrigerator overnight or at room temperature for a few hours.
The most common reason for a whipped cream frosting not thickening is insufficient chilling time for the soy milk and coconut oil mixture, or not enough whipping time. Ensure your base mixture was refrigerated for at least 8 hours (preferably overnight) until it’s very cold and firm. Also, continue to beat on high speed; it can sometimes take up to 10 minutes, but it will eventually thicken. Avoid over-mixing once it has reached a fluffy, whipped consistency.
This recipe is designed for two 9-inch round cake pans. If you use smaller pans (e.g., 8-inch), you might need to adjust the baking time slightly longer, and your cakes will be taller. For larger pans (e.g., 10-inch), the baking time might be shorter, and the cakes will be thinner. Always keep an eye on doneness by using the toothpick test.
Explore More Delectable Vegan Cakes
If you’ve fallen in love with the magic of vegan baking and are eager to try more impressive plant-based desserts, look no further! Here are some other fantastic vegan cake recipes that are sure to impress and satisfy:
- Decadent Chocolate Vegan Bundt Cake
- Light & Fresh Vegan Strawberry Cake
- Creamy Vegan Tres Leches Cake
- Classic Vegan Yellow Cake
- Zesty Vegan Lemon Cake
- Rich Vegan Peanut Butter Cake
Vegan Oreo Cake
Vegan Oreo Cake is a layered masterpiece that’s as delicious as it is stunning! Two homemade Oreo cakes are layered with the BEST chocolate whipped cream frosting.
Prep Time: 30 mins
Cook Time: 35 mins
Total Time: 1 hr 5 mins
Servings: 16 slices
Pin Recipe
Leave a Comment
Ingredients
Chocolate Whipped Cream Layer (see Notes for more options)
- 1 cup unsweetened soy milk
- 1 cup refined coconut oil, melted
- 1/2 cup powdered sugar
- 3 tablespoons natural cocoa powder
- 1/2 teaspoon pure vanilla extract
- 15 Oreo cookies, chopped small or into crumbles
Oreo Cake
- 2 1/2 cups cake flour
- 1 tablespoon baking powder
- 1/2 teaspoon salt
- 1 1/2 cups granulated sugar
- 3/4 cup canola oil or other neutral oil
- 1 1/2 cups unsweetened soy milk
- 2 teaspoons apple cider vinegar
- 2 teaspoons pure vanilla extract
- 15 Oreo cookies, chopped into small pieces
Instructions
- Important Note: You must prepare the whipped cream frosting base the night before you plan to assemble the cake, so plan accordingly! If you prefer not to wait, you can use a different frosting such as Vegan Buttercream Frosting or Vegan Chocolate Frosting instead.
-
Prepare the heavy whipping cream substitution the night before
- Pour the unsweetened soy milk into a microwave-safe bowl. Microwave for about 1 minute until warm; if it’s very cold to start, it might need an extra minute.
- Combine the warm soy milk and the melted refined coconut oil in a blender. Blend on high speed for approximately 1 minute, until completely emulsified and smooth.
- Transfer the mixture to a clean bowl, cover tightly, and refrigerate overnight (or for at least 8 hours) until firm and thoroughly chilled.
-
Make the cake layers
- Preheat your oven to 350 degrees F (175°C). Grease two 9-inch cake pans and line the bottoms with parchment paper circles to prevent sticking.
- In a large mixing bowl, whisk together the cake flour, baking powder, salt, and granulated sugar until well combined.
- Pour in the canola oil, unsweetened soy milk, apple cider vinegar, and pure vanilla extract. Mix with a large spoon or spatula until just combined. Be careful not to overmix, as this can result in a dense cake.
- Gently fold in the chopped Oreo pieces.
- Divide the cake batter evenly between the two prepared pans and bake for 30-35 minutes, or until a toothpick inserted into the center comes out clean.
- Allow the cakes to cool in their pans for 10-15 minutes, then carefully invert them onto a wire rack to cool completely before frosting. This step is crucial!
-
Make the chocolate whipped cream frosting
- Once the cake layers are completely cool and the cream base has chilled overnight, transfer the chilled mixture to the bowl of a stand mixer fitted with a whisk attachment (or use an electric hand mixer).
- Add the powdered sugar, sift in the cocoa powder (to avoid lumps), and add the pure vanilla extract.
- Begin beating the ingredients on low speed, then gradually increase to high. It will take 3-10 minutes for the cream to thicken. With a stand mixer on high speed, it often takes around 3 minutes.
- Beat until the frosting is thick, creamy, and light, resembling real whipped cream. Stop mixing immediately once this consistency is reached to prevent over-mixing, which can cause it to separate. Scrape down the sides of the bowl as needed.
- Gently fold in the chopped Oreo pieces or crumbs.
-
Frost, decorate, and serve
- Once the cakes have cooled completely (this is paramount to prevent the frosting from melting), generously frost the cake. I prefer to create a thick layer of chocolate whipped cream frosting between the cake layers for maximum indulgence.
- For the outside of the cake, you can use the remaining chocolate whipped cream for a thinner coat, or use a batch of Vegan Buttercream Frosting to decorate, as I often do.
- Decorate the top with extra piped frosting and whole or crushed Oreo cookies, if desired, for a beautiful presentation. Enjoy your cake!
- This cake must be stored in the refrigerator due to the whipped cream frosting. It also freezes very well.
Notes
- I absolutely adore the chocolate whipped cream frosting for this cake, but you have many fantastic alternatives! You can easily use my Vegan Buttercream Frosting, Vegan Chocolate Frosting, Vegan Cream Cheese Frosting, or Vegan Swiss Meringue Buttercream. Whichever you choose, simply fold in some chopped small Oreos for that iconic flavor and texture. You can also use a blender to blend the cookies into fine crumbs if you prefer a smoother frosting with integrated cookie flavor. I often use a thick layer of chocolate whipped cream between the cake layers and then decorate the outside with a contrasting vegan buttercream.
- For a gluten-free version of this cake, ensure you use certified gluten-free Oreos and substitute the cake flour with a reliable gluten-free all-purpose flour blend.
Nutrition
Serving: 1 of 16 servings
Calories: 485 kcal
Carbohydrates: 54 g
Protein: 5 g
Fat: 29 g
Saturated Fat: 13 g
Polyunsaturated Fat: 5 g
Monounsaturated Fat: 10 g
Trans Fat: 0.1 g
Sodium: 176 mg
Potassium: 210 mg
Fiber: 2 g
Sugar: 32 g
Vitamin A: 79 IU
Calcium: 89 mg
Iron: 3 mg
Course: Dessert
Cuisine: American
Author: Nora Taylor