
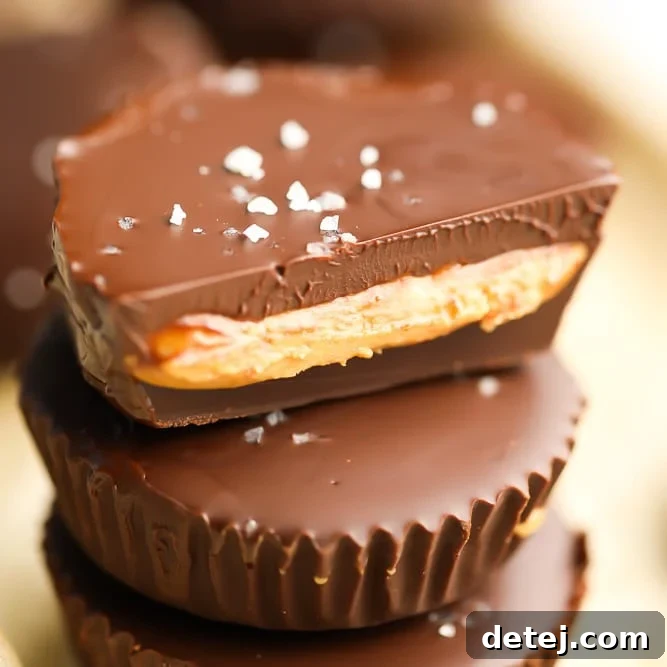
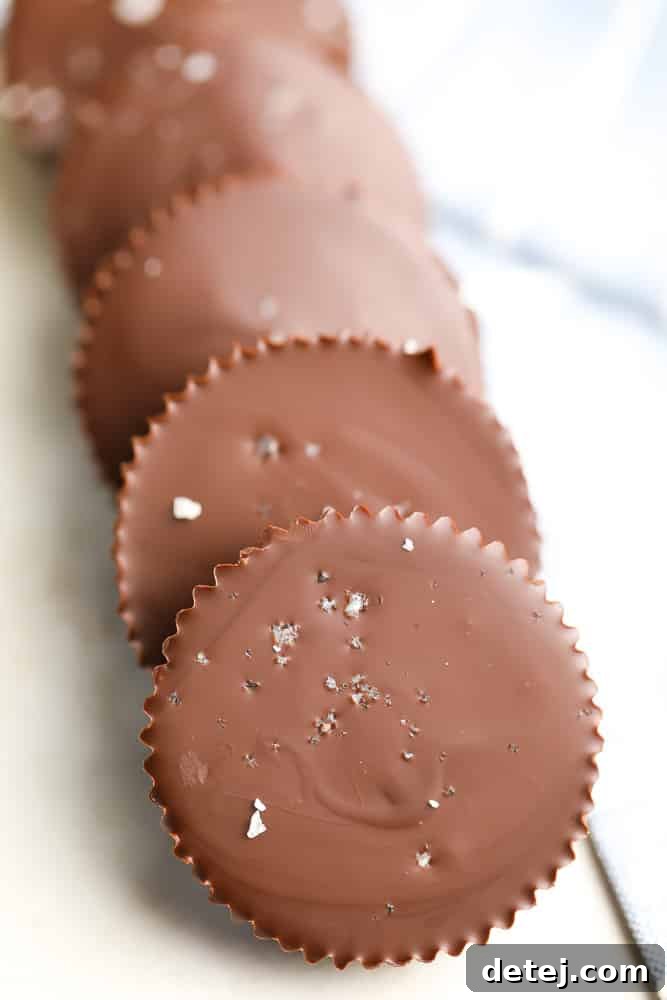
Discover how to make the ultimate Vegan Peanut Butter Cups at home with just 4 simple ingredients. This dairy-free twist on everyone’s favorite classic candy is not only incredibly easy but also tastes better than the original!
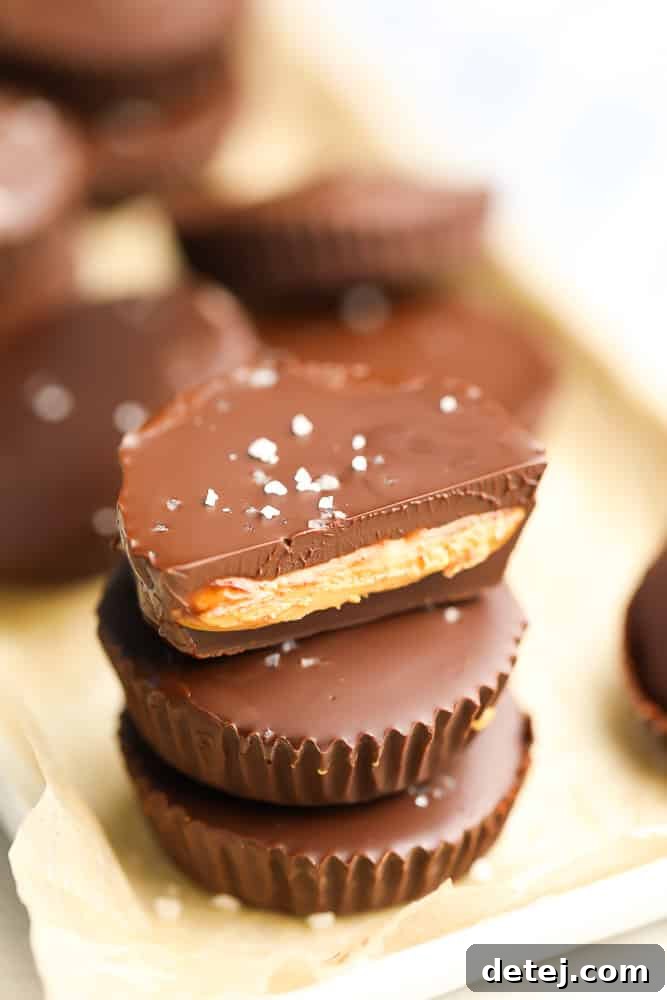
The Irresistible Allure of Homemade Vegan Peanut Butter Cups
For many, peanut butter cups hold a special place in their hearts, evoking fond memories of childhood Halloween hauls and festive Easter baskets. Their delightful combination of rich chocolate and creamy peanut butter is truly iconic. However, embarking on a vegan or dairy-free lifestyle often means saying goodbye to these beloved treats, as most commercial varieties contain milk products.
The good news? You don’t have to miss out! This recipe for homemade vegan peanut butter cups is not just a substitute; it’s an upgrade. Imagine biting into a perfectly crafted cup, where you control every ingredient, ensuring both quality and an unparalleled taste experience. These aren’t just good for vegan candy; they are simply phenomenal. They offer that perfect balance of salty-sweet, smooth-crunchy (if you add salt), and intensely satisfying flavors that will make you forget about store-bought versions entirely.
Why Choose Homemade and Vegan?
Opting for homemade vegan peanut butter cups brings a host of benefits beyond just catering to dietary restrictions. While some natural grocery stores might offer a few vegan alternatives, they often come with a hefty price tag and can be challenging to locate consistently. Making your own empowers you to enjoy this classic treat on demand, without breaking the bank or compromising on ingredients.
Uncompromised Quality and Flavor
- Ingredient Control: When you make candy at home, you know exactly what goes into it. No obscure additives, artificial flavors, or unnecessary preservatives. You pick the best quality chocolate and peanut butter you can find.
- Superior Taste: Believe it or not, many find homemade vegan peanut butter cups to be even more delicious than their dairy counterparts. The freshness of the ingredients and the lack of dairy often allow the pure flavors of chocolate and peanut butter to shine through more vibrantly.
- Customization: Love extra peanut butter filling? Want to add a sprinkle of sea salt? Crave a specific type of chocolate? Homemade allows for endless customization to suit your personal preferences.
Accessibility and Affordability
- Pantry Staples: Our recipe calls for only four basic ingredients that you likely already have in your pantry, making it an incredibly accessible dessert to whip up anytime.
- Cost-Effective: Buying premium vegan chocolates can be expensive. However, many common chocolate chip brands are “accidentally vegan” and more affordable, making these homemade treats much more budget-friendly than specialty store-bought options.
- No Special Equipment: You don’t need fancy candy molds or specialized tools. A standard muffin tin and paper liners are all that’s required.
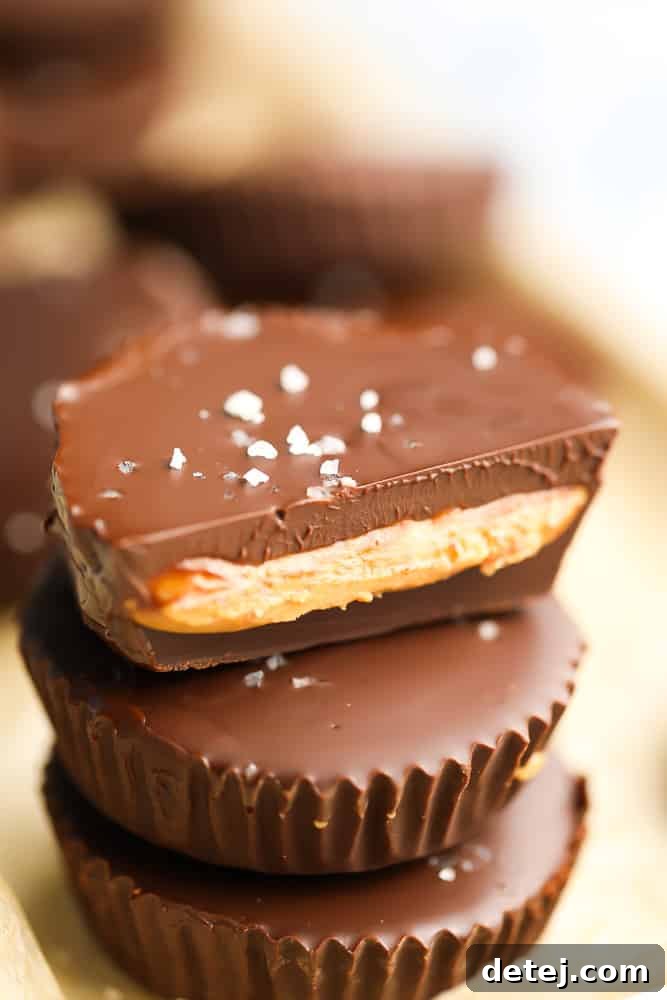
Essential Ingredients for Perfect Vegan Peanut Butter Cups (with Smart Substitutions)
Crafting these delectable vegan peanut butter cups requires careful selection of just a few key components. Understanding the role each ingredient plays and knowing your substitution options will ensure your homemade candies turn out perfectly every time.
- Non-Dairy Chocolate Chips: This is the star of your chocolate shell! You don’t necessarily need to hunt for explicitly “vegan-labeled” chocolate chips, which can sometimes be pricier. Many conventional brands are “accidentally vegan,” meaning they don’t contain any dairy ingredients. Always check the ingredient list for common dairy components like milkfat, butter oil, or “contains milk” warnings. Brands like Guittard, Trader Joe’s semi-sweet, and sometimes even Kirkland (Costco’s brand) often offer dairy-free options. Keep in mind that product formulas can change, so a quick label check is always a good idea. If you can’t find suitable chips, high-quality vegan chocolate bars, finely chopped, work just as well for melting.
- Refined Coconut Oil: The secret to a super smooth, glossy, and easy-to-work-with chocolate layer. Refined coconut oil has a neutral flavor, meaning your chocolate won’t taste like coconut. If you enjoy the subtle hint of coconut, unrefined (virgin) coconut oil is a suitable alternative. This ingredient is optional for the chocolate shell, but it significantly improves the texture, making the chocolate easier to pour and giving the cups a delightful melt-in-your-mouth quality. If you prefer a more shelf-stable candy that doesn’t melt as quickly at room temperature, you can omit the coconut oil or substitute it with melted vegan butter, though the texture might be slightly different.
- Creamy Peanut Butter: For the filling, consistency is key! I strongly recommend using regular creamy peanut butter, not the natural, oil-separated kind. Natural peanut butter can be quite inconsistent – either too runny and oily or overly thick and difficult to mix, which can make your filling challenging to manage and prone to crumbling. If natural peanut butter is your only option, ensure it’s well-stirred to achieve the smoothest possible texture, but be prepared for a potentially slightly different outcome. The classic creamy varieties provide the perfect dense yet smooth filling that holds its shape beautifully.
- Powdered Sugar (Confectioners’ Sugar): This fine sugar is crucial for achieving the smooth, cohesive texture of the peanut butter filling. It blends seamlessly with the peanut butter without creating a grainy consistency, which granulated sugar might. I haven’t experimented with other sweeteners for the filling, but if you’re looking for an alternative, maple syrup might work, though it could alter the texture and sweetness balance, potentially requiring adjustments to the peanut butter ratio to maintain firmness.
- Optional – Coarse Sea Salt: A sprinkle of coarse sea salt on top of your finished peanut butter cups is highly recommended! The flakes of salt provide a fantastic textural contrast and enhance the chocolate and peanut butter flavors, elevating the entire candy experience from simply sweet to a sophisticated salty-sweet delight.
Crafting Your Own Vegan Peanut Butter Cups: A Step-by-Step Guide
Making these delightful vegan peanut butter cups is surprisingly straightforward. Follow these steps for perfect results every time.
- Prepare Your Muffin Tin: Begin by lining a standard 12-cup muffin tin with paper liners. These liners will make it easy to remove your finished peanut butter cups and serve them individually.
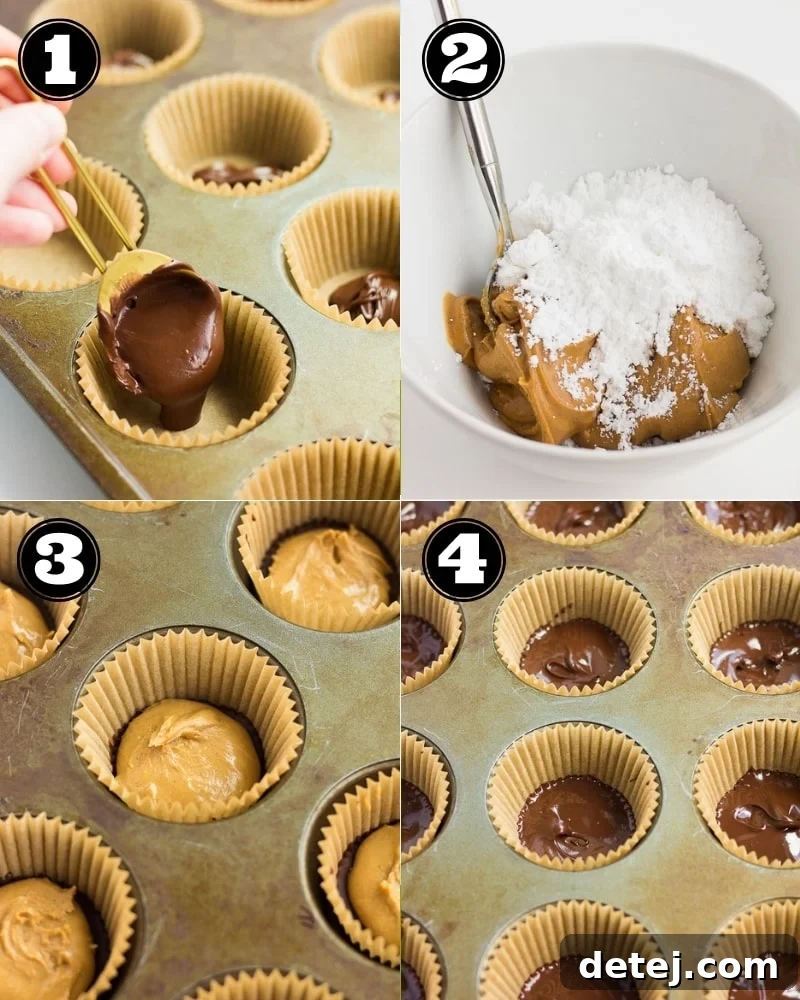
- First Chocolate Layer: In a microwave-safe bowl, combine 1 cup of the non-dairy chocolate chips with 1 tablespoon of refined coconut oil. Microwave in 30-second intervals, stirring well after each, until the chocolate is completely melted and smooth. Alternatively, you can use the double boiler method for a more controlled melt, placing a heatproof bowl over a pot of simmering water. Scoop about half a tablespoon of this melted chocolate mixture into the bottom of each paper liner. Use a small spoon to gently spread the chocolate evenly across the bottom and slightly up the sides, creating a shallow cup. For stability, use your fingers to hold the paper liner in place while spreading. Transfer the muffin tin to the freezer for 10 minutes to allow the chocolate to harden completely. This quick chill ensures a firm base for your peanut butter filling.
- Prepare the Peanut Butter Filling: While your chocolate bases are chilling, combine the creamy peanut butter and powdered sugar in a medium-sized bowl. Mix thoroughly with a spoon or fork until the mixture comes together to form a thick, dough-like consistency. It should be firm enough to handle and press into shape. If your peanut butter is unsalted, add a tiny pinch of salt to the mixture at this stage to enhance the flavor. Taste and adjust sweetness if desired, adding a little more powdered sugar for a sweeter filling.
- Add the Peanut Butter Layer: Remove the muffin tin from the freezer. Your chocolate bases should now be firm. Take about a tablespoon of the peanut butter mixture and press it gently onto the center of each hardened chocolate base. You can use your fingers to flatten it slightly, but it doesn’t need to be perfectly flat or reach the edges – leave a small border for the final chocolate layer. Return the pan to the freezer for another 10 minutes to firm up the peanut butter layer.
- Final Chocolate Layer & Finishing Touches: Melt the remaining 1 cup of chocolate chips and 1 tablespoon of coconut oil using the same method as before (microwave or double boiler). Once smooth, remove the muffin tin from the freezer. The chilled peanut butter will help the chocolate set quickly. Carefully spoon about half a tablespoon of the melted chocolate over the peanut butter layer in each cup, gently spreading it to cover the peanut butter completely and meet the edges of the bottom chocolate layer. If using, immediately sprinkle a pinch of coarse sea salt on top of each cup before the chocolate fully sets. Place the finished cups back into the freezer for a final 10-15 minutes to allow all layers to firm up completely.
Tips for Success and Troubleshooting
Even with a simple recipe, a few insider tips can elevate your homemade vegan peanut butter cups from good to absolutely perfect. Here’s how to ensure the best possible results:
- Melting Chocolate Wisely: When melting chocolate, whether in the microwave or a double boiler, always do so gently. Overheating chocolate can cause it to seize or become grainy. If using a microwave, stir frequently. If using a double boiler, ensure the bottom of your bowl doesn’t touch the simmering water, and avoid getting any water or steam into the chocolate, as this can also cause seizing.
- Achieving Smooth Layers: For the cleanest layers, ensure each component is adequately chilled before adding the next. The quick freezer stints are essential for firming up the chocolate and peanut butter, preventing them from mixing together and creating distinct, beautiful layers.
- Peanut Butter Consistency is Key: As mentioned, regular creamy peanut butter works best for a smooth, uniform filling. If you only have natural peanut butter, try mixing it thoroughly, then chilling it slightly to help it firm up before combining with powdered sugar. If your filling is too crumbly, add a tiny bit more peanut butter. If too sticky, add a touch more powdered sugar.
- Even Spreading: For the initial chocolate layer and the final top layer, a small spoon or even a pastry brush can help you spread the chocolate evenly. Don’t worry about perfection; homemade always has a charming, rustic look!
- Adding a Pinch of Salt: Don’t skip the coarse sea salt! It’s a game-changer that cuts through the sweetness and enhances the overall flavor profile. Sprinkle it while the top chocolate layer is still wet to ensure it adheres.
- Miniature Versions: For bite-sized treats or party favors, use a mini muffin tin with mini paper liners. Adjust the amount of chocolate and peanut butter per cup accordingly – about half the amount for each layer.
Storing Your Vegan Peanut Butter Cups
Proper storage is crucial for maintaining the texture and freshness of your homemade vegan peanut butter cups. Due to the presence of coconut oil in the chocolate, these delightful treats will melt relatively quickly at room temperature. For optimal enjoyment and to prevent them from becoming too soft, it’s best to store them in a cool environment.
- Refrigeration: Keep your peanut butter cups in an airtight container in the refrigerator for up to 1-2 weeks. This will keep the chocolate firm and the peanut butter filling perfectly set.
- Freezing: For longer-term storage, the freezer is your best friend. Stored in a freezer-safe, airtight container, these cups can last for up to 2-3 months. They are actually quite delicious eaten straight from the freezer for an extra firm, fudgy treat!
- Shelf Stability Considerations: If you’re looking to make peanut butter cups that are more stable at room temperature – perhaps for gifting or packing in a lunchbox – you have a couple of options. You can either completely omit the coconut oil from the chocolate layers, or you can substitute it with melted vegan butter. Omitting the coconut oil will result in a firmer, less ‘melty’ chocolate, though it might be slightly less smooth to work with. Using vegan butter offers a good compromise, providing a smoother chocolate while still enhancing stability compared to coconut oil. However, I personally love the melt-in-your-mouth quality that coconut oil provides, so I always use it when making them for home consumption.
Variations and Customizations for Your Vegan Peanut Butter Cups
Once you’ve mastered the basic recipe, the possibilities for customizing your vegan peanut butter cups are endless! Feel free to experiment and make them truly your own:
- Different Nut Butters: While peanut butter is classic, you can easily swap it for almond butter, cashew butter, or even sunflower seed butter (for a nut-free option). Ensure the consistency of your chosen nut butter is creamy and not overly oily or thick.
- Alternative Sweeteners: While powdered sugar is recommended for its texture, you could try substituting with a small amount of maple syrup or agave nectar in the peanut butter filling. Be aware that liquid sweeteners will change the consistency, so you might need to adjust the amount of peanut butter or add a little extra powdered sugar to achieve the desired firmness.
- Dark vs. Milk Chocolate: Experiment with different types of vegan chocolate. Use a darker chocolate for a more intense, slightly bitter contrast to the sweet peanut butter, or opt for a sweeter vegan “milk” chocolate for a classic flavor profile.
- Flavor Enhancers: Stir a tiny drop of pure vanilla extract into your peanut butter filling for an extra layer of warmth. A pinch of cinnamon or a dash of espresso powder can also add intriguing depth to the chocolate.
- Topping Ideas: Beyond sea salt, consider adding other toppings to the wet chocolate layer. Chopped nuts (peanuts, almonds), shredded coconut, a sprinkle of chili flakes for a spicy kick, or even edible glitter for a fancy touch can all elevate your cups.
Frequently Asked Questions About Vegan Peanut Butter Cups
Here are some common questions you might have when making your own vegan peanut butter cups:
- Can I use natural peanut butter? While it might work, it’s not recommended for the best results. Natural peanut butter can be too runny or too thick and separated, making the filling inconsistent and difficult to form. For a smooth, classic filling, stick to regular creamy peanut butter.
- Are all chocolate chips vegan? No, many contain dairy. Always check the ingredient list for milkfat, butter oil, milk powder, or “contains milk” statements. However, many dark or semi-sweet chocolate chips from common brands are accidentally vegan.
- What if my chocolate seizes? If your melted chocolate becomes thick and grainy, it likely seized due to overheating or contact with moisture. You might be able to salvage it by stirring in a teaspoon of refined coconut oil or a neutral oil until it smooths out, but sometimes it’s best to start over.
- My peanut butter filling is too sticky/crumbly. How do I fix it? If it’s too sticky, add a little more powdered sugar until it’s firm enough to handle. If it’s too crumbly, add a tiny bit more creamy peanut butter until it comes together.
- How long do they last? When stored in an airtight container in the refrigerator, they last about 1-2 weeks. In the freezer, they can last up to 2-3 months.
Vegan Peanut Butter Cups
Easy to make, with only 4 ingredients that you probably have in your pantry right now! Everyone’s favorite candy, made vegan.
Total Time: 30 mins
Servings: 12 servings
Ingredients
- 2 cups (12 oz) vegan chocolate chips, divided
- 2 tablespoons refined coconut oil, divided
- 1/2 cup creamy peanut butter *not the natural kind if you can help it.
- 4 tablespoons powdered sugar
- Coarse sea salt, optional for sprinkling on top
Instructions
- Line a 12-cup standard size muffin tin with paper liners.
- Place half of the chocolate chips (1 cup) and half of the coconut oil (1 tablespoon) in a microwave-safe bowl. Microwave for 1 minute, stir, then another minute and stir until melted and smooth. If you do not have a microwave, you can use the double boiler method to melt.
- Scoop about half of a tablespoon melted chocolate, and place it in each liner. Use a small spoon to spread it around and up the sides just a little bit. Place the pan in the freezer for 10 minutes.
- While the chocolate hardens in the freezer, add the peanut butter and powdered sugar to a bowl and mix with a spoon or fork until well combined and a sort of dough is formed. Taste for sweetness, and add more sugar if desired. If using unsalted peanut butter, add a tiny pinch of salt.
- Remove the pan from the freezer. The chocolate should be quite firm and not melty anymore. Place a tablespoon of the peanut butter mixture on top of the chocolate in each cup, and press down a bit with your hands. It does not need to be flattened completely. Place the pan in the freezer for 10 minutes.
- Melt the other cup of chocolate chips and the last tablespoon of coconut oil, as you did before. Scoop 1/2 tablespoon on top of the peanut butter and spread immediately with a small spoon if needed and sprinkle with coarse sea salt, if desired. Because the peanut butter was in the freezer, the chocolate will harden quickly. Place in the freezer for 10 minutes to set.
- Storage: Store the peanut butter cups in the refrigerator or freezer, as they will melt rather quickly at room temperature because of the coconut oil. If you want them to be more shelf stable, substitute melted vegan butter for the coconut oil, or leave it out completely.
Notes
- Many brands of chocolate chips are vegan; simply check the ingredients list for milk fat, butter oil, or any other animal-based ingredients.
- Instead of chocolate chips, you can also use vegan chocolate bars, which may be easier to find depending on where you live.
- Calories estimate is for 1 peanut butter cup if you make 12.
- These can be made into mini peanut butter cups! Use a mini muffin pan and mini liners for smaller treats.
- I have found that when making candy, it’s best to use regular peanut butter, not the natural kind. Natural can be so runny or very thick, and is not as consistent. For the best filling, use regular creamy peanut butter.
Nutrition (Estimated)
Serving: 1 of 12 servings | Calories: 292 kcal | Carbohydrates: 29g | Protein: 5g | Fat: 21g | Saturated Fat: 11g | Sodium: 49mg | Potassium: 70mg | Fiber: 3g | Sugar: 22g | Calcium: 56mg | Iron: 3mg
Course: Dessert
Cuisine: American
Author: Nora Taylor
More Irresistible Vegan Peanut Butter and Chocolate Treats
If you’re a fan of the classic combination of peanut butter and chocolate, you’ll love exploring these other delicious vegan recipes:
- Vegan Chocolate Peanut Butter Bars
- Vegan Chocolate Peanut Butter Balls
- Vegan Peanut Butter Swirl Brownies
- Peanut Butter Chocolate Chip Cookies
This recipe was originally published in April 2019 and has been updated with enhanced details, improved photos, and refined instructions for an even better baking experience. The initial version did not include coconut oil, but after extensive testing, I’ve found that a small amount significantly improves the chocolate’s texture and overall appeal. My commitment is always to provide you with the best possible recipes, and I appreciate your continued support!