
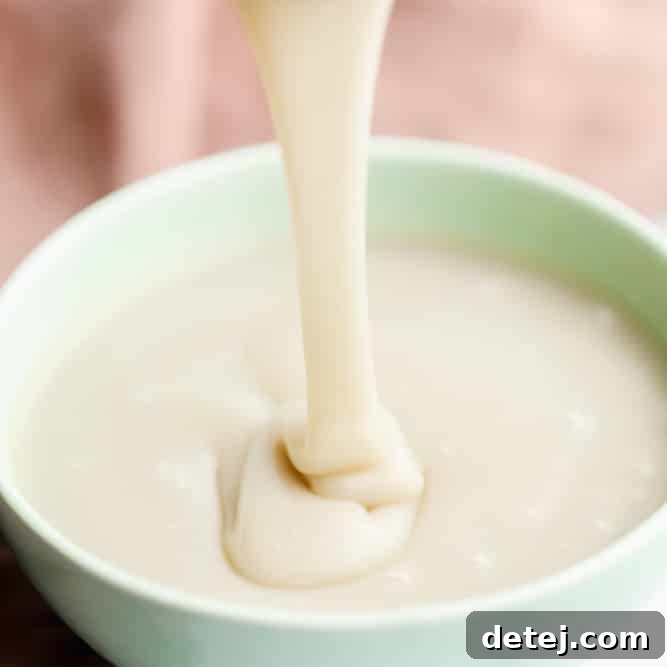
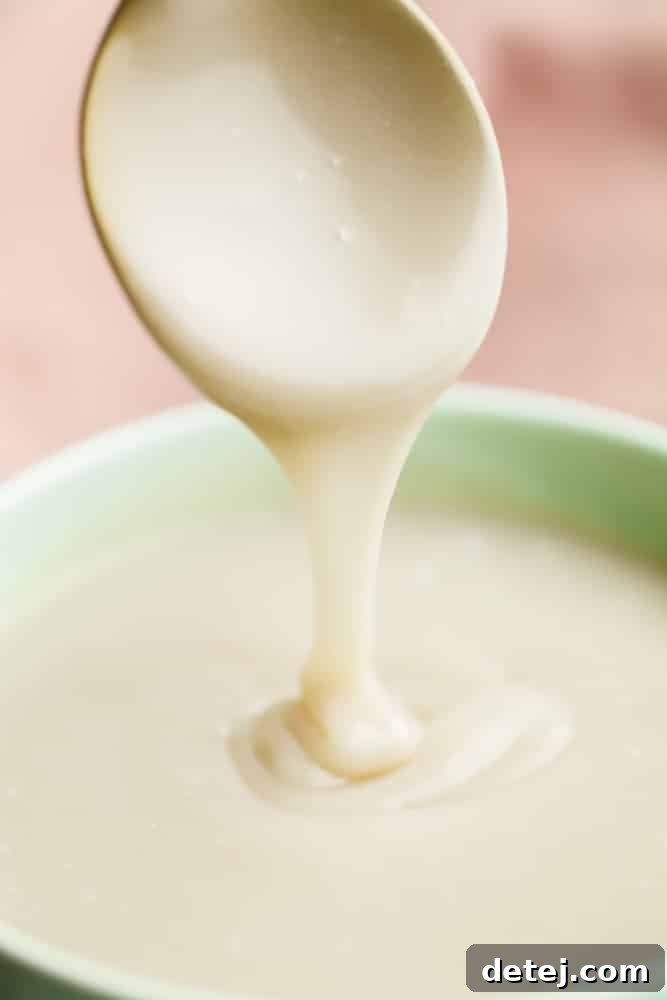
This homemade Vegan Condensed Milk is a dairy-free delight that perfectly replaces traditional condensed milk. Its sweet, creamy texture makes it ideal for drizzling over fresh fruit, enriching your favorite baked goods, or sweetening beverages. Experience the rich flavor and versatility without any dairy!
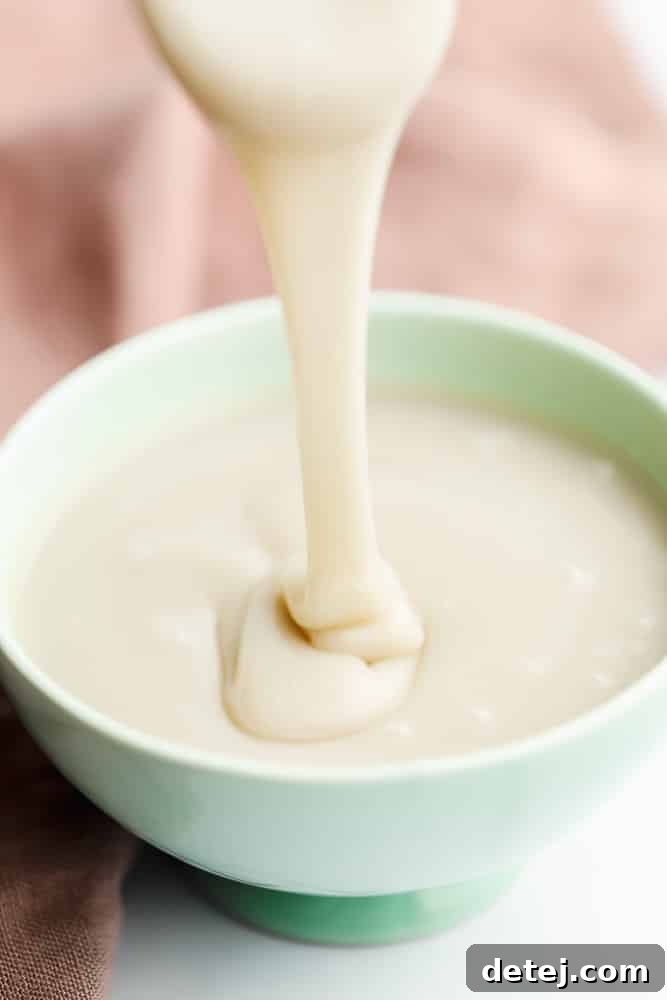
Homemade Vegan Condensed Milk: Your Ultimate Dairy-Free Sweetener
Growing up, cans of **sweetened condensed milk** were an indispensable baking ingredient in many kitchens. That uniquely sweet, syrupy richness had a magical way of transforming desserts, elevating classics like puddings, fudge, ice creams, and countless other baked goods to a whole new level of deliciousness. But for those following a plant-based diet or seeking dairy-free alternatives, finding a comparable substitute has often been a challenge.
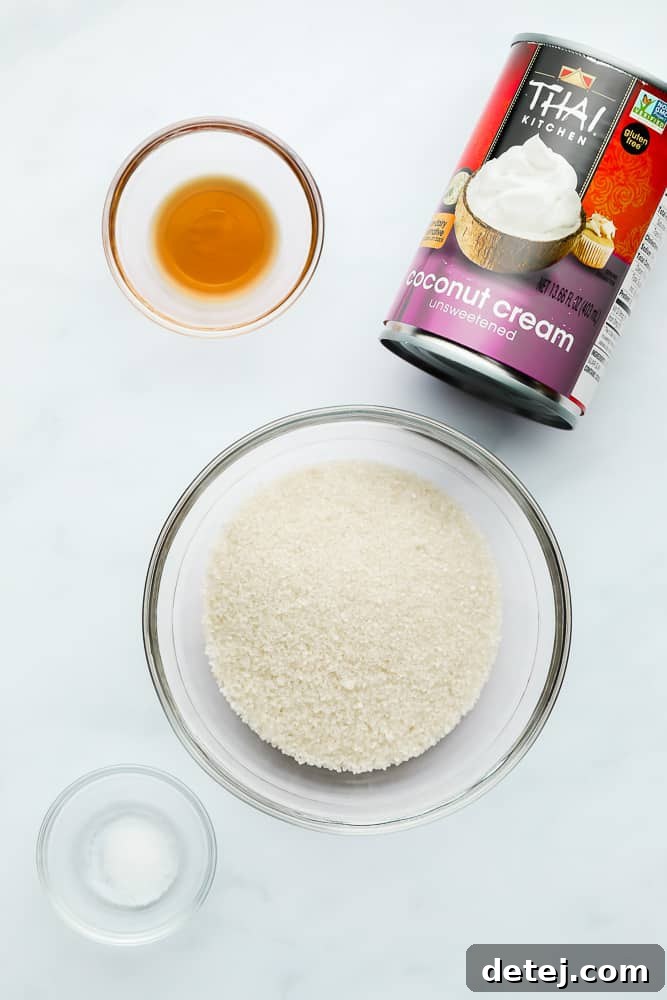
Fear not, sweet tooths! You can easily recreate those delightful, nostalgic flavors and textures with this incredibly simple and versatile **Vegan Condensed Milk recipe**. Say goodbye to store-bought dairy versions and embrace the ease of making your own plant-based perfection. This hassle-free recipe requires just **4 simple ingredients**, readily available at most grocery stores:
- Coconut cream
- Granulated sugar
- Pure vanilla extract
- A pinch of salt
The process is as straightforward as it gets: simply whisk all the ingredients together in a single pot on your stove, allow it to simmer gently, and within minutes, you'll witness a culinary transformation! What you're left with is a lusciously sweet, wonderfully creamy, and perfectly syrupy dairy-free sweetened condensed milk, ready to enrich all your favorite treats.
This homemade vegan gem opens up a world of culinary possibilities. Drizzle it as a decadent glaze over breakfast pastries or use it as a foundational ingredient in a myriad of vegan baked goods. It's particularly fantastic for crafting a smooth Vegan Caramel Sauce, achieving the perfect consistency for Chocolate Pudding, or adding an irresistible creaminess to homemade Vegan Ice Cream. Beyond desserts, it's also an exceptional sweetener for your morning coffee or afternoon tea. The culinary applications are truly limitless, making this recipe an essential staple in any plant-based kitchen.
Understanding Condensed Milk: Traditional vs. Vegan
Before diving deeper into our plant-based version, let's understand what traditional condensed milk entails. Conventionally, sweetened condensed milk is a product derived from cow's milk where a significant portion of its water content (typically over half) has been removed through a heating process. The resulting thick, creamy concentrate is then heavily sweetened with sugar, pasteurized, and canned for sale. Its distinctive rich texture and intense sweetness make it a staple ingredient in many non-vegan recipes, particularly for various puddings, pies, cheesecakes, and even as a luxurious coffee sweetener.
The challenge for vegans, or anyone avoiding dairy, has historically been the absence of a truly comparable substitute. While some store-bought vegan versions exist, they can be pricey or contain unwanted additives. This homemade vegan substitute for condensed milk offers a perfect solution. By carefully combining coconut cream, sugar, vanilla, and salt, we achieve a dairy-free alternative that rivals the original in thickness, creaminess, and syrupy sweetness. The beauty of this recipe lies in its simplicity and its ability to replicate the beloved characteristics of traditional condensed milk without any dairy components.
Why Choose Homemade Vegan Condensed Milk?
While store shelves might offer a few vegan condensed milk options, crafting your own at home brings a multitude of benefits:
- Ingredient Control: You know exactly what goes into your condensed milk. No hidden additives, preservatives, or artificial flavors. This is especially important for those with specific dietary concerns or allergies.
- Cost-Effective: Making your own can be significantly more economical than purchasing specialty vegan products, allowing you to enjoy this versatile ingredient more often without breaking the bank.
- Freshness and Flavor: Homemade always tastes better! You get a fresh, vibrant flavor that enhances your dishes in a way store-bought versions often can't match.
- Customization: The recipe provides a fantastic base, but you have the flexibility to adjust sweetness levels or experiment with different flavorings to suit your preferences.
- Accessibility: The core ingredients are widely available, meaning you can whip up a batch whenever inspiration strikes, without relying on the stock levels of niche products.
- Dietary Needs: Beyond being vegan, this recipe is naturally lactose-free and gluten-free, making it suitable for a wider range of dietary requirements.
Crafting Your Vegan Sweetened Condensed Milk: A Step-by-Step Guide
Making dairy-free condensed milk is surprisingly simple, requiring just one pot and a bit of patience. The resulting batch can be stored in your fridge or freezer, making it a convenient staple for weeks to come!
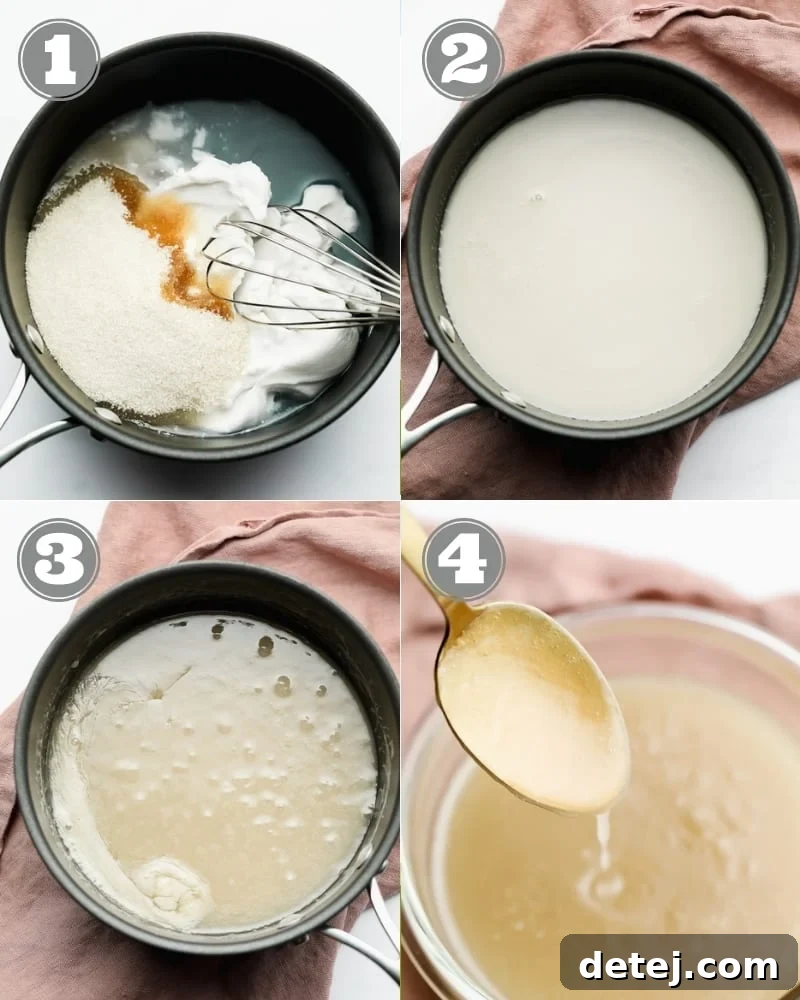
- Combine Ingredients: In a medium-sized saucepan, combine the full can of coconut cream, granulated sugar, pure vanilla extract, and a pinch of salt. Place the saucepan over medium-high heat.
- Whisk and Bring to a Boil: Whisk the mixture continuously to ensure the sugar dissolves and the ingredients are well combined. Bring the mixture to a gentle boil, ensuring it doesn't scorch at the bottom.
- Simmer and Reduce: As soon as it reaches a boil, immediately reduce the heat to low. Allow the mixture to simmer steadily for approximately 40 to 45 minutes. It's crucial to whisk every 5 to 10 minutes during this stage to prevent sticking and ensure even reduction.
- Check for Reduction: You'll know the condensed milk is ready when the liquid has visibly reduced by about half. At this point, it will still appear somewhat thin. Don't worry, this is normal! It will thicken considerably as it cools.
- Cool and Store: Carefully transfer the warm vegan condensed milk to a clean glass container with a lid. Allow it to cool at room temperature for a while before placing it in the refrigerator. Chill for at least 1 hour (preferably longer) before using, as cooling is essential for it to achieve its desired thick, syrupy consistency.
Tips for Perfection and Ingredient Insights
Achieving the perfect batch of vegan condensed milk is easy with a few key considerations:
- Coconut Cream Selection: This is the star ingredient! Always opt for full-fat coconut cream (or full-fat canned coconut milk, ensuring you use only the thick cream that separates at the top). The high-fat content is crucial for the rich, thick texture of condensed milk. Look for cans that haven't been shaken, allowing the cream to separate and solidify at the top. And a common concern: no, the finished condensed milk does NOT end up tasting overwhelmingly like coconut. The cooking process mellows the flavor, and the sugar and vanilla balance it beautifully.
- Sugar Choices: While white granulated sugar delivers a classic light color and flavor, you have options. Coconut sugar can be used, but it will result in a golden-brown condensed milk with a subtle caramel note. For liquid sweeteners like maple syrup or agave, you can substitute, but be aware you'll need to extend the simmering time, likely to 50-60 minutes total, to achieve adequate reduction and thickness due to their higher water content. Ensure your chosen sugar is vegan-friendly (bone char-free, if that's a concern).
- Alternative Plant Milks: While coconut cream or full-fat coconut milk will yield the thickest and most authentic results, you can experiment with other plant milks. Soy, almond, or cashew milk can work. If using these, we recommend adjusting the ratio to 1 ½ cups of plant milk combined with ¾ cup of sugar to compensate for their lower fat content and ensure sufficient sweetness and body. However, be prepared for a slightly thinner consistency compared to the coconut cream version.
- Vanilla Extract: Use pure vanilla extract for the best flavor. It beautifully complements the sweetness and depth of the coconut cream.
- Salt: A small pinch of salt is vital. It doesn't make the condensed milk salty, but rather enhances the other flavors and balances the overall sweetness, preventing it from tasting one-dimensional.
Endless Culinary Applications for Your Vegan Condensed Milk
Get ready to unleash your creativity, because the ways to incorporate this versatile vegan condensed milk into your culinary repertoire are truly boundless! Transform your ordinary meals and desserts into something extraordinary with these delicious ideas:
- In Classic Desserts: It's the secret ingredient for making incredible Vegan Seven Layer Magic Bars, rich Tres Leches Cake, or creamy Homemade Vegan Ice Cream. It also forms the perfect base for luscious Vegan Fudge or decadent Coconut Macaroons.
- Sweetening Beverages: Stir a spoonful into your coffee (especially iced coffee for a wonderfully creamy treat!), tea, or hot chocolate for an indulgent, dairy-free sweetness.
- Breakfast Boost: Elevate your morning routine by drizzling it over warm oatmeal, pancakes, waffles, or French toast for an added layer of sweetness and richness.
- Fruity Companions: A sweet drizzle over a fresh fruit salad or a bowl of berries transforms simple fruit into an elegant dessert.
- Baked Goods Glaze: Use it as a sweet, glossy glaze for muffins, quick breads, or even Peach Scones, adding moisture and flavor.
- Homemade Sauces: It's a key component for making rich and creamy Vegan Caramel Sauce, a must-have topping for so many desserts.
Storing Your Homemade Vegan Condensed Milk
Proper storage ensures your delicious homemade vegan condensed milk stays fresh and ready for whenever you need it:
Refrigerator Storage: Leftover vegan condensed milk can be stored in an airtight, covered glass container in the fridge for up to 2 weeks. Ensure the container is clean and sealed tightly to maintain freshness and prevent it from absorbing other refrigerator odors.
Freezer Storage: For longer preservation, you can freeze your condensed milk. Transfer it to a freezer-safe jar or container with a tight-fitting lid, leaving a little headspace for expansion. It can be frozen for up to 2-3 months. When you're ready to use it, simply transfer the frozen condensed milk to the refrigerator and allow it to thaw overnight. Once thawed, it might appear slightly separated. To restore its smooth, creamy consistency, simply whisk it vigorously in a bowl until it's uniform, or for an even silkier result, give it a quick blend in a blender.
Explore More Vegan Kitchen Staples
Mastering basic vegan recipes can transform your cooking. If you enjoyed making this condensed milk, be sure to check out these other essential vegan basics:
- Vegan Heavy Cream
- Vegan Feta Cheese
- Vegan Sour Cream
- Vegan Pastry Cream
Vegan Condensed Milk
This Vegan Condensed Milk is a dairy-free and delicious replacement for the real thing. Use it as a sweet and creamy drizzle on fruit, in baked goods, or anywhere else condensed milk is called for!
Pin Recipe
Ingredients
- 13.5 ounce can coconut cream
- 1/2 cup granulated sugar
- 1/2 teaspoon pure vanilla extract
- pinch of salt (~1/8th teaspoon)
Instructions
-
In a small saucepan, combine the coconut cream, sugar, vanilla and salt over medium-high heat.
-
Whisk well to combine and bring the mixture to a boil then quickly reduce the heat and simmer on low heat for 40-45 minutes, whisking every 5-10 minutes. The liquid should be reduced by about half when it's done. It will still be fairly thin at first, but as it cools it will thicken up nicely.
-
Remove from heat and transfer to a glass container with a lid. Place in the refrigerator to chill for at least an hour before using.
-
Leftover vegan condensed milk can be stored in a covered container for up to 2 weeks. To freeze, store in a jar with a tight fitting lid. When ready to use, thaw in the refrigerator overnight then add to a bowl and whisk until smooth (or throw it in a blender until smooth).
Notes
- Makes about 1 cup sweetened condensed milk.
- May substitute coconut sugar if desired, but the milk will be more golden in color.
- You can substitute maple syrup or agave for the sugar, but you will need to reduce the mixture for a longer amount of time, about 50-60 minutes.
- May also use a different plant milk, such as soy, almond, cashew, etc. Use 1 1/2 cups of plant milk and 3/4 cup sugar. But the coconut version is the thickest.
Nutrition
Mention @nora_cooks_vegan_ or tag #noracooks!
By following this guide, you're not just making a dairy-free ingredient; you're unlocking a world of delicious vegan desserts and treats, all starting with a simple, wholesome, homemade staple. Enjoy the sweet journey!