
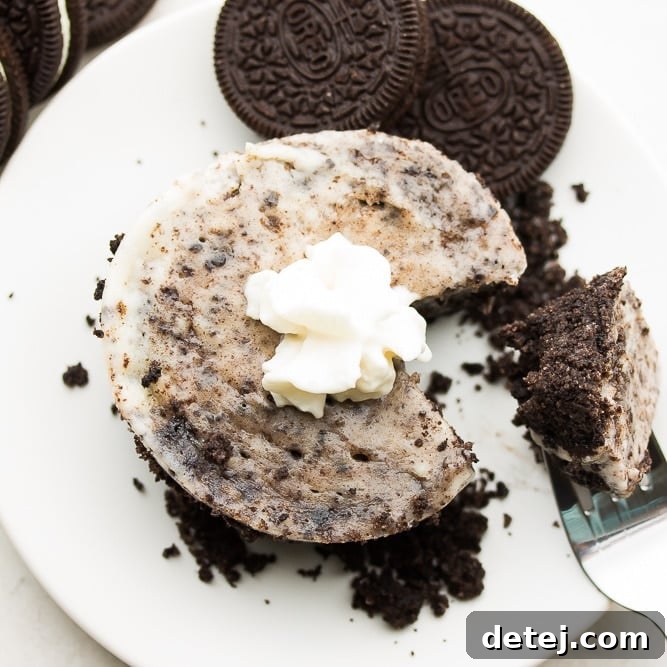
Indulge in a single-serving Vegan Oreo Cheesecake made right in your mug! No mixer required, and it cooks perfectly in the microwave for a quick, delicious treat.
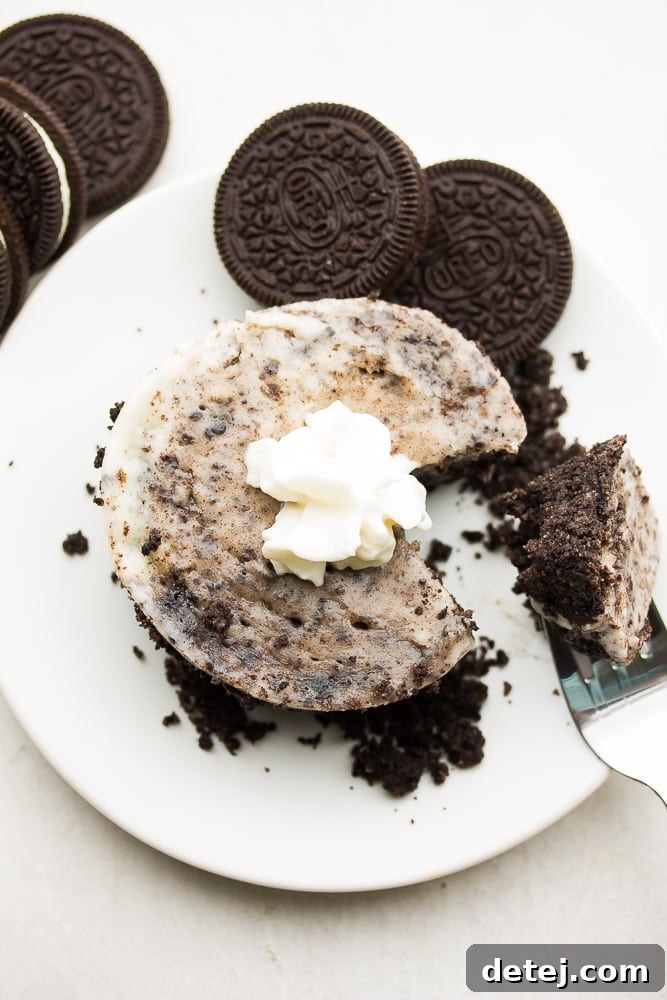
The Ultimate Vegan Oreo Mug Cheesecake: Quick, Easy, & Irresistible Single-Serving Dessert
For too long, the idea of a rich, creamy cheesecake has been associated with lengthy baking times, complex mixers, and recipes designed for large gatherings. But what if you’re just baking for one? Or living in a dorm room without a full kitchen? Or perhaps, like me, you simply crave an instant, indulgent dessert after a long day?
Good news! Your search ends here. I’ve been flooded with requests for more single-serving mug desserts, and I’m thrilled to finally share this incredible recipe with you: the **Vegan Oreo Mug Cheesecake**. If you’ve enjoyed my popular Chocolate Vegan Mug Cake, prepare to be amazed, as this cheesecake might just become your new favorite!
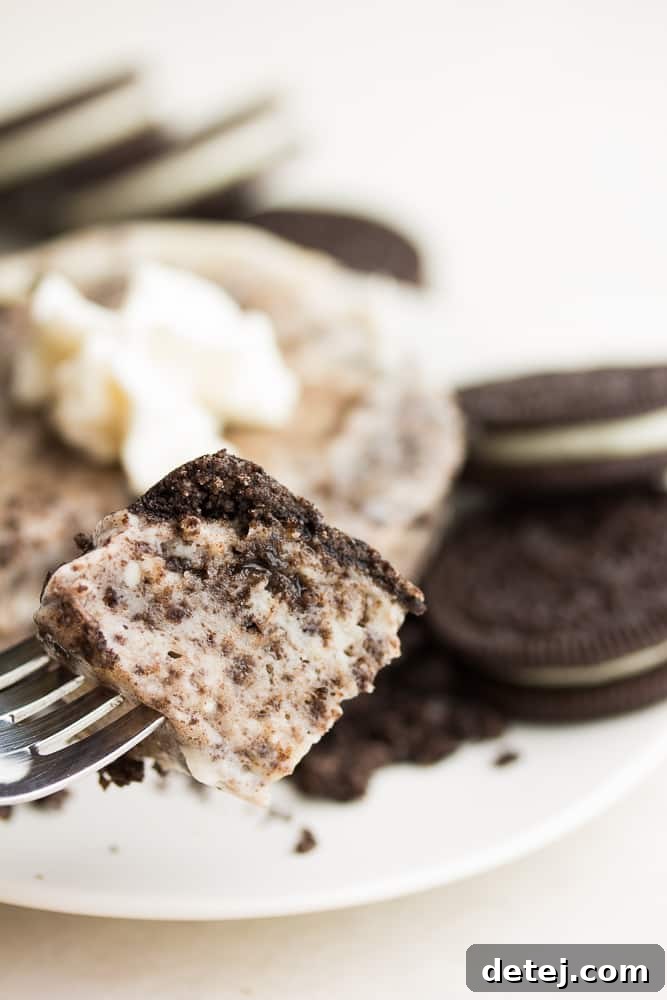
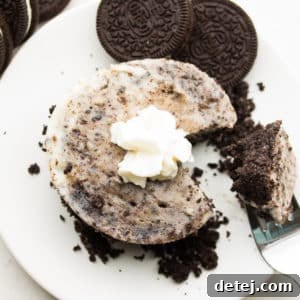
This isn’t just any dessert; it’s a game-changer. It’s designed for convenience, delivering that luxurious cheesecake experience without the fuss. Imagine creamy, tangy cheesecake filling studded with classic Oreo chunks, all atop a crumbly Oreo crust, ready in minutes. It’s surprisingly simple to make, easy enough for even a pre-teen to master, making it a fun culinary project for kids and adults alike.
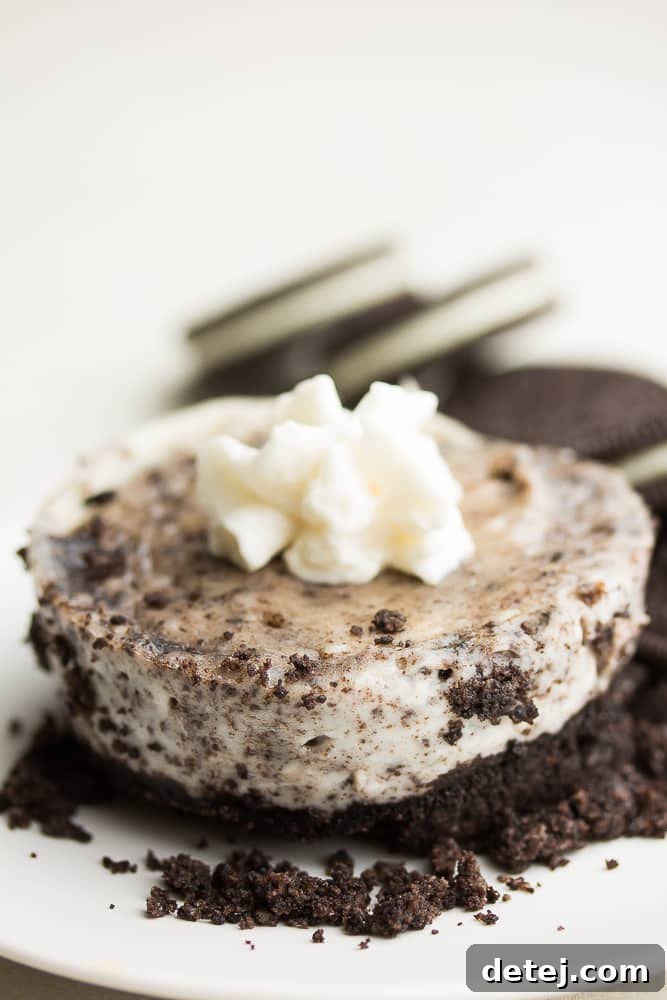
Why You’ll Fall in Love with This Vegan Oreo Mug Cheesecake
There are countless reasons why this single-serving delight is quickly becoming a household favorite. Beyond its irresistible taste, its simplicity and adaptability make it a standout recipe:
- Effortlessly Quick: From prep to plate (or mug!), this cheesecake is incredibly fast. Most of the cooking happens in the microwave in just a minute, making it perfect for those spontaneous dessert cravings.
- Perfectly Portioned: Designed for one, this recipe eliminates the temptation of overeating a whole cheesecake and ensures zero waste. It’s your personal dessert sanctuary.
- No Special Equipment Needed: Forget stand mixers, springform pans, and lengthy baking sessions. All you need is a mug, a bowl, and a fork or whisk.
- Dietary-Friendly & Delicious: Being completely vegan and dairy-free, it caters to various dietary needs without compromising on flavor or texture. It’s rich, creamy, and utterly satisfying.
- Kid-Friendly Fun: Its straightforward steps make it an ideal recipe for young aspiring chefs. It’s a great way to introduce them to basic baking (or microwaving!) concepts.
- Minimal Cleanup: With just a few dishes to wash, post-dessert cleanup is a breeze.
- Budget-Friendly: Using common pantry staples and a few specialized vegan ingredients, this dessert is an economical choice for a gourmet experience at home.
Key Ingredients for Your Perfect Vegan Mug Cheesecake
Crafting this delightful dessert requires just a handful of accessible ingredients. The quality of these components plays a crucial role in achieving that authentic cheesecake texture and flavor. Here’s a closer look at what you’ll need:
- Vegan Cream Cheese: This is the star of your cheesecake filling! For the best results, I highly recommend brands like Tofutti or Trader Joe’s vegan cream cheese. They offer the right consistency and tangy flavor that mimics traditional cream cheese beautifully. I generally advise against using Daiya brand for desserts as its texture can sometimes be unpredictable and not ideal for a creamy cheesecake. Ensure your cream cheese is softened at room temperature for easier mixing.
- Non-Dairy Yogurt OR Coconut Cream: Both options work wonderfully to add moisture, a subtle tang, and contribute to the cheesecake’s creamy texture. If using non-dairy yogurt, opt for a plain, unsweetened variety to control the sweetness of your dessert. For coconut cream, you can either buy a can specifically labeled “coconut cream” or simply scoop the thick, creamy white part from the top of a can of full-fat coconut milk that has been refrigerated overnight. Avoid the watery part at the bottom.
- Granulated Sugar: A touch of sugar is essential to sweeten the cheesecake filling. You can adjust the amount slightly to suit your personal preference, though the Oreos already contribute significant sweetness.
- Cornstarch: This acts as a crucial thickening agent, giving the cheesecake its characteristic firm yet creamy consistency. If you have dietary restrictions or simply prefer an alternative, arrowroot powder or tapioca starch can be used as substitutes. While I haven’t extensively tested these alternatives in this specific recipe, they typically perform similarly to cornstarch in thickening applications.
- Oreo Cookies: The iconic chocolate sandwich cookies are the backbone of both the crust and the delightful chunks mixed into the filling. Good news for vegans: classic Oreos are “accidentally” vegan! However, if you prefer an alternative or need a gluten-free option, brands like Newman’s Own offer similar chocolate cream cookies that are equally delicious. For a gluten-free version, simply choose a certified gluten-free chocolate sandwich cookie.
- Optional Toppings: Don’t forget the finishing touches! Non-dairy whipped cream is a fantastic addition for that classic cheesecake presentation and extra creaminess. A few extra crushed Oreo crumbs or even a drizzle of vegan chocolate sauce can elevate your mug cheesecake to gourmet status.
Step-by-Step Guide to Your Ultimate Vegan Oreo Mug Cheesecake
Creating this single-serving vegan delight is surprisingly straightforward. Follow these simple steps to enjoy your creamy, dreamy Oreo mug cheesecake:
- Prepare the Cheesecake Filling: In a medium-sized mixing bowl, combine the softened vegan cream cheese, non-dairy yogurt (or coconut cream), granulated sugar, and cornstarch. Using a fork or a small whisk, stir vigorously until all the ingredients are thoroughly combined and the mixture is completely smooth and creamy. Ensure there are no lumps of cream cheese remaining. Set this delectable filling aside.
- Crush the Oreo Cookies: Take two of your Oreo cookies (reserving one for later if you like extra crunch on top). The easiest way to crush them into fine crumbs is to place them in a small resealable sandwich bag. Then, use the bottom of a heavy mug, a rolling pin, or even your fist to crush them until they resemble coarse crumbs. Alternatively, a small food processor or blender can achieve this quickly.
- Form the Oreo Crust: Lightly grease the inside of your chosen microwave-safe mug or a small ramekin. This step is important to help the cheesecake slide out easily if you plan to plate it. Sprinkle about half of the crushed Oreo crumbs evenly into the bottom of the mug. Use the back of a spoon or your fingers to gently press the crumbs down firmly, forming a compact crust.
- Combine and Pour the Filling: Now, take the remaining crushed Oreo crumbs and gently fold them into your prepared cheesecake mixture. This infuses every bite with that irresistible Oreo flavor and texture. Carefully pour the cheesecake mixture into the mug, directly on top of your compacted Oreo crust. Smooth the top with the back of a spoon.
- Microwave with Care: Place the mug in your microwave. Cook on high power for 30 seconds. After 30 seconds, open the microwave and observe; you should see a slight bubble forming in the center or around the edges. Stop the microwave. Cook for another 30 seconds, watching carefully to ensure it doesn’t bubble over. The edges of the cheesecake should appear set, while the center might still look a bit soft or jiggly. If it still looks very wet in the middle, microwave for an additional 15-30 seconds, checking frequently. The key is to microwave in short bursts to prevent overflow and achieve the perfect consistency.
- Chill for Perfection: This step is crucial for the cheesecake to firm up and for the flavors to meld beautifully. Carefully transfer your mug cheesecake to the refrigerator and let it chill for at least an hour, or until it is completely cool and set. If you’re short on time, you can place it in the freezer for about 20-30 minutes to speed up the chilling process.
- Serve and Enjoy: Once chilled, your vegan Oreo mug cheesecake is ready! You can either enjoy it directly from the mug for the ultimate cozy experience, or if you prefer a more elegant presentation, gently run a knife around the edges and carefully pop it out onto a plate. Garnish with a dollop of non-dairy whipped cream and extra Oreo crumbs, if desired. Prepare to be delighted!
Expert Tips for a Flawless Vegan Mug Cheesecake
While this recipe is incredibly simple, a few insider tips can elevate your mug cheesecake from good to absolutely phenomenal:
- Mug Size Matters: Do not underestimate the importance of your mug size! Using a mug that is too small (less than 12 ounces) will almost certainly lead to overflow in the microwave, creating a messy situation. A mug with a 12-16 ounce capacity is ideal, and a wider mug is generally better than a tall, narrow one. A small, oven-friendly ramekin also works perfectly for easy removal.
- No Microwave? No Problem (Perhaps!): While designed for the microwave, if you don’t have one, you might still be able to enjoy this treat. I haven’t personally tested an oven version, but a good starting point would be to bake it in an oven-safe ramekin at 325°F (160°C) for approximately 10-15 minutes, or until the edges are set and the center has a slight jiggle. Keep a close eye on it to prevent overbaking.
- Scaling Up for More Servings: Craving more than one? This recipe is easily adaptable. Simply adjust the ingredient quantities based on how many cheesecakes you want to make. However, it’s vital to microwave them one at a time. Microwaving multiple mugs simultaneously can lead to uneven cooking and less-than-ideal results.
- The Golden Rule: Don’t Skip the Chill! I know the temptation to dig in immediately is strong, but trust me on this – chilling is non-negotiable for the best texture and flavor. An hour in the refrigerator (or 20-30 minutes in the freezer) allows the cheesecake to firm up perfectly, develop its creamy consistency, and lets all those delicious flavors deepen and meld. Patience truly pays off here.
- Achieving the Perfect Oreo Crust: When crushing your Oreos, aim for a mix of fine crumbs and slightly larger pieces for interesting texture. When pressing them into the mug, ensure the crust is compact enough to hold together but not so dense that it becomes a solid block.
- Preventing Over-Microwaving: Keep a close eye on your cheesecake during the microwave intervals. It’s better to undercook and add a few more seconds than to overcook, which can result in a rubbery texture. The goal is a set exterior with a slightly soft center that will firm up as it chills.
Flavor Variations & Customizations
While the classic Oreo version is undeniably delicious, this vegan mug cheesecake recipe serves as a fantastic base for endless customization. Get creative and make it your own!
- Different Cookie Crusts: Instead of Oreos, try Graham crackers (ensure they are vegan), Biscoff cookies, or even vegan digestive biscuits. Crush them and mix with a tiny bit of melted vegan butter or coconut oil to form the crust.
- Fruit Swirls: Swirl in a teaspoon of fruit preserves (raspberry, strawberry, or blueberry) into the cheesecake mixture before microwaving for a fruity twist. A fresh berry compote can also be a delightful topping after chilling.
- Citrus Zest: Add a quarter teaspoon of lemon or orange zest to the cheesecake filling for a bright, refreshing flavor profile.
- Chocolate Lover’s Dream: Fold in a tablespoon of vegan chocolate chips or mini chocolate chunks into the batter. A drizzle of melted vegan chocolate or chocolate syrup on top would be divine.
- Nut Butter Infusion: For a richer flavor, swirl in a tiny bit of smooth peanut butter or almond butter into the filling. Pair it with a few chopped roasted peanuts on top!
- Coffee Kick: Dissolve a pinch of instant espresso powder in a few drops of hot water and add it to the cheesecake mixture for a subtle coffee flavor.
Serving Suggestions
This single-serving vegan Oreo mug cheesecake is a treat in itself, but a few thoughtful additions can make it an even more special dessert:
- Classic Whipped Cream: A generous dollop of non-dairy whipped cream (such as coconut whip or soy whip) is always a perfect accompaniment, adding a light and airy contrast to the rich cheesecake.
- Extra Oreo Crumbles: Sprinkle a few extra crushed Oreo cookies or even a mini whole Oreo on top for added texture and visual appeal.
- Fresh Berries: The tartness of fresh raspberries, strawberries, or blueberries beautifully complements the sweet and creamy cheesecake.
- Chocolate Drizzle: A light drizzle of vegan chocolate syrup or melted vegan chocolate over the top creates an elegant finish.
- Ice Cream Pairing: For the ultimate indulgence, serve your mug cheesecake alongside a scoop of your favorite vegan vanilla or chocolate ice cream.
Storage Instructions
While this recipe is designed for immediate enjoyment as a single serving, if by some miracle you have any leftover (or if you make multiple!):
- Refrigerator: Cover the mug tightly with plastic wrap or transfer the cheesecake to an airtight container. It will stay fresh in the refrigerator for up to 2-3 days. The texture might firm up slightly more with extended chilling.
- Freezer: You can also freeze this mug cheesecake! Once fully chilled and set, remove it from the mug and wrap it tightly in plastic wrap, then place it in a freezer-safe container. It will keep in the freezer for up to 1 month. Thaw in the refrigerator for a few hours before enjoying.
Frequently Asked Questions (FAQ)
Are traditional Oreos vegan?
Yes, surprisingly, classic Oreo cookies are considered “accidentally vegan” by many. While they do not contain dairy, they are manufactured on equipment that also processes milk, which is why they are labeled as “may contain milk.” For strict vegans, always check the packaging, but generally, they are suitable for a plant-based diet.
Can I make this recipe gluten-free?
Absolutely! The main component that might contain gluten is the Oreo cookies. Simply substitute them with a certified gluten-free chocolate sandwich cookie, such as gluten-free Oreos (available in some regions) or Newman’s Own gluten-free sandwich cookies. All other ingredients are typically naturally gluten-free, but always double-check labels.
Can I use a different sweetener instead of granulated sugar?
Granulated sugar works best for consistency and flavor balance in this recipe. Liquid sweeteners like maple syrup or agave might alter the texture of the cheesecake filling, making it too soft or requiring adjustments to the cornstarch. For best results, stick with granulated sugar.
How long does the cheesecake take to set in the fridge?
For optimal creaminess and firmness, allow at least one hour of chilling time in the refrigerator. If you’re in a hurry, you can pop it into the freezer for 20-30 minutes to speed up the setting process. The longer it chills, the better the texture will be.
More Irresistible Vegan Cheesecake Recipes You’ll Love
If this single-serving delight has sparked your love for vegan cheesecakes, you’re in luck! Explore some of my other beloved recipes:
- The Best Vegan Cheesecake: A classic, crowd-pleasing recipe perfect for any occasion.
- No-Bake Layered Raspberry Vegan Cheesecake: A refreshing and elegant option that requires no oven at all.
- Double Layer Pumpkin Cheesecake: A seasonal favorite, perfect for autumn celebrations.
Recipe Card: Vegan Oreo Mug Cheesecake
5 stars (3 ratings)
Oreo Mug Cheesecake
A single serving Vegan Oreo Cheesecake made in a mug! No mixer required and it cooks in the microwave.
Prep: 9 mins
Cook: 1 min
Chilling time: 1 hr
Total: 1 hr 10 mins
Servings: 1 serving
Pin
Comment
Save
Ingredients
- 4 tablespoons vegan cream cheese (Tofutti brand recommended)
- 2 tablespoons plain non-dairy yogurt OR coconut cream
- 2 tablespoons granulated sugar
- 1 teaspoon cornstarch
- 3 Oreo cookies (May use a similar cookie, such as Newman’s Own if desired)
- Non-dairy whipped cream, optional for serving
Instructions
- In a medium-sized bowl, add the vegan cream cheese, non-dairy yogurt OR coconut cream, sugar, and cornstarch. Stir or whisk until well combined, creamy, and smooth. Set aside.
- Crush the Oreo cookies into crumbs. This can be done by placing the cookies in a sandwich bag and crushing with a heavy mug, or by using a blender or food processor.
- Lightly grease a large microwave-safe mug or small ramekin (this helps with easy cheesecake removal). Sprinkle about half of the Oreo crumbs into the bottom of the mug and gently push down to create a compact crust.
- Stir the other half of the Oreo crumbs into the cheesecake mixture. Pour the cheesecake mixture into the mug, on top of the prepared crust.
- Place the mug in the microwave and cook for 30 seconds. Stop when you see a bubble in the middle. Microwave for another 30 seconds, watching carefully to prevent it from bubbling over. The cheesecake edges should look mostly done, but the middle may still appear a bit soft. If needed, microwave for an additional 15-30 seconds. (Microwaving in short bursts prevents overflow.)
- Place the mug in the refrigerator to chill and firm up for about an hour, or until completely cool. You can gently pop it out of the mug and serve on a plate with non-dairy whipped cream, or simply enjoy it straight from the mug. Enjoy!
Notes
- For vegan cheesecakes, Tofutti brand vegan cream cheese is highly recommended, but Trader Joe’s and other quality brands also work well. It’s generally best to avoid Daiya cream cheese for desserts due to its texture.
- If you prefer alternatives to Oreos, similar chocolate cream cookies like Newman’s Own brand are excellent choices.
- Both plain non-dairy yogurt and coconut cream have been tested and work successfully. Coconut cream is the thick, white part found in a can of full-fat coconut milk after chilling, or you can buy canned coconut cream.
- Tapioca starch or arrowroot powder can likely replace cornstarch, though specific testing for this recipe has not been done.
- Gluten-Free Option: To make this dessert gluten-free, use a certified gluten-free chocolate sandwich cookie for the crust and mix-ins.
Nutrition Information
Serving: 1 cheesecake | Calories: 463kcal | Carbohydrates: 60g | Protein: 7g | Fat: 25g | Saturated Fat: 8g | Sodium: 402mg | Potassium: 77mg | Fiber: 5g | Sugar: 42g | Vitamin C: 4mg | Calcium: 78mg | Iron: 4mg
Course: Dessert
Cuisine: American
Author: Nora Taylor
Did you make this recipe?
Mention @nora_cooks_vegan_ or tag #noracooks!