
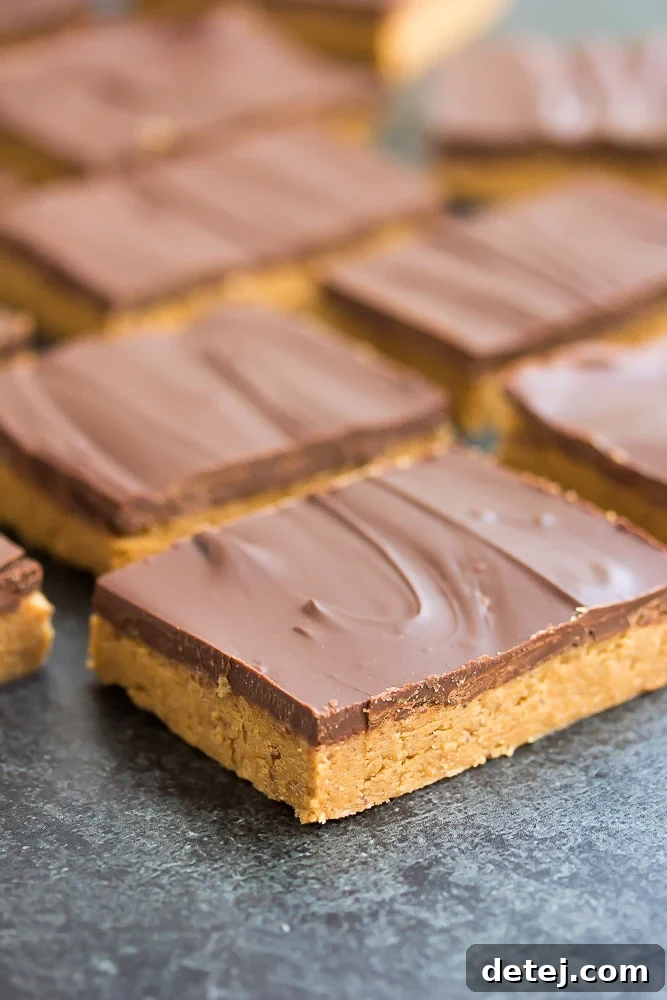
Indulge in the ultimate nostalgic treat with these incredible Vegan Chocolate Peanut Butter Bars! Crafted with just 5 simple ingredients, they come together in a mere 10 minutes and require absolutely no baking. Prepare to be amazed as each bite perfectly replicates the beloved flavor of a classic peanut butter cup, all in a convenient, shareable bar form.
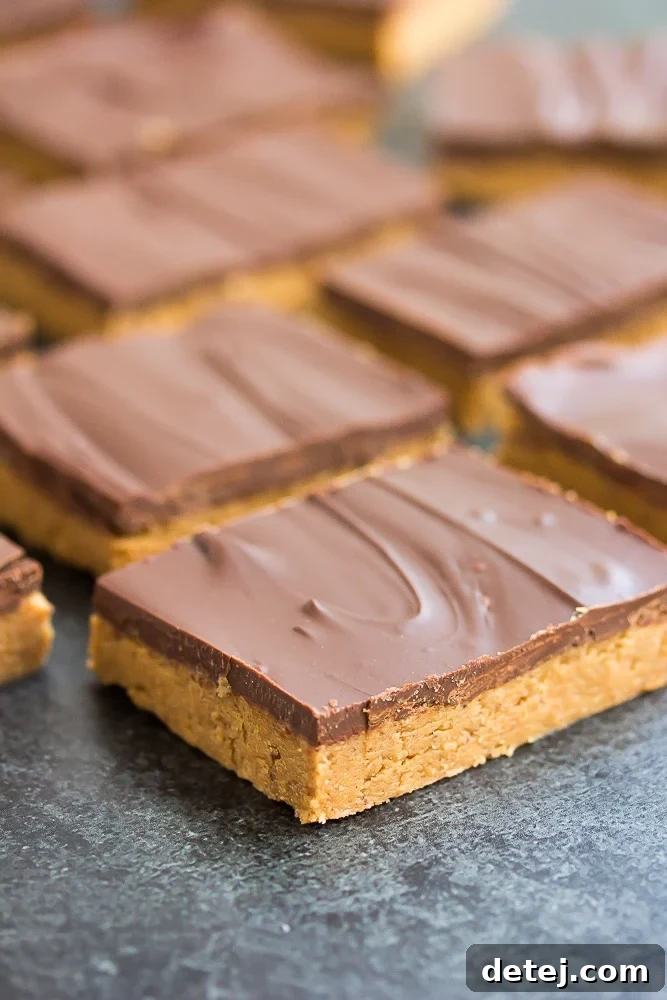
Decadent Vegan Chocolate Peanut Butter Bars: A 5-Ingredient, No-Bake Delight
There are some desserts that just hit differently, bringing back cherished childhood memories with every bite. These Vegan Chocolate Peanut Butter Bars are precisely that kind of treat. The first time my 11-year-old son tried them, his eyes lit up, exclaiming, “They taste exactly like a peanut butter cup! How did you do that?!” It’s true; this recipe delivers that iconic flavor profile, but in an effortlessly prepared bar form. These no-bake chocolate peanut butter bars are incredibly versatile, making them perfect for a wide array of occasions. Imagine serving them at festive Christmas gatherings, vibrant birthday parties (always remember to check for peanut allergies!), or as a refreshing, oven-free dessert in the scorching heat of summer.
What makes these bars truly special, beyond their irresistible taste, is their astounding simplicity. You only need five readily available ingredients and a mere ten minutes of active preparation time to create a batch of these heavenly treats. The rest is just chilling in the refrigerator, allowing the magic to happen. This recipe is a game-changer for anyone seeking a quick, delicious, and entirely plant-based dessert that will impress vegans and non-vegans alike. Whether you’re a seasoned baker or a kitchen novice, these bars are designed for success, promising a delightful reward with minimal effort. Get ready to discover your new go-to recipe for an easy, dairy-free chocolate and peanut butter dream!
Essential Ingredients for Your No-Bake Vegan Chocolate Peanut Butter Bars
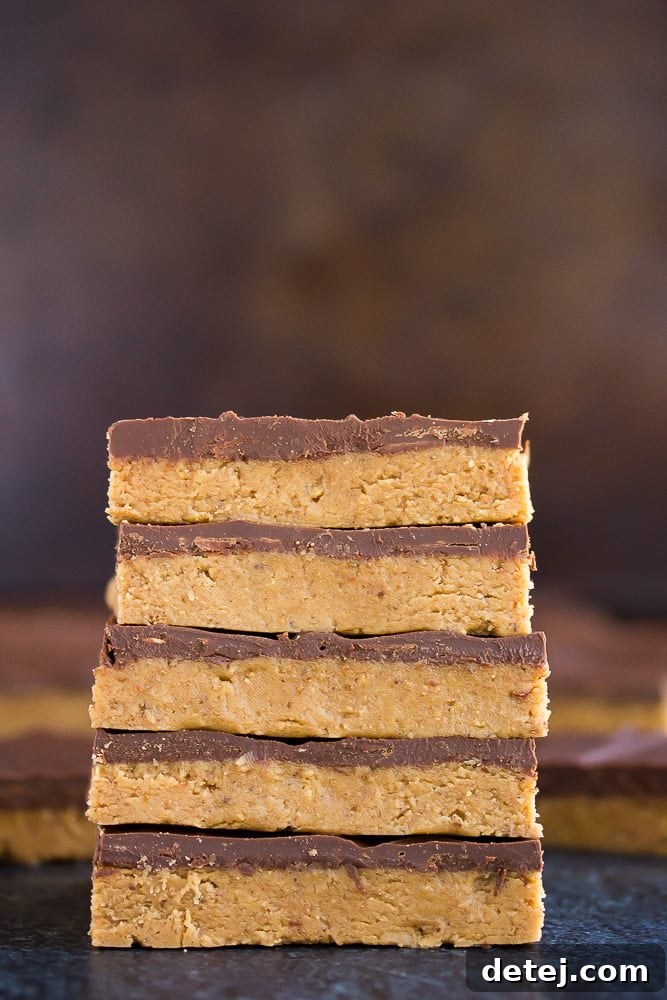
Crafting these delectable vegan chocolate peanut butter bars is surprisingly straightforward, thanks to a carefully selected list of just five core ingredients. Each component plays a crucial role in achieving that perfect balance of sweetness, texture, and the unmistakable flavor of a peanut butter cup. Here’s a closer look at what you’ll need to create this simple yet sensational dessert:
- Vegan Butter: This forms the foundational richness and helps bind the peanut butter layer together. Brands like Earth Balance are excellent choices for their authentic buttery flavor and smooth melt. Miyoko’s Kitchen also offers a fantastic, high-quality vegan butter option that works beautifully. Any reliable vegan butter will do the trick, just ensure it melts smoothly.
- Creamy Peanut Butter: The star of the show! For the best results and a truly smooth texture, opt for creamy peanut butter. Both natural peanut butter (the kind that separates) and conventional varieties (like Skippy or JIF, if you prefer a sweeter, less oily base) will work. Whichever you choose, ensure it’s well-stirred if it’s a natural variety, so the oils are evenly incorporated.
- Cookie Crumbs: These provide the delightful base and add a subtle crunch and sweetness. Honey-free graham crackers are a classic choice for vegan versions, but you can also use other similar plain, crunchy vegan cookies. To make crumbs, simply pulse them in a food processor until fine, or crush them manually in a bag with a rolling pin.
- Powdered Sugar: Also known as confectioners’ sugar, this ingredient is key for both sweetness and structure. Its fine texture helps create a smooth, firm peanut butter layer that holds its shape without becoming grainy. It also perfectly balances the richness of the peanut butter and chocolate.
- Dairy-Free Chocolate Chips: The luscious chocolate topping is incomplete without good quality chocolate chips. The most important tip here is to double-check the ingredient list to ensure they are genuinely dairy-free. Many brands are “accidentally vegan,” meaning they don’t contain animal products despite not being marketed specifically as vegan. Trader Joe’s semi-sweet chocolate chips, Guittard, and Kirkland Signature (Costco brand) are commonly cited as excellent dairy-free options. Enjoy Life is another reliable brand specifically made for those with dietary restrictions.
With these five simple ingredients in hand, you’re well on your way to creating a dessert that tastes far more complex than its preparation suggests!
How to Effortlessly Create Your Chocolate Peanut Butter Bars
The beauty of these Vegan Chocolate Peanut Butter Bars lies not only in their irresistible flavor but also in their incredibly simple, no-bake preparation method. You’ll be surprised how quickly these come together, leaving you with more time to enjoy the finished product. Follow these straightforward steps to achieve perfectly layered, decadent bars every time:
Step 1: Prepare Your Pan and Base Layer
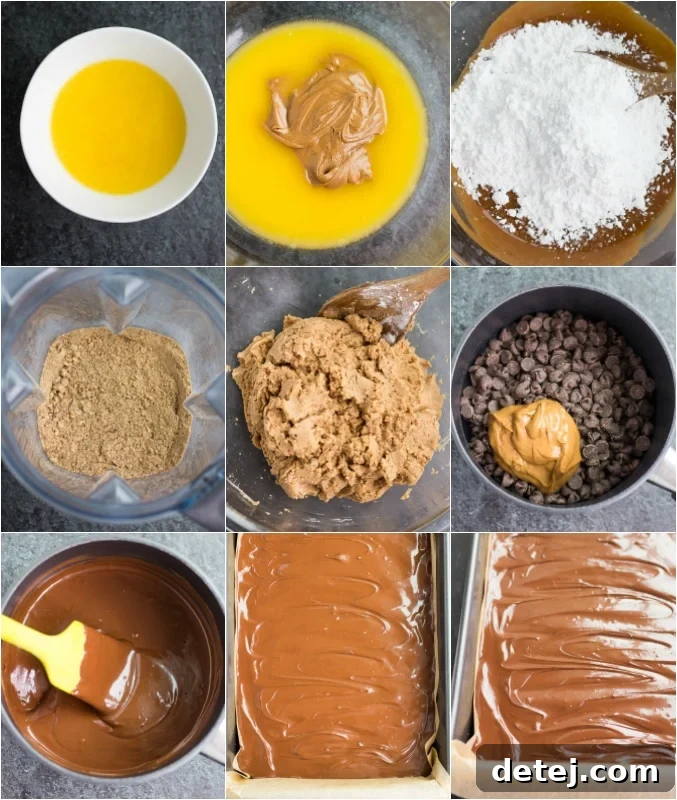
Begin by lining a 9 x 13-inch baking pan with parchment paper. This crucial step will make it incredibly easy to lift the entire batch of bars out of the pan once they’re set, allowing for clean, effortless slicing. Make sure to leave some overhang on the sides for convenient handling. Next, in a large mixing bowl, combine your melted vegan butter and creamy peanut butter. Stir these two ingredients thoroughly until they are completely smooth and well-combined. This creates the rich, creamy foundation for your peanut butter layer. Now, gradually add the powdered sugar to the peanut butter mixture, stirring until it’s fully incorporated and a thick, uniform paste forms. The mixture will be quite dense, which is exactly what you want for a firm base. Finally, add the cookie crumbs in two stages. First, mix in about half of the crumbs until they are evenly distributed. Then, add the remaining half and continue to mix. At this point, the mixture will become very thick and might be challenging to stir with a spoon. Don’t hesitate to get your hands in there and knead it slightly to ensure all the crumbs are incorporated and the mixture is cohesive. Press this peanut butter mixture evenly into the bottom of your prepared pan, using the back of a spoon or your hands to create a smooth, compact layer.
Step 2: Craft the Rich Chocolate Topping
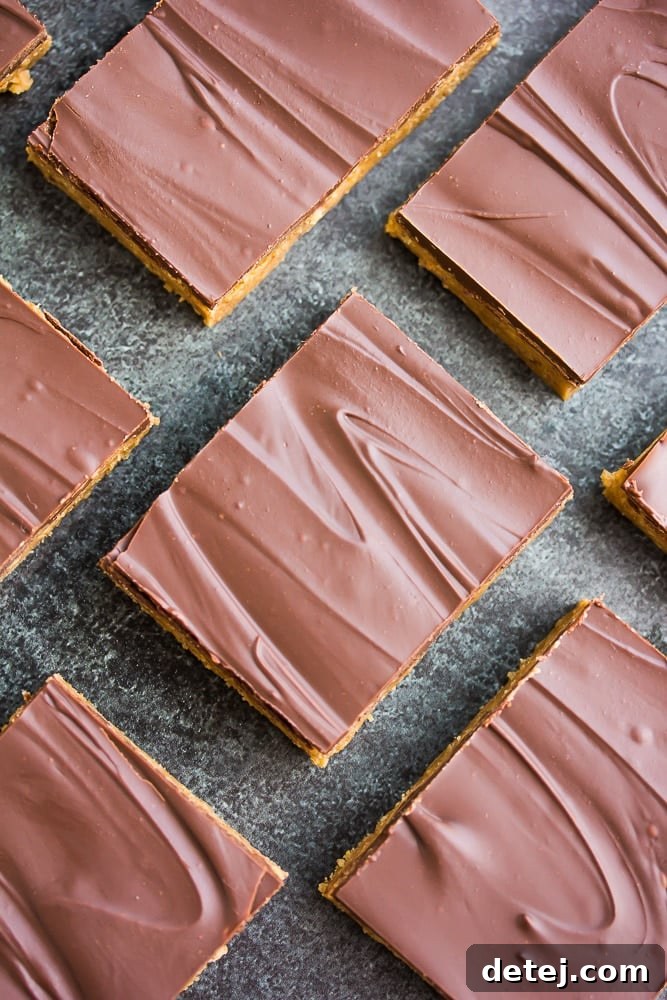
Now it’s time for the irresistible chocolate topping. In a small saucepan, combine your dairy-free chocolate chips and an additional 1/4 cup of creamy peanut butter. Place the saucepan over low-medium heat, stirring continuously. The key here is to melt the chocolate slowly and gently to prevent it from seizing or burning. Continue stirring until the chocolate chips are fully melted and the mixture is smooth, glossy, and creamy. As soon as you achieve this consistency and no whole chocolate chips remain, remove the saucepan from the heat immediately. Promptly pour this luxurious melted chocolate mixture directly over the pressed peanut butter layer in your pan. Using an offset spatula or the back of a spoon, gently spread the chocolate evenly across the entire surface, ensuring it covers the peanut butter layer completely from edge to edge.
Step 3: Chill, Slice, and Serve
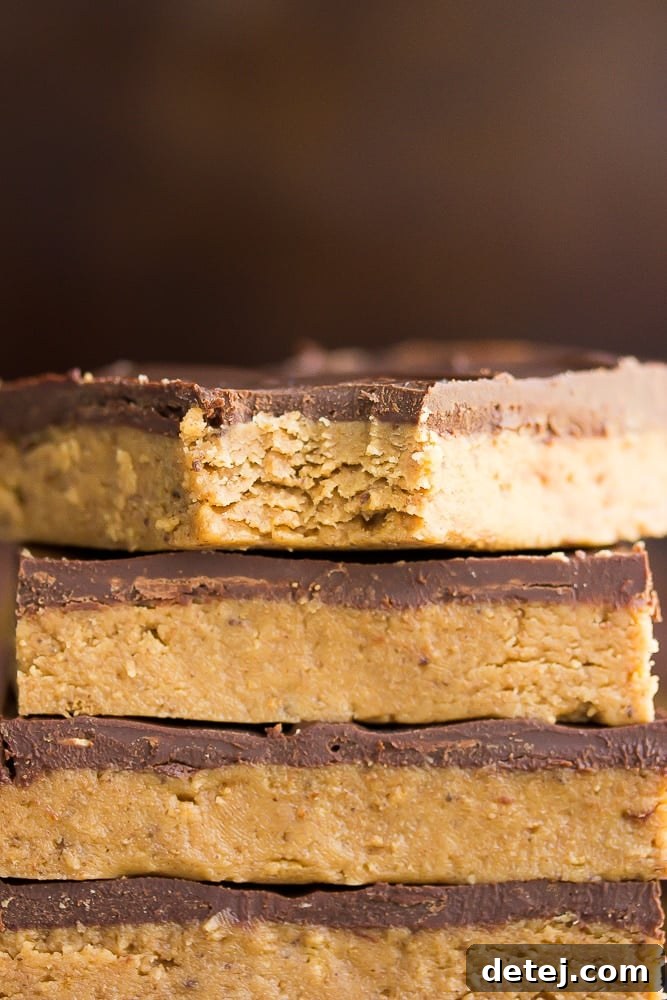
Once the chocolate topping is spread, carefully transfer the pan to the refrigerator. Allow the bars to chill for at least 1 1/2 to 2 hours, or until both the peanut butter and chocolate layers are completely firm. Proper chilling is essential for clean slices. To achieve perfect, crack-free cuts, a helpful tip is to run a large, sharp knife under hot water, wipe it clean, and then make each slice. Re-warm and clean the knife between each cut. Alternatively, you can let the chilled bars sit at room temperature for about 10 minutes before slicing, which helps prevent the chocolate from cracking. Once sliced into individual bars, serve them chilled for the best texture and flavor. Store any leftover bars in an airtight container in the refrigerator for up to one week. These bars are truly a delightful, hassle-free dessert that you’ll want to make again and again!
Can You Freeze These Vegan Chocolate Peanut Butter Bars? Absolutely!
One of the many fantastic qualities of these Vegan Chocolate Peanut Butter Bars is their exceptional freezer-friendliness. Yes, they freeze beautifully! This makes them an ideal candidate for meal prepping your desserts or ensuring you always have a delightful sweet treat on hand whenever a craving strikes. Freezing these bars not only extends their shelf life but also transforms them into a wonderfully firm and chewy confection that many people find even more enjoyable than when chilled.
Imagine the convenience: a quick, satisfying dessert ready in an instant, or a thoughtful addition to a kid’s lunchbox in the morning. By lunchtime, the bar will have thawed just enough to be perfectly soft and delicious, providing a wonderful surprise. To freeze your cut bars, arrange them in a single layer in a freezer-friendly airtight container. If you need to stack them, place a piece of parchment paper between layers to prevent them from sticking together. For even better protection against freezer burn and to make grabbing individual treats easier, consider individually wrapping each bar tightly in plastic wrap before placing them in a container or a freezer-safe bag. This extra step helps maintain their freshness, flavor, and texture for several weeks, if not months.
When you’re ready to enjoy a frozen bar, you can simply take it out and let it thaw at room temperature for about 15-20 minutes, or enjoy it directly from the freezer for a firmer, almost candy-like experience. This convenient storage option ensures that a delicious, dairy-free, and no-bake dessert is always within reach, making these bars a true staple in any vegan household.
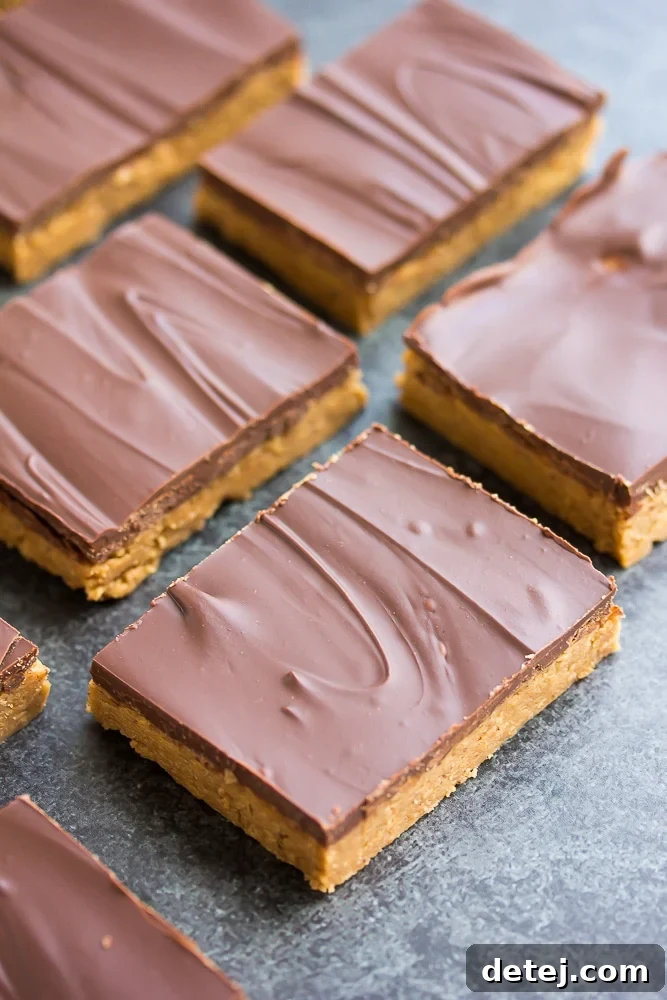
Explore More Irresistible Vegan Peanut Butter Dessert Recipes
If you’ve fallen in love with the combination of chocolate and peanut butter in these no-bake bars, then you’re in for a treat! The world of vegan peanut butter desserts is vast and incredibly delicious. From classic cookies to more unique creations, there’s a peanut butter-infused delight for every palate and occasion. Here are some more fantastic plant-based recipes that celebrate the rich, nutty flavor of peanut butter:
- Vegan Classic Peanut Butter Cookies: Revisit a timeless favorite with these perfectly chewy and crumbly peanut butter cookies. They’re simple to make and deliver that quintessential crisscross pattern and rich peanut butter flavor we all adore.
- Vegan Peanut Butter Cups: If these bars left you craving the pure, unadulterated experience of a peanut butter cup, then these homemade versions are a must-try. They’re even easier than you think to make and taste so much better than store-bought!
- Oil-Free Vegan Peanut Butter Chocolate Chip Cookies: For a slightly healthier twist without sacrificing flavor, these cookies offer all the joy of peanut butter and chocolate chips, made entirely without added oil. A guilt-free indulgence!
- Chickpea Blondies: While not solely a peanut butter dessert, these ingenious blondies often feature peanut butter (or another nut butter) to create their incredibly moist and chewy texture. You won’t believe they’re made with chickpeas!
Each of these recipes offers a unique way to enjoy peanut butter in its vegan form, proving that plant-based desserts can be every bit as satisfying and delicious as their traditional counterparts. Happy baking (or no-baking)!
This recipe was wonderfully inspired by Sally’s Baking Addiction, a fantastic source for delicious baking ideas.
Vegan Chocolate Peanut Butter Bars
These Vegan Chocolate Peanut Butter Bars taste just like a peanut butter cup! They only require 5 ingredients, can be made in 10 minutes, and are no-bake! This recipe yields approximately 24 delightful bars.
Prep time: 10 minutes
Chilling time: 1 hour 30 minutes to 2 hours
Total time: 1 hour 40 minutes to 2 hours 10 minutes
Servings: 24 bars
Ingredients
Peanut Butter Layer
- 1 cup vegan butter, melted (e.g., Earth Balance, Miyoko’s)
- 1 cup creamy peanut butter (natural or conventional, well-stirred)
- 1 1/2 cups cookie crumbs (from honey-free graham crackers or similar vegan cookies)
- 2 cups powdered sugar
Chocolate Topping
- 12 ounces dairy-free chocolate chips (approximately 1 standard bag, check labels for “accidentally vegan” brands like Trader Joe’s, Guittard, Kirkland)
- 1/4 cup creamy peanut butter
Instructions
- Prepare the Pan: Line a 9×13 inch baking pan with parchment paper, allowing some overhang on the longer sides. This overhang will serve as “handles” to easily lift the entire slab of bars out of the pan once chilled, making slicing much simpler and cleaner.
- Combine Wet Ingredients: In a large mixing bowl, pour the melted vegan butter and add the creamy peanut butter. Stir these two ingredients together thoroughly until they are completely smooth and homogenous. Ensure there are no streaks of butter or peanut butter remaining.
- Add Powdered Sugar: Gradually add the powdered sugar to the butter-peanut butter mixture. Stir well until the sugar is fully incorporated and the mixture forms a thick, sticky, and uniform paste. This will be the base for your rich peanut butter layer.
- Incorporate Cookie Crumbs: Add half of the cookie crumbs to the bowl and mix until they are well-distributed throughout the peanut butter mixture. Then, add the remaining half of the cookie crumbs and continue to mix. The mixture will become very thick at this stage. If stirring with a spoon becomes too difficult, you can use your hands to gently knead and combine the mixture until all the cookie crumbs are fully incorporated and the mixture holds together.
- Press into Pan: Transfer the thick peanut butter and cookie crumb mixture into the prepared 9×13 inch pan. Using the back of a spoon, a spatula, or your clean hands, press the mixture down firmly and evenly across the bottom of the pan. Ensure the layer is compact and has a smooth, consistent thickness from edge to edge. Set this aside while you prepare the topping.
- Melt Chocolate Topping: In a small saucepan, combine the dairy-free chocolate chips and the additional 1/4 cup of creamy peanut butter. Place the saucepan over low to medium heat. Stir constantly and gently until the chocolate chips are completely melted and the mixture is smooth, glossy, and creamy. It’s important to keep the heat low to prevent the chocolate from burning or seizing. As soon as all the chocolate chips have melted and the mixture is uniform, immediately remove the saucepan from the heat.
- Pour Chocolate Over Base: Carefully pour the warm, melted chocolate and peanut butter topping over the pressed peanut butter layer in your pan. Using an offset spatula or the back of a spoon, gently spread the chocolate evenly to cover the entire surface of the peanut butter layer. Aim for a smooth and consistent chocolate coating.
- Chill to Set: Transfer the pan to the refrigerator and chill for approximately 1 1/2 to 2 hours, or until both the peanut butter and chocolate layers are completely firm and set. This chilling time is crucial for the bars to hold their shape and allow for clean slicing.
- Slice and Serve: Once fully chilled and firm, lift the entire slab of bars out of the pan using the parchment paper overhang. Place it on a cutting board. For the cleanest cuts and to prevent the chocolate from cracking, a helpful trick is to run a large, sharp knife under hot water, wipe it completely dry, and then make each slice. Re-warm and clean the knife as needed between cuts. Alternatively, you can let the chilled bars sit at room temperature for about 10 minutes before slicing to slightly soften the chocolate. Serve these delightful bars chilled.
- Storage: Store any leftover Vegan Chocolate Peanut Butter Bars in an airtight container in the refrigerator for up to 1 week. For longer storage, these bars freeze beautifully! Individually wrap each bar in plastic wrap, then place them in a freezer-safe bag or container. They can be frozen for several weeks and make a fantastic quick sweet treat or an easy addition to lunchboxes.
Notes
- Cookie Crumb Preparation: To create fine cookie crumbs, place your honey-free graham crackers or similar vegan cookies into a food processor and pulse until a fine, consistent crumb is achieved. If you don’t have a food processor, you can place them in a sturdy plastic bag and crush them with a rolling pin.
- Selecting Dairy-Free Chocolate Chips: Always read the ingredient list carefully when choosing chocolate chips to ensure they are dairy-free. Many brands that aren’t explicitly labeled “vegan” are actually free of dairy ingredients. Popular “accidentally vegan” choices often include certain varieties from Trader Joe’s, Guittard, and Kirkland (Costco brand), as well as dedicated dairy-free brands like Enjoy Life.
- Allergy Alternatives: If you or your guests have a peanut allergy, you can easily substitute the peanut butter with almond butter for a similar rich flavor profile. For a nut-free option, sunflower seed butter (SunButter) works well, though be aware that the flavor will naturally be distinct from peanut butter. Ensure all other ingredients (like cookie crumbs) are also free of the specific allergen.
Nutrition Information
The following nutritional values are approximate per serving (1 bar, based on 24 servings):
- Calories: 266 kcal
- Carbohydrates: 25 g
- Protein: 5 g
- Fat: 18 g
- Saturated Fat: 6 g
- Sodium: 157 mg
- Potassium: 99 mg
- Fiber: 2 g
- Sugar: 19 g
- Vitamin A: 360 IU
- Calcium: 28 mg
- Iron: 1 mg
Recipe Meta
Course: Dessert
Cuisine: American
Author: Nora Taylor
Did you try this recipe? We’d love to see your creations! Share your photos on Instagram and mention @nora_cooks_vegan_ or tag #noracooks!