
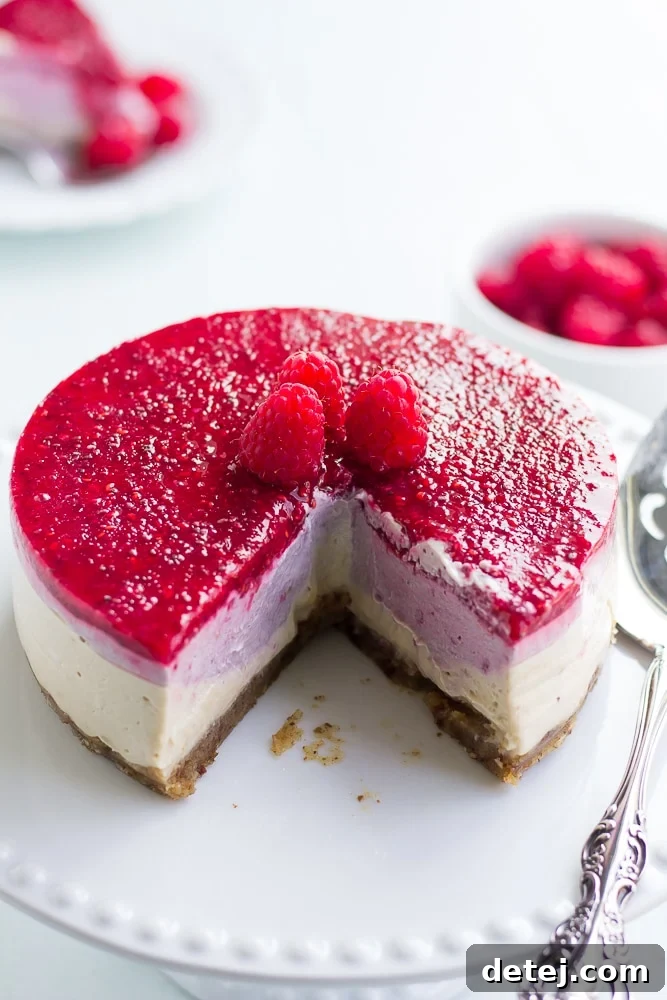
Indulge in Creamy Bliss: The Ultimate No-Bake Raspberry Layered Vegan Cheesecake
This No-Bake Raspberry Layered Vegan Cheesecake is not only stunning to look at but incredibly easy to create! Each decadent layer is crafted for a supremely creamy and luxurious texture, all thanks to the magic of cashews, perfectly complemented by a bright, tart raspberry topping. It’s a dessert that truly shines without any baking required, making it ideal for any season or celebration.
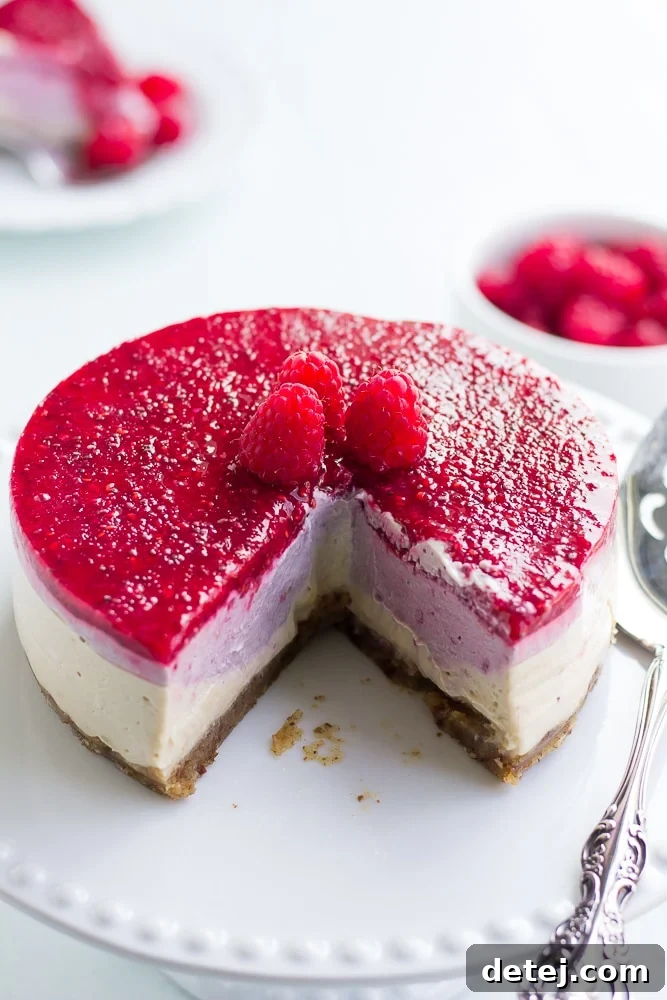
Creating this raspberry layered vegan cheesecake has truly become one of my favorite kitchen adventures! Seriously, no-bake vegan cheesecakes are a revelation, and I find myself constantly brainstorming new flavor combinations. Their simplicity and the incredible textures you can achieve are simply captivating. My current plans include developing a cozy pumpkin version for the autumn season, and a rich chocolate creation is definitely on the horizon. The creative possibilities with these delightful desserts are truly endless, making them a joy to experiment with all year round.
Just last week, my family and I enjoyed a wonderful evening at our local Farmer’s Market, an event we cherish and try to attend every Tuesday throughout the summer. The vibrant atmosphere, live music, and an abundance of fresh, local produce always make for a memorable outing. On this particular visit, I managed to snag a generous half-flat filled with an assortment of juicy blueberries, sweet strawberries, and plump, ruby-red raspberries. We happily munched on these delicious berries as we listened to the music, and the sheer joy on my kids’ faces was priceless. Ah, the simple pleasures of summertime and fresh produce!
With an unexpected bounty of raspberries leftover from our market haul, inspiration struck. I decided it was the perfect opportunity to whip up this exquisite layered cheesecake. And I couldn’t be more thrilled to finally share this incredible recipe with you. Please, don’t let the idea of multiple layers intimidate you! Despite its sophisticated appearance, this vegan cheesecake is surprisingly straightforward to assemble, making it accessible even for novice bakers. The result is a show-stopping dessert that tastes as amazing as it looks and will surely impress anyone you serve it to.
Why You’ll Fall in Love with This No-Bake Raspberry Vegan Cheesecake
This dessert isn’t just another sweet treat; it’s an experience. Here’s why this No-Bake Raspberry Layered Vegan Cheesecake will quickly become a cherished recipe in your collection:
- Effortless Elegance: Forget the complexities of oven baking, water baths, or cracked surfaces. This cheesecake comes together beautifully with minimal fuss, relying on freezing to set. It’s perfect for impressing guests or simply treating yourself without the stress of traditional baking.
- Rich & Creamy Texture: Thanks to the magical transformation of properly soaked cashews, each layer boasts an unbelievably smooth, melt-in-your-mouth creaminess that truly rivals traditional dairy cheesecakes. This plant-based magic creates a truly decadent experience.
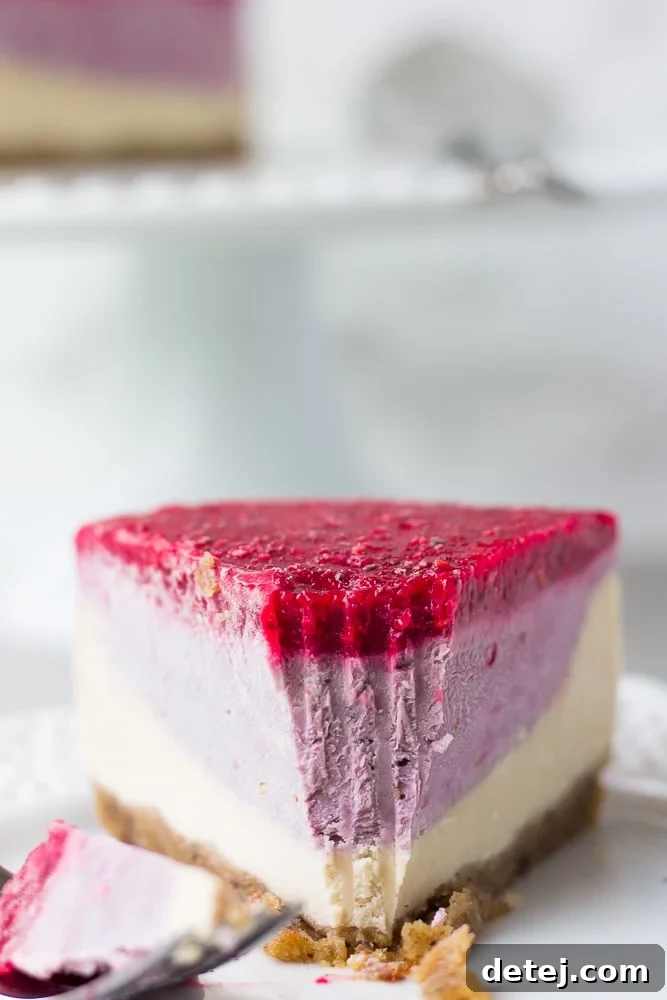
- Vibrant Raspberry Flavor: Fresh raspberries are incorporated into two distinct layers: a subtle pink middle layer and a wonderfully tart topping. This layered approach offers a delightful balance of sweet and tangy notes that burst with natural fruitiness in every bite.
- Naturally Plant-Based & Dairy-Free: Made entirely with whole-food, plant-based ingredients, this cheesecake is suitable for vegans and those looking for delicious dairy-free dessert options. It’s an indulgent treat that aligns with various dietary preferences.
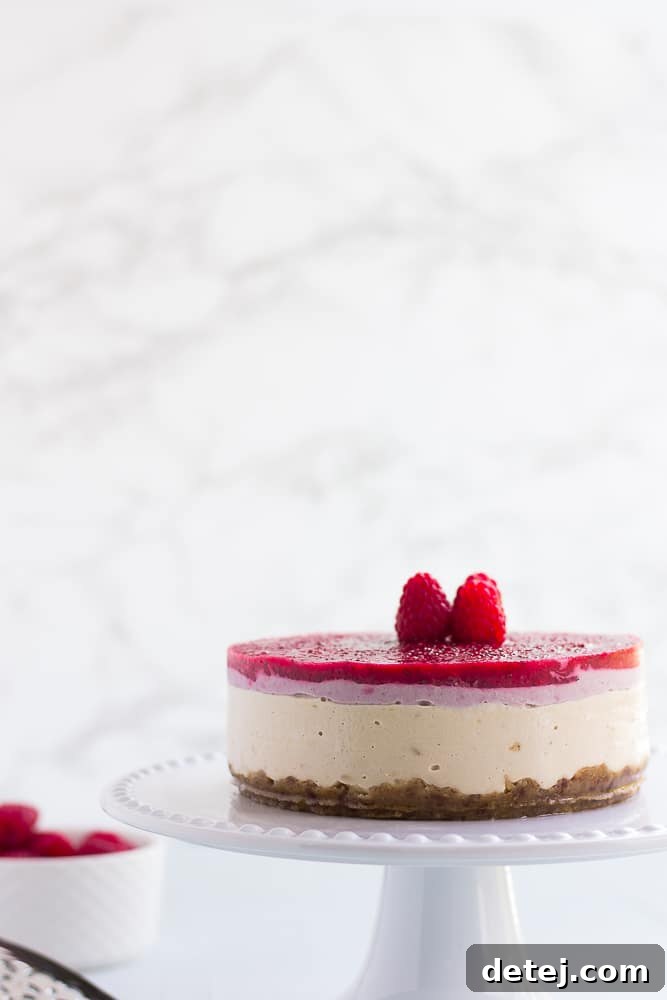
- Stunning Visual Appeal: The distinct, contrasting layers of creamy white and delicate pink, topped with a bright, ruby-red raspberry glaze, create a visually stunning dessert. It’s perfect for celebrations, holidays, or any special gathering where you want to serve something truly spectacular.
- Healthier Indulgence: While still a dessert, it’s packed with nutrient-dense ingredients like walnuts, almonds, dates, and cashews, offering healthy fats, fiber, and natural sweetness without refined sugars. It’s a treat you can feel good about enjoying.
Choosing the Right Pan for Your Vegan Cheesecake Masterpiece
To achieve the most aesthetically pleasing and effortlessly removed cheesecake, the ideal choice for this recipe is a 6-inch springform pan. A springform pan features sides that can be unlatched and removed from the base, making it incredibly easy to release your delicate layered cheesecake without damaging its pristine edges. This is particularly beneficial for layered desserts where presentation is key.
In my own kitchen, I initially only had a larger springform pan. However, knowing how rich and satisfying these vegan cheesecakes are, I wanted to create a more modestly sized dessert that yields perfect portions. Investing in a 6-inch springform pan was a decision I’m very glad I made, as it yields perfect, individual-slice portions that aren’t overly decadent. It’s a relatively inexpensive piece of kitchen equipment that will serve you well if you plan on making more delicious vegan cheesecakes in the future – and trust me, you will find endless uses for it!
Alternatives to a Springform Pan:
If a springform pan isn’t readily available, you do have alternatives, though they might require a bit more care during removal:
- 6-inch Cake Pan: You can absolutely use a standard 6-inch cake pan. The key here is meticulous preparation. Ensure you generously grease the pan (I find coconut oil works wonderfully for this) and/or line it with strips of parchment paper. To do this, cut two long strips of parchment paper, wide enough to extend above the rim of the pan. Lay them in a cross pattern inside the pan, allowing the excess to hang over the edges. This creates “handles” that you can use to gently lift the chilled cheesecake out of the pan once it’s fully set.
- Muffin Tin (for mini cheesecakes): For individual, bite-sized portions, a muffin tin lined with paper liners is an excellent choice. Simply press a small amount of crust mixture into each liner, then add the filling layers. This method eliminates the need for cutting and is fantastic for parties or portion control!
Whichever pan you choose, ensuring it’s properly prepared is crucial for a smooth and satisfying cheesecake experience.
Key Ingredients for Your Luscious No-Bake Vegan Cheesecake
The beauty of this vegan cheesecake lies in its simple yet powerful ingredients. Each component plays a vital role in creating the irresistible flavor and texture:
For the Crust: A Hearty & Flavorful Base
- Raw Walnuts: These provide a rich, earthy base and contribute healthy fats and a delightful crunch to the crust.
- Almond Flour or Meal: Adds structure and a delicate nutty flavor that complements the walnuts perfectly. It also helps bind the crust.
- Medjool Dates, pitted: Act as a natural binder and provide a wonderfully caramelly sweetness without any refined sugar. Their sticky texture is essential for holding the crust together firmly.
- Water: Just a touch helps achieve the perfect sticky dough consistency, allowing the crust ingredients to coalesce without becoming overly wet.
- Salt: A pinch of salt is crucial for enhancing all the other flavors and balancing the sweetness in the crust.
For the Filling (1st & 2nd Layers): Creamy Indulgence
- Raw Cashews (soaked): These are the undisputed star of vegan cheesecakes! When properly soaked and blended, cashews create an incredibly creamy, smooth, and rich base that perfectly mimics traditional cream cheese. They are essential for achieving that luxurious, melt-in-your-mouth cheesecake texture.
- Canned Full-Fat Coconut Milk (creamy white part): Adds richness, body, and helps achieve the thick, decadent consistency. Be sure to use the thick cream from the top of a chilled can, not the watery liquid at the bottom.
- Agave or Pure Maple Syrup: Natural sweeteners that provide the perfect level of sweetness while keeping the recipe refined sugar-free. Choose your preference, both work beautifully.
- Lemon Juice: Absolutely essential for balancing the sweetness and adding that classic “cheesy” tang. It brightens up the overall flavor profile and prevents the cheesecake from being overly heavy.
- Pure Vanilla Extract: Enhances the depth of flavor in the creamy layers, adding a warm, aromatic note.
- Raspberries (for 2nd layer): Infused into a portion of the filling, these berries add a subtle pink hue and a gentle tart-sweet flavor, creating a delightful contrast within the layers.
For the Tart Raspberry Top Layer: A Burst of Freshness
- Raspberries: A larger quantity of fresh raspberries creates a vibrant, intensely fruity, and wonderfully tart topping that cuts through the richness of the cheesecake layers, offering a refreshing finish.
- Lemon Juice: Further boosts the tartness, making the raspberry flavor pop and providing a zesty contrast to the creamy base.
- Agave or Pure Maple Syrup: Sweetens the tart raspberries just enough to create a balanced glaze that’s neither too sweet nor too sour.
- Chia Seeds: These tiny powerhouses act as a natural thickener for the topping, giving it a beautiful gel-like consistency without the need for gelatin or cornstarch. They also add a boost of fiber and omega-3s, making the topping even healthier.
Crafting Your Layered Masterpiece: Step-by-Step Instructions
Creating this beautiful layered vegan cheesecake is a straightforward process, mainly involving blending and freezing. Follow these steps carefully to achieve a stunning and delicious dessert that will impress everyone.
Step 1: Prepare Your Pan – The Foundation of Success
- Start by preparing your 6-inch springform pan. Liberally grease it with coconut oil to ensure easy release. If you’re using a standard 6-inch cake pan, grease it thoroughly and consider lining it with parchment paper strips crisscrossed on the bottom, with excess hanging over the sides to create convenient handles for lifting. This preparation is key for a flawless presentation.
Step 2: Create the Dreamy, Nutty Crust
- To make the crust, add the raw walnuts, almond flour, pitted Medjool dates, 2 tablespoons of water, and salt into a food processor. Pulse and process until a sticky, crumbly dough forms. If the mixture seems too dry and isn’t holding together when pressed between your fingers, add another tablespoon of water (or a little more, one teaspoon at a time) until the desired consistency is reached. Be careful not to over-process; you want a texture that can be pressed into a cohesive crust, not a fine paste.
- Once the dough is ready, press it evenly and firmly along the bottom of your prepared pan. Use the back of a spoon, a flat-bottomed glass, or your knuckles to create a smooth, compact layer. Place the pan in the freezer for about 10-15 minutes to firm up while you prepare the creamy filling. This short chill helps the crust set.
Step 3: Prepare the Silky Cheesecake Layers
- Now, prepare the luxurious first filling layer. In a high-powered blender, combine your thoroughly soaked and drained cashews, the creamy white part of the canned full-fat coconut milk, agave or maple syrup, fresh lemon juice, and pure vanilla extract. Blend on high for at least 2 minutes, or until the mixture is incredibly smooth and velvety. Stop occasionally to scrape down the sides of the blender to ensure everything is fully incorporated. The key to a truly creamy, grain-free cheesecake is to blend until there are absolutely no cashew bits remaining.
- Carefully pour approximately two-thirds of this creamy white filling mixture over the chilled crust in your pan. Gently smooth the top with a spatula or the back of a spoon to create an even layer. Return the pan to the freezer immediately while you prepare the next layer. This quick freeze helps to slightly set the first layer, preventing the subsequent layer from bleeding into it, thus creating beautiful distinct lines.
- For the second layer, add the remaining one-third of the white filling mixture from the blender, along with the 1/2 cup of fresh raspberries. Blend again until the raspberries are fully incorporated and the mixture turns a beautiful, even pink hue. Continue blending until completely smooth.
- Retrieve the pan from the freezer and gently pour this raspberry-infused pink layer on top of the already slightly set white layer. Smooth it out carefully with a spatula. Place the pan back into the freezer once more to chill and firm up.
Step 4: Craft the Vibrant, Tart Raspberry Topping
- Quickly rinse out your blender to prepare for the final layer. Add the 1 cup of fresh raspberries, 1 tablespoon of lemon juice, 3 tablespoons of agave or maple syrup, and the chia seeds. Blend until the mixture is completely smooth and vibrant in color. The chia seeds will begin to thicken the mixture as it sits, creating a lovely gel-like topping.
- Remove the cheesecake from the freezer and pour this vibrant, tart raspberry topping evenly over the pink second layer. Gently tilt the pan or use a spatula to ensure the topping spreads across the entire surface to create a uniform, glossy finish.
Step 5: Setting and Serving Your Masterpiece
- Return the cheesecake to the freezer for a final set. Allow it to freeze for a minimum of 3 hours, though freezing it overnight is truly preferred for the best firm texture and easiest slicing. A properly chilled cheesecake will hold its shape beautifully.
- To serve, carefully remove the springform pan collar. For the cleanest slices, run a large, sharp knife under hot water for about a minute, then wipe it completely dry before making each cut. Repeat this process for every slice. You can also let the cheesecake thaw at room temperature for 10-15 minutes before cutting to make it slightly easier to slice through the firm layers.
- Store any leftover cheesecake in the fridge for a couple of weeks, or in the freezer for longer. Make sure to wrap it well in plastic wrap or store it in an airtight container to prevent freezer burn and maintain its freshness and flavor. For an extra touch of beauty and flavor, garnish each slice with a few more fresh raspberries just before serving. Enjoy your delicious homemade vegan treat!
Helpful Notes for the Best Vegan Cheesecake
- The Importance of Soaking Cashews: This step is absolutely non-negotiable for achieving that ultra-creamy, smooth texture in your cheesecake filling. To properly soak raw cashews, bring a few cups of water to a rolling boil (a tea kettle works perfectly for this). Pour the boiling water over the cashews, ensuring they are fully submerged. Let them soak for at least 5 minutes, or up to an hour, to soften them sufficiently. Before using, always drain and thoroughly rinse the cashews. Soaking longer (e.g., 4 hours or overnight in cold water) will also work, but the hot water method is a quick shortcut when you’re short on time.
- High-Powered Blender is Key: For the smoothest possible filling, a high-powered blender (like a Vitamix or Blendtec) is highly recommended. These blenders are designed to break down nuts and seeds completely, resulting in an incredibly silky, grain-free texture. Regular blenders might struggle to break down the cashews completely, leading to a slightly grainy texture. If you only have a regular blender, soak your cashews for longer (at least 2 hours in hot water or overnight in cold) and blend in smaller batches, stopping frequently to scrape down the sides until truly smooth.
- Chilling Time is Crucial: Do not rush the freezing time. A properly chilled cheesecake will be firm, easy to slice, and hold its beautiful layered shape. Attempting to cut it too soon will result in a messy presentation and compromise the integrity of the layers. Patience truly pays off with no-bake desserts!
Nutrition Highlights (Approximate per serving)
Please note that these are approximate values and may vary slightly based on specific ingredients and brands used.
- Serving Size: 1 slice (out of 10)
- Calories: 336 kcal
- Carbohydrates: 29g
- Protein: 8g
- Fat: 23g
- Saturated Fat: 5g
- Sodium: 66mg
- Potassium: 352mg
- Fiber: 4g
- Sugar: 17g
- Vitamin A: 7 IU
- Vitamin C: 7mg
- Calcium: 64mg
- Iron: 3mg
Recipe Details
- Recipe Name: No-Bake Layered Raspberry Vegan Cheesecake
- Course: Dessert
- Cuisine: American (Modern Plant-Based)
- Prep Time: 30 minutes
- Freezing Time: 2-3 hours (preferably overnight for best results)
- Total Time: Approximately 30 minutes active preparation time, plus chilling/freezing time.
- Yields: 10 slices
- Author: Nora Taylor
- Recipe Inspired by: Bakerita