
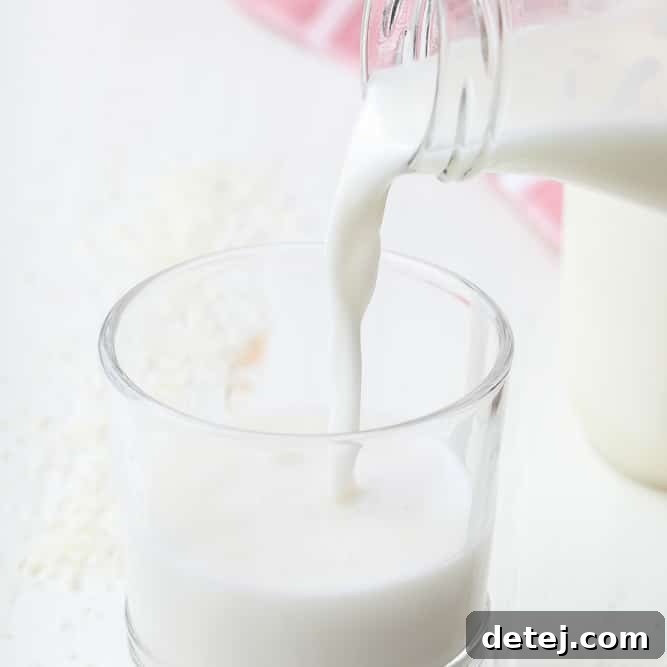
Discover the simple joy of making your own coconut milk at home! With just a few basic ingredients, you can create a truly luscious, creamy, and thick plant-based milk that surpasses anything store-bought.
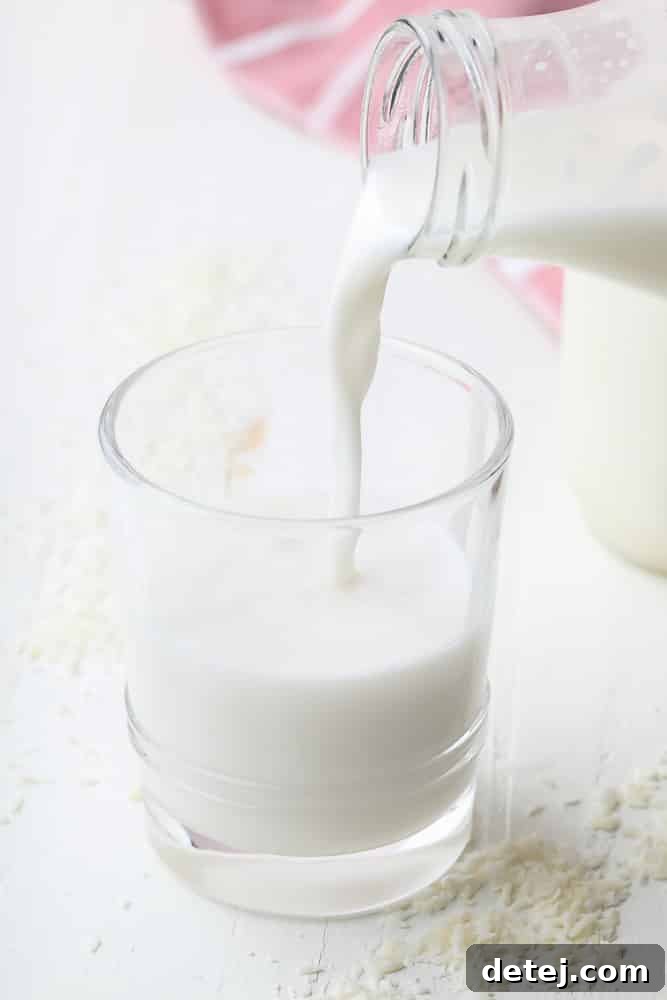
Why Choose Homemade Coconut Milk?
In a world increasingly leaning towards plant-based options, coconut milk stands out as a versatile and delicious choice. While store shelves are stocked with various brands, making your own homemade coconut milk offers unparalleled freshness, purity, and customization. This rich, creamy plant milk is not only incredibly easy to prepare but also free from the additives, preservatives, and stabilizers often found in commercial versions. By making it yourself, you control every ingredient, ensuring a wholesome and natural product for you and your family.
The process is surprisingly simple, requiring minimal effort for a maximum reward. You’ll be amazed at how quickly you can transform dried coconut flakes into a velvety, fragrant milk that elevates both sweet and savory dishes. From enhancing the flavor of your morning oatmeal to becoming the star ingredient in a vibrant curry, homemade coconut milk is a game-changer in any kitchen.
The Simple Ingredients You’ll Need
One of the most appealing aspects of homemade coconut milk is its minimal ingredient list. You truly only need two primary components, with a couple of optional additions to tailor the flavor to your preference.
- Unsweetened Shredded Coconut Flakes: This is the heart of your coconut milk. Opt for high-quality, unsweetened shredded coconut. The fat content in the coconut is what gives the milk its rich, creamy texture. Ensure it’s unsweetened, as this allows you to control the sweetness level yourself. You can find shredded coconut in most grocery stores, often in the baking aisle or bulk section.
- Water: Plain, filtered water is all you need. The temperature of the water plays a crucial role; room temperature or slightly warm water helps to extract more of the natural fats and flavors from the coconut, resulting in a creamier and more flavorful milk. Avoid using cold water, as it can hinder the blending process and lead to a less optimal result.
Optional Flavor Enhancers:
- Pure Maple Syrup: For those who prefer a touch of sweetness in their plant milk, a tablespoon or two of pure maple syrup adds a lovely, subtle sweetness without overpowering the natural coconut flavor. You can also use other sweeteners like dates, agave nectar, or a pinch of stevia.
- Pure Vanilla Extract: A dash of vanilla extract can enhance the overall aroma and taste, especially if you plan to use your coconut milk in sweet applications like smoothies, desserts, or coffee.
- Pinch of Salt: A tiny pinch of sea salt can subtly enhance the flavor of the coconut, balancing out any sweetness and adding depth.
Essential Equipment for Making Coconut Milk
Gathering the right tools before you begin will make the process incredibly smooth and efficient. Luckily, you likely already have most of these items in your kitchen.
- High-Powered Blender: This is the most critical piece of equipment. A strong blender is essential for thoroughly breaking down the coconut flakes and extracting all their creamy goodness. While a standard blender might work, a high-powered model will yield a significantly smoother and richer milk.
- Nut Milk Bag, Cheesecloth, or Thin Tea Towel: To separate the liquid milk from the coconut pulp, you’ll need a fine mesh strainer.
- Nut Milk Bag: These are specifically designed for making plant milks and are highly effective. They are reusable and provide excellent filtration.
- Cheesecloth: If you don’t have a nut milk bag, several layers of cheesecloth (4-6 layers recommended) can work well.
- Clean, Thin Tea Towel: A clean, thin, lint-free tea towel can also serve as an effective straining tool in a pinch.
- Large Bowl: You’ll need a large bowl to place your straining cloth over and collect the freshly squeezed coconut milk.
- Storage Containers: Glass jars or bottles with airtight lids are ideal for storing your homemade coconut milk in the refrigerator.
Crafting Your Homemade Coconut Milk: A Step-by-Step Guide
Making your own coconut milk is a straightforward process that takes just minutes from start to finish. Follow these simple steps for a perfect batch every time.
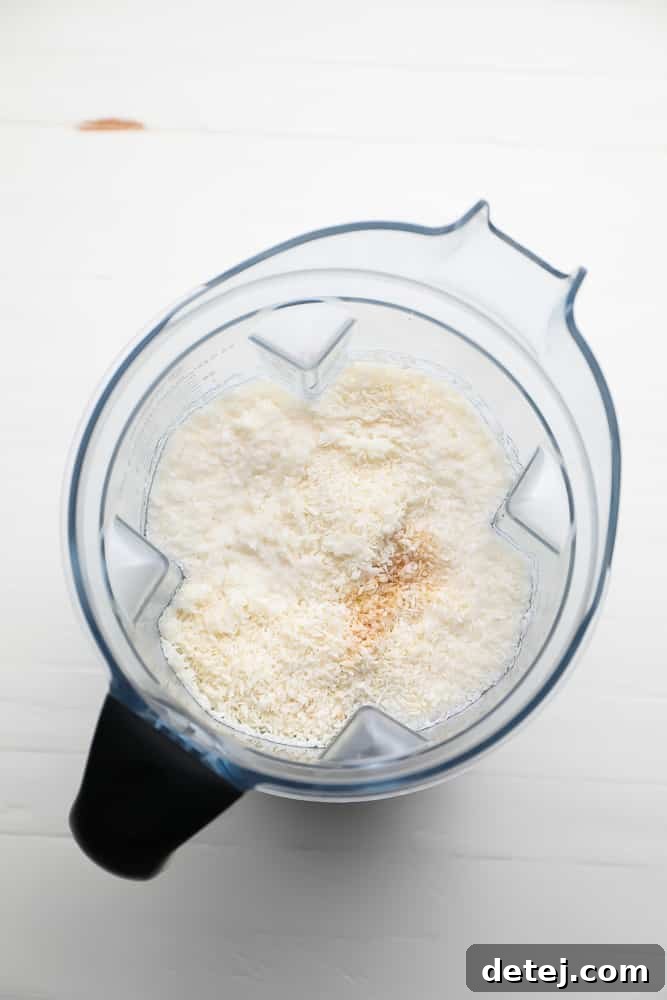
Step 1: Combine Ingredients in Your Blender
To begin, add the unsweetened shredded coconut flakes to your high-powered blender. Pour in the specified amount of room temperature water. If you choose to add sweetener or vanilla extract, now is the time to include those as well. Ensure all ingredients are nestled securely in the blender carafe.
Step 2: Blend to Creamy Perfection
Secure the lid on your blender and blend on high speed for approximately 1 to 2 minutes. The goal is to thoroughly pulverize the coconut flakes and emulsify them with the water. You’ll notice the mixture transforming into a creamy, opaque white liquid with a frothy top. The longer you blend, the finer the coconut particles will become, resulting in a smoother milk.
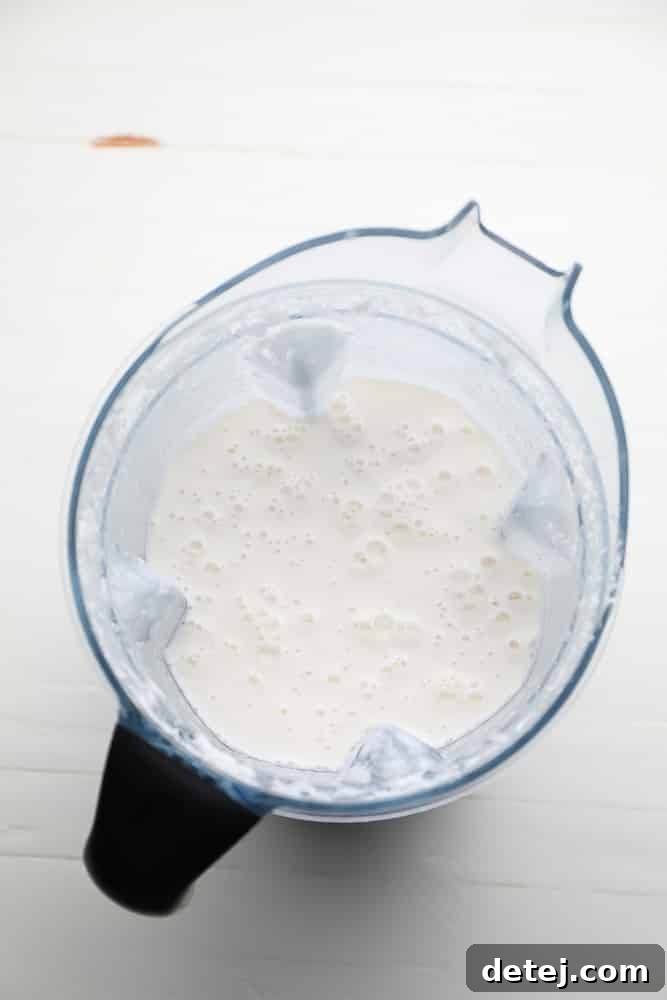
Step 3: Strain for Smoothness
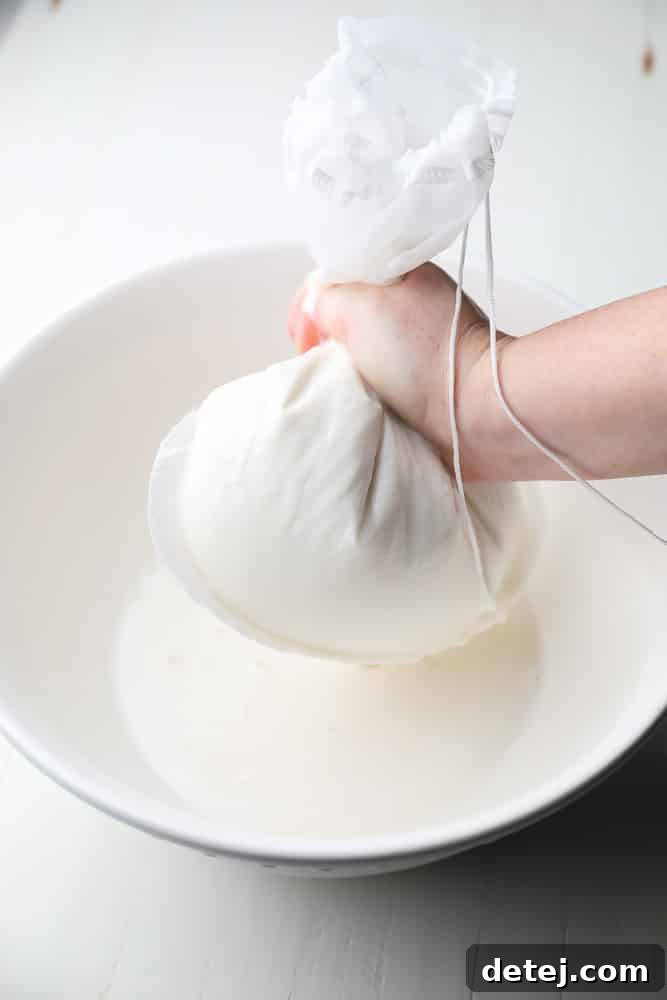
Place a nut milk bag, several layers of cheesecloth, or a clean thin tea towel over a large bowl. Carefully pour the blended coconut mixture into the center of your chosen straining material. Gather the edges of the bag or cloth and begin to squeeze the liquid out into the bowl. Apply firm pressure to extract as much milk as possible. You’ll be left with a rich, white liquid in the bowl and a drier coconut pulp in the bag.
Step 4: Store and Enjoy Your Fresh Milk
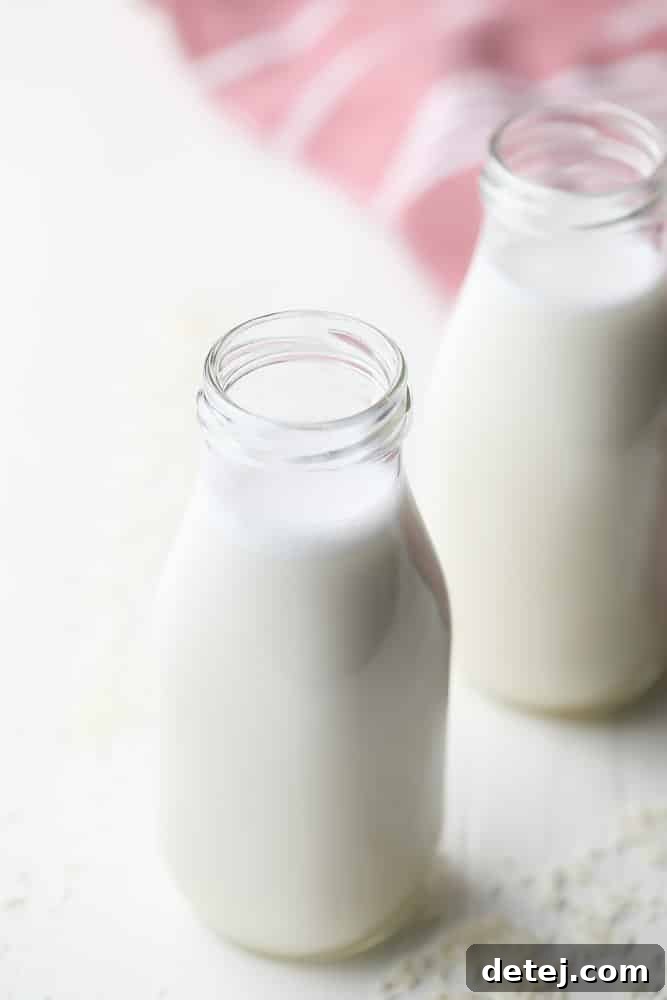
Once you’ve strained all the liquid, pour your freshly made coconut milk into a container of your choice – glass bottles or jars work wonderfully. Store it in the refrigerator. Homemade coconut milk will naturally separate into a thicker cream layer on top and a thinner liquid layer below. This is completely normal and a sign of its natural composition. Simply shake the container well before each use to recombine the layers. Enjoy your delicious, homemade plant milk!
Tips for the Best Homemade Coconut Milk
- Optimize Water Temperature: Using room temperature or slightly warm water is key. Hot water can make the fats separate too quickly and sometimes give a slightly ‘cooked’ flavor, while cold water makes it harder to extract the oils.
- Don’t Skimp on Blending Time: Blending for the full 1-2 minutes ensures that the coconut flakes are thoroughly processed, maximizing the creaminess and flavor of your milk.
- Squeeze Firmly (But Gently): When straining, apply firm pressure to extract as much liquid as possible, but avoid tearing your nut milk bag or cloth. The more you squeeze, the thicker and richer your milk will be.
- Repurpose the Pulp: Don’t throw away the leftover coconut pulp! It’s still packed with fiber and flavor. You can dry it out in a low oven to make coconut flour, add it to smoothies for extra fiber, incorporate it into granola, or use it in baking recipes like muffins or energy balls.
- Adjust Thickness: If you prefer a thinner coconut milk, simply add a bit more water during the blending stage or after straining. For a thicker, more concentrated milk, use slightly less water or try a higher ratio of coconut to water next time.
Creative Ways to Enjoy Your Fresh Coconut Milk
The beauty of homemade coconut milk lies in its incredible versatility. Its rich, subtly sweet flavor makes it a fantastic addition to a wide array of dishes, both sweet and savory.
Savory Delights:
- Curries and Stews: Elevate the creaminess and depth of flavor in dishes like Chickpea Curry, Red Thai Curry, Vegan Butter Chicken, Tikka Masala, or Thai Green Curry. It provides a luxurious base and authentic taste.
- Soups: Add a swirl to pumpkin soup, tomato soup, or any creamy vegetable soup for an exotic twist and extra richness.
- Coconut Rice: Use it to cook your rice for a fragrant and flavorful side dish, perfect with any Asian-inspired meal or a Peanut Tofu with Coconut Rice bowl.
- Sauces: Create dairy-free cream sauces for pasta or vegetables.
Sweet Indulgences:
- Cereal and Oatmeal: A perfect dairy-free alternative for your morning bowl of cereal or creamy Overnight Oats.
- Smoothies: Blend it into your favorite fruit or green smoothies for a tropical flavor and added creaminess. Try it in a Vegan Green Smoothie.
- Coffee and Tea: Use it as a creamer in your coffee or tea for a rich, plant-based option.
- Hot Chocolate: Make an indulgent Vegan Hot Chocolate that’s incredibly satisfying.
- Baking: Substitute dairy milk in many baking recipes, from cakes and muffins to pancakes and waffles.
- Desserts: Ideal for making dairy-free puddings, ice creams, or chia seed puddings. It’s also perfect for dipping these Ultimate Chocolate Cookies in!
Homemade vs. Store-Bought Canned Coconut Milk
While canned coconut milk is a pantry staple for many, homemade offers a distinct advantage in terms of freshness, flavor, and control over ingredients. Canned versions often contain emulsifiers, gums, and sometimes added sugars. The texture of homemade coconut milk is typically lighter and fresher, without the slightly metallic taste some canned varieties can have. It also allows for customization of thickness, making it adaptable for various culinary needs. For recipes where you want a cleaner, purer coconut flavor, homemade is undoubtedly the superior choice.
Frequently Asked Questions About Homemade Coconut Milk
Can I use fresh coconut instead of shredded?
Absolutely! If you have access to fresh coconuts, using the freshly grated meat will yield an even richer and more flavorful milk. The process remains largely the same: blend the fresh coconut meat with warm water and then strain.
How long does homemade coconut milk last?
Homemade coconut milk typically lasts for 4-5 days when stored in an airtight container in the refrigerator. Always check for any off-smells or signs of spoilage before consuming.
Why does my coconut milk separate?
Separation is completely natural for homemade coconut milk! It signifies the purity of your milk, as it lacks the emulsifiers found in many commercial products. The fat will rise to the top, forming a thicker cream layer, while the water settles below. Simply shake or whisk it vigorously before each use to recombine.
Can I freeze homemade coconut milk?
Yes, homemade coconut milk freezes beautifully! Pour it into ice cube trays for convenient single servings, or larger freezer-safe containers. Once frozen, transfer the cubes to a freezer bag. It can be frozen for up to 2-3 months. Thaw in the refrigerator before use.
What can I do with the leftover coconut pulp?
The pulp is a valuable byproduct! You can dry it in a dehydrator or a low oven (around 200°F/95°C) until completely dry to make your own coconut flour. Alternatively, add it to smoothies, oatmeal, energy bites, or use it as a base for vegan “meatballs” or vegetable patties.
Explore More Homemade Plant-Based Milks
Once you master homemade coconut milk, you might be inspired to try other plant-based milk varieties. Making your own nut or seed milks is a rewarding experience that puts you in control of your ingredients and flavor.
- How to Make Almond Milk
- How to Make Cashew Milk
- How to Make Hemp Milk
- How to Make Oat Milk
Homemade Coconut Milk Recipe Card
How to Make Coconut Milk
Learn how to make coconut milk at home! You only need a few simple ingredients to make this luscious, creamy and thick plant milk.
Ingredients
- 2 1/2 cups unsweetened shredded coconut flakes
- 4 cups room temperature water
Optional
- 2 tablespoons pure maple syrup
- 1/2 teaspoon pure vanilla extract
Instructions
- To a high powered blender, add the shredded coconut flakes, room temperature water and optional maple syrup and vanilla. Blend on high for 1-2 minutes until creamy and white.
- Strain the coconut milk through a nut milk bag, cheesecloth or thin tea towel over a large bowl.
- Pour into containers and store in the refrigerator for 4-5 days. Separation is natural, so shake before using. It can also be frozen, if needed.
- Use anywhere you would dairy milk, such as cereal or oatmeal. It’s also a good substitute for store bought canned coconut milk, like in Tikka Masala or Thai Green Curry.
Notes
- Make sure to use room temperature water instead of cold. It will be easier to blend and extract fats.
- For storage, larger glass milk jugs or smaller glass containers work perfectly to keep your milk fresh.
Nutrition
Calories: 190kcal |
Carbohydrates: 10g |
Protein: 2g |
Fat: 17g |
Saturated Fat: 15g |
Sodium: 10mg |
Potassium: 156mg |
Fiber: 4g |
Sugar: 5g |
Vitamin C: 1mg |
Calcium: 12mg |
Iron: 1mg
Did you make this recipe?Mention @nora_cooks_vegan_ or tag #noracooks!
The Rewards of Homemade Coconut Milk
Making your own coconut milk at home is more than just a culinary task; it’s an act of mindfulness and a step towards healthier eating. You gain complete control over what goes into your body, avoiding unnecessary additives and embracing the natural goodness of simple ingredients. The aroma of freshly blended coconut, the creamy texture, and the versatile applications make this an incredibly rewarding kitchen endeavor.
Whether you’re a seasoned chef or a beginner in the kitchen, this easy recipe empowers you to create a superior plant milk that will become a staple in your home. Experiment with different uses, savor its fresh taste, and enjoy the satisfaction of knowing exactly what you’re consuming. Say goodbye to store-bought and hello to the fresh, pure taste of homemade coconut milk!