
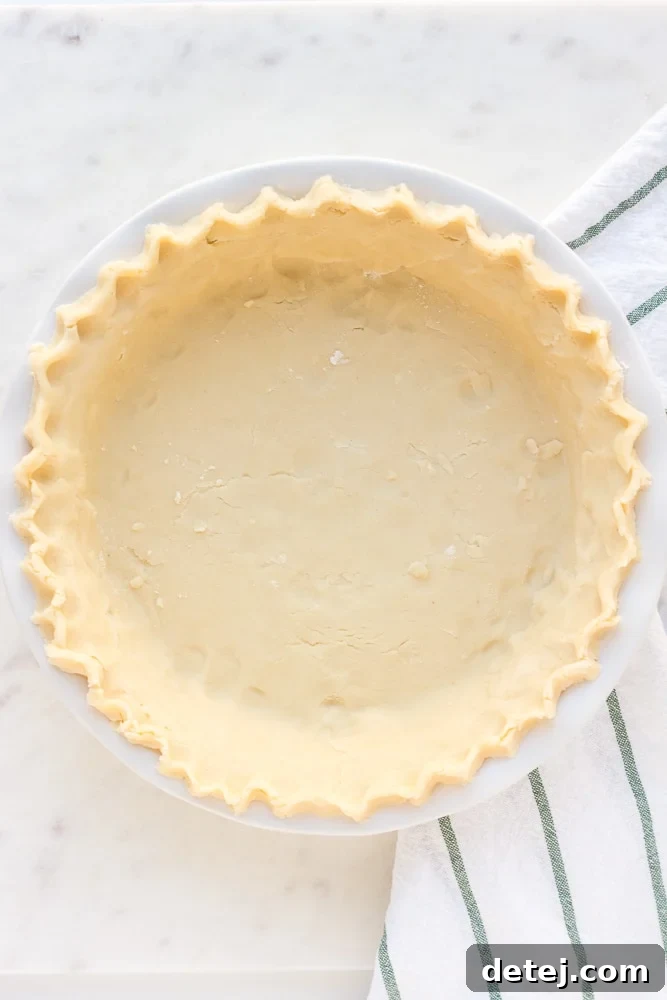
Discover how to craft the perfect vegan pie crust with ease, right in your food processor or by hand, in under 15 minutes! This recipe guarantees a flaky, tender, and irresistibly delicious crust that no one will guess is entirely plant-based. Ideal for all your favorite sweet and savory pies.
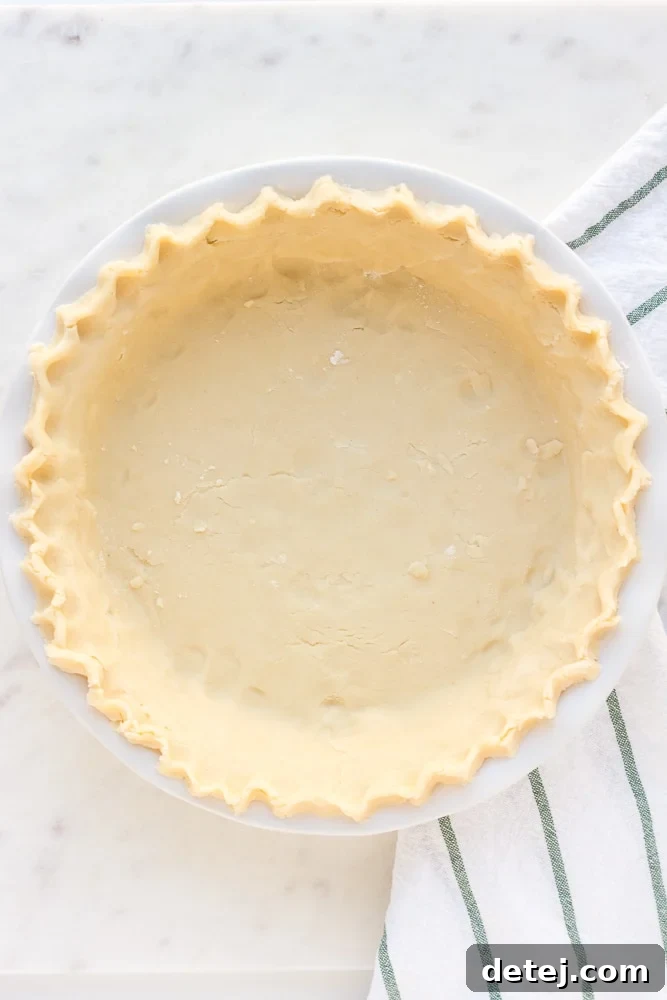
Effortless Vegan Pie Crust: Flaky, Tender, and Fast
For many home bakers, the thought of making pie crust from scratch can be daunting. Visions of tough, crumbly, or overly sticky dough often deter even seasoned cooks. But what if we told you that creating a perfectly flaky, tender, and delicious pie crust—one that’s also entirely vegan—could be incredibly simple and quick? Forget the intimidation! This comprehensive guide will walk you through crafting a sensational homemade vegan pie crust in 15 minutes or less, using either a food processor for maximum speed or by hand for a more traditional approach.
This isn’t just any pie crust; it’s a classic recipe, reimagined to be 100% plant-based, making it suitable for all your baking adventures, from holiday desserts to savory pot pies. We’ve optimized the process to ensure success every time, delivering a crust so good, your guests will never suspect it’s free of animal products.
Why Choose a Homemade Vegan Pie Crust?
Opting for a homemade vegan pie crust offers numerous benefits over store-bought alternatives. Firstly, you gain complete control over the ingredients, avoiding preservatives and artificial flavors often found in pre-made options. Secondly, the flavor and texture of a freshly made crust are unparalleled—its delicate flakiness and rich, buttery taste elevate any pie filling. Lastly, mastering this basic skill opens up a world of culinary creativity, allowing you to customize your pies to perfection. Plus, for those following a vegan lifestyle or accommodating dietary restrictions, this recipe ensures everyone can enjoy a slice of pie.
The Secret to a Flaky Vegan Pie Crust: Cold Fat is Key
The cornerstone of any truly tender and flaky pie crust, vegan or not, lies in the temperature of your fat. Cold fat, when mixed with flour, creates small pockets that steam and expand during baking, resulting in those coveted layers of flaky goodness. If the fat melts and incorporates too much into the flour before baking, you end up with a tough, cookie-like crust rather than a light, airy one. This principle is paramount, so ensure your vegan butter and vegetable shortening are thoroughly chilled before you begin.
Essential Ingredients for Your Vegan Pie Crust
- All-Purpose Flour: The foundation of our crust, providing structure. Sifting or spooning and leveling ensures accuracy.
- Sugar: A small amount of sugar enhances flavor and contributes to browning, without making the crust overly sweet.
- Salt: Essential for balancing flavors and bringing out the richness of the fats.
- Cold Vegan Butter: Provides a rich, buttery flavor profile. We recommend a high-quality stick vegan butter for best results (e.g., Earth Balance sticks).
- Cold Vegetable Shortening: Crucial for achieving ultimate flakiness and tenderness, as it has a higher melting point than vegan butter.
- Ice Water: The binding agent. Using ice water keeps the fats cold and prevents the dough from becoming overworked.
Crafting Your Vegan Pie Crust with a Food Processor
The food processor is your best friend for a lightning-fast pie crust. It mimics the action of cutting fat into flour efficiently, minimizing handling and keeping the ingredients cold.
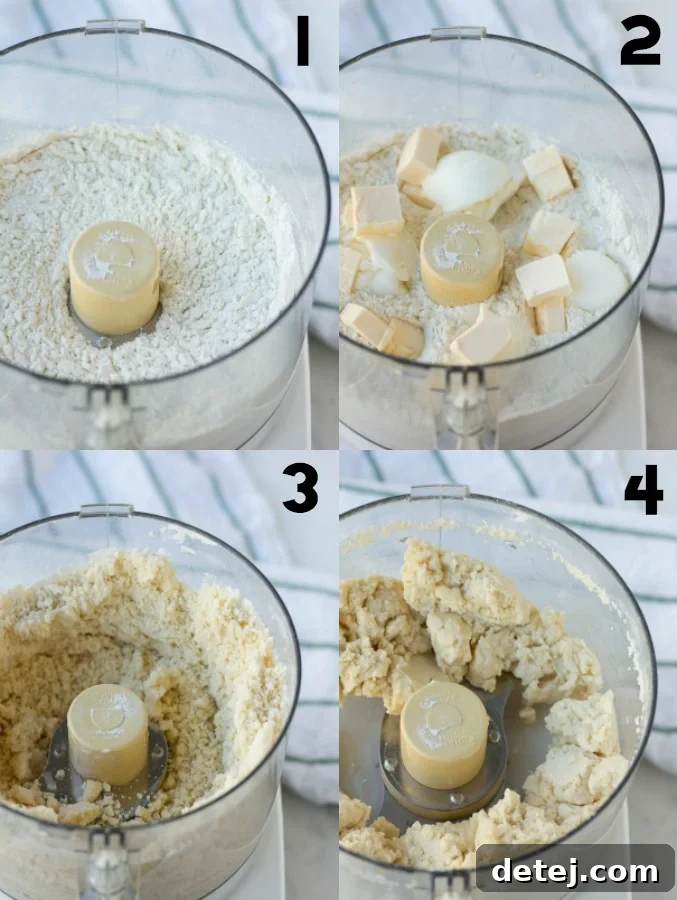
- Prepare Your Fats: Begin by measuring out 1/4 cup (4 tablespoons) of cold vegan butter and 1/4 cup of cold vegetable shortening. It’s crucial that these are very cold—ideally, refrigerate them for at least 30 minutes prior to starting. Cube the vegan butter and break the shortening into a few pieces.
- Combine Dry Ingredients: In the bowl of your food processor fitted with the “S” blade, add the 1 1/2 cups all-purpose flour (spooned and leveled), 1 teaspoon sugar, and 1/4 teaspoon salt. Pulse a few times, about 5-10 seconds, to ensure they are well combined.
- Incorporate Cold Fats: Add the cold cubed vegan butter and pieces of vegetable shortening to the dry ingredients in the food processor. Pulse in short bursts, typically for about 10 seconds total. Stop when the mixture resembles a coarse meal with pea-sized pieces of fat still visible. Avoid over-processing; you want visible bits of fat for flakiness.
- Add Ice Water: With the food processor running, gradually drizzle in 3 tablespoons of ice water through the feed tube. Watch the dough carefully; as soon as it begins to clump together and form a ball, stop processing. You may need to add an additional tablespoon of ice water, one teaspoon at a time, until the dough just comes together. The dough should be moist enough to hold its shape when squeezed, but not wet or sticky.
The Traditional Method: Making Vegan Pie Crust by Hand
No food processor? No problem! You can achieve an equally fantastic vegan pie crust using a pastry cutter or even just your fingertips. The key is to work quickly to keep the fats cold.
- Whisk Dry Ingredients: In a large mixing bowl, whisk together the 1 1/2 cups all-purpose flour, 1 teaspoon sugar, and 1/4 teaspoon salt until thoroughly combined.
- Cut in Cold Fats: Add the cold cubed vegan butter and pieces of vegetable shortening to the flour mixture. Using a pastry cutter, two knives, or your fingertips, cut the fats into the flour until the mixture resembles coarse meal with some pea-sized pieces of fat remaining. Work quickly to prevent the fats from warming up.
- Incorporate Ice Water: Gradually add 3-4 tablespoons of ice water, one tablespoon at a time, stirring with a fork until the dough just begins to come together. Press a small portion of the dough between your fingers; if it holds, it’s ready. Avoid over-mixing, as this can develop the gluten too much, leading to a tough crust.
Rolling and Transferring Your Dough
Once your dough is formed, whether by machine or hand, it’s time to prepare it for your pie plate.
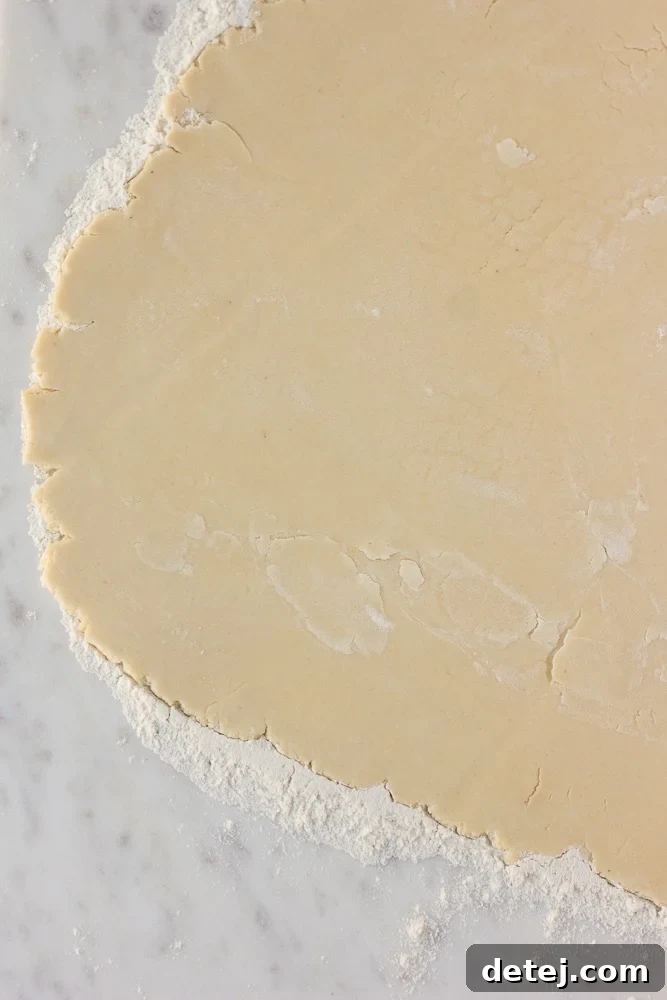
- Form a Disc: Lightly flour a clean work surface. Turn the dough out onto the floured surface and gently gather it into a cohesive ball. Flatten it slightly into a disc. Handle the dough as little as possible to keep the fats cold.
- Roll it Out: Using a rolling pin, roll the dough from the center outwards, rotating it frequently and adding a touch more flour underneath if needed to prevent sticking. Aim for a circle approximately 12 inches in diameter and about 1/8 to 1/4 inch thick.
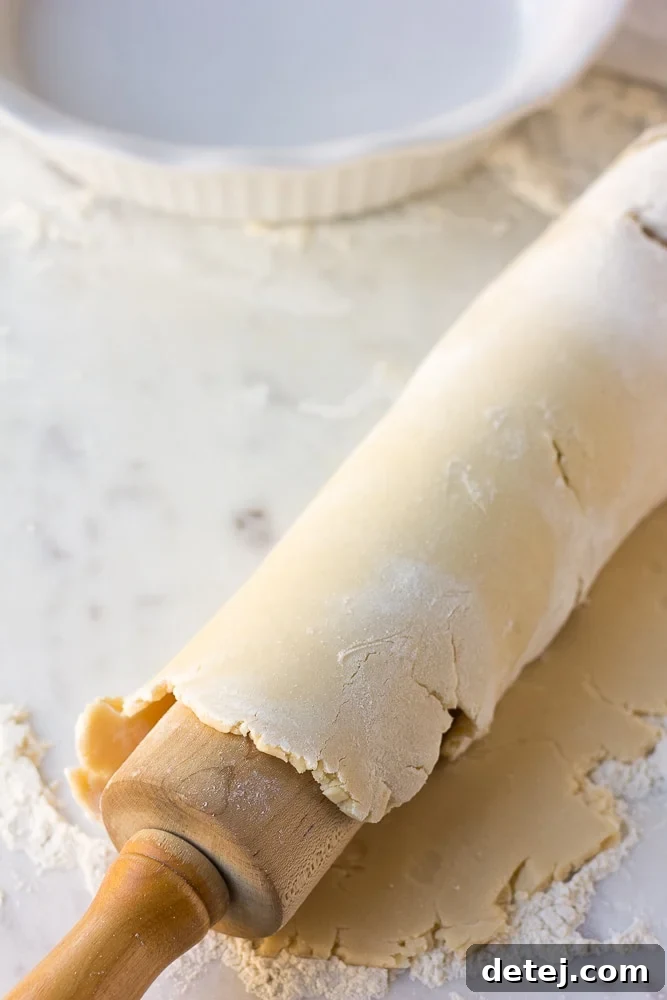
- Transfer to Pie Plate: Carefully transfer the rolled-out dough to your pie plate. A common technique is to gently wrap the dough around your rolling pin, then unroll it over the pie plate. Don’t worry if it’s not absolutely perfect or if it tears slightly; pie crusts are forgiving!
Finishing Touches: Shaping and Edging
Once in the pie plate, it’s time to fit the crust and give it a beautiful edge.
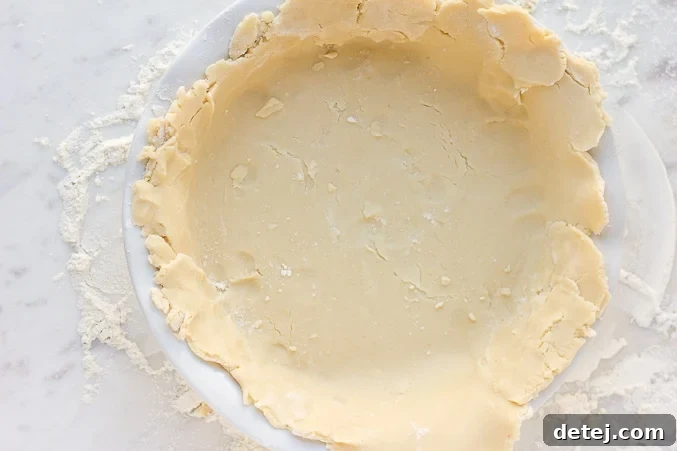
- Fit the Crust: Gently press the dough into the contours of the pie plate, making sure it settles into the bottom and sides without stretching. Stretching can cause the crust to shrink during baking.
- Trim Excess: Trim any excess dough from the edges, leaving about a 1/2 to 1-inch overhang. You can fold this overhang under itself to create a thicker edge.
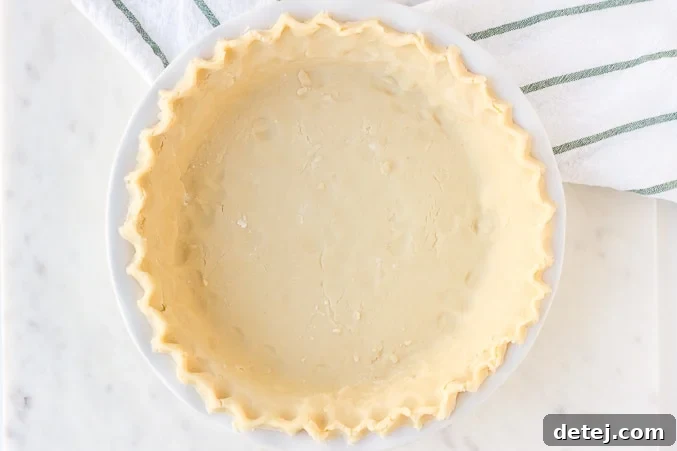
- Flute the Edges: Now for the creative part! Flute the edges by pressing your thumb and index finger into the dough from one side, and your thumb from the opposite side to create a wavy pattern. Alternatively, you can use a fork to press down around the rim for a simpler look. For more intricate designs and techniques, this tutorial offers excellent guidance.
- Chill (Optional but Recommended): For the flakiest crust and to prevent shrinking, refrigerate the pie crust in its pan for at least 20-30 minutes before filling and baking, or before blind baking. This allows the gluten to relax and the fats to re-solidify.
Tips for a Delicious and Flaky Vegan Pie Crust Every Time
- Keep Everything Cold: This cannot be stressed enough. Cold fat is the secret to flakiness. You can even chill your food processor blade and bowl, or your mixing bowl and pastry cutter, for 15-20 minutes before starting.
- Use a Blend of Fats: The combination of vegan butter and vegetable shortening is ideal. Vegan butter (like Earth Balance sticks) provides that desirable rich, buttery flavor, while vegetable shortening contributes significantly to the tender, flaky texture and structural integrity of the crust due to its higher melting point.
- Minimize Handling: Overworking the dough warms the fat and develops gluten, leading to a tough crust. Work quickly and handle the dough as little as possible.
- Just Enough Water: Add ice water gradually, one tablespoon at a time, until the dough just comes together. Too little water results in a crumbly dough; too much creates a sticky, tough crust. The dough should still look a bit crumbly but hold together when pressed.
- Don’t Skip Chilling: Chilling the formed dough in the pie plate before baking helps prevent shrinkage and further solidifies the fats, enhancing flakiness.
Creative Uses for Your Vegan Pie Crust
This versatile vegan pie crust is perfect for a multitude of recipes, both sweet and savory:
- Classic Sweet Pies: From fruit pies like apple, cherry, or peach to creamy delights such as chocolate cream, banana cream, or this Vegan Pumpkin Pie.
- Savory Tarts and Quiches: Create hearty vegetable quiches, tomato tarts, or even a vegan pot pie with a golden, flaky top crust.
- Hand Pies and Galettes: Roll out smaller portions for individual hand pies filled with fruit, or rustic galettes.
Recipe: Easy Vegan Pie Crust
Easy Vegan Pie Crust
Pin
Comment
Ingredients
- 1 1/2 cups all purpose flour, spooned and leveled
- 1 teaspoon sugar
- 1/4 teaspoon salt
- 1/4 cup vegan butter, cold and cut into cubes
- 1/4 cup vegetable shortening, cold and into a few pieces
- 3-4 tablespoons ice water
Instructions
- Make sure your vegan butter and shortening are very cold before starting. Refrigerate along with the shortening for at least 30 minutes.
- Add flour, sugar and salt to food processor with the “S” blade. Pulse a few times to combine.
- Add cold vegan butter and shortening. Process for about 10 seconds, until it looks like a coarse meal (see photos above for reference).
- Now while the food processor is running, drizzle in 3 tablespoons of ice cold water. When it begins to clump together, stop. You may need to add 1 more tablespoon ice water for it to come together.
- Dump the dough onto a lightly floured surface and shape it into a ball. Don’t use your hands too much or it will warm the dough, which will make your pie crust less flaky and light.
- Roll the dough with a rolling pin to about a 12 inch circle, and transfer to a pie plate. Gently wrap it around your rolling pin and then carefully transfer it. Don’t panic if it’s not perfect, you can fix it in the pie plate!
- Gently push the pie crust all around the dish, trimming off any excess and replacing any spots that need repair. See this tutorial for fluting the edges and making other special pie edges.
- It’s now ready to use immediately, or refrigerate until you are ready to use. Simply double the recipe for 2 pie crusts (top and bottom).
To make by hand:
- If you don’t want to use a food processor, you can make the pie crust by hand. Simply whisk together the dry ingredients in a large bowl, then add the cold butter and shortening. Use a pastry cutter or fork to cut it in, then drizzle in the ice water and stir until the dough comes together.
How to pre-bake a pie crust (Blind Baking)
Pre-baking, or blind baking, is often necessary for pies with wet fillings or no-bake fillings to prevent a soggy bottom crust. Here’s how to do it:
- Freeze the Crust: If possible, freeze the pie crust lined in the pie plate for at least 30 minutes. This helps the fats firm up and reduces shrinkage during baking.
- Preheat Oven & Line Crust: Preheat your oven to 350 degrees F (175 degrees C). Once the crust is frozen, line it with aluminum foil or parchment paper. Aluminum foil is generally easier to mold to the crust’s shape.
- Fill with Weights: Fill the lined crust to the top with pie weights, dried beans, or rice. These weights prevent the crust from bubbling up and help maintain its shape.
- First Bake: Place the weighted crust in the preheated oven and bake for 15 minutes. This initial bake sets the crust.
- Second Bake (if needed): Carefully remove the foil and pie weights. If your pie filling will cook further in the oven, you can proceed to fill and bake as per your pie recipe. For no-bake filling pies, or if you desire a fully cooked crust, continue to bake the crust for another 10-15 minutes, or until it turns light golden brown.
- Cool: Allow the crust to cool completely on a wire rack before filling to prevent condensation and maintain crispness.
- Note: Specific baking times and temperatures for pre-baking may vary slightly depending on your pie’s specific recipe. Always refer to your pie recipe’s instructions if available.
Notes
- Nutrition information is for 1/8th of the crust.
- Make ahead: After making the dough, roll into a ball or shape into a patty and wrap well in plastic wrap. Refrigerate for up to 3 days. For longer storage, place the wrapped dough in a freezer-safe bag or container and freeze for up to 3 months. When ready to use, allow frozen dough to thaw in the refrigerator overnight, then bring it to room temperature for about 30 minutes before rolling out to prevent crumbling.
Nutrition
Serving: 1 serving |
Calories: 196 kcal |
Carbohydrates: 18g |
Protein: 2g |
Fat: 12g |
Saturated Fat: 3g |
Sodium: 121mg |
Potassium: 25mg |
Fiber: 1g |
Sugar: 1g |
Vitamin A: 282IU |
Calcium: 4mg |
Iron: 1mg
Conclusion
Making a homemade vegan pie crust doesn’t have to be a culinary challenge. With this straightforward recipe and a few key tips, you can achieve a consistently flaky, tender, and delicious crust that rivals any traditional version. Whether you opt for the speed of a food processor or the satisfying touch of working by hand, you’ll be amazed at the professional results. So go ahead, don’t be afraid to dive into the wonderful world of homemade pie. Your taste buds, and your guests, will thank you!