
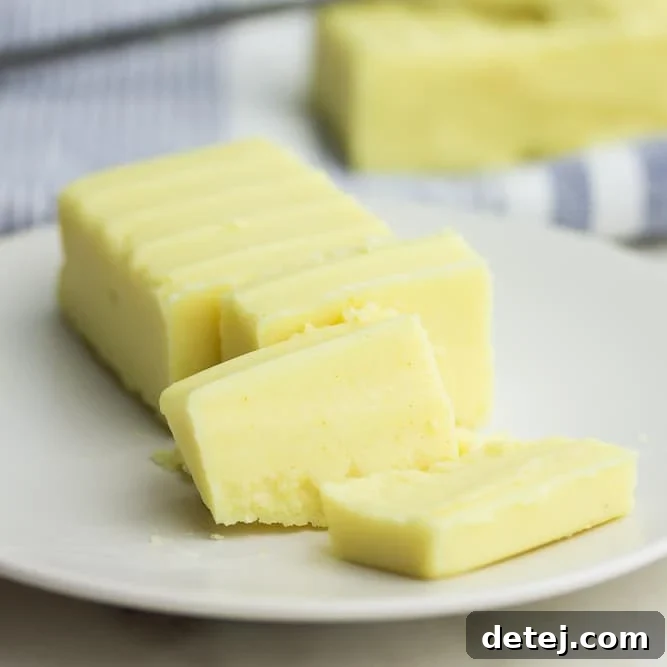
Discover how to effortlessly craft your own rich and creamy vegan butter right at home, using only readily available ingredients! This recipe is incredibly easy, quick, and requires just a whisk and a bowl. Perfect for baking, generously spreading on toast, sautéing your favorite dishes, or any application where you would traditionally use dairy butter.
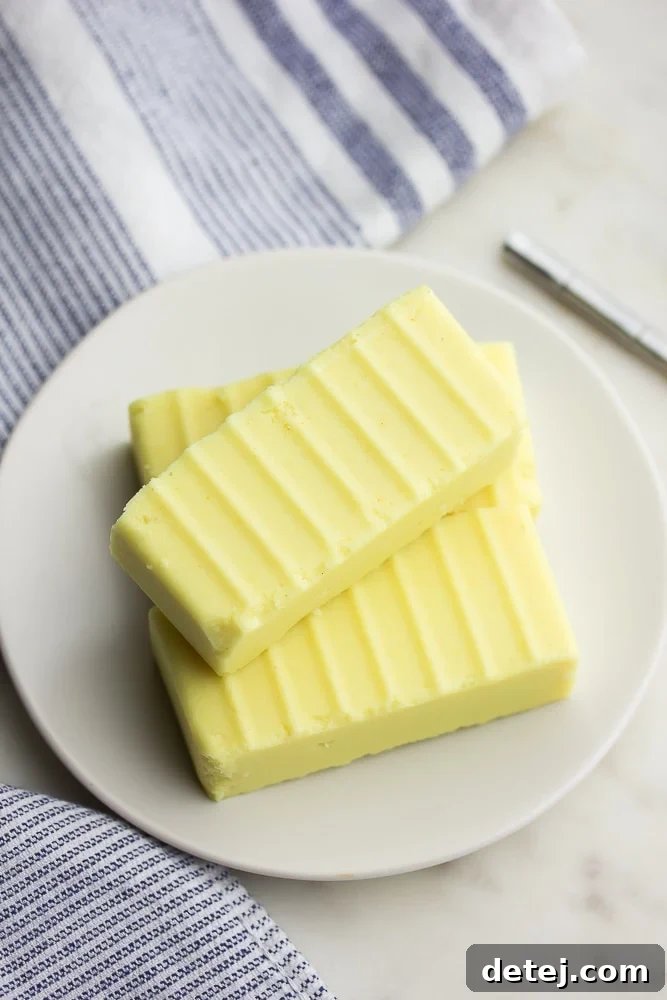
Why Choose Homemade Vegan Butter? A Healthier, Cheaper, and More Accessible Alternative
You might be wondering, “Why go through the effort of making my own vegan butter when I can just buy it?” The reasons are numerous and compelling, addressing common challenges many plant-based eaters face. For starters, I frequently hear from individuals living in regions or smaller towns where purchasing high-quality plant-based butter is either extremely difficult, limited to a few expensive brands, or simply impossible to find on local supermarket shelves.
Beyond geographical limitations, many consumers are actively seeking a palm oil-free buttery spread. Finding such an option in stores can be surprisingly challenging, as palm oil is a common ingredient in many commercial vegan butter formulations due to its texture-providing properties. Making your own empowers you to control every ingredient, ensuring your homemade vegan butter is free from palm oil, hydrogenated oils, or any other additives you wish to avoid. This offers peace of mind regarding both your health and the environmental impact associated with palm oil production.
Furthermore, crafting your own vegan butter is a significant money-saver. Store-bought specialty vegan products, especially high-quality ones, often come with a premium price tag. These costs can quickly add up, making a plant-based diet seem more expensive than it needs to be. By utilizing basic, inexpensive ingredients readily found in most kitchens, such as common oils and plant milk, you can produce a superior product for a fraction of the cost. This makes your plant-based lifestyle more sustainable and budget-friendly, allowing you to enjoy delicious, dairy-free options without breaking the bank.
My goal in developing this easy vegan butter recipe was to create a spread that is not only super simple and quick to prepare but also incredibly versatile, performing flawlessly wherever you’d normally use dairy butter. After extensive testing and numerous adjustments through several rounds, I’ve perfected a formula that yields a gloriously creamy, rich, and truly buttery spreadable butter. It’s designed to mimic the texture, flavor, and functionality of traditional butter, ensuring seamless integration into all your culinary endeavors, from delicate pastries to hearty sautéed vegetables. This truly is the best homemade vegan butter you’ll find, using only simple, accessible ingredients.
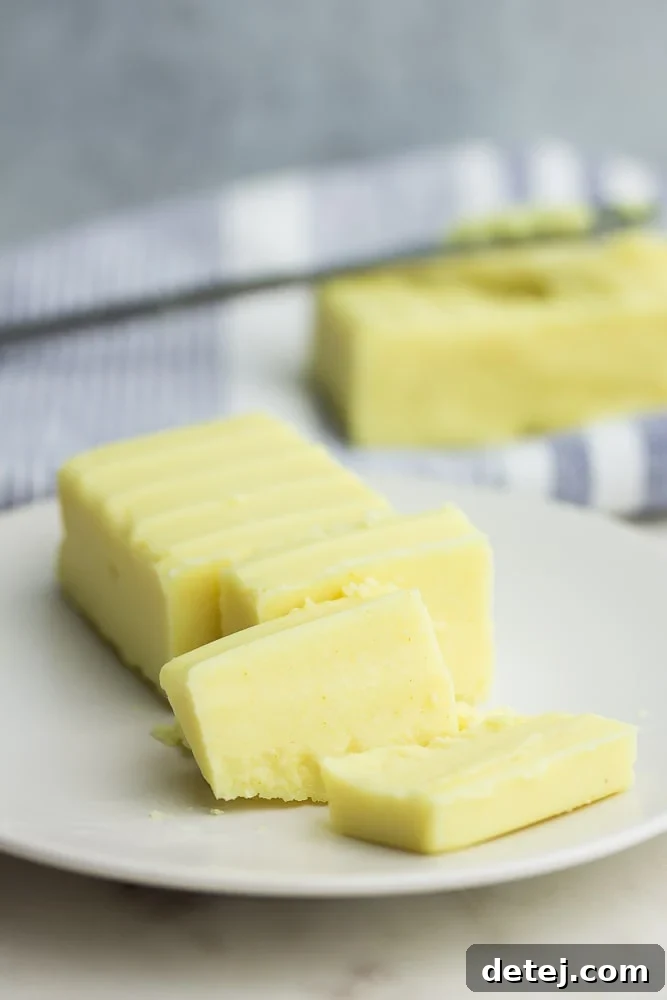
Essential Ingredients for Your Perfect Homemade Vegan Butter
Crafting this incredible homemade vegan butter relies on a few key ingredients, each playing a vital role in achieving that desirable buttery consistency and flavor. The beauty of this recipe lies in its simplicity and the accessibility of these components, proving that you don’t need obscure or hard-to-find items to make a fantastic dairy-free butter alternative.
- Unsweetened Soy Milk (1/2 cup): Soy milk forms the creamy base for our vegan butter. When combined with apple cider vinegar, it curdles to create a vegan “buttermilk” effect. This not only contributes to the butter’s subtle tang but also plays a crucial role in the emulsification process, helping the fats and liquids blend smoothly. It is absolutely vital to use unsweetened and unflavored soy milk to avoid any unwanted sweetness or artificial tastes in your final product. While other unsweetened non-dairy milks like almond or oat milk can work in a pinch, soy milk generally yields the best results due to its higher protein content and natural creaminess, which helps create a stable emulsion.
- Apple Cider Vinegar (2 teaspoons): This acidic component is what reacts with the soy milk to create the “buttermilk” effect. It adds a pleasant, subtle tang that mimics the underlying notes of traditional dairy butter and helps to bind the mixture together. If apple cider vinegar is not available, or if you prefer an alternative, fresh lemon juice or even white vinegar can be used as effective substitutes, providing a similar acidic reaction.
- Melted Refined Coconut Oil (1 cup): This is the cornerstone of our vegan butter, providing the necessary solid structure and rich mouthfeel that we associate with butter. The absolute key here is to use *refined* coconut oil. Unrefined (virgin) coconut oil has a distinct, strong coconut flavor and aroma that will undoubtedly overpower your butter, making it unsuitable for most traditional butter applications. Refined coconut oil, on the other hand, is neutral in taste and smell, making it the perfect fat for a versatile butter substitute. Ensure it is warm and fully melted when added, but not scalding hot, as extreme temperatures can sometimes hinder proper emulsification.
- Salt (1/2 teaspoon): Just like dairy butter, salt is an essential ingredient for enhancing and balancing the flavors of your homemade vegan butter. It brings out the richness of the fats and makes the butter taste more authentic. You can easily adjust the amount of salt to your personal preference; a little extra can make it taste more like traditional salted butter, while less will yield an unsalted version perfect for baking where salt is added separately.
- Neutral-Flavored Oil (1/4 cup canola oil, or light tasting olive oil, avocado oil, or other neutral flavored oil): This liquid oil is crucial for contributing to the butter’s spreadability and helps prevent it from becoming overly hard or brittle when chilled. While refined coconut oil provides the solid structure, a liquid oil ensures a softer, more pliable texture straight from the refrigerator. Canola oil is a widely available and excellent neutral choice, but light-tasting olive oil or avocado oil also work wonderfully, providing healthy monounsaturated fats without imparting strong or distinct flavors to your finished butter.
- Coconut Cream (1/4 cup, optional but highly recommended): While technically optional, coconut cream is a game-changer for the overall texture of this vegan butter. It doesn’t make the butter taste like coconut; instead, it adds an incredible richness, creaminess, and softness, resulting in a gloriously smooth and spreadable consistency even when cold. To obtain coconut cream, you can either purchase a can specifically labeled “coconut cream” or, more commonly, simply skim the thick, solidified cream from the top of a can of full-fat coconut milk that has been refrigerated overnight.
- Tiny Pinch Turmeric (optional, for color): A minuscule amount of turmeric is added purely for aesthetic purposes. It gives the butter a lovely, natural yellow hue, beautifully mimicking the appearance of traditional dairy butter. Rest assured, this tiny amount is solely for color and will not impart any noticeable flavor to your vegan butter.
Easy Step-by-Step Guide to Making Homemade Vegan Butter
Making your own plant-based butter is surprisingly straightforward and incredibly rewarding. Follow these simple steps for a creamy, delicious result that will revolutionize your dairy-free cooking and baking:
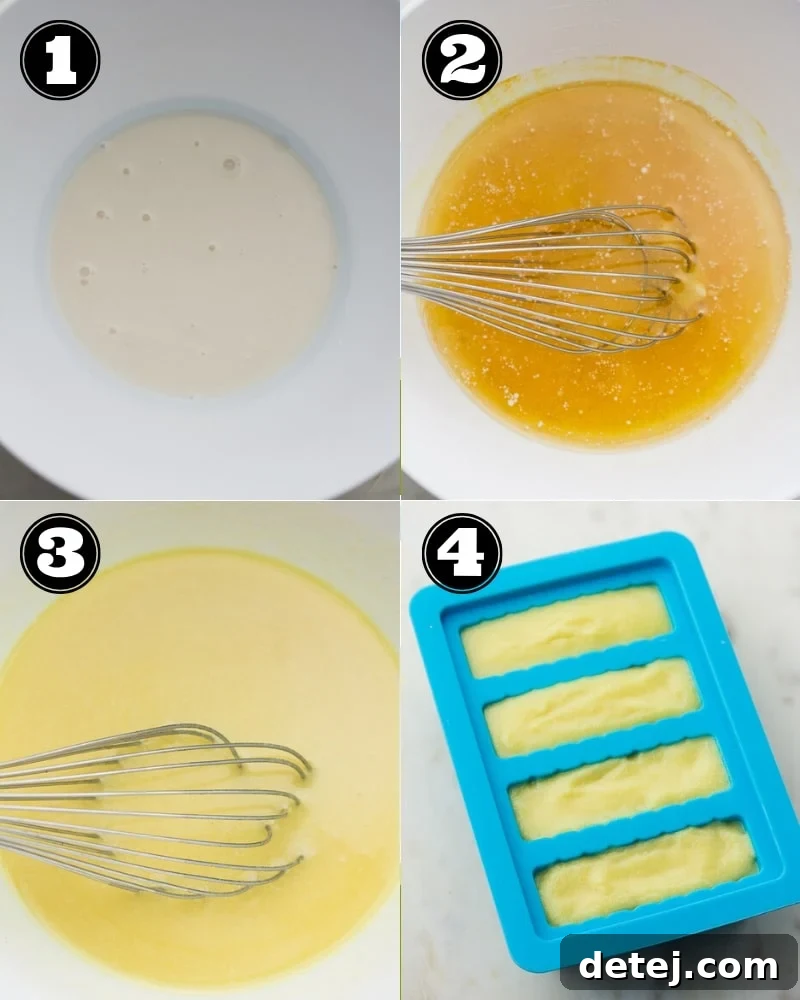
- Prepare Your Vegan Buttermilk: First, get out a medium-sized mixing bowl. Into this bowl, pour 1/2 cup of unsweetened soy milk and add 2 teaspoons of apple cider vinegar. Give the mixture a gentle stir to combine the two liquids. Now, let it sit undisturbed for about 5 minutes. During this brief resting period, the acid from the vinegar will react with the soy milk, causing it to curdle slightly. This creates a homemade vegan “buttermilk,” which is essential for developing a rich flavor profile and aiding in the proper emulsification of the butter.
- Melt the Coconut Oil: While your soy milk and vinegar mixture is curdling, it’s time to prepare the refined coconut oil. Gently melt 1 cup of refined coconut oil until it is completely liquid. This can be done efficiently in the microwave using short bursts (e.g., 30-second intervals), stirring in between, or on the stovetop over very low heat. It’s important that the oil is warm and fully melted, but not excessively hot or boiling, as extreme heat can sometimes affect the emulsion. I find it helpful to microwave the coconut oil directly in a glass measuring cup; this allows me to ensure I have precisely one cup of liquid coconut oil before proceeding. Remember, *refined* coconut oil is crucial here to ensure your final butter has a neutral, buttery taste, free from any coconut flavor.
- Combine and Whisk Until Emulsified: Once the soy milk has curdled and the coconut oil is melted, bring all your ingredients together. To the bowl containing the curdled soy milk and vinegar mixture, carefully add the warm melted refined coconut oil, 1/2 teaspoon of salt, 1/4 cup of canola oil (or your preferred neutral-flavored oil), and the 1/4 cup of coconut cream (if you’re using it for extra richness). If you desire a pleasant, buttery yellow color, now is the moment to add a tiny pinch of turmeric. Using a whisk, vigorously whisk all the ingredients together for a good couple of minutes. Continue until the mixture is completely smooth, uniformly combined, and takes on a pale, creamy, emulsified appearance. The whisking process is vital for properly combining the fats and liquids, ensuring a stable, homogenous, and creamy butter. For an even smoother consistency, or if you prefer less manual effort, you can transfer all the ingredients into a blender or food processor and blend until perfectly smooth.
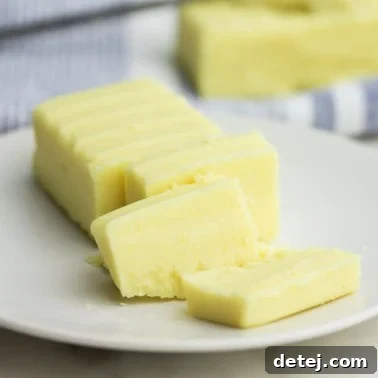
- Chill to Set: Once your butter mixture is thoroughly whisked and emulsified, it’s time for the final setting stage. Carefully pour the liquid butter mixture into your chosen containers. You can opt for silicone butter molds to create traditional stick shapes, or simply pour it into glass containers, ramekins, or even a freezer-safe dish. Keep in mind that smaller molds or containers will allow the butter to harden much faster. Place the filled containers into the refrigerator for at least one to two hours, or until the butter is completely firm and set to a solid consistency. The chilling time is crucial for developing the final texture.
And there you have it! With these straightforward steps, you’ve successfully created your very own batch of creamy, delicious homemade vegan butter. You’re officially a vegan butter-making pro, ready to enhance all your culinary creations!
Elevate Your Butter: How to Make Fluffy Whipped Vegan Butter
For those who love a lighter, airier texture, transforming your homemade vegan butter into a delightful whipped version is a fantastic option. With just a minimal amount of extra effort, you can create a luxurious, fluffy butter that’s perfect for spreading on warm toast, dolloping on pancakes, or crafting exquisite white frostings. This whipped version is particularly ideal for recipes like Vegan Vanilla Frosting, especially if you omit the turmeric for a pure white color.
Here’s how to achieve that wonderful whipped consistency:
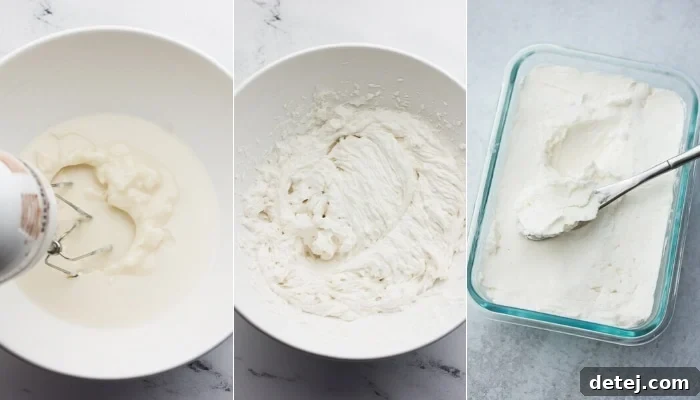
- Partial Chilling: After you have thoroughly whisked all the ingredients for your vegan butter as described in step 3 above, place the bowl containing the mixture into the refrigerator for approximately 20 minutes. The goal here is to let it firm up just slightly, reaching a semi-solid, “slushy” state where it’s still pliable but no longer entirely liquid. This partial setting is crucial for the whipping process.
- Whip to Perfection: Once partially set, remove the bowl from the refrigerator. Using a hand mixer (or a stand mixer fitted with a whisk attachment), begin to mix and whip the butter mixture on medium-high speed. Continue whipping for about 3-4 minutes, or until the butter becomes noticeably lighter in color, significantly increased in volume, and takes on a wonderfully fluffy, airy texture. Periodically scrape down the sides of the bowl with a spatula to ensure all parts are evenly incorporated and whipped.
- Final Set: Once whipped to your desired lightness and fluffiness, carefully transfer the whipped vegan butter into glass storage containers or airtight jars. Return it to the refrigerator to harden completely. This final chilling process will set the airy texture, resulting in a stable and delightful whipped butter ready for all your culinary needs. It’s truly a treat for spreading!
Storage and Shelf Life: Keeping Your Homemade Vegan Butter Fresh
One of the great advantages of homemade vegan butter is its excellent shelf life and versatility in storage. Properly stored, your plant-based butter will remain fresh and ready for use for an extended period, making it a convenient staple in your kitchen.
Refrigeration
Once your homemade vegan butter has fully set and hardened in the refrigerator, it will keep beautifully for approximately 2 to 3 weeks. To maintain its freshness and prevent it from absorbing any unwanted odors from other foods in your fridge, always store it in an airtight container. Traditional butter dishes, glass containers with tight-fitting lids, or individual butter molds wrapped in parchment paper are all excellent options for refrigerator storage.
Freezing for Long-Term Storage
For longer storage, homemade vegan butter freezes exceptionally well, proving to be a highly practical option. This is particularly advantageous if you’ve made a large batch or wish to have a ready supply on hand for future baking and cooking needs. To freeze, wrap individual sticks or desired portions tightly in parchment paper, then place them in an airtight freezer-safe bag or container. It can be stored in the freezer for several months (typically up to 3-4 months) without compromising its quality, texture, or flavor. When you’re ready to use it, simply transfer the frozen butter to the refrigerator and allow it to thaw completely before use. This usually takes a few hours to overnight, depending on the size of the portion you are thawing.
Using Homemade Vegan Butter in Baking and Cooking
The true test of any butter alternative lies in its performance across various culinary applications, especially in baking. I’m thrilled to report that this homemade vegan butter has been rigorously tested in a wide array of baked goods—from flaky pie crusts and chewy cookies to decadent frostings and rich cakes—and it performs perfectly every single time. It truly is a versatile 1:1 substitute for dairy butter in almost any recipe, providing the richness and structure you expect.
When incorporating this homemade vegan butter into your recipes, there’s one important consideration: its consistency directly from the refrigerator. Due to its natural ingredients and higher melting point of coconut oil, it tends to be firmer than many store-bought plant-based butters when cold. For recipes that specifically call for slightly softened butter, such as creaming with sugar for cookies, cakes, or preparing creamy frostings, it’s essential to let it sit out at room temperature for about 30 minutes before use. This allows it to soften to the ideal pliable consistency, making it much easier to work with and ensuring smooth incorporation into your batters and mixes.
While a quick microwave zap for 15-20 seconds can rapidly soften it, exercise caution with this method. It is not always ideal, as some parts of the butter may melt completely, which can be particularly problematic when making delicate frostings or certain doughs where the precise temperature and consistent texture of the butter are critical for the final outcome. For the absolute best results in baking, aim for a consistently softened, but never melted, vegan butter.
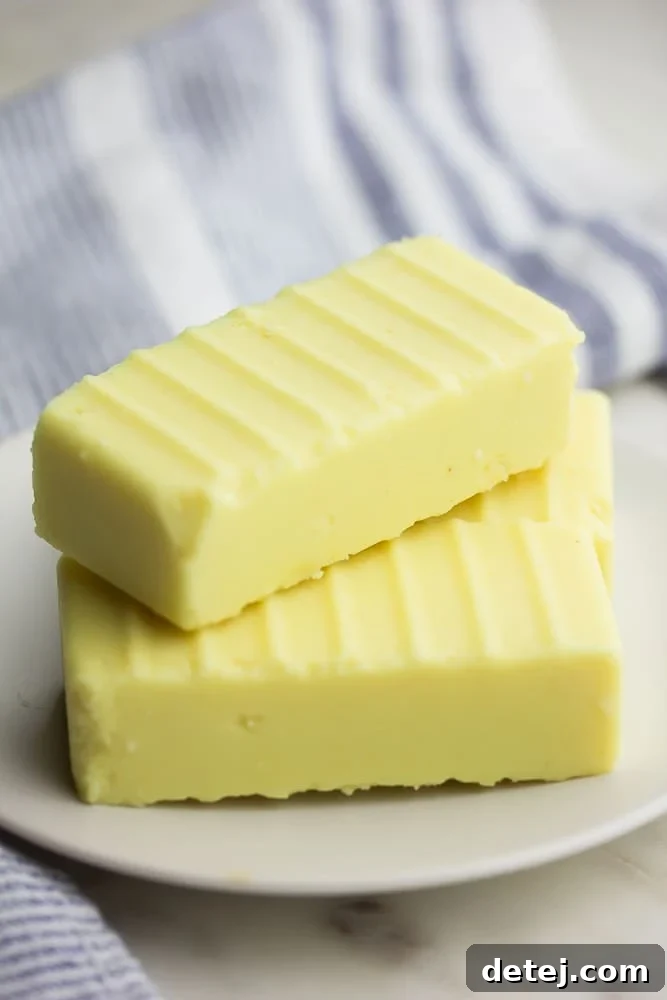
Beyond Baking: Everyday Uses for Your Homemade Vegan Butter
The versatility of this easy homemade vegan butter extends far beyond just baking. It’s an indispensable staple for your everyday cooking:
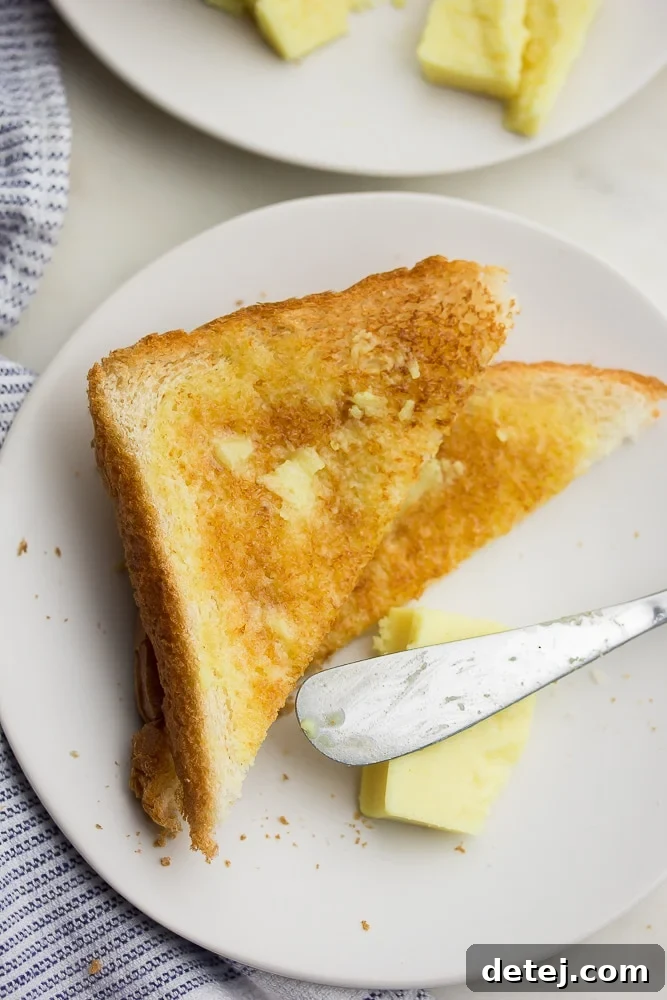
- Spreading: Its wonderfully creamy texture makes it absolutely ideal for spreading generously on freshly baked bread, warm toast, fluffy muffins, or savory bagels. It melts beautifully into the nooks and crannies.
- Sautéing and Frying: Use it just as you would dairy butter to sauté a medley of vegetables, mushrooms, or plant-based proteins. Its neutral flavor profile ensures it won’t overpower your dish, allowing the natural tastes of your ingredients to shine through.
- Sauces and Gravies: Incorporate this rich butter into a roux for creamy gravies, use it to thicken various sauces, or simply finish a dish with a pat of melted butter for an extra layer of depth and richness. It adds a luxurious sheen and flavor.
- Popcorn Topping: Elevate your movie night snack by melting a dollop of this vegan butter and drizzling it over freshly popped popcorn. It creates that classic buttery taste without any dairy.
- Compound Butters: Get creative by mixing in fresh herbs like chives or parsley, minced garlic, a pinch of chili flakes, or other favorite spices to create savory compound butters. These are phenomenal melted over corn on the cob, baked potatoes, or grilled vegan steaks and vegetables.
Delicious Recipes to Try with Your Homemade Vegan Butter
Now that you’ve mastered the art of making your own incredible vegan butter, it’s time to put it to good use! This versatile ingredient will elevate countless plant-based dishes, adding that familiar richness and texture. Here are some fantastic recipes where your homemade vegan butter will truly shine:
- Perfect Vegan Chocolate Chip Cookies: Achieve that classic chewy texture, golden edges, and rich, melt-in-your-mouth flavor that everyone loves.
- Vegan Vanilla Frosting: Create light, fluffy, and decadent frostings for cakes and cupcakes that hold their shape beautifully.
- Vegan Chocolate Cake: Use it in the frosting to achieve an unbelievably rich, moist, and deeply chocolatey cake that will impress even the most discerning palates.
- Best Ever Vegan Brownies: Contribute to the fudgy, dense texture and deep chocolate flavor of these irresistible brownies.
- Easy Vegan Pie Crust: Get a perfectly flaky, tender, and sturdy crust for all your sweet and savory pies, providing the ideal foundation for your fillings.
- Vegan Rice Krispie Treats: Essential for that chewy, gooey, and utterly delicious classic treat, ensuring they set up perfectly.
Homemade Vegan Butter Recipe
Effortlessly make creamy, rich, and spreadable vegan butter at home with simple ingredients. Perfect for all your dairy-free baking, spreading, and cooking needs!
Prep time: 15 mins
Chilling time: 1 hr
Total time: 1 hr 15 mins
Servings: 32 servings (2 tbs each)
Ingredients
- 1/2 cup unsweetened soy milk
- 2 teaspoons apple cider vinegar
- 1 cup melted refined coconut oil *make sure to use REFINED; unrefined will taste like coconut
- 1/2 teaspoon salt
- 1/4 cup canola oil *OR light tasting olive oil, avocado oil, or other neutral flavored oil
- 1/4 cup coconut cream *may omit, but it helps make the butter gloriously soft
- Tiny pinch turmeric, optional for color
Instructions
- Get out a medium-sized bowl. Add the soy milk and apple cider vinegar, stir, and let sit for 5 minutes until it curdles.
- While the milk/vinegar curdles, melt the coconut oil in the microwave (or stovetop) until warm, but not too hot. I microwave it in a glass measuring cup, so I can make sure I have exactly 1 cup of melted coconut oil.
- To the bowl with the milk/vinegar mixture, add the melted coconut oil, salt, canola oil, coconut cream, and optional tiny pinch of turmeric. Whisk well until smooth and pale in color. This will take less than 5 minutes. You could also place everything in a blender or food processor and blend until smooth.
- Pour the mixture into glass containers or butter molds. If you use 1 large container, the butter will take longer to harden in the refrigerator; small molds will be ready faster. Place in the refrigerator for an hour or two to set.
For Whipped Vegan Butter
- This is so delicious, but just a little more work. After you have whisked the butter mixture well, place the bowl in the refrigerator for 20 minutes so it slightly hardens. Remove it from the refrigerator and, with a hand mixer, mix and whip until light and fluffy, 3-4 minutes. Add to glass storage containers and place back in the refrigerator to harden.
How to Store Vegan Butter
- Vegan butter will keep in the refrigerator for 2-3 weeks. To use for baking, slightly soften it by leaving out at room temperature for 30 minutes. You can also microwave it for 15 seconds, but some may melt that way which is not ideal.
- It freezes very well, too! Simply let it thaw in the refrigerator before using.
Notes
- It is fine to use another unsweetened non-dairy milk, but I like soy the best here. Almond, coconut, perhaps even oat milk will work okay though. Just make absolutely sure it is unflavored and unsweetened, with no sugar added.
- If you don’t have apple cider vinegar or can’t eat it, you can substitute lemon juice or white vinegar.
- There is no substitute for REFINED COCONUT OIL; it is what makes the butter. Unrefined coconut oil will make your butter taste too much like coconut.
- I really like the coconut cream in the butter. It doesn’t make it taste like coconut, but it adds a creaminess and softness. You can skim the top of a can of full-fat coconut milk to get only the cream, or use a can of coconut cream.
Nutrition
Serving: 2 tbs | Calories: 82kcal | Carbohydrates: 1g | Protein: 1g | Fat: 9g | Saturated Fat: 7g | Trans Fat: 1g | Sodium: 38mg | Potassium: 11mg | Fiber: 1g | Sugar: 1g | Vitamin A: 8IU | Vitamin C: 1mg | Calcium: 5mg | Iron: 1mg
Course: Appetizer, Breakfast, Side Dish
Cuisine: American, French
Author: Nora Taylor